Imagine you walk into your shop and see your press brake working well. Every bend is right, and every job is on time. You do this by making maintenance very important. Taking care of your dies and punches often keeps your work safe. It also helps you spend less money.
| Benefit | Description |
|---|---|
| Proactive Care Reduces Repairs | Checking your tools often stops big problems and repairs that cost a lot. |
| Extends Machine Lifespan | Good maintenance helps parts last longer, so you do not need new ones soon. |
| Energy Efficiency | Machines that are cared for use less power and save money. |
| Minimizes Downtime | Preventive maintenance stops surprise problems, so you do not lose time or money. |
You also make press brake tooling alignment better and keep your team safe. With Nanjing Metal, you get tools that last long and work well. This helps you do a good job every day.
Key Takeaways
- Taking care of press brake tooling stops expensive repairs. It helps dies and punches last longer.
- Checking tooling every day finds problems early. This keeps work safe and parts better.
- Cleaning and oiling tooling lowers friction. It stops rust and makes tooling work well.
- Tooling must be lined up right for good bends. This cuts down on damage and helps work go faster.
- Store tooling in a clean, dry place to stop rust. This keeps tooling safe and ready to use.
- Write down all maintenance to watch tooling condition. This helps plan how to care for tooling later.
- Teach your team how to care for tooling the right way. This makes work safer and keeps quality high.
- Pick strong materials for tooling to make it last longer. This means you do not need to replace it as often.
Maintenance Importance
Cost and Performance
You want your press brake tooling to last a long time. Doing regular maintenance helps you reach this goal. When you care for your tools, you protect your money and keep your shop working well. Nanjing Metal’s press brake tooling uses strong 42CrMo alloy steel. It works for hard jobs in places like car, plane, and building industries. Even the best tools need care to stay strong and work well.
If you skip maintenance, your tools wear out faster. This can cause bad bends and waste materials. You may spend more money fixing problems. You might need to buy new dies and punches sooner. This hurts your budget. Taking care of your press brake tooling helps you save money and time.
Here are some easy ways to make your press brake tooling last longer and work better:
- Clean and check your tools every day.
- Take away dirt and look for cracks or chips.
- Keep your tooling in a dry and safe spot.
- Use the right oil to stop rust.
These steps help you get the good results of strong press brake tooling. You will see better part quality and fewer mistakes. Your shop will work faster and smoother. Good tooling means you spend less time setting up and changing jobs. This keeps your work moving quickly.
Tip: Cleaning and checking your tooling often stops bending mistakes. Good tooling gives you better parts and less scrap. This helps you make more products. Taking care of your tools also makes setup and job changes faster. This helps your shop work better.
Safety
You need to think about safety when using press brake tooling. Not taking care of your tools can be dangerous. If you do not check your tools, accidents can happen. Worn or broken tooling can slip or break. This can hurt you or damage your machine.
Some common safety problems are crushing injuries from open machine parts. Pinch points from the backgauge system can also cause harm. Accidents can happen when cleaning or oiling your tools. By following good care steps, you lower these risks and make your shop safer.
Making your press brake tooling stronger protects your team and your machines. You also help your shop do better work. When you make maintenance a habit, you get good results like fewer injuries and a shop you can trust.
| Maintenance Focus | Benefit |
|---|---|
| Daily Inspection | Stops accidents and tool problems |
| Proper Lubrication | Cuts down wear and keeps tools safe |
| Safe Storage | Keeps tooling safe from damage and rust |
You help keep your press brake tooling working well. Good habits give you better parts, faster work, and a safer shop.
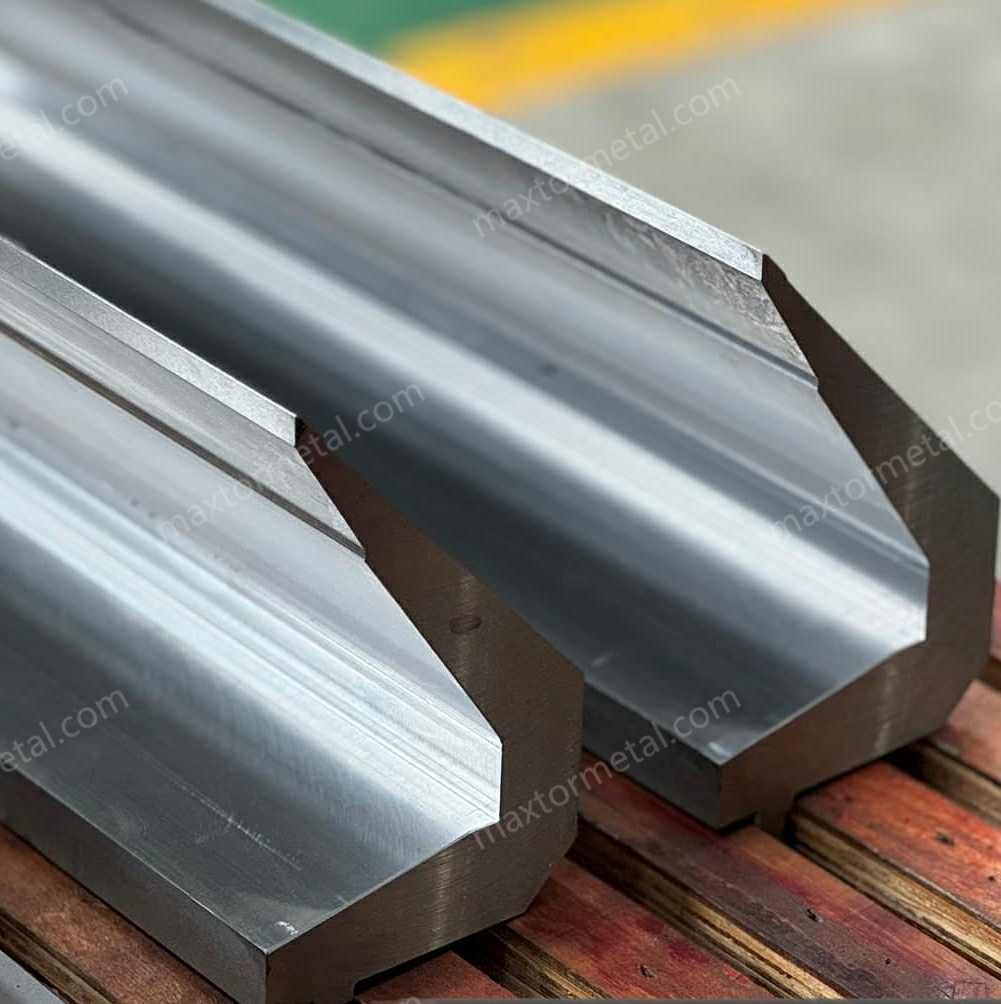
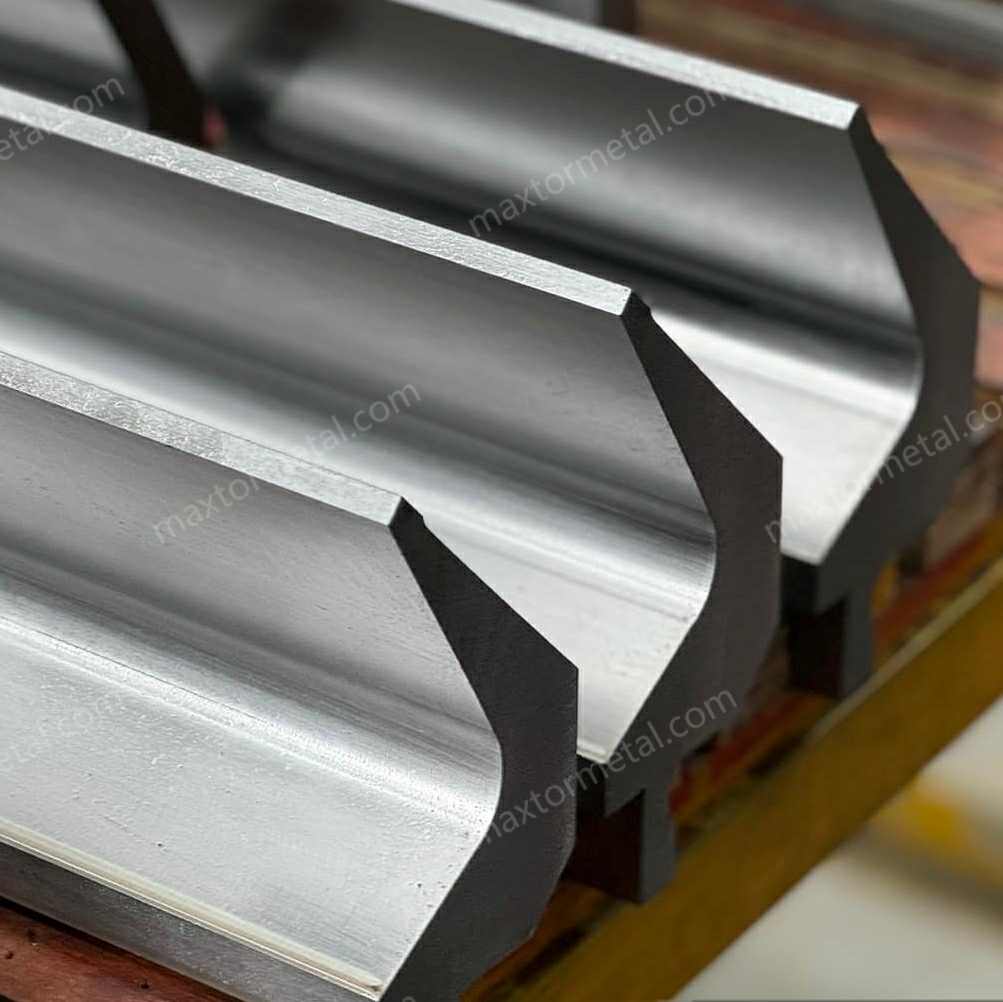
Press Brake Tooling Overview
Tooling Types
You use press brake tooling every day in your shop. Each type of tooling helps you shape metal in a different way. You choose the right tool for each job to get the best results. Nanjing Metal offers a wide range of press brake tooling for many industries, such as automotive, aerospace, and construction. You see these tools in action when you bend car panels, make airplane parts, or build metal furniture.
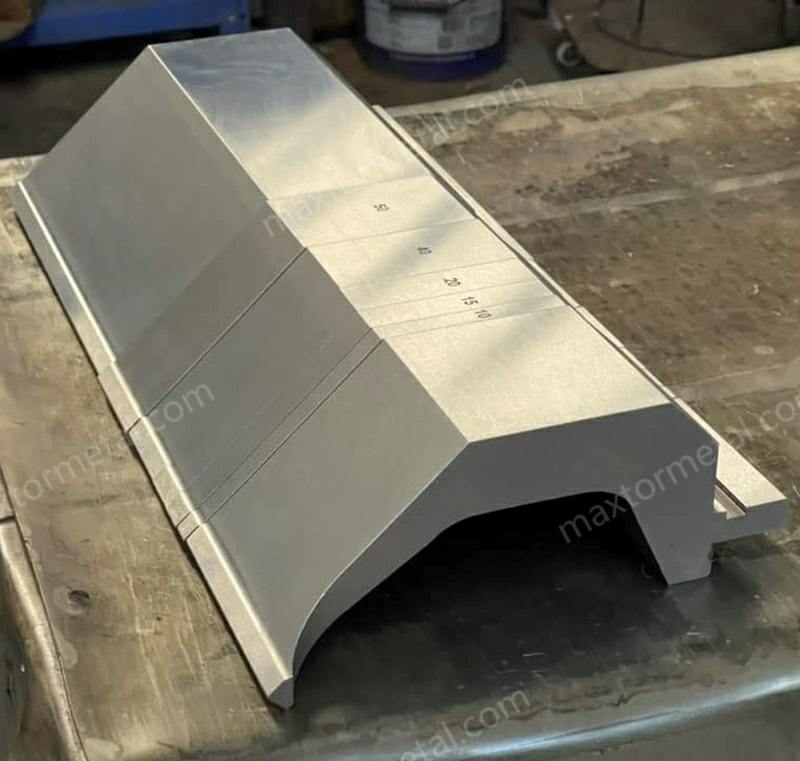
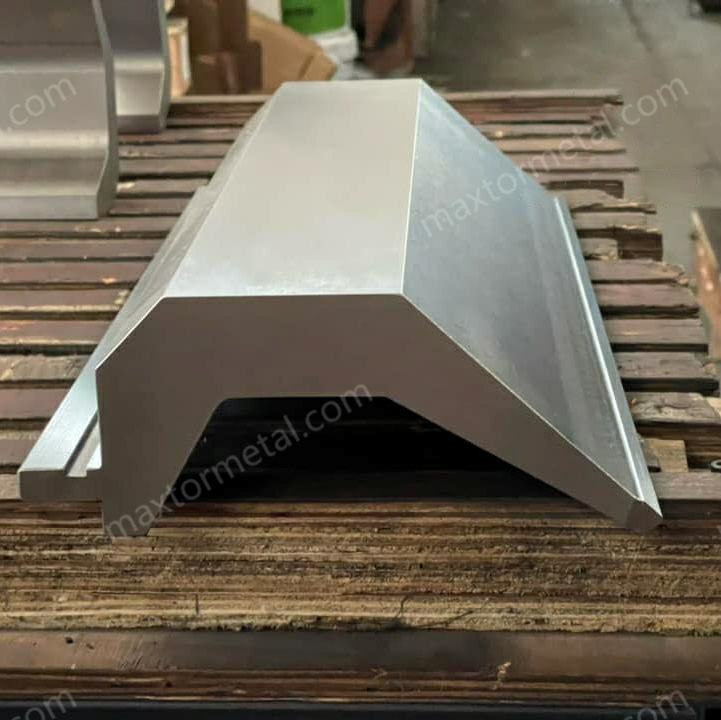
Here is a table that shows common types of press brake tooling and what each one does:
| Tooling Type | Description |
|---|---|
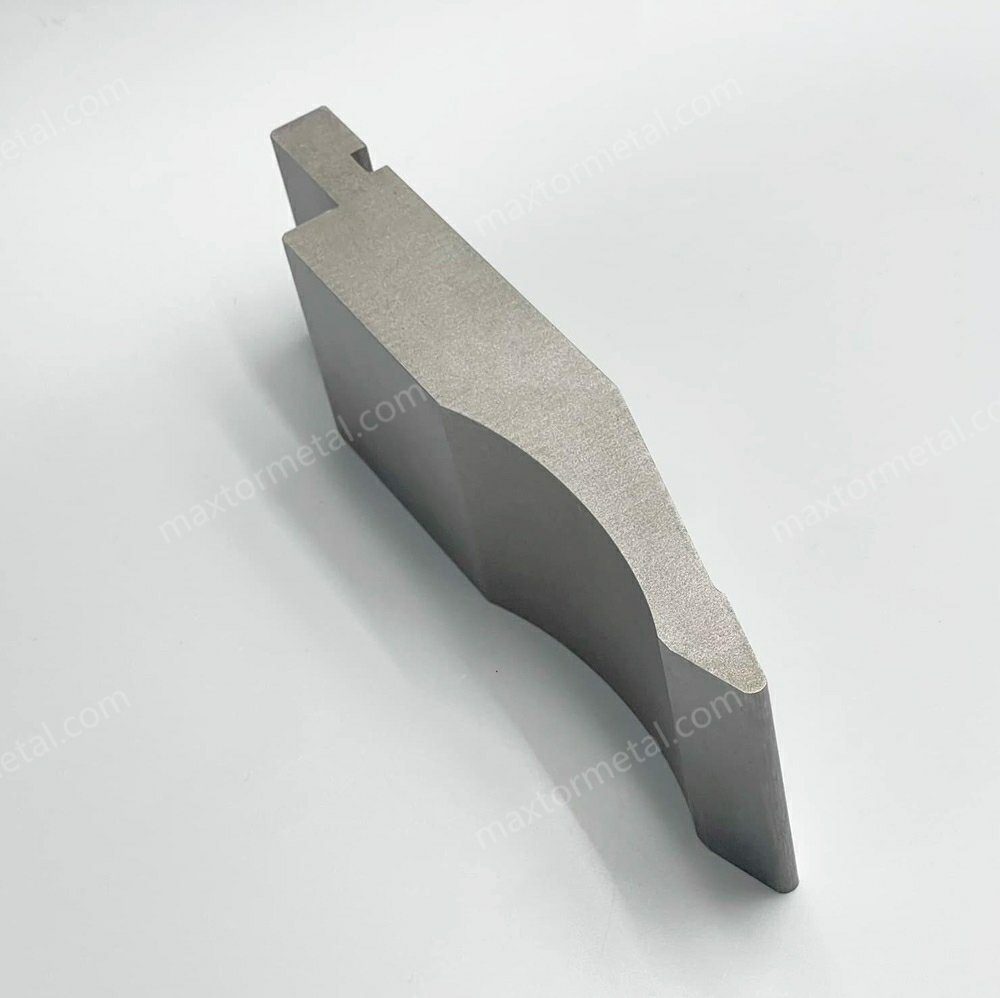
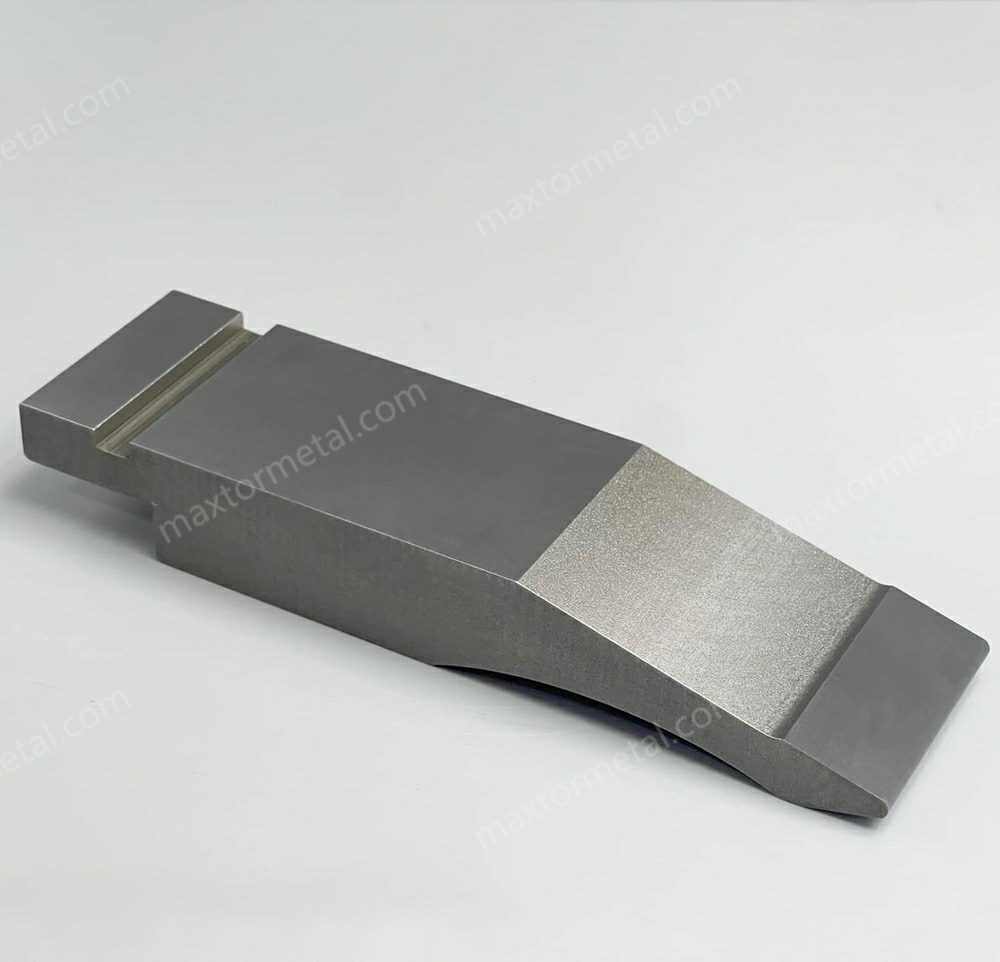
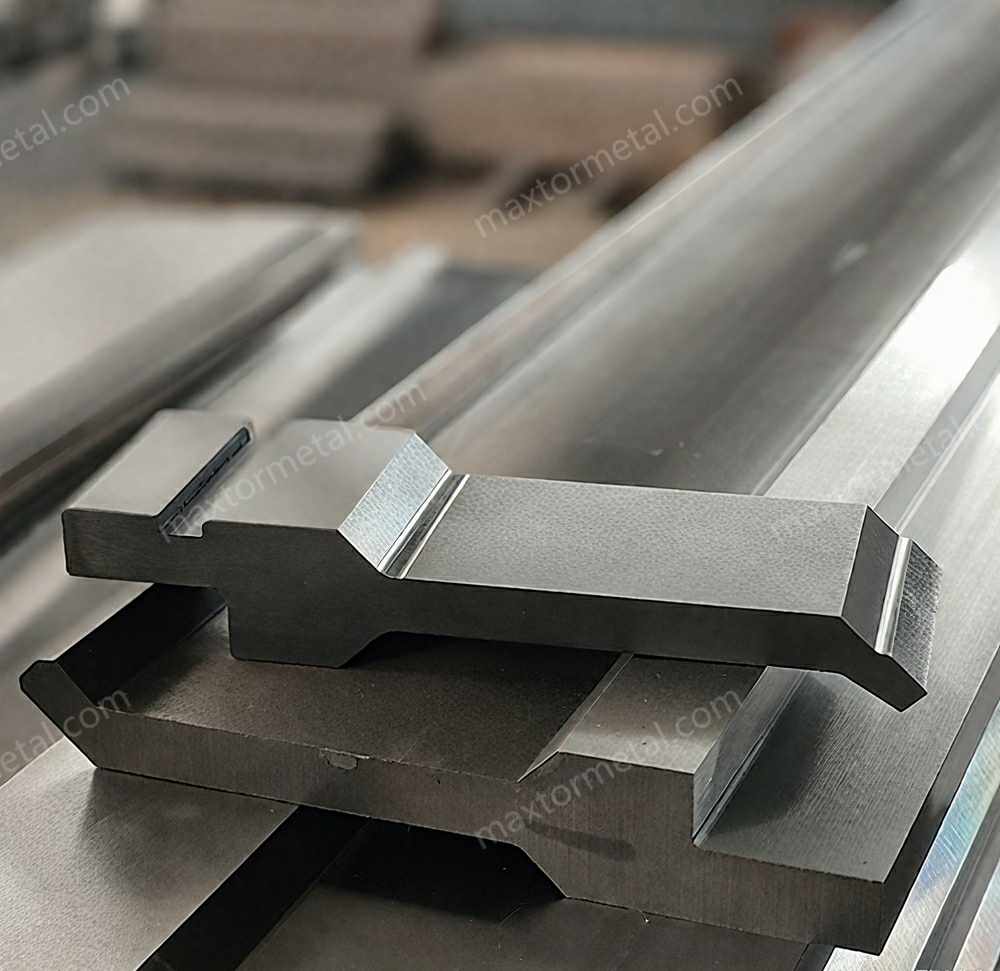
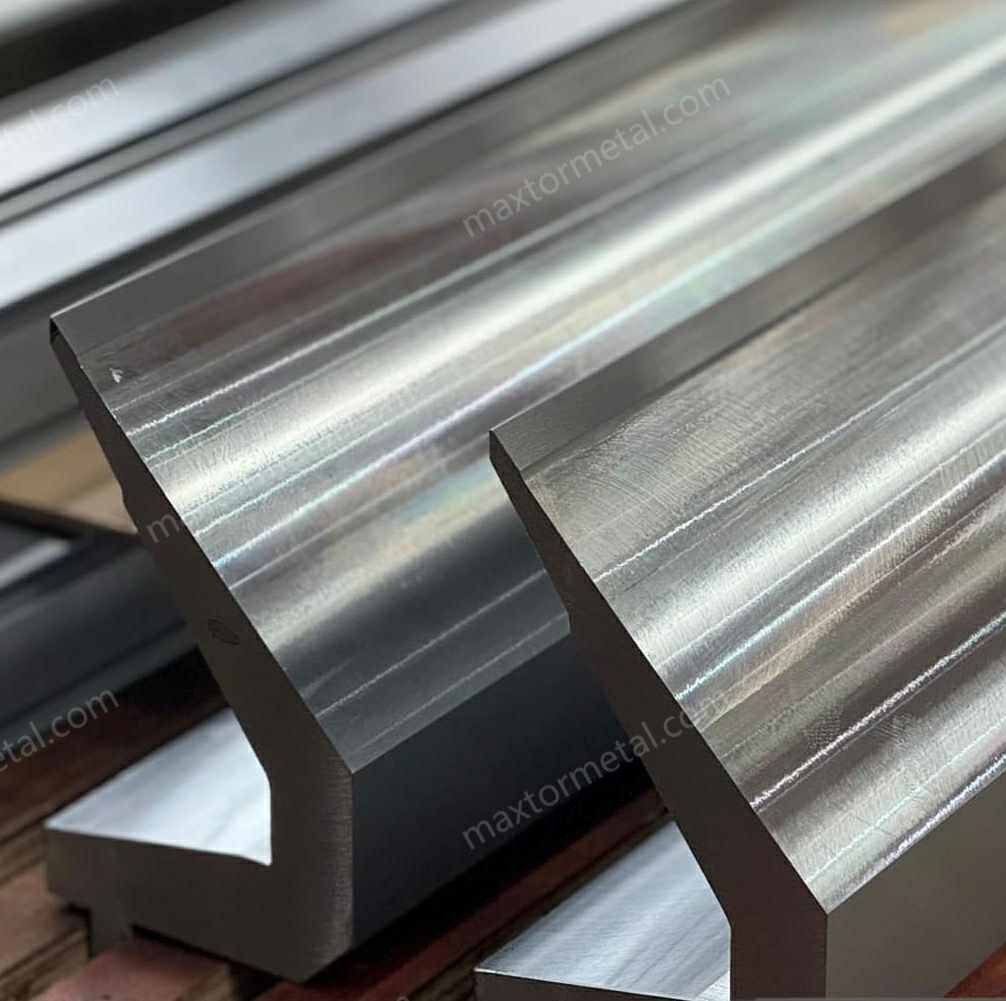
| Standard Punch | Bends thicker materials with a concave side for shorter flanges. |
| Acute Angle Punch | Makes sharp angles with a pointed tip and strong body. |
| Narrow Punch | Fits tight spaces, good for closing square profiles. |
| Sash Punch | Has an angled tip for bending around corners. |
| Swan Neck Punch | Creates U profiles without hitting the tooling, used at lower tonnage. |
| Joggle Punch | Makes S-shape bends, thin profile for special jobs. |
| Radius Top Punch | Forms U-shape bends with a rounded tip, often used with U-shape dies. |
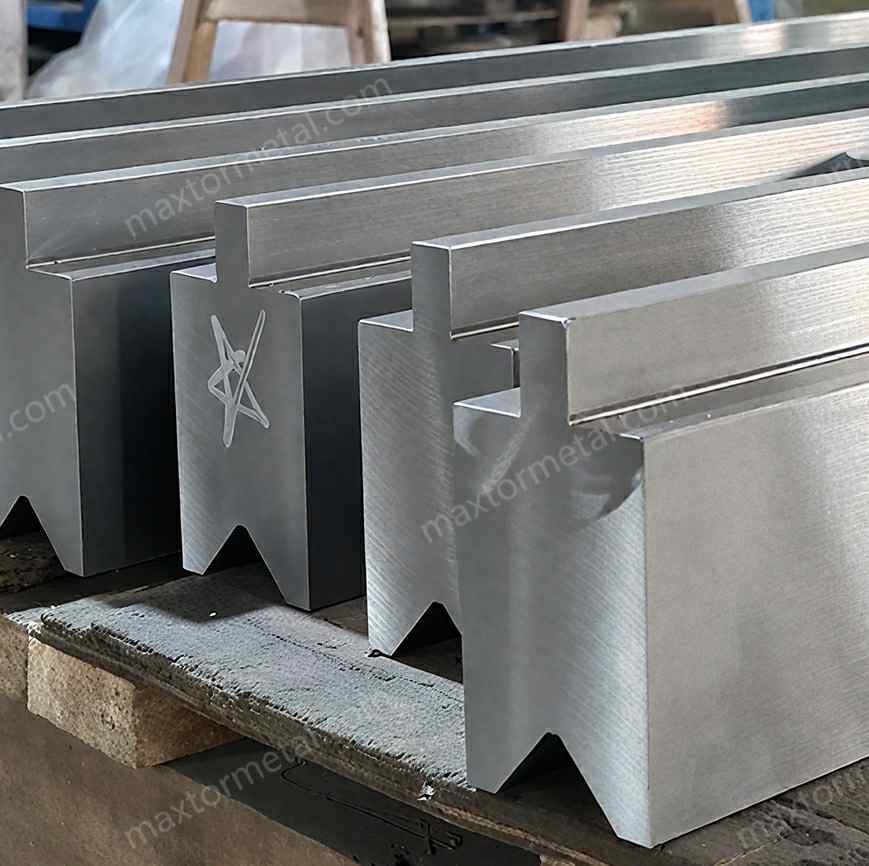
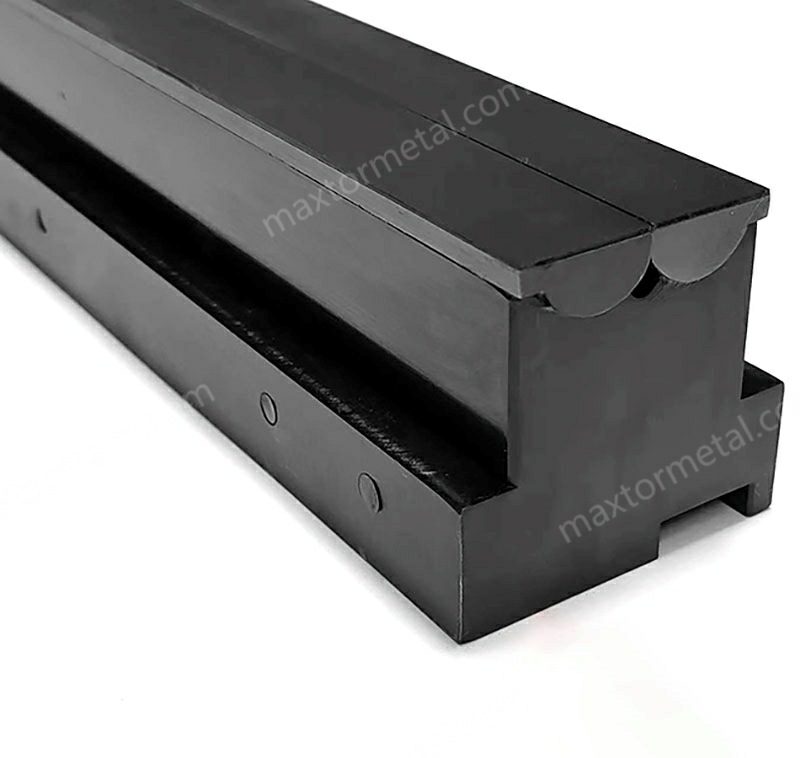
| Single V Die | Most common die, has a ‘V’ shaped cavity for many needs. |
| Two-Way Self-Centering V Dies | Has two ‘V’ cavities for faster work, no need to change tools for extra bends. |
| Multi V Die | Lets you bend at different angles and thicknesses by rotating the die. |
| Corrugating Dies | Makes a corrugated pattern for special surfaces on sheet metal. |
You can also order custom blades for unique jobs.
Material Quality
You want your press brake tooling to last a long time. The material you choose makes a big difference. Nanjing Metal uses high-quality materials like 42CrMo alloy steel. This steel gives you great durability and keeps your tools working well under high pressure.
- Chromoly steel stands out for its strength and toughness.
- You get resistance to rust, which helps your tools last longer.
- 42CrMo alloy steel handles high stress and keeps its shape after many uses.
- You see less wear, so your tooling durability improves.
Here is a table that shows why 42CrMo alloy steel is a good choice for press brake tooling:
| Property | Description |
|---|---|
| Hardness | Punches reach 48-52 HRC, dies reach 42-45 HRC. |
| Wear Resistance | Excellent resistance to wear and fatigue, lowers risk of tool failure. |
You use press brake tooling made from high-quality materials to get better efficiency and part quality. You spend less time replacing worn tools. You also see fewer mistakes in your finished products. Tooling durability means you can trust your tools to work well every day.
Tip: Choosing the right material for your press brake tooling helps you get better results and saves you money over time.
Regular Inspection and Maintenance
You want your press brake tooling to last a long time. Checking and caring for your tools helps them work better. It also keeps your shop safe. When you look at your tools every day, you protect your money. You make sure your equipment works well.
Daily Checks
Visual Inspection for Wear and Damage
Begin each day by looking at your press brake tooling. Walk around the machine and check for oil leaks. See if any bolts are loose or if there are strange marks. Look at the punches and dies for signs of wear. If you see scratches or dents, your tools may need help. These checks help you find problems early. Your tools stay in good shape.
Tip: Looking at your tools each morning can stop bigger problems. You save time and money by fixing small issues first.
Identifying Cracks, Chips, and Deformation
Look for cracks, chips, or bent spots on your tooling. Even small cracks can break your tools. Chips on the edges can make bad bends. They can also hurt your workpieces. If you find damage, take out the tool. Fix or replace it right away. This helps your tools last longer and keeps your work good.
Surface Cleanliness and Debris Removal
Keep your press brake tooling clean and free from rust. Wipe all surfaces with a dry cloth. Remove dust, dirt, and metal bits. Clean around the press brake to get rid of hazards. A clean tool works better and lasts longer. You also protect your machine from harm.
- Clean the machine and tooling every day.
- Take away all foreign objects from the work area.
- Put tools in a clean, dry place when not in use.
Preventing Corrosion and Rust Formation
Rust can make your tools wear out faster. It can also lower quality. To stop rust, keep your tools clean and dry. Use oil or rust spray on your tooling. Store your tools in a dry spot. If you see rust, clean it off right away. These steps help you protect your tools and make them last longer.
| Issue Type | Description |
|---|---|
| Lack of Lubrication | Not enough oil can cause bad friction and wear. |
| Surface Scratches | Scratches and marks show up on the workpiece surface. |
| Tooling Condition | Dirty or worn tooling can hurt the workpiece. |
| Process Pressure | Too much force can make deep marks on the material. |
| Material Properties | Soft metals get scratched more easily. |
Functional Testing
Checking Press Brake Tooling Alignment Accuracy
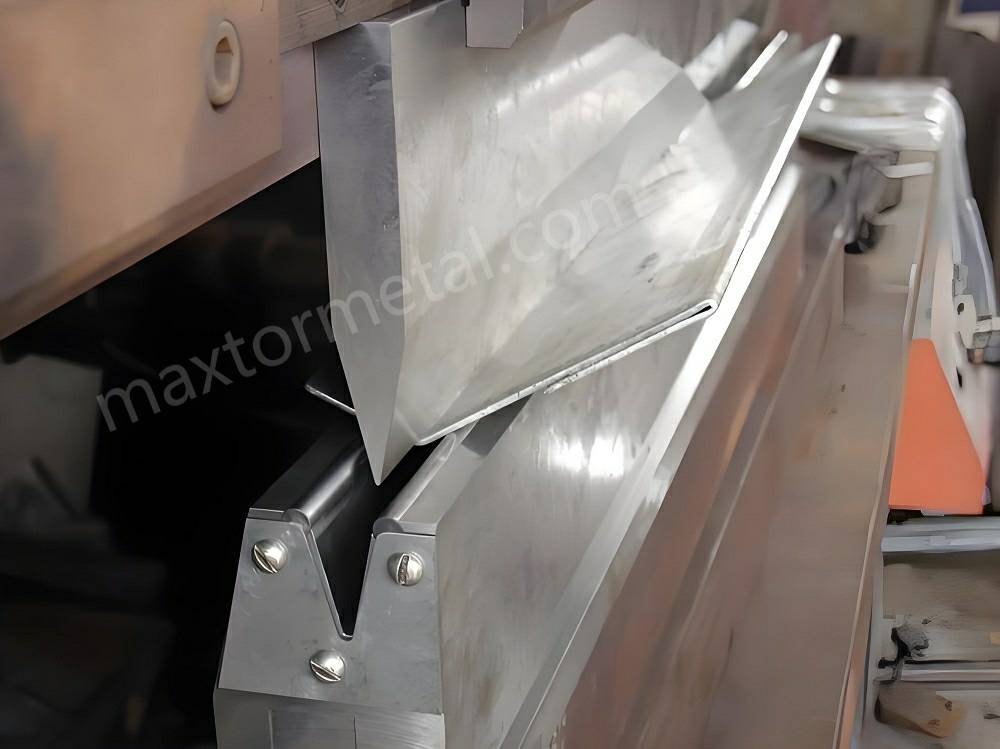
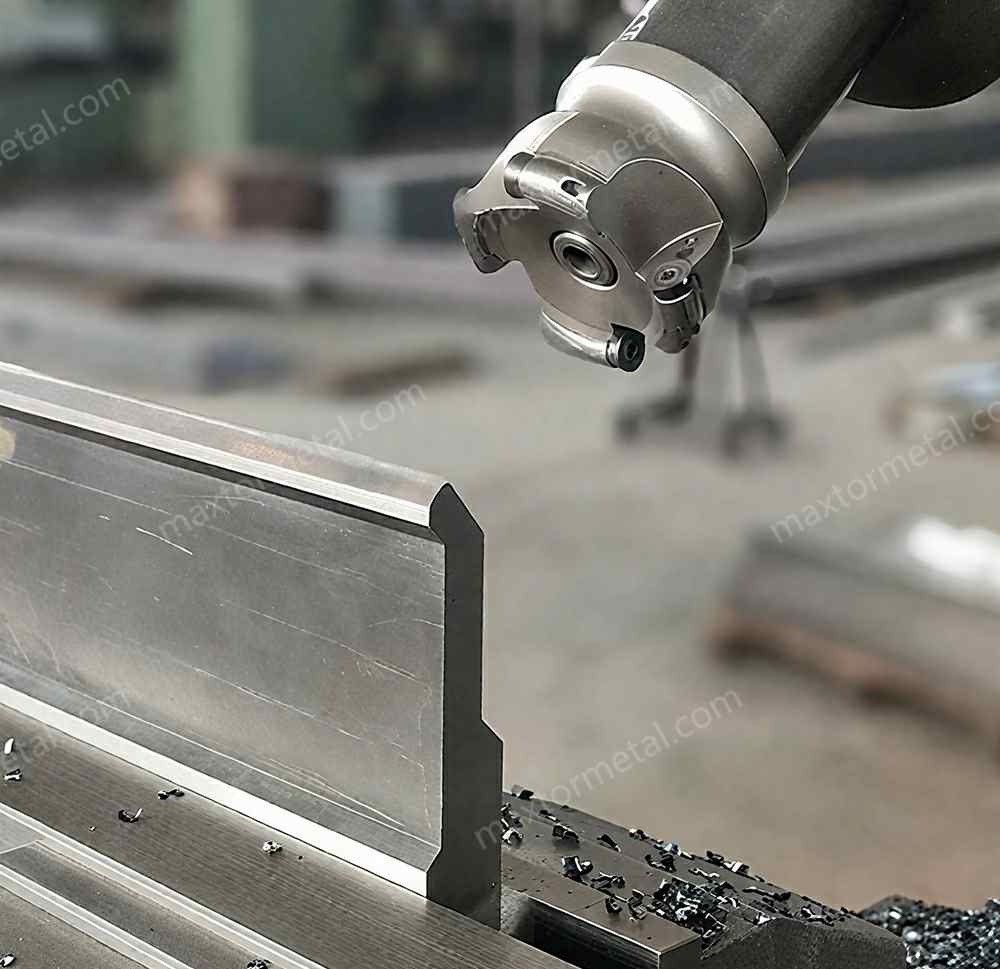
Press brake tooling alignment is important for good bends. It also helps your tools last longer. Check that punches and dies line up right. If they do not, you get uneven wear and bad results. Use alignment tools to make sure everything is straight. Good alignment helps your shop work better.
Verifying Proper Tool Engagement
Make sure your tooling fits with the press brake. Check that the punch goes into the die without gaps. If you see problems, fix the setup before bending. Good engagement stops damage and keeps your shop safe.
Ensuring Secure Clamping and Fastening
Always check that your tooling is tight and secure. Loose tools can slip or move. This can cause accidents or damage. Tighten all bolts and clamps before you start. This step keeps you safe and protects your tools.
Testing for Consistent Bending Results
Do a test bend before starting a new job. Look at the finished part for accuracy and quality. If you see problems, fix the alignment or change worn tools. Good results show your maintenance is working. You get better work and your tools last longer.
- Check hydraulic pressure to make sure it is right.
- Look at tooling for wear before each shift.
- Check calibration to keep your machine safe.
- Watch system performance for changes.
Note: Follow the maker’s advice for checking and caring for your tools. If you use your machine a lot or work in tough places, check your tools more often. Pay attention to important parts like the hydraulic system and press brake tooling.
By making inspection and care part of your daily routine, you help your tools last longer. Your machine works better and your shop stays safe. Clean and rust-free tools give you better results. You keep high quality and durability every day.
Cleaning and Lubrication
Cleaning Tools
You should clean your press brake tooling every day. Clean tools help you make better parts. Dirt and dust can mess up your bends. They also make your tools wear out faster. You want to stop dirt from hurting your tools, so you clean them the right way.
- Use mild soap and water to wash dies and punches. Strong chemicals can hurt the surface.
- Wipe all tools with a soft cloth and safe cleaner. Isopropyl alcohol is good for cleaning off sticky stuff.
- Always wear gloves when you touch press brake tooling. This keeps oil from your hands off the tools.
- Dry every part well after you clean it. Wet tools can get rusty and not last as long.
- Look at punches and dies for damage while you clean. Change out any broken parts right away.
Cleaning your tools often keeps dirt and dust away. You stop rust and keep your press brake tooling strong. Change how often you clean based on how much you use your tools. Some shops clean every day, but others may clean once a week or month.
Tip: Clean tools help you stop machine problems and keep your shop safe. You get better work and your tools last longer.
Here is an easy cleaning plan for your press brake tooling:
| Step | Action |
|---|---|
| 1. Wipe Down | Use isopropyl alcohol and a clean rag |
| 2. Dry Thoroughly | Remove all moisture to prevent rust |
| 3. Inspect | Check for cracks, chips, or deformation |
| 4. Coat | Apply preservative lubricant before storage |
| 5. Store Properly | Use a cabinet with silica gel for humidity |
Lubrication Best Practices
Lubrication helps your press brake tooling work well. It lowers friction and helps your dies and punches last longer. Lubrication also helps you do a good job every time.
Lubricant Types
Pick the right lubricant for your press brake tooling. Some lubricants work better in certain places. Always check your manual or ask an expert if you are not sure. Isopropyl alcohol cleans off dirt, and preservative lubricants stop rust.
- Isopropyl alcohol takes off dirt and oil before you add lubricant.
- Preservative lubricants cover the tooling and stop rust.
- Keep lubricants in a dry, clean spot so they work well.
Application Frequency
Put on lubricant often to keep your press brake tooling in good shape. Too much lubricant can bring in dirt. Too little can make your tools rub and wear out. You need to find what works best for your shop.
- Spread lubricant on all parts that touch.
- Wipe off extra lubricant so it does not build up.
- Check moving parts for wear or strange sounds.
- Make lubrication part of your regular care.
- Change how often you add lubricant based on how much you use your tools and your shop’s air.
Good lubrication helps your tools last longer and work better. It cuts down friction and can make your tools wear less by up to 20%. If you skip lubrication, your tools can wear out fast, break, or stop your work.
Note: Lubricate your tools often to keep them working well. You get better results and your tools last longer with each bend.
Press Brake Tooling Alignment
Bress Brake Tooling Alignment Steps
Preparation and Safety Measures
First, get your workspace ready. Clean the press brake bed and tooling. Take away dust, oil, and dirt. This keeps your dies and punches safe. You stop scratches and keep your tooling working well. Put on safety gloves and goggles before you start. Check that safety guards are in place. Make sure the emergency stop button works. Always put safety first when setting up your machine.
Inspecting Tooling and Machine Surfaces
Look closely at the dies and punches. Check for cracks, chips, or wear. Look at the press brake bed for dents or rust. Wipe all surfaces with a dry cloth. You want smooth contact between the tooling and machine. This helps your tooling last longer and work better. If you see damage, replace the broken part before you go on.
Positioning Dies and Punches
Put the dies and punches on the press brake bed. Line up the punch right above the die. Make sure both are centered on the machine. Use your hands to guide the tooling into place. You want the punch and die to meet evenly when the ram moves down. Good positioning helps you get accurate bends and saves time.
Adjusting Bress Brake Tooling Alignment
Lock the dies and punches with the right clamps. Adjust the clamps so the tooling stays tight. Set the press brake tonnage for your material and bend. Double-check that the punch and die centers match up. Use a straightedge or alignment tool to check this. Adjust the tooling until everything is level and straight. Good alignment helps your tooling last longer and gives you better results.
Verifying Alignment Accuracy
Test your setup by making a sample bend. Measure the finished part with a caliper or protractor. Check the angle and size. If the bend is wrong, fix the tooling and try again. Keep testing until you get it right. When your bends are always correct, your tooling is aligned well. You save time and waste less material.
Addressing Common Alignment Issues
Sometimes, you find alignment problems during setup. Here is a table that shows common errors and how to stop them:
| Alignment Error | Description | Prevention Measure |
|---|---|---|
| Unaligned tooling | The punch and die must be aligned to ensure accurate part production. | Ensure the punch and die centers are in the same plane throughout the machine’s length. |
| Ram drifting | The ram may drift down due to internal oil leaks, causing misalignment. | Replace the internal oil seal and use a block under the ram when the machine is shut down to maintain level. |
You can stop these problems by checking alignment before each job. Regular checks help you find issues early. You protect your dies and punches and keep your tooling working well.
Precision Tips
Using Alignment Tools and Gauges
Use special tools to check alignment. Digital calipers and micrometers help you measure parts and backgauge spots. Dial gauges or test indicators with magnets check if things are straight. Digital protractors help you check bend angles fast. Laser alignment systems give you very accurate measurements. Tonnage monitors show you the bending force as you work. Test dies with certified accuracy help you check your press brake’s performance. These tools help you keep your work high quality and efficient.
Ensuring Consistent Clamping Pressure
Make sure clamping pressure is even across dies and punches. Even pressure keeps the tooling tight and in place. You stop movement during bending. Good pressure helps you get precise bends and makes your tooling last longer. Check clamps before each job to make sure they hold tight.
- Even clamping pressure keeps press brake tooling lined up.
- It holds the workpiece steady during bending, stopping mistakes.
- Good pressure across the tooling helps you get exact bends.
Checking for Wear or Deformation
Check dies and punches for wear or bending. Look for uneven spots, cracks, or chips. Worn tooling can make bad bends and lower quality. Change broken parts right away. Regular checks help you keep your work fast and your tooling strong.
Maintaining Clean Contact Surfaces
Keep all contact surfaces clean. Dirt and dust can mess up alignment and cause damage. Wipe the press brake bed, dies, and punches before each setup. Clean surfaces help you get accurate bends and better finished parts.
Tip: Clean contact surfaces and regular checks help you stop alignment problems. You get better results and tooling that lasts longer.
Documenting Alignment Procedures
Write down each step of your alignment process. Keep notes about changes and measurements. Writing things down helps you see patterns and track changes. You work faster and keep quality high. Good records help you teach new workers and keep your shop running well.
Note: Keeping alignment and records the same helps your tooling last longer and work better. You make fewer mistakes and your press brake tooling works great.
Proper Storage
Handling
You keep your press brake tooling safe by handling it with care. When you move dies and punches, you lower the chance of damage. You help your tools last longer by following easy steps.
- Clean your tooling before and after you use it. Dirt can scratch the surface and make it wear out.
- Lubricate dies and punches to stop friction. This helps stop rust and keeps your tools working well.
- Check your tooling for cracks, chips, or bent spots before you put it away.
- Store your press brake tooling the right way to keep it in good shape.
- Use the right equipment when lifting heavy parts. This helps you avoid dropping or hitting your dies and punches.
- Follow lockout/tagout rules when doing maintenance. This keeps you safe and stops accidents.
- Teach all workers how to handle tooling the right way. Good training helps everyone protect the tools.
Tip: Careful handling helps your press brake tooling last longer and keeps your shop safe.
Storage Conditions
You keep your press brake tooling strong by storing it in a good place. Good storage stops rust, corrosion, and bending. You want your dies and punches to stay clean and dry.
- Store your tooling in a clean, dry spot. Water causes rust and makes metal weak.
- Use metal or hard cabinets for storage. These cabinets keep out water better than wood ones.
- After you use your tooling, clean it with isopropyl alcohol. This takes off dirt and handprints that can cause rust.
- Put a preservative lubricant on your dies and punches. Wipe off extra oil so it does not build up.
- Put silica gel packets in your cabinet. Silica gel soaks up water and keeps the air dry.
Here is an easy storage routine you can use:
- Wipe your press brake tooling with a clean rag and isopropyl alcohol.
- Cover the tool with preservative lubricant and take off extra oil.
- Put the tool in a cabinet with silica gel packets to keep out water.
| Storage Step | Purpose |
|---|---|
| Clean with alcohol | Takes off acids and dirt |
| Lubricate surface | Stops rust and corrosion |
| Use silica gel | Keeps the cabinet dry |
You keep your press brake tooling ready for work by following these steps. Clean, dry, and oiled tools last longer and work better. Good storage saves your money and helps you do a great job every time.
Note: Storing your tools the right way is just as important as cleaning them. You stop damage and keep your press brake tooling working well.
Press Brake Maintenance
Taking care of your press brake machine helps you get good results. You make your tooling last longer and work better. You also keep your shop safe and protect your money.
Hydraulic System
The hydraulic system makes your press brake work. You need to check it often to keep things running well. Good maintenance stops breakdowns and helps your tooling last longer.
Checking Hydraulic Fluid Levels
Check the hydraulic fluid in your press brake every week. Look at the tank like you check oil in a car. If the fluid is low, fill it up to the right mark. Low fluid can make the machine move strangely and hurt the pump. Clean fluid helps your machine run smoothly and keeps your tooling strong.
Inspecting for Leaks and Contamination
Walk around your press brake and look for leaks. Check the cylinders and hoses for oil dripping or pooling. If you see leaks, fix them right away. Leaks lower pressure and make your machine work worse. Also, check for dirt or water in the oil. Dirty oil can hurt the hydraulic system and make bends bad.
Replacing Hydraulic Filters
Change the hydraulic filters when you change the oil. For new machines, change the oil after 2,000 hours. After that, change it every 4,000 to 6,000 hours. Clean or replace the filters each time you change the oil. If the machine alarms or the oil looks dirty, change the filter right away. Clean filters help your machine and make your tooling last longer.
Monitoring System Pressure and Temperature
Check the pressure and temperature gauges on your press brake. Make sure the numbers match what the maker says. High pressure or temperature can mean something is wrong. If you see strange numbers, stop the machine and check. Good control helps you get the same results and keeps your tooling safe.
Lubricating Moving Components
Lubricate all moving parts in the hydraulic system. Use the right lubricant for your machine. Lubrication lowers friction and helps your tooling last longer. Follow the schedule in your manual. Well-lubricated parts help your machine work smoothly.
Identifying and Addressing Unusual Noises or Vibrations
Listen to your press brake while it runs. If you hear strange noises or feel shaking, stop and check the machine. Noises can mean loose parts or problems in the hydraulic system. Fix problems fast to stop damage. Quick action helps you keep your machine working and protects your tooling.
Scheduling Regular Professional Inspections
Have a professional check your press brake at least once a year. Experts look at the hydraulic system, test the oil, and find hidden problems. They help you keep your machine in good shape. Regular checks help your shop do better work.
Tip: Good hydraulic maintenance helps you avoid expensive repairs and keeps your tooling working well.
Electrical System
The electrical system controls your press brake. You need to check it often to keep your machine safe and working. Good electrical maintenance stops downtime and helps your tooling last longer.
Inspecting Wiring and Connections
Look at all wires and connections on your press brake. Make sure they are tight and not broken. Loose or damaged wires can cause power problems. Check for frayed insulation and change bad wires right away. Good wiring helps your machine run safely and better.
Checking Control Panel Functionality
Test the control panel before each shift. Press all buttons and switches to make sure they work. If you see problems, fix them before you start. A working control panel helps you control your press brake and get good results.
Testing Safety Interlocks and Emergency Stops
Test the safety interlocks and emergency stop buttons. Make sure they work every time. Safety features protect you and your team. Test these systems often as part of your maintenance routine.
Cleaning Electrical Components and Panels
Clean the electrical panels and parts with a dry cloth. Dust and dirt can make things overheat and work worse. Keep the panels closed when not in use. Clean parts help you get better results and protect your tooling.
Monitoring for Overheating or Burnt Odors
Check for signs of overheating. Smell for burnt odors near the electrical panels. If you notice heat or strange smells, stop the machine and check. Overheating can hurt the electrical system and make your tooling wear out faster.
Replacing Worn or Damaged Components
Change any worn or damaged electrical parts right away. Old relays, switches, or sensors can cause failures. Use good replacement parts to keep your press brake working well. Fast changes help you avoid downtime and keep your maintenance strong.
Keeping Maintenance Logs for Electrical Issues
Write down all electrical checks and repairs in a logbook. Record the date, problem, and fix. Good records help you see patterns and stop future problems. Logs help you work better and keep your tooling in top shape.
Note: Regular electrical maintenance helps you avoid common problems like power issues, breaker trips, and sensor errors. Use tools like multimeters and pressure gauges to check your system. Good care keeps your machine safe and your shop running well.
Adjustment and Calibration
Calibration Tools
You need the right tools to keep your press brake tooling accurate. Calibration tools help you check and adjust your machine so you get the best results. You use these tools to measure, align, and test your dies and punches.
- Dial gauges help you measure small changes in position. You use them to check if your tooling sits flat and straight.
- Shims let you adjust the height of your dies and punches. You place shims under the tooling to fix small gaps or uneven spots.
- Test bends show you if your press brake tooling makes the right angle. You bend a sample piece and measure it with a protractor or caliper.
- Alignment blocks help you set up your dies and punches in a straight line. You use these blocks to keep everything level.
- Calibration guides from your press brake manufacturer give you step-by-step instructions. You follow these guides to make sure you do each step correctly.
Here is a table that shows common calibration tools and what they do:
| Calibration Tool | Purpose |
|---|---|
| Dial Gauge | Measures small movements |
| Shim | Adjusts tool height |
| Test Bend Piece | Checks bending accuracy |
| Alignment Block | Keeps tooling straight |
| Calibration Guide | Provides setup instructions |
Tip: Use calibration tools often to keep your press brake tooling working well. You get better bends and save time.
Adjustment Steps
You keep your press brake tooling accurate by following clear adjustment steps. These steps help you get the right bend every time and make your tools last longer.
- Inspect and Clean Your Tools
Start by cleaning your dies and punches. Remove dust, oil, and metal bits. Check for cracks, chips, or worn edges. Replace any damaged tooling before you begin. Clean tools help you get accurate bends. - Align Punches and Dies
Place your dies and punches on the press brake bed. Use alignment blocks or shims to level them. Make sure the punch sits directly above the die. Check with a dial gauge to see if everything is straight. Good alignment stops uneven bends and helps your tooling last longer. - Test Bend and Measure
Do a test bend with a scrap piece of metal. Use a protractor or caliper to measure the angle and size. If the bend is off, adjust the tooling height with shims. Repeat the test until you get the right result. - Secure and Recheck
Tighten all clamps and fasteners. Make sure your tooling does not move during bending. Do another test bend to confirm everything stays in place. Secure tooling helps you avoid mistakes and keeps your shop safe. - Store and Handle Carefully
After you finish, clean your tooling again. Store dies and punches in a dry cabinet with padding. Handle them gently to avoid damage. Good storage keeps your press brake tooling accurate for the next job.
Note: Follow these steps each time you set up your press brake tooling. You get better results and help your tools last longer.
You keep your press brake tooling working well by using calibration tools and following adjustment steps. Regular checks and careful handling help you make accurate bends and protect your investment.
Sourcing Quality Tooling
Supplier Selection
You want your press brake tooling to work well and last long. Picking a good supplier helps your shop do better work. Look for suppliers who offer strong, custom, and well-checked tooling. Nanjing Metal lets you order tooling made just for you. Their team checks every tool for alignment, hardness, and how it works before sending it out. You know your tools are high quality.
Here is a table to help you compare press brake tooling suppliers:
| Criteria | Description |
|---|---|
| Type of Material Being Processed | Match tooling material to the metal you bend, like aluminum or stainless steel. |
| Production Volume and Precision | Use high-performance materials for large jobs and tight tolerances. |
| Cost Considerations | Balance cost with performance; choose affordable options for basic jobs, premium for tough work. |
| Compatibility with Press Brake | Make sure tooling fits your machine’s clamping style and tonnage. |
Check if the supplier has certifications like ISO 9001:2015. This means they care about quality and trust. Ask if they test tools before shipping and if they can make custom tooling for you. If you need a special blade or shape, visit the custom blades page to see what you can get.
Tip: Suppliers who test their tools and offer custom options help your shop work faster and avoid problems.
Material Choice
The material you pick for your tooling matters a lot. It affects how long your tools last and how much care they need. Choose press brake tooling made from strong alloys or tool steels for hard jobs. D2 and H13 tool steel do not wear out fast and work well under pressure. These materials may cost more at first, but you save money because you do not replace them often.
New materials make it easier to find tooling that is both strong and tough. Good materials help you bend metal right and keep your shop running smoothly. You get better parts and make fewer mistakes.
When you pick press brake tooling, think about the metal you use, how much you make, and how exact you need to be. Strong materials and careful making help your tooling last longer and work better. You spend less time fixing things and more time working.
If you want to learn about custom materials or see how Nanjing Metal checks quality, visit the company homepage. You can look at their press brake tooling and see how their checks help you get good results.
- Strong materials and careful making
- Good quality checks with certifications
- Testing before shipping for alignment and hardness
Note: Picking the right material helps your tooling last longer, lowers care costs, and makes your shop work better.
Maintenance Records

Keeping good maintenance records helps you use your press brake tooling better. You make your tools last longer and work faster. You also keep your parts high quality. When you write down your work, you find problems early. This helps you make smart choices for your shop.
Logging
You should write down every time you do maintenance. Use a notebook, a spreadsheet, or an app. Write the date, what you did, and any problems you saw. Record when you clean, oil, or fix your press brake tooling. If you see damage or wear, write it down right away. This habit helps you notice patterns and plan fixes before things get worse.
A simple log can look like this:
| Date | Task Performed | Tool Condition | Action Taken | Next Step |
|---|---|---|---|---|
| 2024-06-01 | Cleaned & Lubricated | Good | None | Check in 1 week |
| 2024-06-08 | Inspected for wear | Minor scratches | Polished surface | Monitor closely |
Tip: Writing things down often helps you see how long your tooling lasts. You can spot drops in quality or speed.
You can use colors or emojis to show urgent problems. For example, use 🟢 for good, 🟡 for watch, and 🔴 for replace. This makes your notes easy to read and quick to use.
Scheduling
You need a clear plan for maintenance. Make daily, weekly, and monthly tasks. Daily checks keep your press brake tooling clean and safe. Weekly checks help you find wear early. Monthly deep cleaning and calibration keep your machine working well.
Here is a sample schedule:
- Daily:
- Wipe down press brake tooling
- Check for cracks or chips
- Remove debris
- Weekly:
- Look for wear and check alignment
- Oil moving parts
- Test for even bends
- Monthly:
- Deep clean all tooling
- Calibrate machine settings
- Review your maintenance notes
Note: Following a plan helps your tooling last longer and keeps your shop working fast.
You can set reminders on your phone or calendar. Give jobs to team members so everyone helps keep press brake tooling in good shape. When you follow your plan, you do not miss steps and your equipment works longer.
Good notes and a strong plan help you reach your goals for lasting tools, good parts, and fast work. You make better products and save money by stopping breakdowns. Maintenance records are easy to use and help you get big results.
Troubleshooting
Wear Issues
Sometimes your press brake tooling does not bend metal well. This can make your finished parts look bad. It can also slow down your shop. You want to keep your tooling durability high. You need a strong maintenance routine. Here are some easy steps to fix wear problems and keep your shop working fast:
- Grinding and Re-sharpening
You can fix the edge of your dies and punches by grinding. Re-sharpening helps your tools work almost like new. You get better bends and your tooling durability goes up. - Heat Treatment
If your tools show some wear, heat treatment helps. This makes the surface of your press brake tooling hard again. Your tools last longer and work better. - Welding Repair
If you see cracks or breaks, use welding repair. Fill the broken spots with weld. After welding, grind and polish the area. This keeps your bends looking good. - Routine Inspections
Check your press brake tooling every week. You can also check after every 50 cycles. Early checks help you find wear before it gets worse. This helps your tools last longer and keeps your shop fast. - Proper Cleaning
Clean your tools every day. Use non-corrosive lubricants to stop rust. Clean tools last longer and cost less to fix. - Alignment Checks
Always check the alignment before you start work. Good alignment stops uneven wear. It helps you keep your quality high.
Tip: Regular care and quick fixes help you avoid downtime. You keep your press brake tooling working well. Your shop runs smoothly.
Alignment Problems
Alignment problems can make bends look bad. They can also damage your tools and slow down your work. You want to fix these problems quickly. This protects your tooling durability and keeps your parts looking good. Here are some signs and ways to fix alignment problems:
- Signs of Alignment Problems
- Bends or angles do not look even
- You see gaps between punch and die
- You hear strange noises when working
- One side of the tooling wears out faster
- How to Fix Alignment Problems
- Clean all contact surfaces before you set up. Dirt can cause misalignment.
- Use alignment tools like straightedges or dial gauges. These help you check if your press brake tooling sits flat.
- Adjust clamps so pressure is even across dies and punches.
- Test with a sample bend. Measure the angle and check if it is right.
- If you see problems, stop and fix your tooling before you keep working.
| Problem | Solution | Benefit |
|---|---|---|
| Uneven bends | Realign punch and die | Better part quality |
| Tool movement | Tighten clamps | Higher efficiency |
| Excessive wear | Check and fix alignment | Improved durability |
Note: Good alignment helps your press brake tooling work well. You get better efficiency, higher quality, and longer tooling durability.
Training and Improvement
Operator Training
When you train your team, they work better. You teach everyone how to use press brake tooling the right way. You show them how to look for damage or wear. You tell them why maintenance is important for safety and tooling durability. You give hands-on lessons so everyone learns to clean, align, and store dies and punches.
You use easy steps to train new workers. You start with basic safety rules. You show how to check for cracks or chips on tooling. You teach how to clean surfaces and put on lubricant. You explain how to set up the press brake for good alignment. You let operators practice making sample bends. You look at their work and give advice.
You keep training up to date by reviewing best practices often. You talk about how maintenance helps tooling durability and part quality. You remind your team that good habits mean better efficiency and fewer mistakes. You use checklists so operators remember each step. You tell them to ask questions and work together.
Tip: Training often helps you find problems early. You build a team that cares about quality and durability.
Here is a simple training checklist:
| Training Task | Purpose |
|---|---|
| Safety rules | Stop accidents |
| Tool inspection | Find damage or wear |
| Cleaning and lubrication | Make tooling last longer |
| Alignment setup | Get better parts and speed |
| Sample bends | Check if parts are correct |
Procedure Updates
You help your shop run well by updating procedures. You look at your maintenance plan every few months. You try to find ways to make things faster and help tooling durability. You ask your team for ideas. You change steps that do not work or take too long.
You write new steps in simple words. You use pictures or diagrams to help everyone understand. You test new steps before using them for real jobs. You watch to see if part quality and machine work get better. You update your records to match the new steps.
You tell your team about updates right away. You have short meetings to explain changes. You answer questions and listen to ideas. You make sure everyone follows the new steps. You check that maintenance gets done on time.
Note: Updating steps helps you use new technology. You make your shop stronger, safer, and faster.
When you train your team and update steps, you get better results. You build a team that cares about maintenance and tooling durability. You get better parts and faster work. You protect your tools and help your shop grow.
When you take care of press brake tooling every day, it lasts longer. Your shop makes better parts and works faster. You save money and help keep everyone safe. Good maintenance gives you strong tools and good results. You protect your tools and make your parts better. Make a checklist for maintenance now. Teach your team what to do and write down your work. If you need help or have questions about press brake tooling, go to the contact page. Your shop will have fewer problems and get more done.
FAQ
How often should you inspect press brake tooling?
You should inspect press brake tooling every day before you start work. Daily checks help you find cracks, chips, or wear early. This habit keeps your tools safe and helps you make better parts.
What is the best way to clean press brake tooling?
Use a soft cloth and mild cleaner to wipe down your press brake tooling. Avoid strong chemicals. Dry each tool well after cleaning. Clean tools last longer and help you get accurate bends.
Why does press brake tooling need lubrication?
Lubrication reduces friction and stops rust. You should apply a thin layer of preservative lubricant after cleaning. Well-lubricated press brake tooling works smoothly and lasts longer.
How do you store press brake tooling safely?
Store press brake tooling in a dry cabinet with silica gel packets. Clean and oil each tool before storage. Good storage prevents rust and keeps your dies and punches ready for use.
What signs show press brake tooling needs replacement?
Look for deep cracks, chips, or bent edges. If you see uneven bends or poor part quality, your press brake tooling may need replacement. Regular checks help you spot these signs early.
Can you repair worn press brake tooling?
You can repair minor wear by grinding or polishing the surface. For deep damage, you may need welding or heat treatment. Always check if repairs keep your press brake tooling safe and accurate.
Does alignment affect press brake tooling lifespan?
Yes. Proper alignment stops uneven wear and helps your press brake tooling last longer. Use alignment tools and check setup before each job. Good alignment gives you better results and saves money.
What records should you keep for press brake tooling maintenance?
Keep a log of cleaning, lubrication, inspections, and repairs. Write the date and what you did. Maintenance records help you track tool lifespan and plan future care.
Tip: Good records make your press brake tooling last longer and help you avoid costly mistakes.
See Also
Air Bending vs. Bottoming: Choosing the Right Press Brake Tooling for Your Project
European vs. American Style Press Brake Tooling: Which is Right for Your Shop?
Choosing the Best Press Brake Tooling for Stainless Steel
Mastering Press Brake Tooling: How to Identify and Fix Punch and Die Wear
How Precision in Press Brake Dies Impacts Bending Results: A Guide to Achieving Perfect Bends
5 Essential Tips to Extend the Lifespan of Press Brake Tooling and Maximize Durability