Herramientas de plegado rotatorio lets you make smooth bends. Your tubes will not have any marks. You can get great results if you pick the right bender. You should use the correct materials. You must control the bending process. Advanced tooling helps stop problems. These tools include non-marking inserts and synthetic die surfaces. They help prevent ovality, wrinkling, thinning, and springback. Here are ways to fix these problems:
| Surface Imperfection | Common Causes | Advanced Tooling Solutions |
|---|---|---|
| Ovality | Too much force, not enough support, poor lube | Use mandrels, correct die, add booster |
| Inner Wall Wrinkling | Bad wiper setup, wrong mandrel, thick wall | Use wiper die, adjust mandrel, thin-wall tech |
| Outer Wall Thinning | Tight radius, low tension, wrong tool | Booster pressure, pressure die assist, big radius |
| Springback | Metal snaps back after bending | Overbend, real-time angle sensors |
If you use the right rotary bending tooling, you can stop these marks. Your tube bending process will be reliable. You can repeat it and get the same good results each time.
Puntos clave
- Pick the right rotary bending tooling for smooth bends with no marks. The correct tooling stops problems like oval shapes and wrinkles.
- Always check your die alignment and pressure before you bend. A good setup lowers the chance of marks and gives steady results.
- Use non-marking inserts and the right lubrication to keep tube surfaces safe. This is very important for jobs that need a clean finish, like in medical or food work.
- Know how material properties affect bending. Different metals act in different ways, so change your tooling and pressure as needed.
- Check and take care of your tooling often. Change old parts quickly to keep your bending process working well and smoothly.
Rotary Bending Tooling Overview
How Rotary Bending Works
Rotary bending tooling shapes tubes in a special way. The tube turns around a center point. This helps make smooth, round shapes. You must set up the bender carefully. Every part of the tooling helps the tube keep its shape.
Here is a table that shows how rotary bending tooling compares to traditional bending methods:
| Component/Mechanism | Rotary Bending | Traditional Bending |
|---|---|---|
| Mandrel Support | Used to prevent tube collapse and maintain shape | Not typically used |
| Precisión | Achieves tolerances within ±0.5 mm | Generally less precise |
| Aplicación | Common in aerospace and automotive | Broader applications, less specialized |
| Bending Mechanism | Draw bending with external/internal forces | Varies widely, often simpler mechanisms |
To get a good bend, follow these steps:
- Put the mandrel nose in the right spot.
- Set the pressure die to the correct level.
- Place the wiper tip to stop wrinkles.
- Change the pressure-die assist so the tube does not flatten.
Check all your settings before you bend the tube. Mandrels, pressure-die settings, and careful setup help you get great results.
Benefits for Mark-Free Tube Bending
Rotary bending tooling has many good points for bending tubes. You can make bends that are smooth and have no marks. This works well for tubes that need a perfect surface. You do not get bulges or twists like with other ways of bending.
Studies show rotary draw bending keeps the tube’s surface cleaner than compression bending. You get the same good results every time. This matters for aerospace and automotive jobs. You can count on rotary bending tooling to give you mark-free bends each time you use it.
Tip: Always check your tooling setup before you start. Good preparation stops marks and keeps your bends neat.
Bend Quality Factors
When you want flawless bends, you need to understand what affects the quality of your work. The material, tube size, and bend radius all play a big part in how your tube looks and performs after bending.
Material and Surface Finish
Impact of Different Metals
You will notice that different metals react in their own way during rotary bending. Stainless steel, aluminum, and copper each have unique properties. Stainless steel can scratch easily if you do not use the right tooling. Aluminum is softer, so it can get dents or marks if you use too much force. Copper bends easily, but it can still show marks if you do not handle it with care.
No-mar tooling helps you avoid these problems. This is very important when you need a smooth finish, like in food service or medical tubes. A clean surface keeps bacteria away and looks professional.
Here is a table that shows how different types of aluminum respond to bending:
| Propiedad | Non-Hardened Aluminum | Hardened Aluminum |
|---|---|---|
| Elasticity | Alto | Bajo |
| Resistance to Cracking | Alto | Bajo |
| Acabado de la superficie | Liso | Prone to Defects |
You can see that non-hardened aluminum bends more easily and keeps a smoother finish. Hardened aluminum may crack or show more marks.
Surface Treatments and Their Effects
Surface treatments can change how your tube reacts during bending. Polishing makes the surface smoother, so it is less likely to get scratched. Anodizing adds a hard layer, which can protect the tube but may also crack if you bend it too tightly. Plating can help prevent rust, but it might chip if the bend is too sharp.
Tip: Always match your surface treatment to your bending needs. If you need a perfect finish, choose treatments that add strength without making the tube brittle.
Tube Dimensions
Wall Thickness Considerations
The wall thickness of your tube matters a lot. Thin walls can wrinkle or collapse when you bend them. Thick walls resist these problems, but you need more force to bend them. If you use a thin-walled tube for a tight bend, you risk making the tube weak or even breaking it.
When you bend a tube, the outside wall stretches and gets thinner. The inside wall gets compressed and can wrinkle. If your tube has a low thickness-to-diameter ratio, it will not hold its shape well. This can lead to leaks or weak spots.
Diameter Variations and Common Issues
The diameter of your tube also affects the bend. Large-diameter tubes can flatten or become oval if you do not support them well. Small-diameter tubes are easier to control, but you still need to watch for kinks or marks.
Los errores más comunes incluyen:
- Using tubes that are too thin for the bend you want.
- Picking a diameter that does not fit your tooling.
- Not supporting the tube enough during bending.
Note: Always check your tube’s wall thickness and diameter before you start. This helps you avoid problems like wrinkling, thinning, or flattening.
Radio de curvatura
Industry Standard Recommendations
The bend radius is the distance from the center of the bend to the centerline of the tube. Choosing the right radius helps you avoid marks and keeps your tube strong. Here are some standard guidelines:
| Tipo de material | Minimum Bend Radius (xD) | Notas |
|---|---|---|
| Acero inoxidable | 7 x D | Best for thick tubes to avoid deformation. |
| General Applications | 2 x D | Good for smooth bends without overstressing. |
| Soft Aluminum Alloys | 2 x D | Allows bends without damage. |
| Hard Aluminum Alloys | 3 to 4 x D | Use a larger radius for harder alloys. |
For most jobs, a bend radius of 2 to 3 times the tube diameter works well. If you use stainless steel or thick tubes, you may need a bigger radius.
Effect on Surface Quality
A tight bend radius can cause problems. The tube may wrinkle on the inside or flatten on the outside. If you use a larger radius, you lower the risk of these defects. Mandrel support and the right tooling help you make tight bends without marks, but you should always follow the guidelines for your material.
- Wrinkling on the inside of the bend means you need more support.
- Tighter radii make defects more likely.
- Using a larger radius reduces stress and keeps the tube round.
Always check the standards for your material and application. Following these rules helps you get smooth, mark-free bends every time.
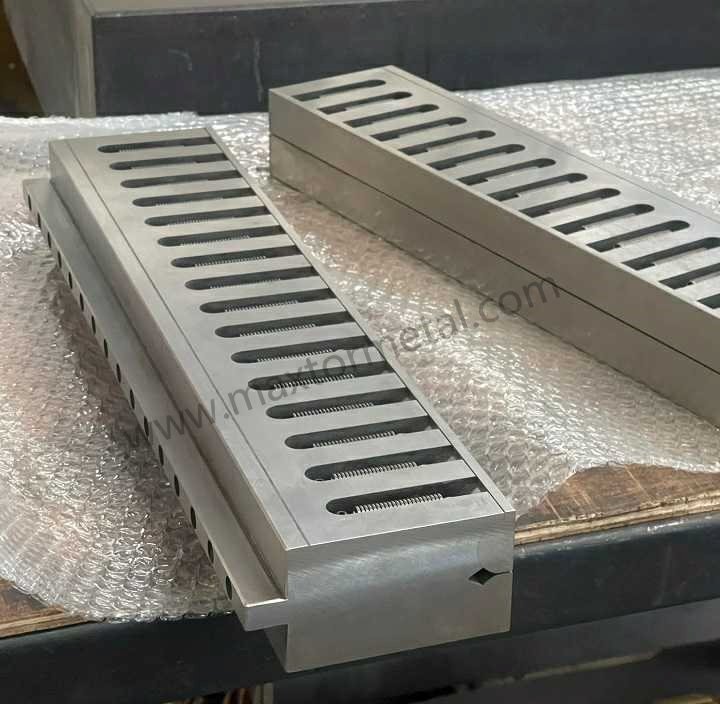
Tooling Selection
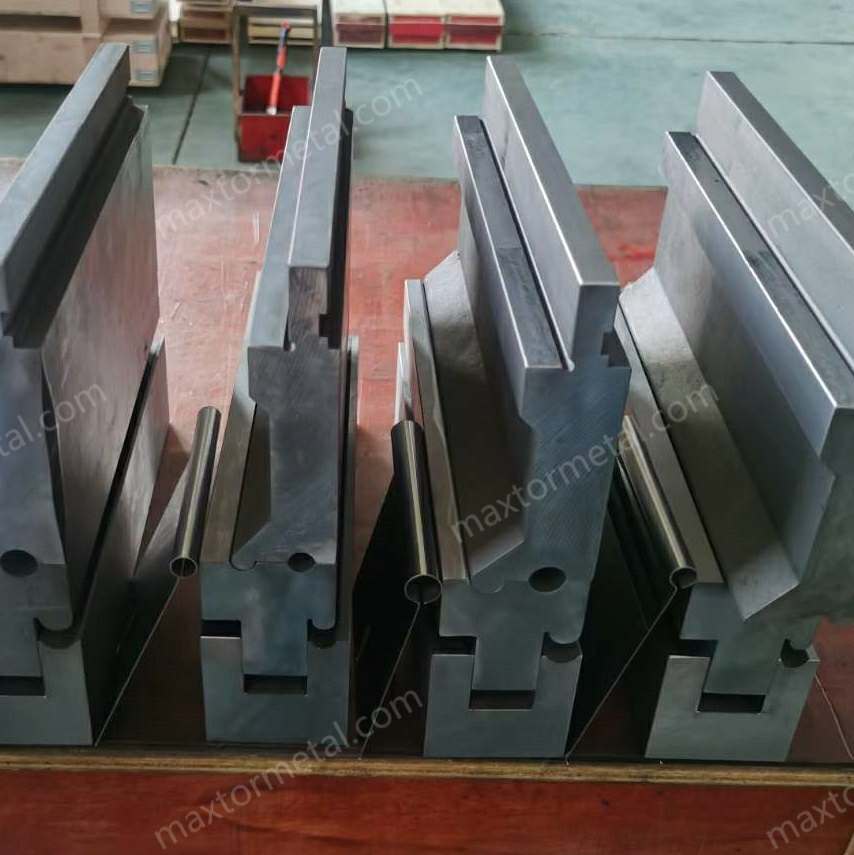
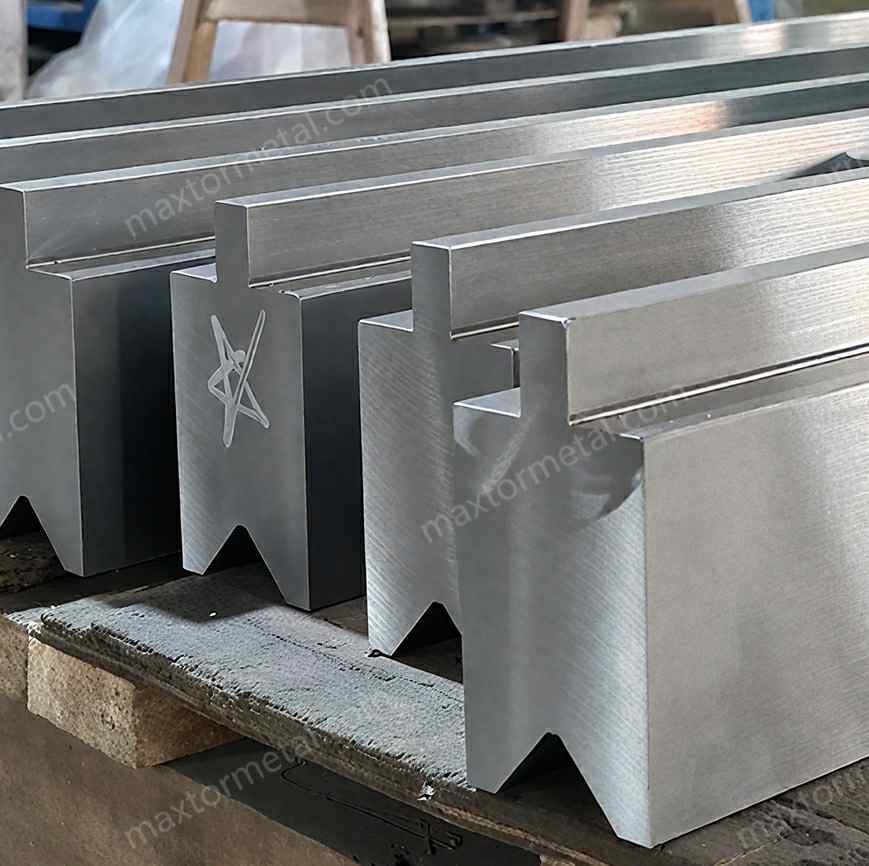
Picking the right tooling is very important. It helps you make perfect bends in tubes. You must match your tooling to your tube’s material and size. The finish you want also matters. Good tooling stops marks and wrinkles. It keeps your tube looking smooth. You can get the best tooling set by learning about different types. Use non-marking inserts and strong die materials.
Tube Bender Tooling Types
There are many choices for tube bender tooling. Each type has special features. These features help you get bends without marks. The table below shows common tooling types and their good points:
| Tipo de herramienta | Grip Area Features | Advantages for Mark-Free Bending |
|---|---|---|
| Bender Tooling Systems | Exchangeable grip lengths and surface finishes | Directional serrations minimize surface marking |
| Serrated Grip | Machined ridges (16 or 32 TPI) | Very high grip with minimal marking for short lengths |
| Knurled Grip | Deep cross-hatch surface | Maximum grip, suitable for heavy-wall tubing |
| Compound Grip | Grips both bent and adjacent sections | Ideal for tight designs, customizable finishes |
Some grip surfaces work better for certain jobs. SurfAlloy™ uses a rough carbide finish. This is good for hard materials. It stops the tube from getting squeezed too much. Serrated grip tooling has small ridges. You can use it for tubes as small as 5/8″ inside diameter. Knurled grip tooling has a deep pattern. It gives strong grip for thick tubes. Compound grip tooling holds both bent and nearby tube parts. This helps with tight designs.
Choosing the best tooling set lowers the chance of marks. It makes your bends look better. If you need special blades for odd shapes, you can look at soluciones de cuchillas personalizadas to improve your setup.
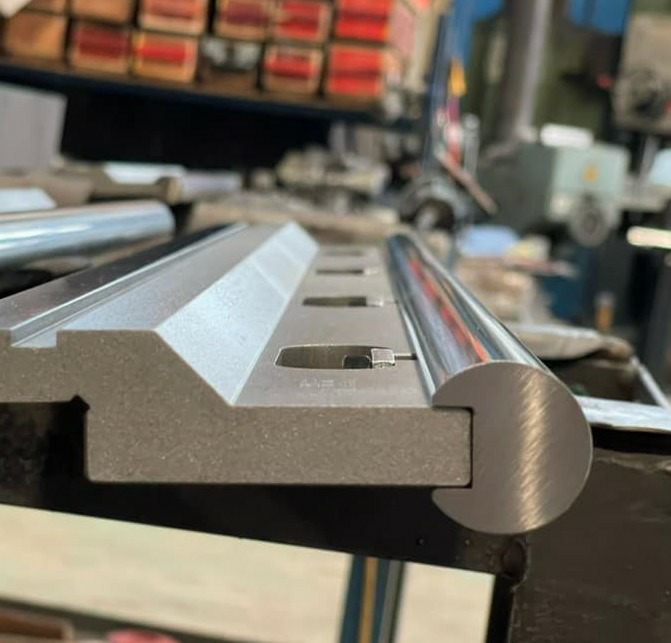
Non-Marking Inserts
Non-marking inserts help stop marks on tubes. You can use soft materials like polyurethane. Polyurethane inserts protect the tube’s surface. They cushion the tube and keep tooling from leaving marks. These inserts are best when you need a perfect finish. This is important for medical or food tubes.
- Polyurethane inserts stop marks during rotary bending.
- These inserts help you get a smooth finish. But they can make it harder to control the bend angle. Use them when surface quality is more important than exact angles.
Plastic tooling and winged die surfaces are also options. They help you make a good tooling set for mark-free bends. Always check your wiper die. Change inserts when they get worn out.
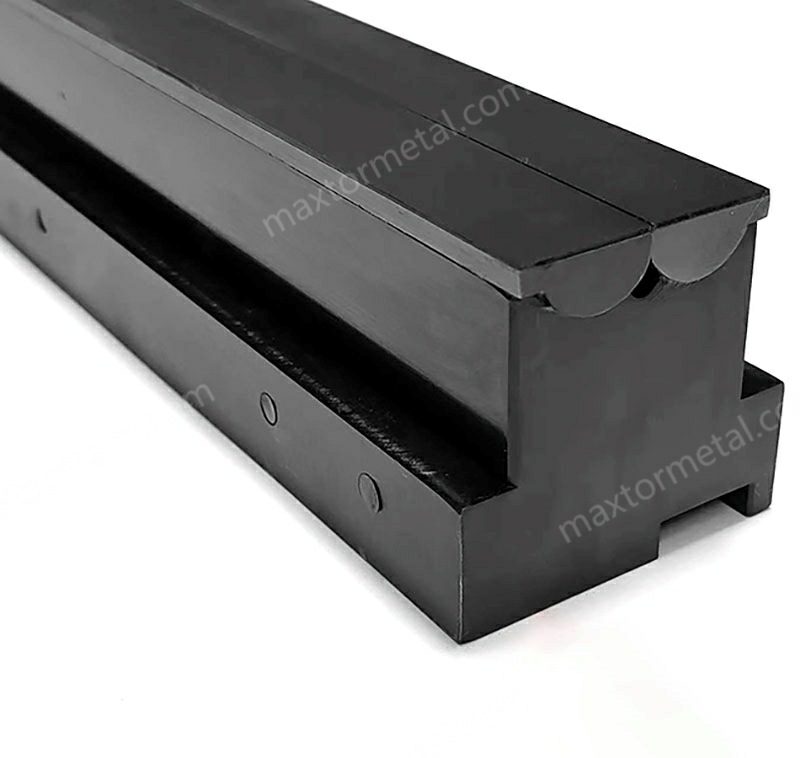
Die Materials
The die material affects your tube’s surface and how long your tooling lasts. You want a die that does not wear out fast. It should keep its shape after many bends. The table below compares common die materials:
| Tipo de material | Propiedades clave | Impact on Surface Quality and Tool Longevity |
|---|---|---|
| Heat-Treated Alloy Steel | Toughness and durability, can withstand wear without breaking | Positively impacts both surface quality and tool longevity |
| Tool Steel (A2, D2, S7) | High hardness but can be brittle, not ideal for bending applications | Brittleness can degrade surface quality and reduce tool longevity |
| Nitrided/Carburized Alloy Steel | Enhanced toughness through casing methods, maintains dimensional stability | Improves durability and shock absorption, enhancing tool longevity |
Pick heat-treated alloy steel or nitrided alloy steel for most jobs. These materials last longer and keep your tube smooth. Always look at your wiper die for damage. A worn die can cause marks or wrinkles.
If you want strong and custom tooling, Nanjing Metal has press brake tooling made from 42CrMo alloy steel. This tooling does not wear out fast. It gives good results for many tube bending jobs.
Tip: Make your best tooling set by using the right grip type, non-marking inserts, and strong die materials. Check your wiper die and other parts often. This helps you keep your bends looking great.
Setup and Adjustment
Setting up rotary bending tooling is very important. You need to pay attention to die alignment and pressure. You should also watch for worn parts. Each step helps you stop tube damage and marks.
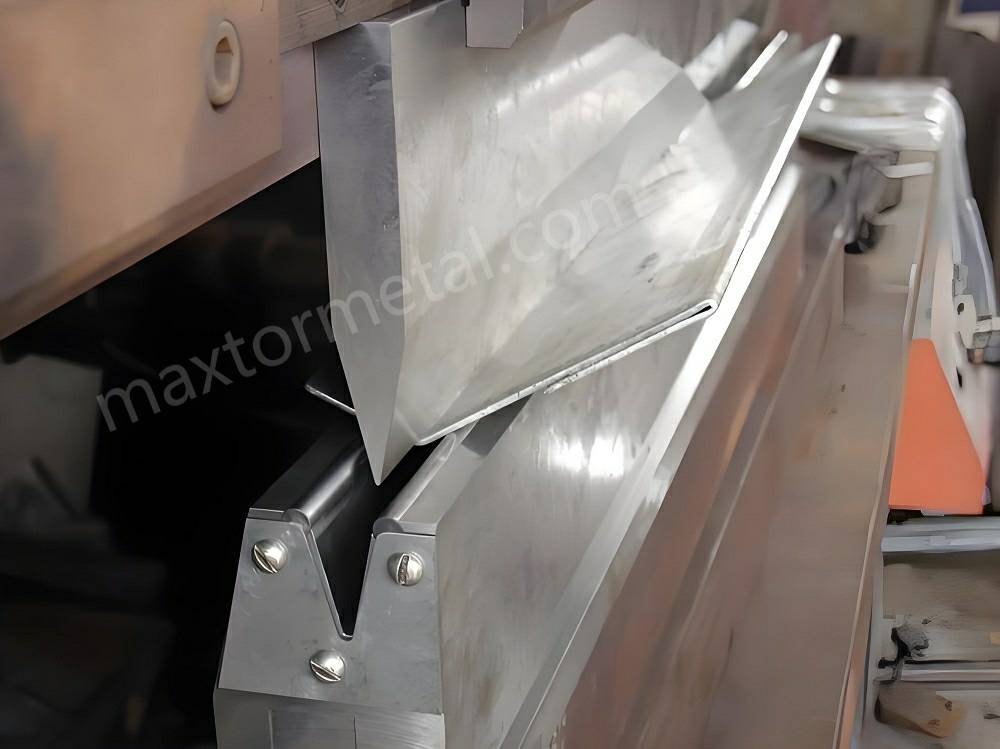
Die Alignment
Importance of Precise Die Positioning
You must put dies in the right spot for each bend. Good alignment keeps tubes straight and stops marks. The bend die holds the tube steady. The clamp die grips the tube so it does not slip. The pressure die pushes the tube and helps it bend right.
- Good alignment keeps tubes round.
- The clamp die stops tube movement.
- The pressure die guides the tube’s shape.
Tip: Always check die alignment before you bend. Good alignment means fewer marks and better bends.
Step-by-Step Die Setup Procedures
Follow these steps to set up dies for rotary bending:
- Clean die surfaces with air and a soft cloth.
- Put the bend die in place and make it tight.
- Line up the clamp die with the bend die. Make sure there are no gaps.
- Move the pressure die so it touches the tube evenly.
- Add the wiper die. The tip should be close but not too tight.
- Run a test bend to check for marks or wrinkles.
- Change the wiper die if you see any problems.
Note: Always look at the wiper die for damage. A bad wiper die can scratch or wrinkle tubes.
Common Alignment Mistakes and How to Avoid Them
Bad alignment causes many problems. You can avoid mistakes by following easy rules:
- Do not leave gaps between dies.
- Do not set the wiper die too far away.
- Do not use damaged dies.
- Do not skip test bends before you start.
If you see bad bends or marks, check die alignment first. Fix problems before you keep going.
Control de presión
Adjusting Pressure for Different Tube Materials
You must change pressure for each tube type. If pressure is too low, tubes slip. If pressure is too high, tubes can crush or wrinkle. You need to know the tube’s size and strength.
- Use less pressure for soft tubes like aluminum.
- Use more pressure for thick tubes.
- Match pressure to the tube’s strength.
Tip: Try different pressures with a sample tube before you start.
Monitoring and Calibrating Pressure Settings
You should watch pressure during every bend. Calibrate your bender often to keep pressure steady. Use gauges or sensors to check pressure. Write down settings for each tube.
- Check pressure before each bend.
- Change settings if you use a new tube.
- Keep a record of pressure settings.
If you see marks or damage, check and fix pressure settings.
Effects of Over- or Under-Pressurization on Surface Quality
Too much pressure can crush tubes or leave deep marks. Too little pressure can cause slipping or bad bends. Both hurt tube quality and strength.
| Pressure Issue | Result on Tube Surface | How to Fix |
|---|---|---|
| Over-Pressurization | Indentations, flattening | Lower pressure, check wiper die |
| Under-Pressurization | Slipping, wrinkling | Increase pressure, realign dies |
Always balance pressure and alignment. This keeps bends smooth and mark-free.
Consumable Monitoring
Identifying Wear on Tooling Components
You must check tooling for wear. Worn dies and wiper dies can cause problems. Look for scratches, chips, or dull spots. Feel the wiper die for rough places.
| Método | Descripción | Impact on Quality |
|---|---|---|
| Limpieza adecuada | Clean tools daily to stop rust and dirt. | Stops defects from rust and dirt, keeps bends good. |
| Comprobaciones de alineación | Make sure punches and dies line up before each job. | Spreads pressure evenly, stops bad bends. |
| Inspecciones de rutina | Look at tools each week or after 50 bends. | Finds wear early, keeps quality high. |
| Rectificado y reafilado | Sharpens edges, helps bending stay accurate. | Sharp punches work well, keep bends good. |
| Tratamiento térmico | Makes worn tools harder and stronger. | Good for small wear, helps tools last longer. |
| Reparación de soldadura | Fills cracks, then grind and polish. | Fixes broken tools, stops bad bends. |
| Impact of Tool Wear | Worn tools make bends uneven or bad. | Dull punches cause bad angles and waste. |
| Increased Costs | Changing tools often costs more money. | High costs can mean less money for quality checks. |
Note: Change worn wiper dies and other parts fast. This keeps bends looking good.
Scheduled Maintenance and Replacement Intervals
Make a plan to check and change tooling. Look at dies and wiper dies after 50 bends or each week. Change any part that is worn. Keep extra wiper dies ready.
- Check tools before each shift.
- Change broken parts right away.
- Write down when you check and change parts.
Regular checks save time and money. They help your bending stay reliable.
Lubrication and Cleaning Best Practices
Clean and oil your tools to stop marks and help them last. Do these steps:
- Clean all tool surfaces with air and soft cloths.
- Check dies and wiper dies for damage. Fix with a stone or change if needed.
- Use special lubricant for tube bending. Cover the tube and mandrel.
- Clean the mold after each use. Look at gaps and the wiper die tip. Remove all metal bits.
Cleaning and oiling tools keeps rotary bending tooling working well. You get smooth bends and tools last longer.
Careful setup and adjustment help a lot. You control tube surface and stop damage. If you need special blades, you can find them at soluciones de cuchillas personalizadas.
Solución de Problemas
Eliminating Wrinkles
Causes of Wrinkling During Bending
Wrinkles can show up when you use rotary bending tooling. Tubes may slip if the clamp die does not hold tight. The wiper die might not fit close enough. Sometimes, the mandrel is too far back. There can be too much space between the mandrel and tube. Not enough pressure on the pressure die can cause wrinkles. Using too much or the wrong lubricant can make wrinkles appear. Machine stiffness and tube material also matter. Real tests often show more wrinkles than computer models.
Adjusting Bend Radius and Wall Thickness
You can stop wrinkles by matching bend radius to wall thickness. A steady bend radius helps keep tubes safe. Uniform wall thickness keeps tubes strong while bending. The table below lists important points:
| Descripción | Puntos clave |
|---|---|
| Consistent bend radius | Lowers damage risk and gives better bends |
| Uniform wall thickness (0.9mm–20mm) | Keeps tube strong and in shape |
| Proper radius-to-thickness matching | Stops cracks and shape problems |
Optimizing Tooling Pressure and Alignment
Check pressure on the pressure die before bending. Too little pressure lets tubes slip. Too much pressure can crush tubes. Make sure the wiper die sits close to the bend die. Adjust inboard pressure to help stop wrinkles. Always line up your tooling before you bend.
Using Internal Mandrels or Support Tools
Use an internal mandrel to support tubes while bending. The mandrel keeps tubes round and stops wrinkles. Make sure the mandrel is not too far back. Support tools like a good wiper die help prevent problems.
Real-World Examples of Wrinkle Prevention
Many shops fix wrinkles by moving the mandrel forward. They adjust the wiper die for a better fit. Shops check wiper dies for wear and replace them fast. Changing pressure and using the right lubricant helps a lot.
Preventing Surface Marks
Selecting Non-Marking Tooling and Inserts
Pick plastic tools or non-marking inserts for rotary bending. These tools protect tube surfaces and stop scratches. No-mar molds work well for steel and aluminum tubes. They are great for food and drink jobs.
Proper Lubrication and Cleaning Practices
Use water-based lubricants to avoid bad reactions. Clean your wiper die and other tools after each use. This keeps tube surfaces smooth and free of marks.
Monitoring Tool Wear and Surface Condition
Check your wiper die often for scratches or dull spots. Change worn tooling right away to keep bends clean.
Adjusting Pressure to Minimize Indentation
Set the right pressure on your bender. Too much pressure leaves marks. Too little pressure causes slipping. Adjust until bends look smooth with no dents.
Case Studies: Achieving Mark-Free Bends
Shops using non-marking inserts and clean wiper dies see fewer marks. Regular checks and pressure changes help them get perfect bends.
Consistent Bend Quality
Controlling Springback and Deformation
Plan for springback by doing pre-bend math. Try a test bend with scrap tube. Overbending helps you get the right angle.
Maintaining Uniform Pressure and Speed
Keep pressure and speed steady while bending. This helps you avoid problems and makes every bend the same.
Regular Inspection and Calibration of Equipment
Check your bender and tools often. Look at hydraulic fluid and pressure settings. Watch for misalignment and worn wiper dies. The table below shows what to check:
| Item | Por qué es importante |
|---|---|
| Hydraulic fluid | Stops pressure changes |
| Pressure settings | Keeps bends correct |
| Tool alignment | Prevents uneven bends |
| Tooling maintenance | Stops angle changes |
| Calibration records | Helps you get the same results |
Documenting and Standardizing Bending Procedures
Write down your bending steps and settings. Keep records for each job. This helps you repeat good bends and fix problems faster.
Troubleshooting Inconsistent Results
If bends look bad, check your wiper die, pressure, and alignment first. Regular checks find problems early. This keeps rotary bending tooling working well.
You can make perfect bends with rotary bending tooling if you follow some important steps:
- Always figure out how much force your bender needs and make sure your tooling is as hard as your tube material.
- Use a wiper die that fits well and check it often to see if it is worn or broken.
- Lower friction by picking bottom tools with a bigger shoulder and use oil or grease if needed.
- Add a wiper die and mandrel to stop wrinkles, especially when working with thin tubes.
- Look over your bending steps, do not use old or damaged tools, and set up your wiper die the right way so you get the same good bend every time.
- Get better tooling and do regular checks to help your shop work faster and have less machine stoppage.
If you want help with rotary bending tooling or need to talk to a sales engineer, Contacto.
Preguntas frecuentes
What is rotary bending tooling?
Rotary bending tooling helps you bend tubes smoothly. You use it to shape metal without leaving marks. This tooling works with a bender to create precise curves for many industries.
How do you prevent marks when using a wiper die?
You should clean your wiper die before each job. Replace it if you see scratches or wear. Use non-marking inserts for extra protection. This keeps your tube surface smooth.
Why does tube wrinkling happen during bending?
Tube wrinkling happens when you set up the tooling wrong. You may use too little pressure or a worn wiper die. Always check alignment and pressure before you start bending.
How often should you inspect your bender and tooling?
You need to inspect your bender and tooling before every shift. Look for worn parts and clean all surfaces. Regular checks help you avoid defects and keep your bends consistent.
Can you use rotary bending tooling for different metals?
You can use rotary bending tooling for many metals. Adjust your setup for each material. Use the right wiper die and pressure settings to get the best results.
Ver también
Cómo Decidir Entre Herramientas de Prensa Plegadora Nuevas, Usadas y Personalizadas
Soluciones Prácticas para el Almacenamiento Eficiente de Herramientas de Prensa Plegadora
Por Qué los Juegos de Troqueles de Prensa Plegadora son Importantes para Proteger Sus Materiales
Grados de Acero para Herramientas de Prensa Plegadora y Rendimiento