

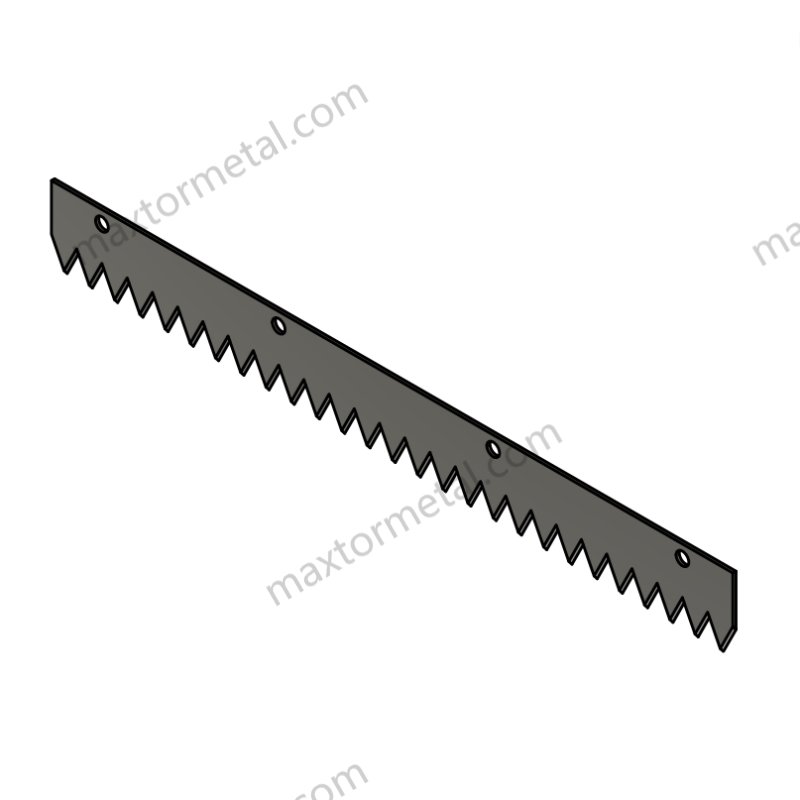
Anda mungkin melihat hasil perforasi yang tidak rata dan banyak waktu henti pada lini produksi Anda. Menggunakan pisau yang berkualitas baik Pisau Perforasi sangat membantu. Pisau-pisau ini membuat pekerjaan Anda lebih cepat dan produk Anda lebih baik. Tabel di bawah ini menunjukkan seberapa jauh proses Anda dapat meningkat dengan pisau yang tepat.
| Kategori Manfaat | Dampak Statistik |
|---|---|
| Efisiensi Produksi | Meningkatkan efisiensi lini produksi sebesar 12-15% setiap tahun |
| Kecepatan Produksi | Membuat lini produksi berjalan hingga 20% lebih cepat |
| Pengurangan Sampah | Mengurangi limbah kemasan sebesar 20-30% |
| Daya Tahan Bilah | Lapisan pelindung (coating) seperti TiN atau DLC membuat pisau bertahan 25-40% lebih lama |
| Peningkatan Efisiensi | Pisau khusus desain membuat efisiensi 53% lebih baik |
| Pengurangan Tegangan | Bentuk pisau khusus menurunkan tegangan sebesar 27% |

Poin-poin Utama
- Gunakan pisau perforasi yang berkualitas untuk mempercepat proses, mengurangi limbah, dan memperpanjang masa pakai pisau.
- Periksa, bersihkan, dan lumasi pisau secara rutin untuk menjaga kualitas potongan dan mencegah kerusakan mesin.
- Pasang pisau dengan hati-hati dengan mengikuti aturan keselamatan, menggunakan peralatan yang tepat, dan menyelaraskan pisau untuk hasil potongan yang mulus.
- Sesuaikan pengaturan mesin seperti kecepatan, tekanan, ketegangan, dan kedalaman pisau agar sesuai dengan material sehingga hasilnya tetap konsisten.
- Lakukan uji coba setelah memasang atau mengganti pisau untuk mendeteksi masalah lebih awal dan menghemat material.
- Asah pisau sesuai jadwal yang ditentukan berdasarkan material yang dipotong dan lapisan pelindung (coating) pisau untuk menjaganya tetap tajam dan memotong dengan baik.
- Catat semua perawatan dan gunakan daftar periksa untuk memantau kondisi pisau serta mencegah masalah yang tidak terduga.
- Jika terjadi keadaan darurat, hentikan mesin dengan cepat, periksa pisau, lalu perbaiki atau ganti untuk menghindari waktu henti yang lama.
Pentingnya Perawatan Pisau Perforasi
Stabilitas Produksi
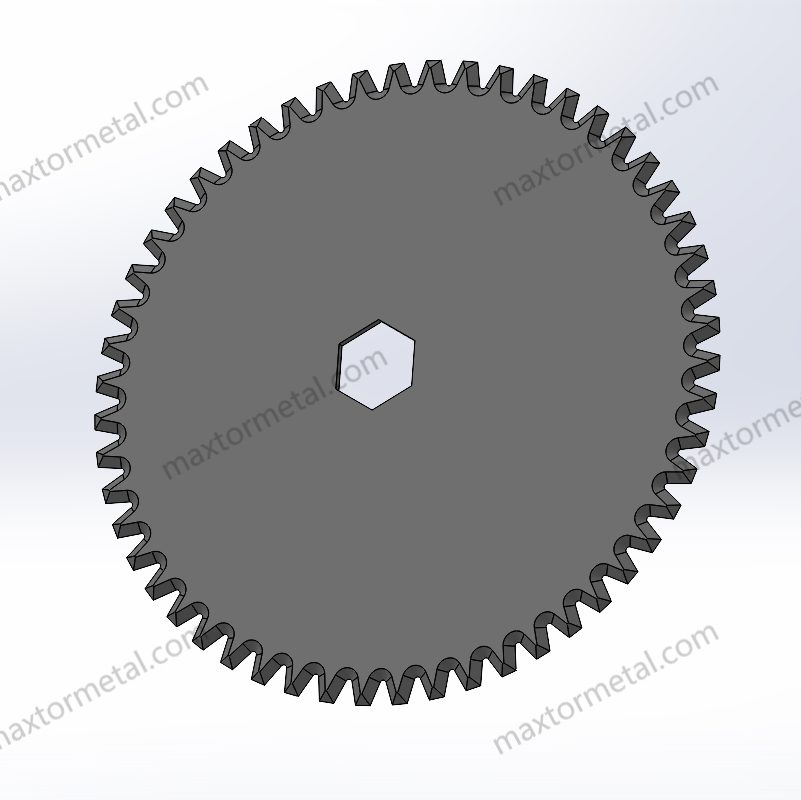
Merawat pisau perforasi Anda menjaga lini produksi tetap stabil. Pisau yang tajam dan terpasang dengan benar akan memotong dengan cepat dan bersih. Jika Anda tidak merawat pisau, Anda akan menghadapi lebih banyak penghentian dan waktu henti (downtime) yang lebih lama. Mesin bahkan dapat rusak jika Anda mengabaikan perawatan pisau. Perawatan yang buruk menyebabkan pisau cepat aus, patah, dan memotong dengan buruk. Masalah-masalah ini sering terjadi di pabrik dan membuang waktu serta biaya. Anda dapat mencegah sebagian besar kegagalan dengan memeriksa, membersihkan, dan melumasi pisau Anda secara rutin.
Tip: Periksa pisau Anda setiap hari atau setiap minggu untuk mendeteksi masalah lebih awal dan menjaga lini produksi Anda tetap berjalan lancar.
Kualitas Produk
Cara Anda merawat pisau perforasi memengaruhi kualitas produk Anda. Pisau yang tajam menghasilkan perforasi yang rapi dan rata. Jika pisau tumpul atau gumpil, Anda akan mendapatkan tepi yang kasar dan garis sobekan yang lemah. Anda akan melihat lebih banyak limbah dan produk cacat jika tidak menjaga pisau dalam kondisi baik. Perawatan pisau yang baik memastikan produk Anda selalu konsisten dan lebih baik bagi pelanggan. Selalu pilih pisau yang terbuat dari material kuat seperti SK5, D2, M2, atau 440C. Material-material ini membuat pisau bertahan lebih lama dan tetap tajam.
- Pisau yang dirawat dengan baik menghasilkan perforasi yang rapi dan rata.
- Memilih material pisau yang tepat membantu pisau bertahan lama dan memotong dengan baik.
- Pengasahan yang terjadwal dan penggunaan desain pisau kustom menjaga presisi potongan Anda.
Masalah Umum
Keausan dan Ketumpulan Pisau
Ketika pisau aus, pisau menjadi tumpul dan memotong dengan kasar. Mesin mungkin mengeluarkan suara aneh atau bergetar. Keausan pisau disebabkan oleh penggunaan yang sering, kurangnya pembersihan, atau penggunaan pisau yang salah. Anda dapat mencegah hal ini dengan membersihkan pisau setelah setiap penggunaan, mengasah tepat waktu, dan memilih pisau yang tepat.
Pemasangan yang Tidak Tepat
Jika Anda salah memasang pisau, Anda akan mendapatkan potongan yang tidak rata dan pisau dapat selip. Anda mungkin melihat perforasi yang miring atau kemacetan mesin. Selalu ikuti langkah-langkah yang benar dan gunakan peralatan yang tepat. Pastikan pisau terpasang kencang dan sejajar sebelum Anda memulai.
Pelumasan yang Kurang
Jika pisau tidak mendapatkan cukup pelumas, pisau akan menjadi panas dan lebih cepat aus. Anda akan mendengar lebih banyak kebisingan dan melihat potongan yang lebih kasar. Pelumas membantu pisau bergerak dengan mulus dan tetap dingin. Oleskan pelumas secara rutin dan periksa apakah pisau kering.
Penumpukan Material
Ketika kotoran menempel pada pisau, pisau akan memotong dengan buruk dan dapat rusak. Kotoran dan serpihan membuat perforasi tidak rata. Bersihkan pisau setelah setiap giliran kerja (shift) untuk menghilangkan penumpukan kotoran dan menjaganya tetap berfungsi dengan baik.
Korosi atau Karat
Karat membuat pisau menjadi lemah dan memperpendek masa pakainya. Anda mungkin melihat bintik-bintik cokelat atau lubang pada pisau. Air dan kurangnya pembersihan menyebabkan karat. Keringkan pisau setelah dibersihkan dan gunakan pelumas untuk mencegah karat.
Penyelarasan Pisau yang Salah
Jika pisau tidak sejajar, Anda akan mendapatkan perforasi yang tidak rata dan material yang robek. Anda mungkin melihat garis miring atau potongan yang tidak tembus sepenuhnya. Gunakan pemandu dan periksa posisi pisau sebelum setiap pengoperasian. Menyelaraskan pisau dengan benar membuat pemotongan menjadi mulus dan akurat.
| Masalah Umum | Gejala | Penyebab | Tindakan Pencegahan |
|---|---|---|---|
| Keausan dan Ketumpulan Pisau | Tepi tumpul, potongan kasar, kebisingan | Penggunaan berat, pembersihan yang buruk | Bersihkan, tajamkan, gunakan pisau yang tepat |
| Pemasangan yang Tidak Tepat | Hasil potong tidak rata, selip, macet | Pemasangan tidak benar, sekrup longgar | Ikuti langkah pemasangan, periksa |
| Pelumasan yang Kurang | Panas berlebih, hasil potong kasar, bising | Kering, kurang pelumas | Lumasi secara teratur |
| Penumpukan Material | Hasil potong buruk, kerusakan pisau | Kotoran, serpihan | Bersihkan setelah setiap penggunaan |
| Korosi atau Karat | Bercak cokelat, penurunan kekuatan pisau | Kelembapan, pembersihan yang buruk | Keringkan, gunakan oli pelindung |
| Penyelarasan Tidak Tepat | Garis miring, hasil potong tidak putus | Pengaturan buruk, bergeser | Gunakan pemandu, periksa penyelarasan |
Catatan: Menggunakan pisau baja bermutu tinggi dan memilih pisau yang tepat untuk material Anda membantu menghindari sebagian besar masalah. Kualitas yang baik dan perawatan rutin menjaga lini produksi Anda tetap bekerja dengan baik dan produk Anda tetap konsisten setiap saat.
Pemasangan Pisau Perforasi
Persiapan
Langkah-langkah Keselamatan
Anda harus mengutamakan keselamatan saat menggunakan peralatan pemotong. Selalu matikan dan cabut kabel mesin terlebih dahulu. Ini mencegah Anda terluka secara tidak sengaja. Kenakan sarung tangan tahan potong dan kacamata pengaman untuk melindungi diri Anda. Alat pelindung ini menjaga tangan dan mata Anda aman dari serpihan tajam. Pastikan area kerja Anda bersih dan tidak berantakan. Lepaskan pakaian longgar atau perhiasan agar tidak tersangkut di mesin.
Tip: Pastikan mesin dalam keadaan mati sebelum menyentuh pisau atau bagian yang bergerak.
Daftar Periksa Peralatan
Siapkan semua peralatan Anda sebelum memulai. Ini membantu Anda bekerja lebih cepat dan meminimalkan kesalahan. Berikut adalah daftar untuk membantu Anda:
- Kunci L atau kunci hex untuk dudukan pisau
- Obeng, baik minus maupun kembang (plus)
- Kunci momen (torque wrench) untuk mengencangkan sekrup dengan tepat
- Kain bersih bebas serat untuk membersihkan komponen
- Oli pelumas untuk pisau dan bagian yang bergerak
- Alat ukur penyelarasan pisau atau penggaris
- Sarung tangan dan kacamata pengaman untuk perlindungan
Menyiapkan peralatan ini membuat pekerjaan menjadi lebih aman dan mudah.
Pelepasan Pisau
Pertama, pastikan mesin mati dan kabelnya dicabut. Buka pelindung pisau atau panel akses. Gunakan kunci pas atau obeng yang tepat untuk melonggarkan sekrup atau baut. Pegang pisau dengan erat saat Anda melepas sekrup terakhir. Ini mencegah pisau terjatuh. Geser pisau lama keluar dari dudukannya dengan hati-hati. Letakkan pisau bekas di tempat yang aman untuk dibuang atau ditajamkan kembali.
Pengaturan Pisau Baru
Penyelarasan
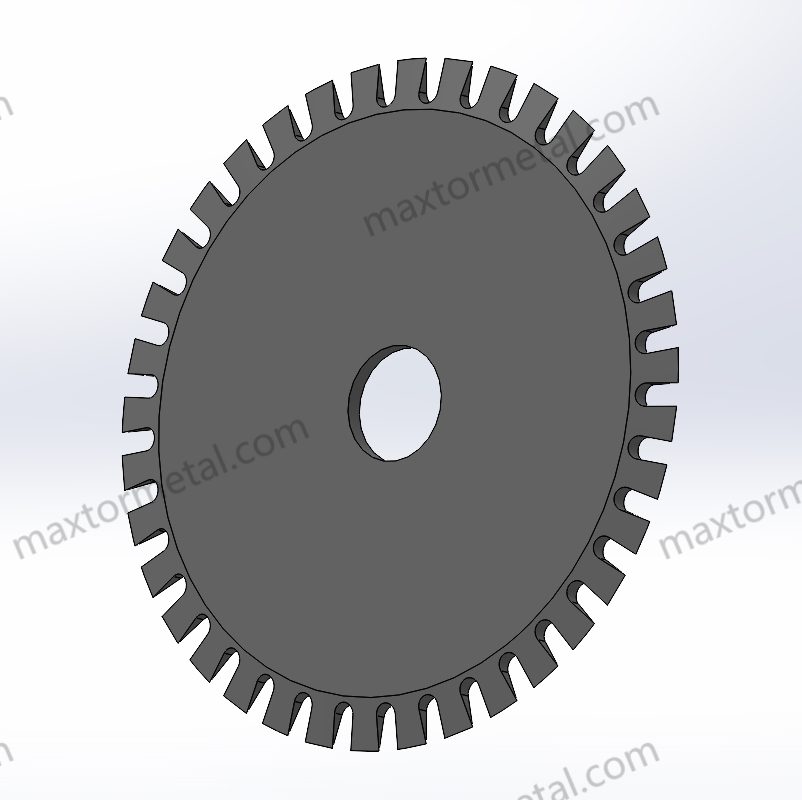
Menyelaraskan pisau dengan benar sangatlah penting. Ambil Pisau Perforasi baru Anda dan periksa apakah lubangnya sesuai dengan mesin Anda. Gunakan alat ukur atau penggaris untuk memastikan pisau lurus dengan jalur pemotongan. Untuk pisau rotari atau bergerigi, selaraskan gigi atau tepinya dengan arah pergerakan material.
Pisau yang berbeda memerlukan perawatan khusus:
| Jenis Pisau | Fokus Penyelarasan |
|---|---|
| Pisau Lurus | Pastikan bagian tepi lurus dengan material |
| Pisau Putar | Posisikan pisau di tengah poros dan periksa apakah ada goyangan |
| Pisau Bergigi | Selaraskan gigi pisau dengan pola material |
Pisau yang diselaraskan dengan benar akan memotong lebih baik dan bertahan lebih lama.
Pemasangan
Setelah Anda menyelaraskan pisau, pasang pada tempatnya. Masukkan sekrup atau baut dan kencangkan dengan tangan terlebih dahulu. Gunakan kunci momen untuk menyelesaikan pengencangan hingga pengaturan yang tepat. Jangan mengencangkannya terlalu kuat karena dapat membengkokkan pisau. Pastikan pisau terpasang rata tanpa ada celah di bawahnya.
Pisau Maxtor Metal tersedia dalam pilihan baja perkakas (tool steel), baja kecepatan tinggi (high-speed steel), dan baja tahan karat (stainless steel). Bahan-bahan ini disesuaikan dengan kekerasan material yang Anda potong. Hal ini membantu pisau bertahan lebih lama dan memotong dengan baik. Tepi pisau khusus, seperti bergelombang (scalloped) atau bevel ganda (double-bevel), dapat membantu pemotongan material tertentu.
Catatan: Selalu periksa posisi dan kekencangan pisau sebelum menutup pelindung dan menghidupkan kembali mesin.
Pemasangan yang cermat membantu pekerjaan pemotongan Anda berjalan lancar dan menjaga Anda tetap aman.
Verifikasi
Inspeksi
Setelah Anda memasang pisau, periksa kembali pekerjaan Anda. Pastikan penahan pisau kencang dan tidak bergerak. Perhatikan pisau untuk melihat apakah penyelarasan sudah tepat. Gunakan penggaris atau alat ukur untuk memeriksa kelurusan pisau. Periksa semua sekrup dan baut untuk memastikan kekencangannya, tetapi jangan terlalu kencang.
Periksa area sekitar pisau dari sisa potongan atau kotoran. Bersihkan landasan nilon (nylon anvil) dan penahan pisau. Ini membantu mencegah kemacetan dan menjaga pisau tetap memotong dengan baik. Periksa tepi pisau dari kerusakan atau keausan. Jika Anda melihat adanya takik atau bagian yang tumpul, tajamkan atau ganti pisau sebelum menggunakan mesin.
Tip: Selalu bersihkan sisa penumpukan kotoran sebelum Anda memulai proses produksi baru. Ini menjaga hasil potongan tetap rapi dan mesin Anda tetap aman.
Uji Jalan
Anda harus selalu do a test run after putting in a new blade. This step checks if the blade works and if your setup is right. Follow these steps for a good test:
- Set the machine’s starting point and make a simple cut.
- Put in a sample of the material you will use.
- Start cutting at a slow speed.
- Take out the material and look at the perforation line.
- Check for missed cuts, rough edges, or bad perforations.
If you see problems, stop the machine and check the blade’s spot. Fix the alignment or pressure if you need to. Do the test again until you get a clean, even cut. This helps you find mistakes early and saves material during big jobs.
Catatan: A good test run saves time and materials. It also helps you find problems before they get worse.
Pemecahan Masalah
Even if you install the blade carefully, you might have problems like slipping, uneven cuts, or crooked material. Use this table to find quick fixes:
| Masalah | Langkah-Langkah Pemecahan Masalah |
|---|---|
| Slippage or Uneven Cuts | – Change blade force a little and test each time. – Make sure the blade and holder are tight. – Change speed or blade offset for the material. – Adjust how deep the blade cuts. – Run a test cut to see if it is better. |
| Material Slipping from Pinch Rollers | – Check that pinch rollers hold the material tight. – Load material straight and flat. – Clean rollers and blade holder. |
| Material Misalignment | – Load material straight and use pinch rollers. – Run a test cut to check if it lines up. – Move the cutting spot if needed. – Check blade tip offset. |
| Persistent Issues | – Change dull or broken blade. – Clean and care for blade holder and rollers often. |
| Material Feeding | – Load material carefully to stop wrinkles. – Make sure material is tight so it does not move. |
Sometimes, you need to change how deep the blade cuts. If the blade does not cut all the way, make it go deeper. If it cuts too deep or hurts the backing, make it less deep. Always do a test after each change to find the best setting.
Peringatan: If you keep having trouble, check if the blade is dull or damaged. Change it if you need to. Cleaning and caring for your tools often stops most problems.
You can keep your perforation blade working well by doing these steps. Careful checking, testing, and fixing problems help your production line stay steady and your products stay good.
Penyetelan Mesin

Settings
Kecepatan
You need to set the machine speed for each material. Thin things like paper or film can be cut fast. Thick or soft materials need a slower speed. Changing speed changes how much energy the blade uses. High-speed laser surface hardening helps the blade stay sharp longer.
When you change speed, cutting can change too. If the machine goes too fast, it may shake or get hot. These problems mean you should check the blade’s spot or sharpen it. Maxtor Metal’s Perforating Blade Knives work well with high-speed laser cutting. You get clean cuts and less stopping.
The table below shows how different materials act when you change speed and pressure:
| Jenis Bahan | Energy Levels Tested (J) | Maximum Absorbed Energy (Relative to JFRP) | Peak Load Behavior | Damage Progression and Displacement Characteristics |
|---|---|---|---|---|
| JFRP | 3 | Baseline (lowest energy absorption) | Barely presented a peak; brittle failure | Low energy absorption; brittle failure mode |
| CURAUÁ 2D and 3D | 7 | ~74% higher than JFRP | Peak load reached at ~6 mm displacement, maintained until ~10 mm | Similar initial slopes; moderate damage progression |
| SISAL 2D and 3D | 12 | ~86% higher than JFRP | SISAL 2D peak load at 6 mm, SISAL 3D peak load interval shorter (1.2 mm) | Higher deformation and damage in SISAL 2D; faster damage progression in SISAL 3D |

Tip: If you see too much heat or shaking, slow down. Check the blade’s surface or if it is lined up right.
Tekanan
You pick the pressure by looking at how thick and strong the material is. High pressure is good for thick or many-layered materials. Low pressure is better for thin or weak materials. Too much pressure can break the blade or mess up the material. Too little pressure means the cuts are not finished or look bad.
Check and change the pressure often to keep cuts the same.
Catatan: Always try the pressure on a test piece first. This step helps you not make big mistakes.
Material Alignment
Getting the material straight is important for good cuts. Feed the material flat and straight into the machine. Use guides and sensors to help line it up.
Here are some tips for keeping material lined up:
- Check if the material is clean and in the right spot before cutting.
- Use the tools from the maker to set up the machine.
- Teach workers to check and fix alignment as needed.
- Pick the right tool for each material to stop damage.
- Do regular checks and fixes to find problems early.
- Show workers how to set the machine and start the strip right.
- Fix jams or bad cuts fast to keep the line moving.
Peringatan: If cuts are crooked or uneven, the material may not be lined up. You can stop these problems by following good alignment steps.
Blade Depth
Set the blade depth to match how thick the material is. If the blade is too high, cuts will not go all the way through. If it is too low, the blade wears out or hurts the backing. Always test the depth on a sample before starting a big job. Write down the best depth for each material to help next time.
Tip: Write down the blade depth for every job. This makes future jobs faster and keeps cuts looking good.
Tegangan (Tension)
You need to control tension to keep things steady. Tension changes how material moves in the machine. It also affects how the blade cuts. If tension is too loose, material can wrinkle or slip. If tension is too tight, you might see tears or blade slippage. Both problems make perforations uneven and waste material.
Tension control systems help set the right tension. These systems measure and change tension by themselves. You should check tension before every run and recalibrate often. Maxtor Metal’s Perforating Blade Knives work well with tension control systems. These blades cut many materials like paper, film, and textiles. They stay sharp and do not jam.
Here are steps to keep tension right in your setup:
- Look at the material for slack or tight spots before starting.
- Change tension using the control panel or levers.
- Watch for wrinkles, tears, or blade movement while working.
- Use tension sensors if your machine has them.
- Recalibrate tension after switching materials or blade types.
Tip: If you see vibration or overheating, check tension first. These signs usually mean tension is wrong.
Good tension helps you get clean perforations. It keeps your machine running smoothly. You avoid downtime and waste by watching tension closely.
Pemantauan Waktu Nyata
Real-time monitoring lets you control your production line. You track speed, pressure, temperature, and vibration as the machine works. This helps you find problems early and fix them fast.
You can set alerts for strange readings. For example, if temperature goes up quickly, check lubrication or blade alignment. If vibration gets worse, look at the blade for wear or misalignment. Maxtor Metal’s blades work well with monitoring systems. They stay sharp and resist damage, even at high speeds.
Use real-time monitoring to:
- Track speed and pressure for each material.
- Watch temperature to stop overheating.
- Check vibration to find misalignment or blade wear.
- Plan maintenance using the data.
- Change settings for each run to make things better.
| Monitoring Parameter | What to Watch For | Action to Take |
|---|---|---|
| Kecepatan | Sudden changes, slowdowns | Check for jams or blade issues |
| Tekanan | Drops or spikes | Adjust settings, inspect blade |
| Suhu | Rapid increases | Check lubrication, clean blade |
| Getaran | Unusual patterns | Inspect alignment, tension, blade |
Catatan: Real-time monitoring helps you stop surprise stops. It keeps your machine line steady. You get better results and save time by acting on alerts fast.
Kesalahan Umum
You may make common mistakes when adjusting machines. These mistakes can hurt your production and waste time and money. Many problems happen from missed steps, poor planning, or not enough training.
Some common mistakes are:
- Not changing settings when you switch materials. This causes bad perforations and blade damage.
- Skipping alignment checks. You get uneven cuts and machine jams.
- Forgetting to set tension and pressure. This leads to wrinkles, tears, and slippage.
- Ignoring vibration or overheating signs. Small problems can turn into big failures.
- Not following lean maintenance like 5S. Messy work areas cause more errors.
Machine adjustment mistakes often mean more rework, lots of scrap, and uneven product quality. You may see delays, bottlenecks, and safety risks. Human mistakes during repeated tasks can mess up machining and cause defects. Not following standards leads to complaints and possible penalties.
You can stop these mistakes by using error-proofing methods. Poke-Yoke tools, fixture automation, and tool monitoring help catch errors early. Continuous pressure hydraulics keep clamping force steady. This gives you even part quality. Training your team and keeping good records also help you avoid mistakes.
| Common Machine Adjustment Mistakes | Documented Effects on Production Outcomes |
|---|---|
| Insufficient Planning | Last-minute work, time pressure, interruptions, unscheduled interventions, loss of effectiveness and productivity |
| Poor Task Prioritization | Quality deterioration, additional costs, non-compliance with standards, customer dissatisfaction |
| Lacking Documentation and Follow-up | Loss of traceability, difficulty in assessment, repetition of errors, delays in continuous improvement initiatives |
| Overlooking Team Training and Expertise | Declining motivation, increased turnover, reduced performance, loss of competitiveness |
| Neglecting Preventive Maintenance | Premature equipment wear, unexpected failures, performance loss, increased energy consumption, compliance violations |
| Incorrect Use of Equipment | Material deterioration and contamination, breakage, injuries, sanctions |
| Underestimating Cleaning and Lubrication | Dirt accumulation, corrosion, increased friction and overheating, accelerated machinery wear |
| Ignoring Modernization and Technological Updates | Obsolescence, competitive disadvantage, increased vulnerability, compatibility issues, market exclusion |
⚠️ Always use a checklist for machine adjustment. Write down each step, train your team, and use error-proofing tools. You will get better results and have fewer problems.
Laser machining and machining need careful adjustment and watching. When you avoid common mistakes, you keep your line steady and your products high quality.
Pengasahan Pisau Perforasi

Kapan Harus Mengasah
Signs of Dull Blades
Watch for signs that your perforation blade is dull. If cutting gets harder, the blade edge is not sharp. Uneven perforations or rough edges mean the blade needs help. Loud machine noise or more vibration can be a clue. These changes show the blade is not working well. You might see nicks or chips on the blade edge. If you notice any of these, sharpen the blade soon.
Tip: Check the blade after every shift. Finding dullness early stops bigger problems on the line.
Recommended Sharpening Intervals
Set your sharpening schedule by material type and blade coating. Some materials wear blades out faster than others. Low pressure LDPE can dull a blade in hours. High pressure LDPE lets blades last longer. Coated blades like Teflon or tungsten carbide need less sharpening. The table below shows how often to sharpen blades for different materials and coatings:
| Jenis Bahan | Pelapisan Pisau | Blade Life / Sharpening Interval | Catatan |
|---|---|---|---|
| LDPE tekanan tinggi konvensional | Tidak dilapisi | 2 hingga 4 minggu | Perforating blades service life |
| LDPE tekanan rendah | Tidak dilapisi | A few hours (approx. 26 hours) | Perforating blades dull quickly, requiring frequent replacement |
| LDPE tekanan rendah | dilapisi teflon | 26 hingga 30 jam | Slightly extended blade life compared to uncoated |
| LDPE tekanan rendah | Ny-Carb (logam keras) | Sekitar 20 jam | Coated blades last longer but still require frequent sharpening |
| Low pressure LDPE (resharpened blades) | Tidak tersedia | 8 hingga 24 jam | Pisau yang diasah ulang memiliki masa pakai yang lebih pendek |
| LDPE tekanan tinggi konvensional | Uncoated (slitting blades) | Dipertajam seminggu sekali | Slitting blades require less frequent sharpening |
| Low pressure LDPE (slitting blades) | Tidak dilapisi | Diasah dua kali sehari | Sharpening frequency increases significantly without coating |
| Low pressure LDPE (slitting blades) | Tungsten carbide coating | Dipertajam seminggu sekali | Hard metal coating extends sharpening interval back to once a week |

Catatan: Track your sharpening times. This helps you plan and avoid surprise downtime.
Metode Penajaman
Buku petunjuk
Manual sharpening is good for many production lines. You use hand tools to make the blade edge sharp again. This way, you control the angle and pressure. It works best for small jobs or quick sharpening.
Step-by-Step Manual Sharpening Procedure
Follow these steps to sharpen a blade by hand:
- Take the blade out and clean it.
- Hold the blade steady in a vise or holder.
- Use a fine-grit stone or diamond file. Hold it at the right angle.
- Move the stone along the edge in smooth strokes. Keep the angle the same.
- Check the edge after a few strokes. Look for a sharp, smooth surface.
- Do the same on the other side if needed.
- Wipe the blade and check for missed spots.
- Put the blade back and test it on a sample.
Tip: Use light pressure. Pressing too hard can hurt the blade and make it wear out faster.
Tools and Safety Precautions
You need the right tools and safety gear for sharpening:
- Fine-grit stones or diamond files
- Blade holder or vise
- Safety glasses and cut-resistant gloves
- Clean cloths for wiping
- Lubricating oil for the stone
Wear gloves and glasses to stay safe from sharp edges and flying bits. Always hold the blade tight before you start. Keep your work area neat and clear.
Automated
Automated sharpening systems help keep blades sharp with less work. These machines use controls to grind the blade edge. You get the same results every time and save time, especially for big jobs.
Automated Sharpening System Setup
To set up an automated sharpening system:
- Put the blade in the machine’s holder.
- Pick the right program for your blade.
- Set the grinding wheel or belt to the right angle and pressure.
- Choose the speed and feed rate.
- Start the machine and watch the sharpening cycle.
- Check the blade when it is done.
Automated systems use sensors to check blade sharpness and finish. This makes sure you get a good edge every time.
Calibration and Monitoring
You must set up your automated sharpening system before each use. Check the grinding wheel for wear and change it if needed. Set the right angle and pressure for your blade. Use the machine’s monitor to track temperature, vibration, and progress. If something looks wrong, stop and check the blade.
Peringatan: Calibrate your sharpening system often. This keeps edges even and helps blades last longer.
Pembersihan
Pre-Sharpening Cleaning Steps
Always clean your blade before sharpening. Remove dirt, glue, or build-up from the edge. Use a soft brush or cloth to wipe away loose stuff. Cleaning helps sharpening work better and keeps the blade safe.
Cleaning Agents and Tools
Pick the right cleaning agents and tools for your blade:
- Mild cleaners for sticky stuff
- Soft brushes for dust and dirt
- Lint-free cloths for wiping
- Compressed air for tiny bits
Do not use harsh chemicals that can hurt the blade. Only use cleaners made for your blade material.
Safety Guidelines for Cleaning
Follow safety rules when cleaning blades:
- Wear gloves to protect your hands.
- Use safety glasses to keep your eyes safe.
- Work in a place with good air when using cleaners.
- Take your time and do not rush cleaning.
Tip: Clean blades last longer and are easier to sharpen. Make cleaning part of your regular maintenance.
Reconditioning
Welding and Grinding Process
You can make a perforation blade last longer by reconditioning it. If the blade has chips or cracks, start with welding. Use a filler metal that matches the blade. This helps rebuild the damaged part. Be careful not to let the blade get too hot during welding. Too much heat can make the blade softer and hurt how it cuts.
After welding, you need to grind the blade. Use a precision grinder to fix the blade’s edge. Keep the grinding angle the same as before. Grinding removes extra weld and shapes the edge for smooth cutting. Always cool the blade while grinding to protect it. Cooling stops the blade from warping or getting damaged. Keep grinding until the edge is sharp and even.
Tip: Use fine-grit wheels for the last grinding step. This makes the blade smooth and helps it cut cleanly.
Inspection After Reconditioning
When you finish welding and grinding, check the blade carefully. Look for uneven spots or leftover weld marks. Gently run your finger along the edge to feel for smoothness. Use a magnifier to find small cracks or pits. Make sure the blade edge is straight and sharp.
Spin the blade slowly in its holder to check balance. A balanced blade will not wobble. Test the blade on a sample to see if it cuts well. If you see rough edges or bad cuts, sharpen or grind the blade again.
Catatan: Always check both sides of the blade. Even a small flaw can cause big problems when cutting.
When to Replace Instead of Recondition
Sometimes, fixing the blade is not enough. Replace the blade if you see deep cracks, bad warping, or lots of rust. If too much metal is gone after grinding, the blade may not fit or cut right. Blades with many welding repairs can get weak and unsafe.
Replace the blade if it does not pass inspection after fixing. Using a worn or damaged blade can hurt your cutting and your machine.
⚠️ Always pick a new blade if you are not sure about safety or how well it works.
Pemeliharaan Preventif
Routine Inspection Checklist
Regular checks keep your cutting tools working well. Use this checklist every day or week:
- Look at the blade edge for nicks, chips, or dull spots.
- Check if the blade holder is tight and lined up.
- Look for rust or corrosion on the blade.
- Test the blade on a sample to see if it cuts clean.
- Check the machine for loose parts or dirt.
A simple checklist helps you find problems early and stop downtime.
Pelumasan dan Penyimpanan
Lubrication protects the blade and machine. Put a thin layer of oil on the blade after cleaning and sharpening. Oil lowers friction and stops rust. Only use oils made for your blade material.
Store blades in a dry, clean place. Use blade guards or cases to protect the edge. Keep blades away from water and chemicals. Good storage makes blades last longer and keeps cuts good.
Tip: Write the last sharpening date on each blade before storing. This helps you track maintenance easily.
Pencatatan untuk Pemeliharaan
Keep good records of all maintenance work. Write down each sharpening, grinding, or welding job. Note the date, what you did, and any problems you found. Track when you replace blades and why.
Use a simple table or notebook for your records:
| Tanggal | Jenis Perawatan | Kondisi Pisau | Action Taken | Next Check |
|---|---|---|---|---|
| 2024-06-01 | Mengasah | Slightly dull | Sharpened, oiled | 2024-06-08 |
| 2024-06-08 | Inspeksi | Bagus | No action needed | 2024-06-15 |
Good records help you plan future checks and spot patterns in blade wear.
Troubleshooting Wear
Identifying Types of Wear or Damage
You may see different kinds of wear on your perforation blade. Common problems are:
- Corrosion: Rust or pits on the blade, often from liquids.
- Edge dulling: The blade edge gets blunt and does not cut well.
- Chipping: Small pieces break off the edge and make rough cuts.
- Warping: The blade bends or twists and cuts unevenly.
Look for these signs every time you check the blade. Finding problems early helps you fix them before they get worse.
Common Causes and Solutions
Many things can make blades wear out. Corrosion often comes from liquids like shampoos or conditioners. Uncoated steel blades, like M2, rust the most. You can fix this by using blades with special coatings. Physical Vapor Deposition (PVD) coatings like Titanium Nitride (TiN) or Chromium Nitride (CrN) protect the blade. CrN-coated SS420 blades resist rust best and last longer. Coatings that keep water off also help stop corrosion.
Edge dulling happens when you cut rough materials or skip sharpening. Chipping can happen if you use too much force or cut hard things. Warping often comes from too much heat during grinding or using the blade wrong.
Catatan: Pick the right blade material and coating for your job. Regular care and the right steps keep your blades in good shape.
Emergency Repair Steps
If your blade fails suddenly, act fast to stop production loss:
- Stop the machine and take out the damaged blade.
- Check the blade for cracks, chips, or rust.
- Clean the blade and see if quick sharpening or grinding can fix it.
- If the blade cannot be fixed, put in a new one.
- Check the machine for dirt or bad alignment before starting again.
Keep extra blades and tools ready for emergencies. Fast action helps you avoid downtime and keep cuts clean.
⚡ Always teach your team the emergency repair steps. Quick action protects your tools and your products.
Daftar Periksa Stabilitas
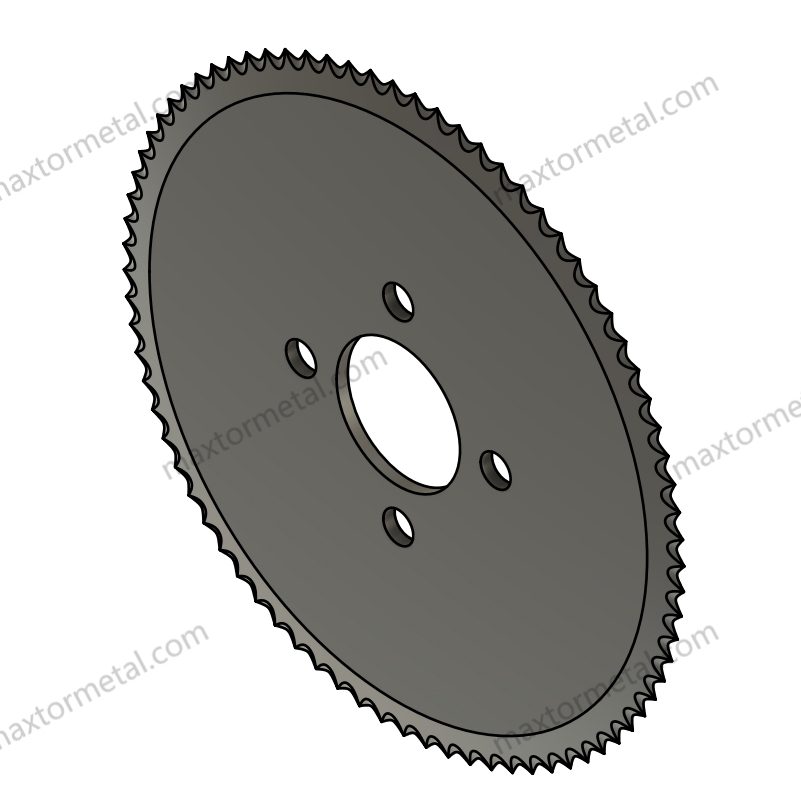
A checklist helps keep your production line steady. Use this guide to make sure your Pisau Perforasi and machine work well every day.
Daily Tasks
Periksa Anda Pisau Perforasi and machine after each shift. These steps help you find problems early and keep things running.
| Tugas | Frekuensi | Catatan |
|---|---|---|
| Lap Permukaan | Sehari-hari | Wipe blade surface at the end of every shift to remove debris and contaminants |
| Inspeksi visual | Sehari-hari | Check blade edges and chips for damage or wear |
| Pemeriksaan Pemasangan | Sehari-hari | Ensure blade is securely mounted and does not wiggle |
First, wipe the blade to get rid of dust and glue. Then, look at the blade edge for chips or dull spots. If you see any, plan to sharpen or change the blade soon. Always check that the blade is tight in its holder. A loose blade can make cuts uneven or jam the machine.
Tip: Do these checks at every shift change. You will find small problems before they get worse.
Weekly Tasks
Weekly jobs go further. Test if your Pisau Perforasi is sharp and check if it lines up right. These steps help you get clean cuts and keep your machine steady.
| Tugas | Frekuensi | Catatan |
|---|---|---|
| Uji Ketajaman | Mingguan | Test blade sharpness by cutting actual material; look for clean cuts without dragging or burrs |
| Tinjauan Penyelarasan | Mingguan | Use a straight edge or gauge to verify blade alignment parallel to material feed |
| Pembersihan Permukaan Pemasangan | Mingguan | Remove blade and clean mounting area; inspect for dirt, rust, or damage |
Cut a piece of material with your Pisau Perforasi. If the cut is rough or drags, sharpen the blade. Use a straight edge to see if the blade lines up with the material. Take out the blade and clean where it sits. Look for rust or dirt that could cause trouble.
Catatan: Doing these checks every week helps stop surprise problems and keeps your line steady.
Emergency Steps
Sometimes, things go wrong fast. You need to act quickly to keep your machine and products safe. If you see bad cuts, hear strange sounds, or get a jam, stop the machine right away. Take out the Pisau Perforasi and check for cracks, chips, or rust. Clean the blade and where it sits. If you cannot fix it, put in a new blade.
Keep extra perforation blades and tools ready for quick fixes. If you need a custom blade, ask about their OEM options.
⚡ Acting fast in emergencies keeps your line safe and stops long delays.
Following this checklist keeps your Pisau Perforasi sharp, your machine steady, and your production line working well.
You can make your production line more stable by following simple steps for perforation blade installation, machine adjustment, and sharpening. Pick high-quality blades like Maxtor Metal’s for better cuts and blades that last longer. Do regular maintenance and use the stability checklist each day. Share your tips or questions in the comments.
Tanya Jawab Umum
What materials can perforation blades cut?
Perforation blades can cut paper, film, textiles, packaging, rubber, and more. These blades work in many industries. You will get neat and exact cuts every time.
How often should you sharpen a perforation blade?
Check your perforation blade after each shift. Sharpen it if you see dull edges, rough cuts, or hear more noise. Most of the time, sharpening once a week keeps the blade working well.
What is the best way to store perforation blades?
Keep your perforation blades in a dry and clean place. Use blade guards or cases to keep the edge safe. Do not let blades touch water or chemicals. Storing them right helps them last longer and cut better.
How do you know if a perforation blade needs replacing?
Look for deep cracks, lots of rust, or a blade that still cuts badly after sharpening. If you see these problems, change the perforation blade. Using a broken blade can hurt your machine and make products worse.
What safety steps should you follow when changing a perforation blade?
Always turn off and unplug the machine first. Wear cut-resistant gloves and safety glasses. Use the right tools for the job. Make sure the blade is tight before you start the machine again.
Lihat Juga
Cara Mendapatkan Kinerja Terbaik dari Pisau Berlubang Anda
Cara Memilih Pisau Perforasi yang Tepat untuk Bahan Anda
Apa Itu Bilah Perforasi dan Bagaimana Cara Penggunaannya?
Pisau Industri Berlubang: Kunci Pemotongan Presisi dalam Pengemasan dan Lainnya

 English
  Spanish
  Italian
  French
  Portuguese
  Russian
  German
  Arabic
  Hindi
Hindi  Vietnamese
  Indonesian
  Japanese
  Korean