
Jika Anda tidak melakukan Penggantian bilah slitter rotary Jika tidak dilakukan dengan benar, Anda dapat menghemat waktu dalam pembuatan produk. Sekitar 25% waktu henti mesin terjadi karena alat-alat rusak, seperti mata pisau. Mata pisau yang baik membantu Anda memotong lebih baik dan mengurangi pemborosan. Mata pisau ini juga meningkatkan keselamatan kerja dengan mengurangi risiko kecelakaan. Tersedia banyak jenis mata pisau dan pilihan khusus untuk berbagai pekerjaan dan material. Jika Anda merawat mata pisau Anda secara teratur, pekerjaan Anda akan tetap efisien dan aman.
Poin-poin Utama
- Periksa mata pisau pemotong putar secara berkala. Ganti jika diperlukan. Ini membantu mencegah masalah pada mesin. Selain itu, hasil potongan juga tetap rapi.
- Gunakan perlengkapan keselamatan setiap saat. Gunakan sarung tangan tahan potong dan kacamata pelindung. Ini akan menjaga keselamatan Anda saat mengganti mata pisau.
- Siapkan semua peralatan Anda sebelum memulai. Ini akan menghemat waktu. Selain itu, ini juga membantu Anda menghindari kesalahan.
- Pilihlah mata pisau yang tepat untuk pekerjaan tersebut. Pertimbangkan jenis material dan ketebalannya. Hal ini akan membantu mata pisau memotong dengan baik.
- Bersihkan dudukan mata pisau dengan sangat teliti sebelum memasang mata pisau baru. Ini memastikan mata pisau terpasang dengan benar dan berfungsi dengan baik.
- Baca dan ikuti petunjuk pabrikan. Pastikan mata pisau sejajar dengan benar. Gunakan torsi yang tepat. Ini mencegah kerusakan.
- Perhatikan bilah-bilah tersebut setelah Anda memasangnya. Lakukan uji coba dengan kecepatan rendah. Ini membantu Anda menemukan masalah sejak dini.
- Simpan mata pisau di tempat yang kering. Pastikan tidak lembap. Ini mencegah karat dan menjaga mata pisau tetap aman.
Peralatan dan Keselamatan untuk Penggantian Mata Pisau Mesin Pemotong Putar
Anda harus bersiap-siap sebelum mengganti mata pisau mesin pemotong putar. Anda membutuhkan alat yang tepat dan perlengkapan keselamatan. Memilih mata pisau yang benar juga penting. Langkah-langkah ini membantu Anda bekerja dengan aman dan cepat.
Alat-alat Penting
Siapkan semua peralatan Anda sebelum memulai. Ini akan mencegah Anda membuang waktu atau membuat kesalahan. Sebagian besar mesin pemotong putar membutuhkan beberapa peralatan dasar:
- Kunci pas dan obeng yang sesuai dengan pengencang mesin Anda
- Kunci Allen untuk baut pada rakitan mata pisau
- Kunci momen untuk mengencangkan baut dengan tepat.
- Alat pelepas mata pisau atau penarik jika mesin Anda membutuhkannya.
- Kain bersih untuk menyeka dudukan mata pisau
- Wadah aman untuk pisau lama dan baru.
Tips: Selalu baca manual mesin Anda untuk mengetahui saran penggunaan alat. Alat yang tepat akan menjaga komponen mesin Anda tetap aman dari kerusakan.
Perlengkapan Keselamatan
Anda harus melindungi diri saat mengganti mata pisau pemotong putar. Mata pisau sangat tajam dan dapat melukai Anda dengan parah. Para ahli keselamatan menyarankan untuk mengenakan sarung tangan tahan potong dan pelindung lengan. Tabel di bawah ini mencantumkan beberapa perlengkapan keselamatan terbaik:
| Nama Produk | Tingkat Perlindungan Terhadap Pemotongan | Keterangan |
|---|---|---|
| Helix® 2080 | ANSI/ISEA level A6 | Cangkang berbahan campuran Kevlar® dan baja ukuran 13 gauge dengan telapak tangan berbahan nitril busa untuk cengkeraman dan ketangkasan. |
| Seri Chrome® 4018 | ANSI/ISEA level A6 | Kenyamanan yang ditingkatkan dengan telapak tangan berbahan kulit sintetis, meniru nuansa sarung tangan tradisional. |
| Seri Chrome® 4023 | ANSI/ISEA level A8 | Sarung tangan mekanik yang menutupi seluruh bagian telapak tangan dan punggung tangan untuk melindungi saat mengganti mata pisau. |
| Pelindung Lengan HexArmor® | Standar ANSI/ISEA A7-A8 | SuperFabric® memberikan ketahanan terhadap sayatan dan tusukan yang tinggi, ideal untuk pemotongan lempengan dan penggantian pisau. |
Kenakan kacamata pengaman untuk melindungi mata Anda dari serpihan yang beterbangan. Sepatu tertutup dan lengan panjang memberikan perlindungan lebih.
Pemilihan Pisau
Memilih mata pisau yang tepat sangat penting. Mata pisau harus sesuai dengan mesin Anda dan bahan yang Anda potong. Pertimbangkan hal-hal berikut:
- Kompatibilitas Material: Pilih mata pisau yang sesuai dengan kekerasan material Anda.
- Geometri Mata Pisau: Periksa ukuran dan bentuk tepi mata pisau untuk hasil pemotongan yang baik.
- Pelapisan dan Perawatan Permukaan: Beberapa mata pisau memiliki lapisan khusus agar lebih awet.
- Kecepatan Pemotongan dan Laju Umpan: Atur dengan benar untuk mencegah kerusakan mata pisau.
- Kompatibilitas dan Penyelarasan Mesin: Pastikan mata pisau pas dan sejajar dengan benar.
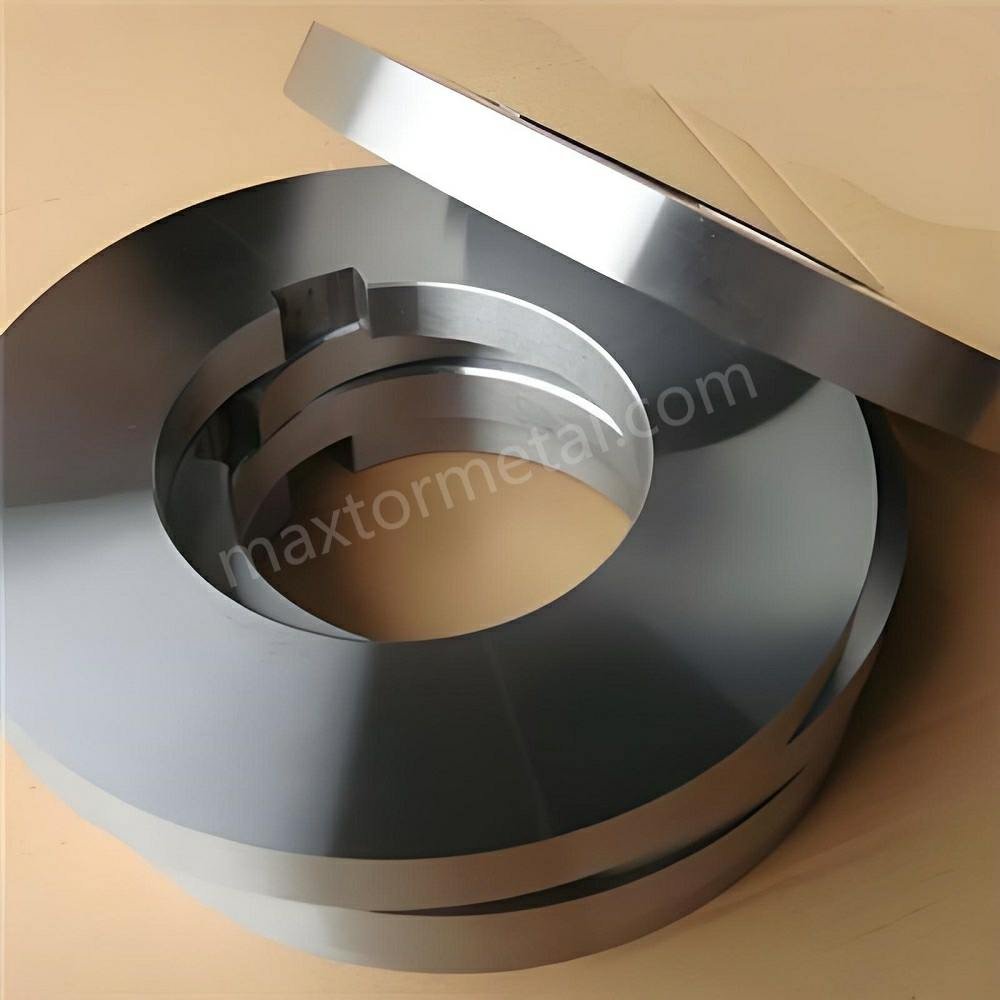
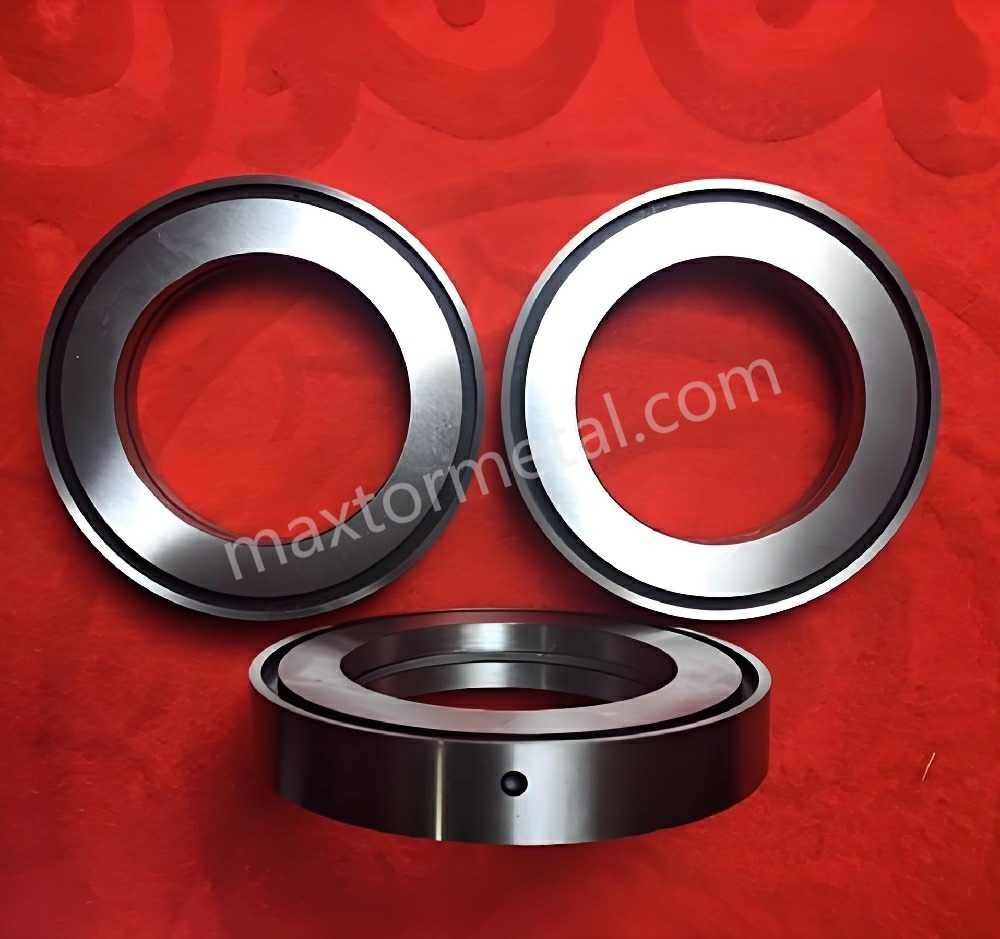
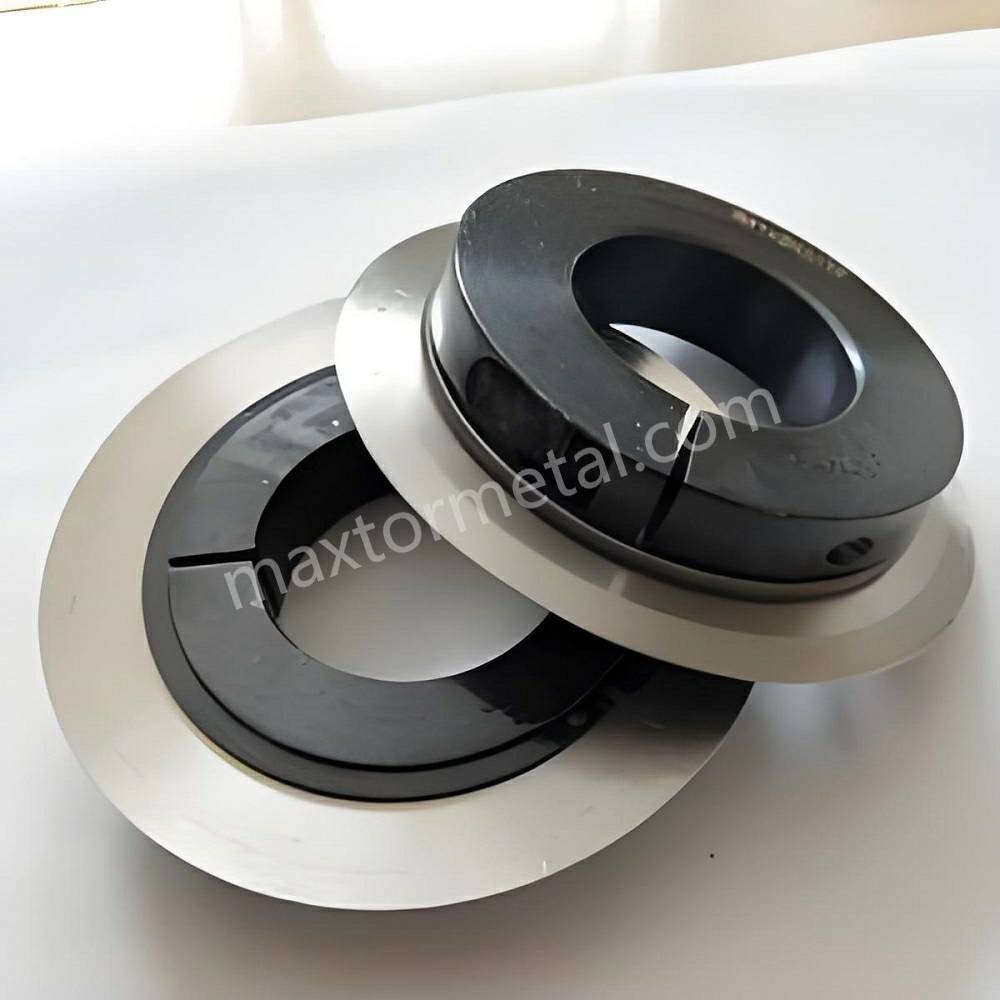
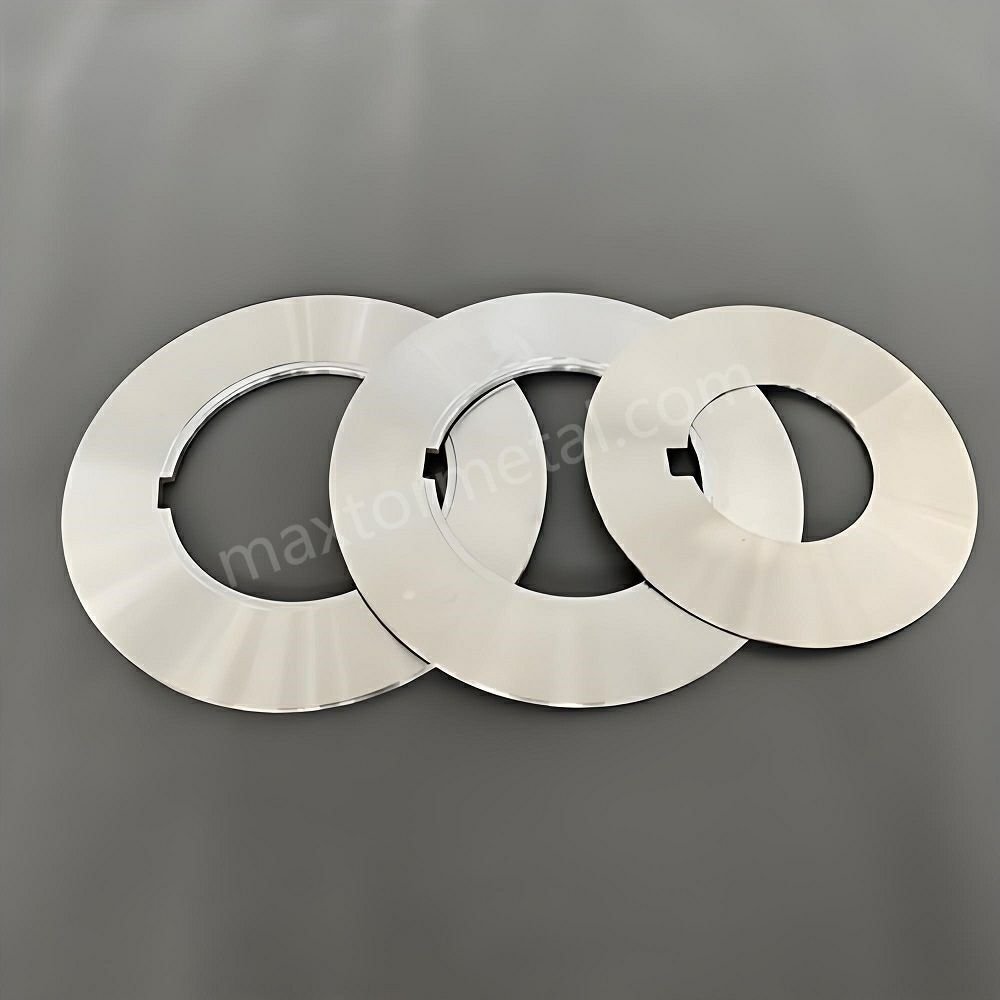
Mata pisau tersedia dalam berbagai material seperti baja karbon tinggi, baja perkakas, baja kecepatan tinggi, dan karbida tungsten. Nanjing Metal Industrial memiliki banyak jenis mata pisau dan pilihan kustom. Anda dapat memesan mata pisau yang dibuat sesuai gambar Anda sendiri atau memilih berbagai bentuk tepi.
Banyak merek juga menjual mata pisau OEM dan aftermarket. Mata pisau kustom dapat lebih sesuai dengan kebutuhan Anda. Pisau OEM Terkadang, mata pisau ini paling cocok untuk pekerjaan khusus. Selalu periksa kualitas dan kesesuaian mata pisau sebelum memasangnya.
Catatan: Mata pisau yang bagus dan pilihan yang tepat akan membantu Anda memotong lebih baik dan menghemat waktu.
Persiapan Penggantian Pisau
Persiapan untuk penggantian mata pisau mesin pemotong putar membantu Anda bekerja dengan aman dan cepat. Anda perlu mengikuti beberapa langkah penting sebelum memulai. Langkah-langkah ini melindungi Anda dan mesin Anda.
Pemadaman Listrik
Anda harus mematikan mesin sebelum menyentuh mata pisau apa pun. Langkah ini akan menjaga Anda tetap aman dari kecelakaan. Ikuti praktik terbaik berikut:
- Cabut steker mesin atau matikan daya utama.
- Gunakan perangkat pengunci untuk memastikan tidak ada yang menyalakan mesin secara tidak sengaja.
- Periksa apakah semua bagian yang bergerak telah berhenti.
- Tunggu hingga mesin mendingin jika sebelumnya sedang beroperasi.
Tips: Selalu periksa kembali sakelar daya dan label pengunci sebelum Anda mulai. Keselamatan adalah prioritas utama.
Penataan Area Kerja
Ruang kerja yang bersih dan terorganisir membantu Anda menghindari kesalahan. Anda perlu menyiapkan area kerja sebelum memulai penggantian mata pisau. Berikut adalah daftar periksa sederhana:
| Melangkah | Mengapa Hal Ini Penting |
|---|---|
| Singkirkan puing dan sisa-sisa | Mencegah kerusakan mata pisau dan kecelakaan. |
| Siapkan peralatan dan mata pisau baru. | Menghemat waktu dan membuat Anda tetap terorganisir. |
| Tempatkan wadah untuk pisau bekas. | Menjaga pisau bekas tetap aman dan tidak mengganggu. |
| Bersihkan permukaan mesin | Mencegah kotoran masuk ke dalam rakitan. |
Anda harus membersihkan semua bagian, termasuk poros dan flensa. Langkah ini membantu Anda memasang mata pisau baru dengan lancar.
Pemeriksaan Keamanan
Sebelum memulai penggantian mata pisau mesin pemotong putar, Anda perlu memeriksa perlengkapan keselamatan dan area kerja Anda. Ikuti langkah-langkah berikut:
- Pastikan mesin dimatikan dan dikunci.
- Kenakan sarung tangan tahan potong, kacamata pengaman, dan sepatu anti selip.
- Bersihkan area tersebut dari segala barang yang berserakan atau barang-barang yang berserakan.
- Periksa mata pisau untuk melihat apakah ada serpihan, penyok, atau retakan.
- Dengarkan suara-suara aneh dari mesin tersebut.
- Simpan mata pisau di dalam sarung pelindung hingga Anda membutuhkannya.
Catatan: Anda harus selalu menangani mata pisau dengan hati-hati. Goresan dan terjatuh dapat merusak mata pisau dan menyebabkan hasil pemotongan yang buruk.
Anda perlu mengasah mata pisau secara teratur dan memilih mata pisau yang tepat untuk material Anda. Penyimpanan dan penanganan yang tepat akan menjaga mata pisau Anda dalam kondisi baik. Langkah-langkah ini membantu Anda menghindari cedera dan menjaga mesin Anda tetap beroperasi dengan baik.
Dengan mengikuti langkah-langkah ini, Anda mempersiapkan penggantian mata pisau pemotong putar yang aman dan efisien. Anda melindungi diri sendiri, tim Anda, dan peralatan Anda.
Melepas Pisau Pemotong Lama
Penggantian mata pisau mesin pemotong putar membutuhkan kehati-hatian. Anda harus memperhatikan keselamatan di setiap langkahnya. Ini akan menjaga keselamatan Anda dan memastikan mesin Anda bekerja dengan baik.
Catatan Keselamatan: Selalu kenakan sarung tangan tahan potong dan kacamata pengaman. Pastikan semua bagian yang bergerak telah berhenti sebelum Anda mulai.
Mengakses Rakitan Pisau
Anda perlu mengakses rakitan mata pisau terlebih dahulu. Ikuti langkah-langkah ini agar tetap aman dan berfungsi dengan baik:
- Matikan mesin dan kunci pengamannya. Ini mencegah mesin menyala secara tidak sengaja.
- Lepaskan semua penutup atau pelindung dari rakitan pisau. Gunakan alat yang tepat untuk mesin Anda.
- Temukan rumah mata pisau. Bersihkan kotoran atau sisa material yang menghalangi jalan Anda.
- Gunakan buku panduan pabrikan untuk menemukan semua titik akses dan pengencang.
- Berdirilah dengan posisi yang stabil. Ini membantu Anda menghindari terpeleset atau jatuh.
Kenakan kacamata pengaman, sarung tangan tahan potong, dan sepatu yang kokoh. Berdiri tegak dan periksa tinggi meja Anda. Ini membantu Anda menghindari nyeri leher dan punggung. Jaga kebersihan dan kerapian ruang kerja Anda untuk mengurangi risiko.
| Melangkah | Mengapa Hal Ini Penting |
|---|---|
| Matikan mesin | Mencegah penyalaan yang tidak disengaja |
| Lepaskan penutupnya | Memungkinkan Anda menjangkau mata pisau dengan mudah. |
| Singkirkan puing-puing | Mencegah kerusakan mata pisau dan kecelakaan. |
| Temukan pengencang | Membuat proses pemindahan menjadi aman dan sederhana. |
| Posisi berdiri yang stabil | Mencegah tergelincir dan cedera |
Melonggarkan Pengencang
Anda perlu melonggarkan pengencang yang menahan mata pisau. Gunakan alat yang tepat agar Anda tidak merusak mesin Anda.
- Gunakan kunci pas atau obeng yang sesuai dengan ukuran baut atau pengencang Anda. Ini mencegah baut atau pengencang tersebut patah atau aus.
- Kendurkan setiap pengencang dengan pola menyilang atau sesuai petunjuk manual. Ini akan menyebarkan tegangan secara merata dan mencegah rakitan bengkok.
- Masukkan semua pengencang yang dilepas ke dalam wadah yang aman. Ini akan menjaga agar pengencang tetap bersama dan mencegah tercampur.
- Jika pengencang macet, gunakan pelumas. Tunggu hingga pelumas bekerja sebelum mencoba lagi.
- Periksa setiap pengencang untuk kerusakan atau keausan. Ganti pengencang yang terlihat aus agar pemasangan kembali aman.
Jangan pernah memasukkan tangan ke dalam mesin saat bilah pisau sedang berputar. Selalu ikuti aturan pabrikan untuk pelepasan yang aman. Jika Anda ragu, mintalah bantuan orang lain.
Tips: Jauhkan tangan Anda dari mata pisau. Pegang pisau pada bagian pangkal atau badannya untuk menghindari luka.
Pelepasan Pisau yang Aman
Anda perlu melepas mata pisau dengan hati-hati agar tetap aman.
- Pegang pisau dengan kedua tangan. Jauhkan jari-jari Anda dari ujung yang tajam.
- Geser mata pisau perlahan keluar dari dudukannya. Sangga beratnya agar tidak terjatuh.
- Masukkan mata pisau yang dilepas ke dalam wadah yang aman untuk mata pisau bekas.
Kesalahan umum adalah menggunakan tangan kosong, menjatuhkan mata pisau, dan tidak memeriksa sisa tegangan. Anda dapat mencegah hal ini dengan mengenakan sarung tangan, memegang dengan kuat, dan memastikan semua pengencang longgar sebelum Anda melepas mata pisau.
Jika mata pisau terasa macet, jangan dipaksa. Periksa apakah ada pengencang tersembunyi atau benda yang menghalangi. Tangani mata pisau dengan sangat hati-hati. Gunakan teknik pengangkatan yang aman untuk menghindari cedera. Luka pada jari atau tangan adalah cedera yang paling umum terjadi saat melepas mata pisau. Anda dapat menghindari hal ini dengan sering mengganti mata pisau, menggunakan ukuran yang tepat, dan selalu memotong menjauh dari tubuh Anda.
Catatan: Penggantian mata pisau pemotong putar paling aman jika Anda mengikuti setiap langkah dan menggunakan perlengkapan keselamatan yang tepat. Mintalah bantuan jika Anda ragu tentang bagian mana pun.
Memasang Pisau Pemotong Putar Baru
Penggantian mata pisau pemotong putar akan berjalan lebih baik jika Anda mengikuti setiap langkahnya. Pertama, Anda perlu membersihkan dudukannya. Kemudian, Anda harus menyelaraskan mata pisau dan memastikan semuanya terpasang dengan kencang. Langkah-langkah ini membantu Anda mendapatkan hasil pemotongan yang halus dan menjaga agar mesin Anda tetap berfungsi dengan baik.
Membersihkan Dudukan
Membersihkan Puing dan Sisa-sisa
Mulailah dengan membersihkan dudukan mata pisau. Gunakan kain bersih untuk menyeka debu dan minyak. Material lama juga dapat menempel pada dudukan. Kotoran dan karat dapat menyebabkan mata pisau terpasang tidak सही. Periksa setiap bagian untuk memastikan tidak ada kotoran atau sisa-sisa dari pekerjaan sebelumnya.
Membersihkan dudukan pisau sangat penting. Ini membantu pisau pemotong putar bertahan lebih lama dan bekerja lebih baik. Pembersihan memastikan tidak ada kotoran, karat, atau kerusakan. Bahkan pisau yang tajam pun tidak akan berfungsi dengan baik jika dudukannya kotor.
Inspecting Mounting Surfaces for Damage or Wear
Look closely at the mounting surfaces. Search for cracks, dents, or worn spots. Damaged mounts can make the blade wobble or cut badly. If you see any problems, fix them before you put in the new blade. This step helps you stop future breakdowns.
Ensuring Dryness and Cleanliness Before Installation
Make sure the mounts are dry and clean before you install the new blade. Water or oil can make the blade slip or rust. Use a dry cloth to finish cleaning. A clean mount helps the blade last longer and cut better.
Penyelarasan Bilah
Positioning the Blade According to Manufacturer Specifications
Put the blade in the right spot. Follow your machine’s manual for instructions. Each machine has its own rules for blade position and spacing. If you use the wrong spot, you might get crooked cuts or break the blade.
- Install rotary slitter blades on the holder or arbor. Make sure they are lined up and tight.
- Adjust blade spacing and position for the number and width of slit lanes you want.
- Control web tension before the cutting zone for smooth flow.
- Line up the web with the blades to waste less and get even slit widths.
Adjusting Blade Height and Lateral Placement
Set the blade height to match the material thickness. Move the blade sideways to line up with the cut path. Use the knobs or screws on your machine. If the blade is too high or low, you might get rough edges or miss the cut line.
Verifying Parallelism and Clearance with Adjacent Blades
Check that all blades are parallel. Use a ruler or gauge to measure the space between blades. Make sure there is enough room so blades do not touch. If blades are too close, they can rub and wear out fast.
Using Alignment Tools or Gauges for Precision
Use alignment tools or gauges for the best results. These tools help you set the blade exactly where it needs to go. Being exact matters for smooth cuts and long blade life. If you do not have alignment tools, ask your supplier for help.
Securing Blades
Selecting Proper Fasteners and Torque Settings
Pick the right bolts or screws for your blade and machine. Use ones that match the size and thread type. Tighten each fastener to the torque setting in your manual. If you use the wrong fastener or torque, the blade can come loose or bend.
Tightening Sequence to Prevent Blade Distortion
Tighten the fasteners in a cross-pattern. This spreads the pressure evenly and keeps the blade flat. If you tighten one side too much, the blade can bend. Follow the order in your manual for best results.
Double-Checking Security and Stability
After you tighten the fasteners, check that the blade does not move. Wiggle the blade gently to see if it feels loose. If you find any movement, tighten the fasteners again. A tight blade helps you avoid accidents and bad cuts.
Documenting Installation for Maintenance Records
Write down the blade type, installation date, and torque settings in your maintenance log. Good records help you track blade life and plan future rotary slitter blade replacement. You can also note any problems or changes you made during installation.
Choosing the Right Blade for Your Material
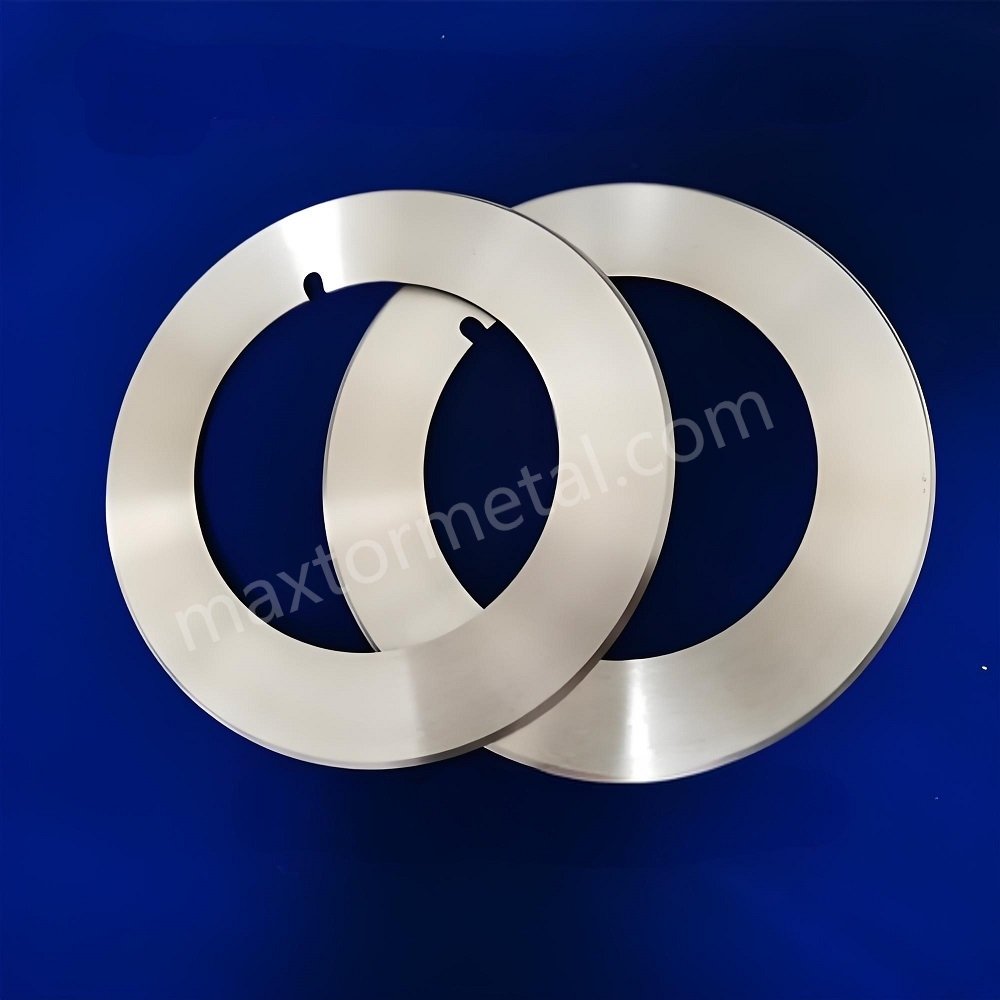
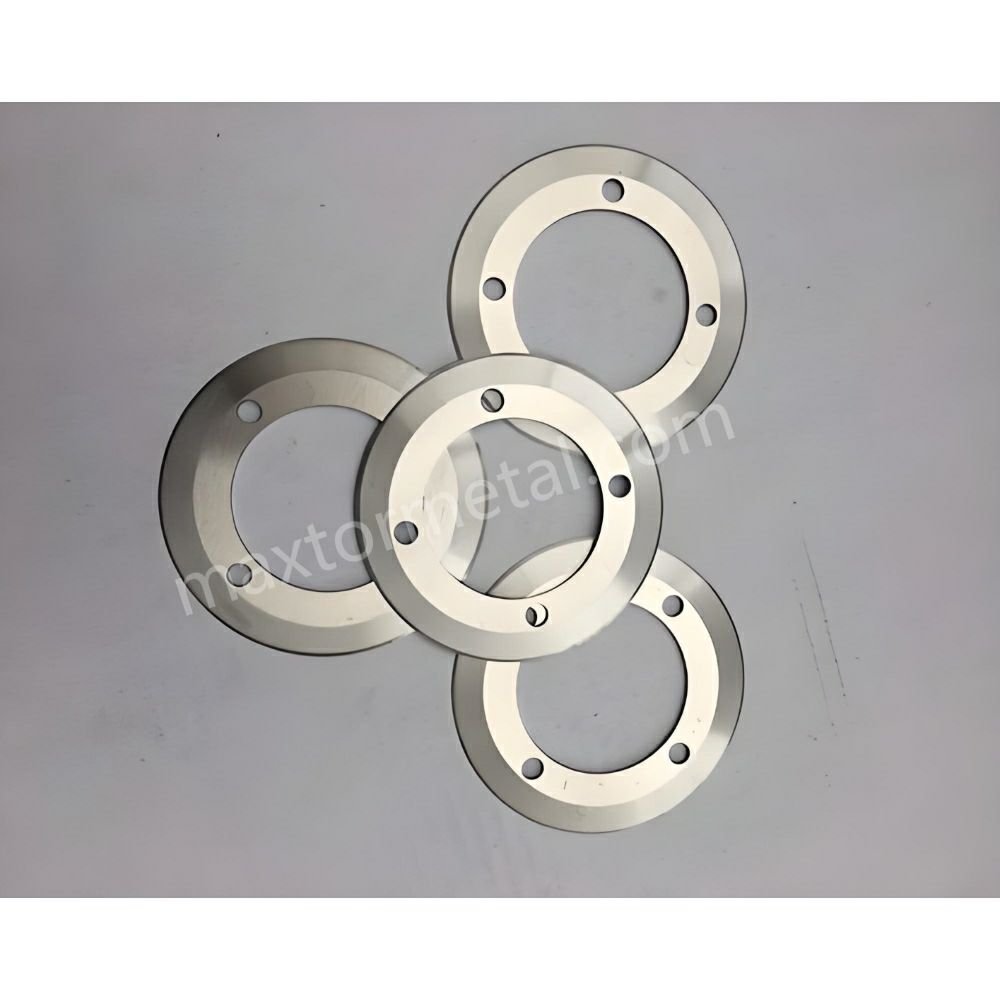
Pick the correct blade type and edge for your job. Paper, metal, and plastic need different blades. For example, single-layer small edge blades work well for hard materials. Double-layer large edge blades give you precise cuts on thin materials. If you want a blade made for your needs, you can order custom blades from Nanjing Metal Industrial. Custom blades help you get the best results for your machine and material.
Quality is important for every rotary slitter blade replacement. Always check that your new blade matches your machine and material. Look for blades made from high-carbon steel, tool steel, high-speed steel, or tungsten carbide. These materials last longer and cut better. Before you install the blade, check it for chips or cracks. Make sure it fits your machine and lines up with the other blades. Good quality and fit checks help you avoid problems and keep your machine running smoothly.
Pemeriksaan dan Pengujian Akhir
You should check your work before using the machine. Careful checking and testing help you find problems early. This keeps your cuts neat and safe. Follow these steps to make sure your rotary slitter blade replacement works well.
Inspeksi visual
Inspecting Blade Installation
Look at the blades closely for any chips or scratches. Check the locating hole for flat spots, burrs, or bent areas. If you see damage, do not use that blade.
Checking for Proper Alignment and Spacing
Use a ruler or gauge to measure space between blades. Make sure each blade is straight and does not touch others. Blades that are too close can rub and wear out fast.
Verifying Fastener Tightness
Check every bolt and screw with your hand. Make sure they feel tight. Loose bolts can make blades wobble or fall off. Tighten any that feel loose.
Tip: Always check your work twice before moving on. Careful checking helps you find mistakes early.
Here is a table showing what you need to check during visual inspection:
| Jenis Inspeksi | Kriteria |
|---|---|
| Inspeksi visual | Look for chips or scratches on the edge; check the knife’s locating hole for flat spots, burrs, or bent areas. |
| Dimension Verification | Measure the knife’s diameter and thickness with calipers; make sure sizes match the old knife. |
| Material Confirmation | Make sure the new knife’s material matches what you are cutting to stop fast wear. |
Manual Rotation
Rotating the Blade Assembly by Hand
Turn the blade assembly slowly with your hand. Wear gloves to protect your fingers. The blades should move smoothly and not stick.
Observing for Smooth Movement
Watch the blades as they turn. They should spin evenly and not shake. If you see wobbling, check the alignment again.
Listening for Unusual Sounds
Listen while you turn the blades. You should not hear grinding, scraping, or clicking sounds. Strange noises mean something is wrong with the installation.
Note: If you notice any problems, fix them before turning on the machine.
Uji Jalan
Powering Up the Machine
Turn on the machine after you finish all checks. Stay alert and keep your hands away from moving parts.
Conducting a Low-Speed Test
Start with a slow test run. This helps you spot problems before they get worse. Watch the blades and listen for odd sounds.
Monitoring for Vibration and Noise
Pay attention to shaking and loud sounds. Use your senses or sensors to check for vibration or noise. Too much shaking can hurt the blades and the machine.
Checking Initial Cut Quality
Look at the first cuts. Check the edges for tearing, rough spots, or uneven lines. Good cuts mean your blades are installed right.
Here is a table showing what you should watch during a slow test run:
| Parameter | Monitoring Technique |
|---|---|
| Cut Edges | Check for tearing, rough spots, or uneven cuts |
| Vibration | Use sensors to measure shaking |
| Sound Changes | Use sensors to listen for strange sounds |
| Kekuatan Pemotongan | Use gauges to measure how hard it is to cut |
| Blade Temperature | Use sensors to check for overheating |
Callout: Always stop the machine if you see bad cuts, hear loud noises, or feel strong shaking. Fix the problem before you keep going.
You can keep your machine working well by following these steps. Careful final checks and testing help you get the best results from rotary slitter blade replacement.
Kesalahan Umum dan Pemecahan Masalah
Rotary slitter blade replacement can be tricky. If you skip steps or use the wrong tools, things can go wrong. You should learn about common mistakes and how to fix them. This section helps you avoid problems and keep your machine working well.
Removal Errors
Failing to Fully Power Down the Machine
If you do not turn off the machine, you could get hurt. Machines might start by accident and cause injuries. Always check the power switch and use lockout devices. Make sure all moving parts have stopped before you touch anything.
Not Wearing Proper Safety Gear
You need to wear cut-resistant gloves and safety goggles. If you do not wear safety gear, you can get cuts or hurt your eyes. Gloves protect your hands from sharp blades. Goggles keep your eyes safe from flying pieces. Never work without safety gear.
Skipping the Step of Marking Blade Positions
If you do not mark blade positions, you might put new blades in the wrong spot. Marking helps you put each blade back where it belongs. Use a marker or tape to show each blade’s place. This step saves time and stops mistakes.
Using Incorrect Tools for Fastener Removal
Using the wrong tools can break bolts or damage the blade assembly. Always use wrenches and screwdrivers that fit your fasteners. If you use the wrong size, you might break the fastener or harm your machine. Check your manual for the right tools.
Forcing Stuck Blades or Fasteners
If a blade or fastener is stuck, do not force it. Forcing can bend the blade or break the fastener. Use a lubricant and wait for it to work. Look for hidden fasteners or debris blocking the blade. Take your time and work slowly.
Solutions and Prevention Tips
Tip: You can avoid most removal mistakes by using a checklist.
- Always follow lockout/tagout steps before you start.
- Wear cut-resistant gloves and safety goggles every time.
- Mark blade positions before you take them out.
- Use the tools the manufacturer recommends for fasteners.
- If something is stuck, look for hidden fasteners or blockages instead of forcing it.
Installation Issues
Incorrect Blade Alignment
If you do not line up the blade right, you might get crooked cuts or damage the blade. Misalignment can happen if you rush or skip measuring. You need to check the blade from different angles and use shims if needed.
Uneven Fastener Tightening
If you tighten bolts unevenly, the blade can bend or move during use. You must tighten bolts in a cross-pattern to spread pressure. Uneven tightening can cause shaking and bad cuts.
Installing Incompatible or Damaged Blades
If you use a blade that does not match your machine or material, you might get poor cuts and fast wear. Damaged blades can break or cause accidents. Always check new blades for chips or cracks before you put them in.
Overlooking Manufacturer Specifications
If you ignore the manual, you might use the wrong torque or install the blade wrong. Manufacturer instructions help you get the best results and stay safe. Always follow the steps for your machine and blade.
Solutions and Prevention Tips
You can fix installation problems by doing these steps:
- Check if the blade is lined up at different angles.
- Use U-shaped shims of different thicknesses to adjust alignment.
- For cabinet saws, add shims to the rear or front corners if needed.
- Loosen one bolt at a time, adjust shims, and check measurements.
- Check blade alignment at both 90 and 45 degrees.
- Make sure all bolts are tight after you finish.
- Put covers back on after making changes.
- Double-check blade alignment with alignment tools or gauges.
- Tighten bolts in a cross-pattern to spread pressure.
- Check new blades for damage and make sure they fit before installing.
- Follow the manual for torque and installation steps.
Cut Quality Problems
Burrs or Rough Edges on Cut Material
Burrs and rough edges happen when the blade setup is wrong or the blade is dull. Compressive force during cutting causes burrs. If you set up the blade right and use sharp blades, you get fewer burrs.
Material Wrinkling or Deformation
Material can wrinkle or bend if blade clearance is wrong or pressure is too high. Damaged rubber bonded spacers can also cause shaking, which leads to bad cuts and short blade life.
Crooked or Inconsistent Cut Lines
Crooked cuts happen if blades are not lined up or if the material moves while cutting. You need to check alignment and make sure the material feeds smoothly.
Solutions and Troubleshooting Steps
You can make cut quality better by doing these things:
- Make sure blades are sharp, clean, and lined up right.
- Adjust blade clearance and pressure for your material.
- Replace worn or damaged blades quickly.
- Test cut on sample material and adjust settings before full production.
- Check rubber bonded spacers and replace them if damaged.
- Set up the blade to lower compressive force on the material.
Note: Good setup and regular checks help you avoid burrs, rough edges, and other cut problems.
Kebisingan dan Getaran
Rotary slitter blade replacement can fix many problems. Sometimes, you still hear loud sounds or feel shaking. These signs mean something is wrong with your machine. You should learn what causes these issues and how to fix them.
Excessive Operational Noise
You might hear grinding, squealing, or rattling when the slitter runs. These sounds show that parts are not moving smoothly. Worn bearings, dry gears, or loose bolts can make the machine noisy. If you ignore these sounds, you could damage your blades or machine.
Tip: Listen for new or louder noises after rotary slitter blade replacement. If you act early, you can stop bigger problems.
Unusual Vibrations During Cutting
If your machine shakes while cutting, stop and check it. Vibrations can make cuts uneven or hurt the blades. Sometimes, you feel the table or floor move. Other times, you see the material shift as it goes through the slitter. Vibrations can also make the blade wear out faster.
Possible Causes (e.g., Worn Bearings, Loose Fasteners, Misalignment)
Many things can cause noise and vibration during rotary slitter blade replacement:
- Worn Bearings: Bearings help parts spin smoothly. If they wear out, you hear grinding and feel shaking.
- Loose Fasteners: Bolts and screws hold the machine together. If they get loose, parts can move and make noise.
- Blade Misalignment: If blades are not lined up, they can rub or hit each other.
- Improper Roller Tension: Rollers guide the material. If tension is wrong, the material can slip or wrinkle.
- Lack of Lubrication: Dry gears and rollers make friction. This leads to noise and wear.
- Damaged Belts: Belts move parts inside the machine. If they crack or stretch, you hear slapping or squealing.
Solutions and Maintenance Tips
You can lower noise and vibration by keeping up with maintenance. Here are some steps you should follow:
- Lubricate moving parts often. Use the lubricant your manual says to use.
- Check roller alignment and tension. Adjust them for the material you cut.
- Look at bearings and belts for wear. Replace them if you see cracks or feel rough spots.
- Tighten all fasteners after rotary slitter blade replacement. Use a torque wrench for best results.
- Realign blades with gauges or alignment tools. Make sure each blade sits straight and does not touch others.
- Plan regular checks. Write down what you inspect and when you change parts.
The table below shows how to keep your machine working well:
| Maintenance Tip | Pentingnya | Method of Execution | Routine Checkpoints |
|---|---|---|---|
| Lubrication of Moving Parts | Cuts down friction and wear in gears, rollers, bearings | Use the right lubricants at set times | Look for signs of wear or dry spots |
| Roller Alignment and Tension | Helps you get even cuts and stops wrinkling | Check and adjust roller tension for each material type | Watch tension settings often |
| Bearing and Belt Inspections | Keeps the slitter working smoothly | Check for wear or bad tension every month | Monthly checks to catch problems early |
Catatan: Good maintenance helps you avoid most noise and vibration problems. If you hear new sounds or feel shaking after rotary slitter blade replacement, stop the machine and check all parts before you keep going.
By following these tips, you keep your rotary slitter quiet and smooth. You also help your blades last longer and get better cuts every time.
Tips Perawatan untuk Pisau Mesin Pemotong
Inspeksi Reguler
Check your slitter blades often. This helps you find problems early. Look for chips, cracks, or dull spots on each blade. Use a flashlight to see small damage. If you see any damage, change the blade right away. Check the blade mounts and bolts for wear. Loose bolts can make blades shake and cut badly. Write your inspection notes in a logbook. This helps you plan when to change blades and see how long they last.
Tip: Make a schedule for checking blades. Busy machines need weekly checks. Machines used less can be checked once a month.
Pembersihan dan Pelumasan
Clean blades and machine parts often to keep them working well. Dust, dirt, and scraps can build up and cause problems. Use a soft brush or air blower to clean the slitting area. Wipe blades with a clean cloth to get rid of oil and dirt. Lubricate moving parts like shafts and bearings with good oil. Lubrication helps blades spin easily and last longer.
Here are some cleaning and lubrication steps you should follow:
- Use a soft brush or air blower to clean away dust and scraps.
- Wipe blades and mounts with a clean cloth to remove oil and dirt.
- Lubricate shafts and bearings with the right oil for your machine.
- Check oil spots every time you inspect the machine.
A clean and oiled machine helps you avoid breakdowns and makes blade changes easier.
Scheduling Replacements
Plan to change blades before they get too dull or damaged. Waiting too long can make cuts bad and hurt the machine. Use your logbook to track blade wear. Change blades after a set number of hours or cuts. Some companies can sharpen blades to make them last longer. You can send blades to a service center for sharpening and testing. If you use custom blades, ask your supplier when to replace them.
| Metode Penggantian | Keuntungan | When to Use |
|---|---|---|
| Scheduled Replacement | Stops sudden breakdowns | After set hours or cut cycles |
| On-Demand Replacement | Fixes problems fast | When you see damage or dullness |
| Sharpening Service | Membuat mata pisau lebih awet. | When blades have small wear |
Note: Changing blades on time keeps your machine safe and your cuts neat. Good planning saves you time and money.
If you follow these tips, your blades last longer and your rotary slitter works better. Regular care and smart planning make blade changes easier and help your machine run smoothly.
Storing Blades
You must store rotary slitter blades the right way. This keeps them sharp and safe. Good storage stops damage, rust, and accidents. If you store blades well, changing them is easier and faster.
Pick a dry place to keep your blades. Moisture and humidity can cause rust. The room should be between 68°F and 72°F. Try to keep the humidity under 50%. If the room feels wet, use a dehumidifier to keep blades dry.
Always use gloves when you touch blades. Fingerprints can leave oil that causes rust. Never touch the blade edge with bare hands. Gloves also keep your hands safe from cuts. Before storing, wipe blades with a clean cloth. Put a thin layer of oil on each blade. The oil keeps water away and stops rust.
Put blades in a case or drawer with foam or felt. Soft lining stops scratches and dents. Wrap each blade in oiled paper or a sleeve. If your blades do not have oil, seal them in tight packaging. This keeps out air and moisture. Lay each blade flat in storage. Do not stack blades on top of each other. Stacking can bend or chip the edges.
Here is a simple checklist for storing rotary slitter blades:
- Use gloves when you handle blades.
- Clean blades and put on a thin layer of oil.
- Wrap blades in oiled paper or sleeves.
- Store blades in foam-lined cases or drawers.
- Keep blades in a dry, low-humidity room.
- Do not stack blades on top of each other.
- Use sealed packaging for blades without oil.
Check the storage area often for problems. Look for moisture, dust, or pests. If you see rust or damage, clean the area and replace bad blades. Good storage keeps blades ready for rotary slitter blade replacement. It also helps you get clean cuts every time.
Nanjing Metal Industrial uses strict rules for storing and shipping blades. Their team can give you tips for storage and blade care. Other brands can help with sharpening and replacement if you need it. Always store blades safely to protect your money and keep your rotary slitter working well.
Tip: Safe storage means fewer accidents and longer blade life. Good habits make rotary slitter blade replacement easier and safer.
If you follow every step, you can change rotary slitter blades safely. Always put on safety gear before you start. Pick the blade that matches your material. Check your blades often and store them the right way. This helps blades last longer. Good blades from Industri Nanjing Metal help you get better cuts. You can choose blades that fit your needs. Learning new skills and talking to suppliers helps you do a better job.
Want to make your slitting better? Hubungi teknisi penjualan kami untuk bantuan ahli.
Tanya Jawab Umum
How often should you perform rotary slitter blade replacement?
Check your blades every week if you use the machine a lot. Change blades when you see dull edges or chips. If cuts look bad, replace the blade. Regular rotary slitter blade replacement keeps your machine safe. It also helps you get clean cuts.
What safety gear do you need for rotary slitter blade replacement?
Wear cut-resistant gloves, safety goggles, and closed-toe shoes. These keep your hands, eyes, and feet safe from sharp blades. They also protect you from flying debris. Always put on safety gear before rotary slitter blade replacement.
Can you reuse old slitter blades after sharpening?
You can use blades again if they have no cracks or deep chips. Sharpening makes blades last longer. Always look at blades before you put them back. If you see damage, pick a new blade for rotary slitter blade replacement.
What signs show you need rotary slitter blade replacement?
Watch for rough edges, burrs, or uneven cuts on your material. Listen for new sounds or feel more shaking when cutting. These signs mean you need rotary slitter blade replacement soon.
How do you choose the right blade for your material?
Look at your material type and thickness. Use harder blades for tough materials like metal. Pick the right edge shape for clean cuts. Always match the blade to your job for the best rotary slitter blade replacement.
What should you do if a blade gets stuck during removal?
Stop and look for hidden fasteners or debris. Do not force the blade out. Use a lubricant if you need to. Always follow safe steps during rotary slitter blade replacement to stay safe.
Why is blade alignment important in rotary slitter blade replacement?
Good alignment keeps cuts straight and your machine safe. Blades that are not lined up can make rough edges and loud noises. They also wear out faster. Always check alignment during rotary slitter blade replacement for the best results.
Lihat Juga
Kesalahan Utama dalam Pemecahan Masalah Bilah Slitter Rotary dan Cara Memperbaikinya
Memperpanjang Umur Pisau Anda: Panduan Lengkap untuk Mengasah Pisau Rotary Slitter
Bilah Slitter Rotary Presisi Tinggi untuk Slitting Film dan Foil
Bilah Slitter Rotary Terbaik untuk Slitting Logam
Cara Mencapai Potongan Sempurna dengan Bilah Slitter Rotary untuk Kertas