最適なパフォーマンスを確保するには、ギロチンブレードを慎重にセットアップする必要があります。 ギロチン刃のセットアップ 機械の安全性を維持しながら、きれいな切断を実現します。平行度とクリアランスは、切断品質と機器の寿命の両方に影響を与える重要な要素です。 下の表これは、小さな調整が結果に大きな影響を与える可能性があることを示しています。
| 側面 | カット品質への影響 | 機械寿命への影響 |
|---|---|---|
| ブレードクリアランス | クリアランスが大きすぎると刃先が粗くなり、小さすぎると刃の摩耗が早くなります。 | 適切なクリアランスは摩耗を減らし、機械の寿命を延ばします。 |
| ブレードの平行度 | 刃の位置がずれると、切り口が不均一になります。 | 適切な位置合わせにより過度の摩耗や損傷を防止できます。 |
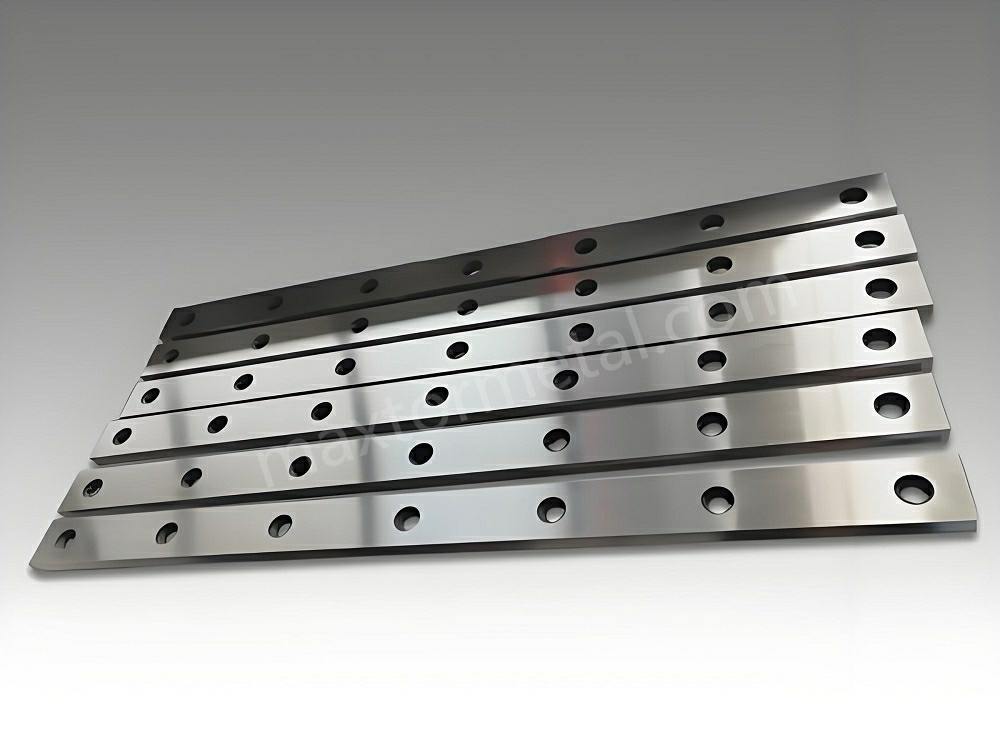
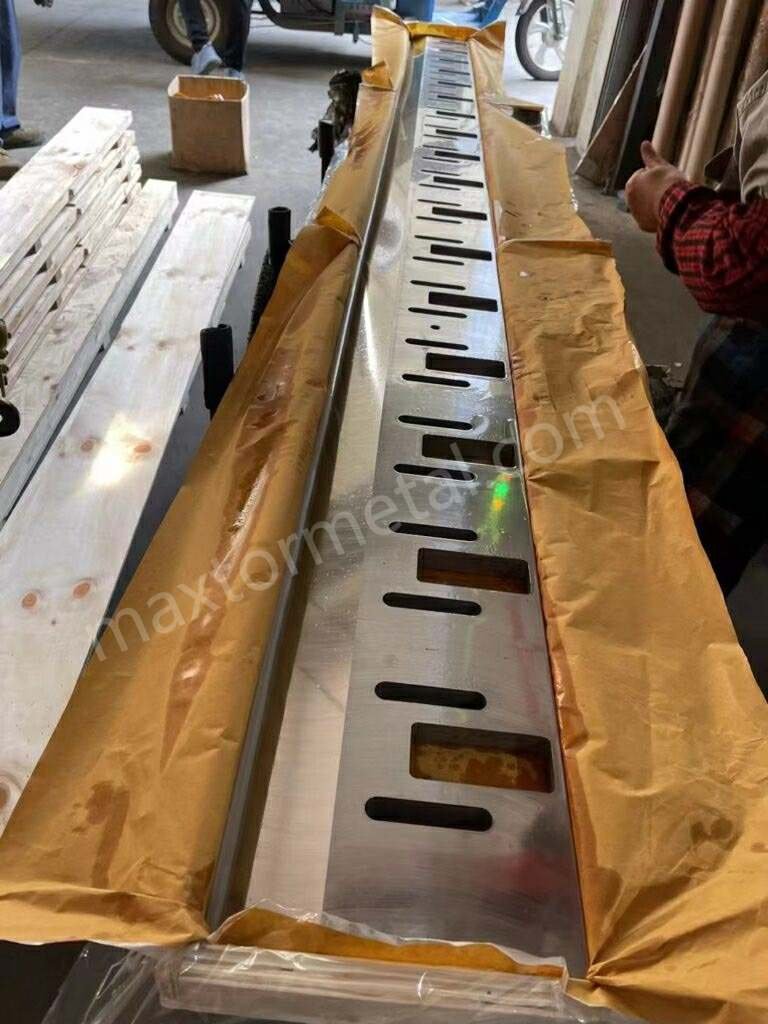
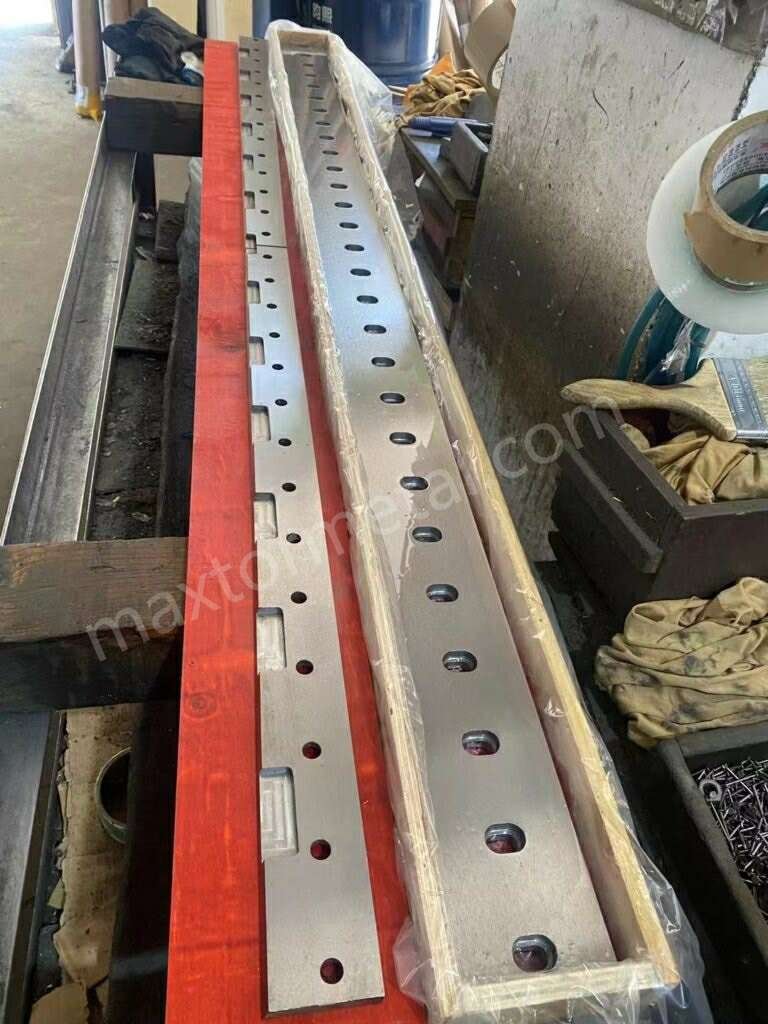
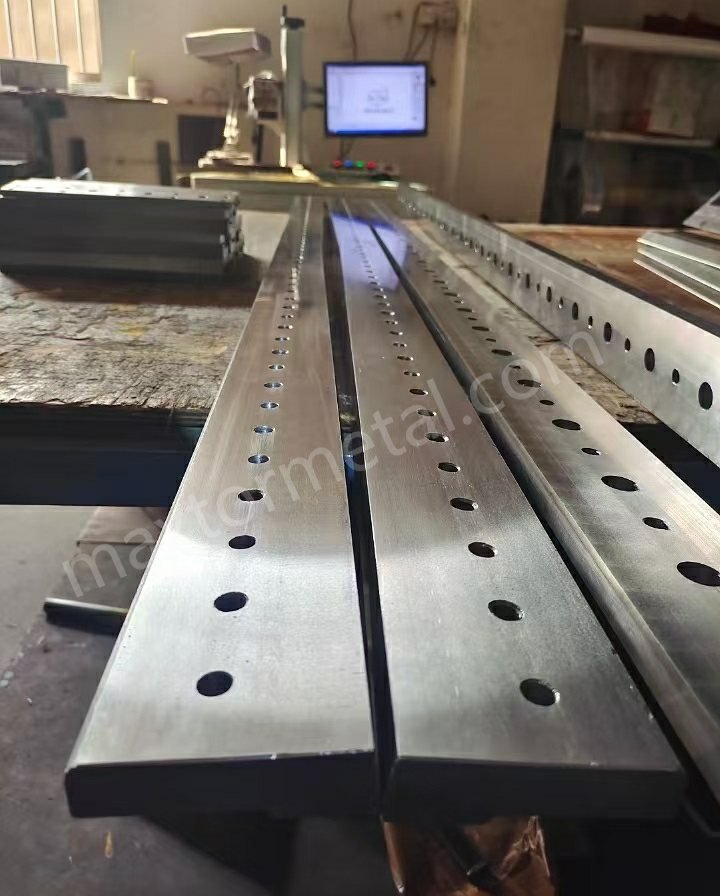
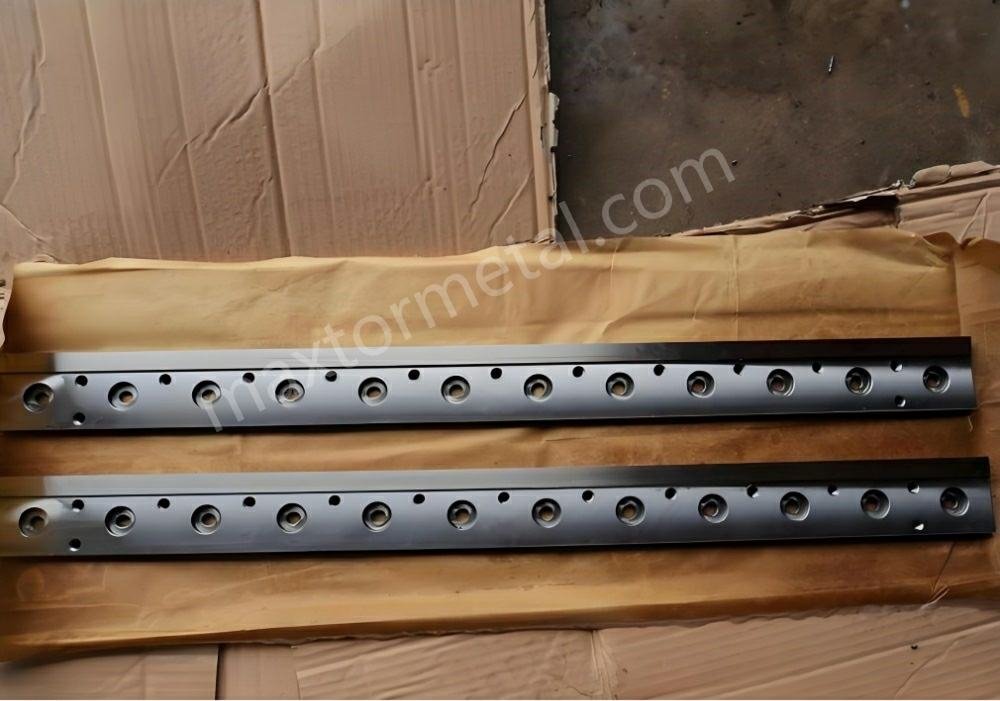
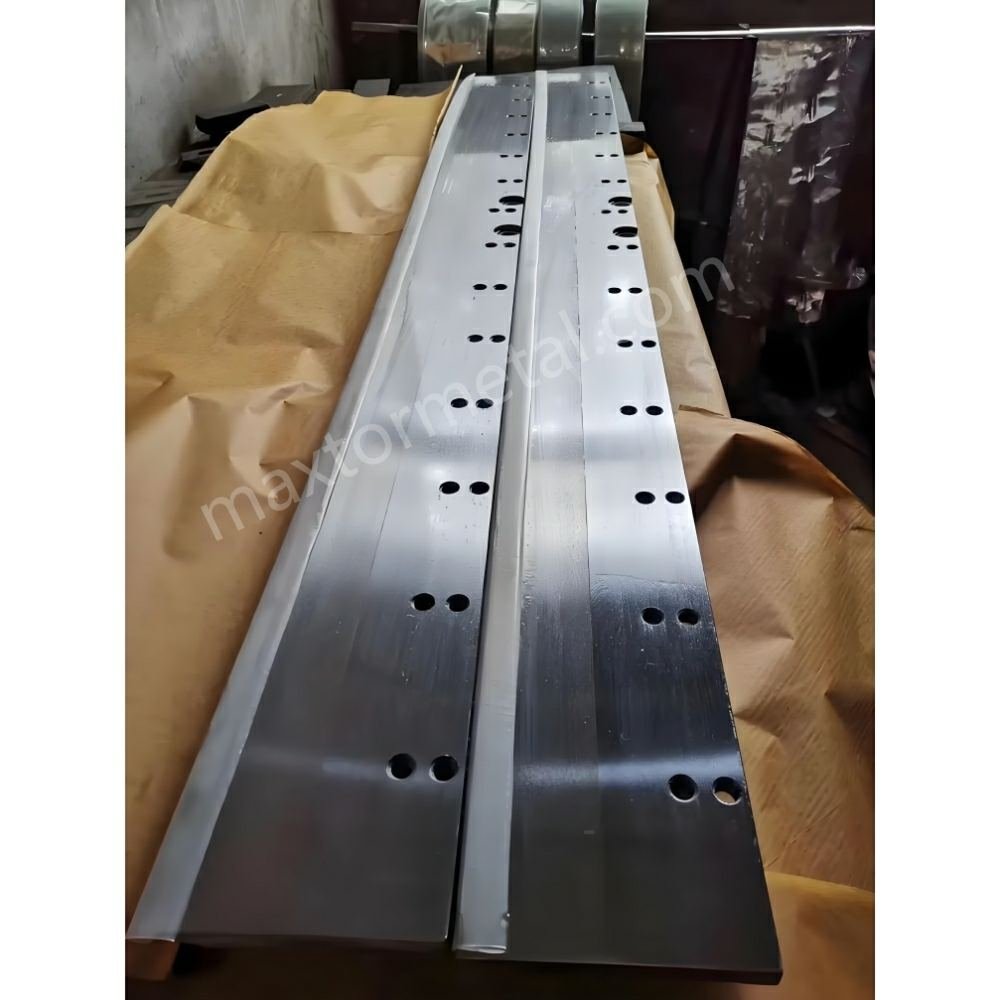
Nanjing Metal Industrial は、さまざまな用途に適したさまざまなブレードを提供しており、ギロチンのあらゆる用途で適切なカットを実現できます。
重要なポイント
- ギロチンブレードを正しく設定すると、きれいな切断ができます。また、機械の寿命も長くなります。作業を始める前に、必ず平行度とクリアランスを確認してください。
- 安全第一です。PPE(個人用保護具)を着用し、ロックアウト手順に従ってください。これにより、セットアップ中の安全が確保されます。
- ダイヤルインジケータやトルクレンチなどの精密工具を使用してください。これらの工具は、ブレードの平行度とクリアランスが正しいことを確認するのに役立ちます。
- 危険を避けるため、作業場を清潔に保ちましょう。整理整頓された作業場は、作業に集中しやすく、刃のセットアップ中に事故が起こる可能性も低くなります。
- 切断する材料に合わせてブレードのクリアランスを調整してください。柔らかい材料の場合は、より狭いクリアランスが必要です。硬い材料の場合は、より良い結果を得るためには、より広いクリアランスが必要です。
- ギロチンの刃は頻繁に点検・清掃してください。摩耗を防ぎ、刃の良好な状態を保つことができます。これらの作業を忘れないよう、スケジュールを立てましょう。
- キャリブレーションの設定と変更はすべて記録しておきましょう。記録を残しておくことで、適切な設定を再度行う際に役立ちます。また、問題をより早く解決するのにも役立ちます。
- 実際の作業を始める前に、テストカットで設定を試してみてください。このステップで問題を早期に発見でき、素晴らしい結果を得ることができます。
ギロチンブレードのセットアップにおける安全性

ギロチンの刃をセットする時は、必ず安全について考えてください。正しい手順を踏めば、自分自身だけでなく周囲の安全も守れます。注意を怠ると、すぐに怪我をする可能性があります。始める前に、危険性を理解しておく必要があります。
PPEとロックアウト手順
ギロチンの刃を扱う際は、必ず個人用保護具(PPE)を着用してください。手袋は鋭利な刃物から手を守ります。安全メガネは、飛び散る破片から目を守ります。つま先がスチール製のブーツは、重いものから足を守ります。機械の騒音が大きい場合は、耳栓も着用してください。
ロックアウト手順により、機械が誤って起動するのを防ぎます。ギロチン刃をセットする前に、機械の電源を切り、プラグを抜いてください。ロックアウトタグを付けることで、他の人に機械が安全に使用できないことを知らせることができます。刃に触れる前に、すべての可動部品が停止していることを確認してください。この手順により、突然の動きから身を守ることができます。
ヒント:作業を始める前に、必ず電源スイッチとロックアウトタグを確認してください。この習慣を身につけることで、重傷を防ぐことができます。
安全な刃の取り扱い
ギロチンの刃の取り扱いには十分注意してください。刃先は鋭利なので、注意しないと手袋を切ってしまう可能性があります。刃を持ち上げたり動かしたりする時は、必ず両手を使ってください。刃は体から離し、平らな面に静かに置いてください。
ギロチンの刃をセットする際に指を挟まれて怪我をする人は多い。下の表は、その例を示している。 よくある怪我とその原因:
| 傷害の種類 | 傷害の原因 |
|---|---|
| 指が潰れたり切断されたりした | 金属板を固定するクランプの間に指が挟まる |
| シーツの下に指が挟まった | 操作中に誤って指を挟んだ |
| 捻挫 | 大きな金属板や扱いにくい金属板を持ち上げる |
常に注意を払い、正しい方法で持ち上げることで、こうした怪我を防ぐことができます。刃が重かったり持ちにくかったりする場合は、誰かに手伝ってもらいましょう。刃をセットする際は、決して急がないでください。
ワークスペースの準備
作業場を清潔に保ち、整理整頓しておくことで、ギロチンブレードのセットアップ中の安全を確保できます。作業場に置いてはいけないものはすべて片付けましょう。床が乾いていて、油やゴミなどが落ちていないことを確認してください。十分な照明があれば、作業が見やすくなります。工具は可動部から離して置きましょう。
機械の周囲にクリアランスを確保してください。ギロチンブレードのセットアップ中は、訓練を受けた作業員のみがこのエリアに入るようにしてください。このルールは事故防止に役立ちます。平行度とクリアランスの調整を始める前に、すべての安全ガードが設置されていることを確認してください。
注:作業スペースに危険がないか、頻繁に確認してください。安全な場所であれば、慎重に作業を進めることができ、怪我を防ぐことができます。
これらの手順に従うことで、作業の安全性が向上します。安全対策は、あなた自身、同僚、そして機器の安全を守るために重要です。ギロチンブレードをセットアップする際は、常に安全を最優先に考えてください。
精密セットアップのためのツール
ギロチンブレードのセットアップには適切な工具が必要です。正確な工具は、平行度とクリアランスを調整するのに役立ちます。これらの工具は、切断面をきれいにし、機械を安全に保ちます。
計測機器
この作業には精密な測定機器が必要です。これらのツールは平行度と位置合わせをチェックします。正確な測定はより良い切断を可能にし、機械の寿命を延ばします。
以下の表には、上位 2 つの測定ツールがリストされています。
| 楽器の種類 | 主な特徴 |
|---|---|
| AF-X | 高速かつ正確な非接触測定、最大 1秒あたり20,000データポイント、10ミクロンの不確実性。 |
| 座標測定機(CMM) | 精度と柔軟性が向上し、ブレード設計ごとに特定のツールを必要とせずにさまざまな検査ルーチンを実行できます。 |
AF-Xは高速で、非常に正確な結果を提供します。CMMは柔軟性が高く、様々なブレード設計に適合します。どちらのツールも、平行度とクリアランスを適切に設定するのに役立ちます。
ヒント:測定ツールを使用する前に必ず点検してください。レンズと測定面をきれいにしておくと、間違いを防ぐことができます。
トルクレンチの使用
ギロチンブレードを取り付けるにはトルクレンチが必要です。この工具は、ボルトに適切な力をかけるのに役立ちます。締め付けの不均一を防ぎ、ブレードを安全に保ちます。
- ブレードを取り付けるときは、校正されたトルクレンチを使用してください。
- 機械のマニュアルに記載されているトルク値に従ってください。
- 不均等な力を加えると刃が損傷する恐れがあります。
トルクレンチはブレードをしっかりと固定し、安全に保ちます。また、反りや割れなどの問題も防ぎます。適切なトルクを使用することは、平行度とクリアランスを保つ上で重要です。
注:マニュアルに記載されている順番にボルトを締めてください。この手順により、圧力が均一になり、正しいセットアップを維持できます。
掃除用品
清潔なツールと表面は、良い結果につながります。埃、油、汚れは測定や位置合わせを台無しにする可能性があります。作業スペースを準備するには、清掃用品が必要です。
まず、糸くずの出ない布でブレードとマウントを拭きます。油汚れは中性溶剤で落とします。ブラシは細かい部分の掃除に役立ちます。測定ツールは使用前後に清潔に保ちましょう。この習慣を身につけることで、セットアップを良好な状態に保つことができます。
清潔な作業エリアは、平行度とクリアランスを正しく設定するのに役立ちます。ミスを減らし、機械を保護します。
注意:掃除用品は安全な場所に保管してください。古い布やブラシは頻繁に交換してください。
適切な工具を使用することで、切断品質が向上し、機械の寿命も長くなります。測定器、トルクレンチ、清掃用品はすべて、ギロチンブレードのセットアップに不可欠です。平行度とクリアランスを設定する際には、これらの工具を定期的に使用してください。
ギロチンせん断刃の取り付け
ギロチンブレードのセットアップは、慎重な取り付けから始まります。機械を安全に保ち、良好な動作を維持するには、各手順に従う必要があります。このパートでは、古いブレードの取り外し、取り付け部の点検、新しいギロチンシアーブレードの取り付け方法を説明します。また、ミスを防ぎ、正しいトルクで締め付ける方法も学びます。
古いブレードの取り外し
新しいギロチンシアーブレードを取り付ける前に、必ず古いブレードを取り外してください。これにより、機械の状態を良好に保ち、作業の安全性を確保できます。ブレードを安全かつ迅速に取り外すには、以下の手順に従ってください。
- 前面作業台プレート、前面サポートアーム、およびカバーを取り外します。
- ブレードの真ん中にあるボルトを1本緩めます。まだ取り外さないでください。このボルトはブレードが落ちるのを防いでいます。
- その他のボルトをすべて取り外します。2人で下側のブレードをゆっくりと持ち上げます。
- マシンのコントロール パネルを「手動シャフト モード」に変更します。
- 上刃の真ん中のボルトを緩めて取り外します。
- ブレードについた油や埃を拭き取り、損傷や摩耗がないか確認してください。
- スチール切断ブレードを交換する場合は、これらの手順を逆に実行して新しいブレードを取り付けます。
ヒント:ギロチンシザーの刃を持ち上げる際は、必ず2人で行ってください。刃は重く、非常に鋭利です。
マウントの検査
新しいギロチンシアーブレードを取り付ける前に、マウントを点検する必要があります。マウントを清潔に保つことで、良好な切断とマシンの良好な動作が得られます。以下の点に注意してください。
- マウント部分に汚れ、油、ゴミなどが付着していないか確認してください。糸くずの出ない布で拭いてください。
- ひび割れ、へこみ、摩耗した箇所がないか確認してください。取り付けが不十分だと刃が曲がってしまうことがあります。
- すべての取り付け穴がブレードとマシンに適合していることを確認してください。
問題が見つかった場合は、作業を進める前に修正してください。清潔で丈夫なマウントは、平行度とクリアランスを正しく設定するのに役立ちます。この手順は、新しいブレードの損傷を防ぐのにも役立ちます。
位置決めと固定
ギロチンシザーの刃を正しい位置にしっかりと固定する必要があります。この手順は、切り口の仕上がりに影響します。最良の結果を得るには、以下の手順に従ってください。
- 刃をホルダーに取り付けます。最終的な位置まで移動します。
- マシンのガイドを使用して、ドリルで穴を開ける必要がある場所に印を付けます。
- マークした穴をゆっくりと慎重に開けます。
- ボルトとワッシャーでブレードを固定します。各部品に適したサイズのものを使用してください。
異なる材料やニーズに合わせて特別な刃が必要な場合は、 カスタムブレードオプション あなたの仕事に合うように。
トルクシーケンス
ボルトは正しい順序で締め付ける必要があります。これにより圧力が均一になり、刃の曲がりを防ぎます。お使いの機械の説明書に記載されているトルクの順序に従ってください。多くの場合、中央のボルトから始めて、外側に向かって交互に締めていきます。必要なトルクに合わせて、校正済みのトルクレンチを使用してください。
注意: 均一な圧力をかけることで、マシンがまっすぐに保たれ、安全になります。
マウントエラー
取り付けミスはギロチンブレードのセットアップに問題を引き起こす可能性があります。以下のよくあるミスに注意してください。
- 間違ったボルトサイズまたはトルクを使用する。
- マウントのクリーニングをスキップします。
- ボルトを不均等に、または間違った順序で締める。
- ブレードを固定した後の位置合わせを確認していない。
これらの間違いに気付いたら、作業を中断して修正してから作業を続行してください。慎重にセットアップすることで、修理を回避し、マシンを良好な状態に保つことができます。
正しい手順については、お使いのマシンのガイドをご確認ください。特殊な機能を持つ刃が必要な場合は、お使いのマシンとカットのニーズに合ったカスタムオプションをご検討ください。
ブレード平行度校正
ギロチンの刃の平行度を確認しましょう。これにより、非常に正確な切断が可能になります。上刃と下刃は両方とも直線上に連動して動かなければなりません。刃が平行であれば、切断面の見栄えが良くなり、機械の寿命も長くなります。また、研磨刃の性能を維持するのにも役立ちます。平行度を確認すれば、毎回同じ結果が得られます。
並列性の測定
まず、上刃と下刃の平行度を測定します。この作業にはダイヤルゲージを使用します。下刃にダイヤルゲージを当てます。上刃をその軌道に沿って動かします。上刃の動きに合わせてダイヤルの位置を確認します。ダイヤルが変化する場合、上刃は平行ではありません。これは、上刃と下刃の間隔が異なっていることを意味します。この情報は、問題を解決するために必要です。
ヒント:刃の様々な箇所でダイヤルの目盛りを書き留めておきましょう。こうすることで、ムラのある箇所を見つけやすくなり、修正計画を立てやすくなります。
ブレードの位置調整
平行度の問題を修正するには、慎重に変更する必要があります。ブレードを正しく並べるには、以下の手順に従ってください。
- 下刃を取り外し、各部品を清掃してください。汚れがあると作業が台無しになる可能性があります。
- 刃が左右、上下ともに真っ直ぐになっているか確認してください。定規を使って確認しましょう。
- 下刃を動かすことで、せん断刃の隙間を調整します。これにより、刃間のスペースが変化します。
- 必要に応じて、下側のブレードの左右のネジを回して隙間を大きくします。
- 左右の止めネジを回して隙間を小さくします。
- 下刃テーブルのボルトを緩めます。これにより、刃を少し動かして調整できるようになります。
- 調整のため、上刃を適切な位置まで下げます。刃が触れないように注意しながら、刃が近い位置にあることを確認してください。
- 隙間ゲージを使って、隙間を約0.5mmに設定します。多くの材料の場合、この値から始めるのが良いでしょう。
- 隙間ゲージが3本のワイヤーにフィットし、5本にはフィットしなくなるまで調整を続けます。これで正確な隙間が得られます。
最良の結果を得るには、いくつかの手順を再度実行する必要があるかもしれません。各手順は、機械の切断精度を調整するのに役立ちます。切断面が不均一な場合や、より強い力が必要な場合は、せん断角度を変更してみてください。
注意:小さな変更を加え、その都度確認してください。急いで行うとミスが発生し、正確さが失われる可能性があります。
アライメントの検証
調整が終わったら、位置合わせを確認する必要があります。適切なツールと方法を使用して作業を確認してください。 下の表はいくつかの良い選択肢を示しています:
| ツール/テクニック | 目的/有効性 |
|---|---|
| 校正プローブ | サブミリメートルの精度を実現 |
| レーザー変位センサー | 高精度な位置合わせを実現 |
| マイクロメートル | アライメント検証のための正確な測定を保証する |
| レーザースキャナー | 点群登録による高精度 |
| 定規 | ブレードの位置合わせを目視で確認する |
作業内容とお手持ちの工具に最適なツールをお選びください。校正プローブとレーザーセンサーが最も精度の高いツールです。マイクロメーターと定規は、簡単なチェックに最適です。必ず、結果と材料や機械の仕様を比較してください。
リマインダー:アライメントチェックを記録しておきましょう。これにより、経時的な変化を把握でき、今後の調整が容易になります。
ギロチン刃のセットアップは、測定、調整、そしてアライメントの確認で完了です。これにより、カットの精度が向上し、マシンの良好な動作が維持されます。頻繁に確認と調整を行うことで、カット面はきれいになり、マシンの寿命も長くなります。
ブレードクリアランス構成

クリアランスの理解
調整を始める前に、ブレードクリアランスの意味を理解しておく必要があります。ブレードクリアランスは、ギロチンせん断機の上刃と下刃の間の隙間のことです。この隙間はランダムに決まるものではなく、切断したい材料に合わせて意図的に設定します。適切なクリアランスであれば、きれいでまっすぐな切断が可能です。クリアランスが適切でない場合、刃先が粗くなったり、刃が損傷したりする可能性があります。
素材によってクリアランス(隙間)のパラメータは異なります。紙のような柔らかい素材は、小さな隙間が必要です。これにより、刃先が破れたり、ギザギザに見えたりするのを防ぎます。鋼鉄のような硬い素材は、より大きな隙間が必要です。これにより、刃が素材をきれいに切り分けることができます。素材を変えるたびに、必ずクリアランスを確認してください。この手順により、切れ味が鋭くなり、機械の安全性も向上します。
ヒント:推奨クリアランス値については、必ずメーカーのガイドをご確認ください。これにより、機械を高精度に動作させることができます。
材料のクリアランスの設定
クリアランスは、切断したいものに合わせて設定する必要があります。素材によって必要なクリアランスは異なります。間違ったパラメータを使用すると、作業が台無しになったり、刃が早く摩耗したりする可能性があります。一般的な素材のクリアランス設定方法をご紹介します。
紙/段ボール
紙や厚紙は柔らかく薄いため、滑らかに切るには少しの隙間が必要です。隙間が広すぎると紙が破れたり、端がぼやけたりします。隙間が狭すぎると刃が早く摩耗する可能性があります。
- 隙間ゲージを使用して隙間を測定します。
- 薄い紙の場合は、約 0.1 mm のクリアランスから始めます。
- 厚い段ボールの場合は、隙間を少し広げても構いませんが、隙間は小さくしておいてください。
- テストカットをして、切り口の状態を確認します。ギザギザや不均一な切り口がある場合は調整してください。
注意:クリアランスの小さな変化がカット品質に大きな違いをもたらす可能性があります。大きな作業を始める前に必ずテストを行ってください。
プラスチック/Metals
プラスチックと金属には特別な注意が必要です。刃が熱くなりすぎたり、クリアランスが適切でなかったりすると、プラスチックは溶けてしまう可能性があります。鋼やアルミニウムなどのMetalは、きれいに切断するためにはより大きなクリアランスが必要です。
さまざまな材料に適切なクリアランスを設定するのに役立つ表を以下に示します。
| 材質タイプ | 最適なブレードクリアランス |
|---|---|
| 軟鋼 | 7.5%の材料の厚さ |
| アルミニウム | 歯数の多い刃を使用する |
| プラスチック | 60~80枚の刃を持つ刃を使用する |
- 軟鋼の場合、クリアランスは板厚の約7.5%に設定します。
- アルミニウムの場合は、歯数の多いブレードを使用し、隙間を頻繁に確認してください。
- プラスチックの場合は、刃の数が60または80の刃を使用してください。これにより、端が溶けるのを防ぐことができます。
最初の試作後は必ず切断面を確認してください。バリや溶けた部分が見られる場合は、クリアランスを調整して再度試してください。このプロセスにより、各作業で最高の精度を実現できます。
ヒント:各材料のクリアランスを書き留めておきましょう。この記録は、今後の作業時間を節約するのに役立ちます。
ジャッキボルトの使用
ジャッキボルトは、クリアランスの微調整に役立ちます。このボルトはブレードホルダーにあります。ジャッキボルトを回すと、ブレードがわずかに動きます。これにより、クリアランスを高精度に設定できます。
ジャッキボルトを使用するには、次の手順に従ってください。
- 下刃を固定しているネジを緩めます。
- ジャッキボルトをゆっくり回して、ブレードを上部のブレードに近づけたり遠ざけたりします。
- 隙間ゲージを使用して、ブレードに沿ったいくつかのポイントで隙間を確認します。
- ブレード間の隙間の調整が終わったらネジを締めます。
- テストカットを行ってクリアランスが正しいことを確認します。
両端と中央のクリアランスを必ず確認してください。この手順により、ブレード全体の隙間を均一に保つことができます。差がある場合は、ジャッキボルトを再度調整してください。この方法により、最良の結果が得られ、機械を最高の精度で稼働させることができます。
リマインダー:制作を始める前に、必ずクリアランスを再確認してください。この習慣はミスを防ぎ、きれいなカットを保つのに役立ちます。
クリアランスの確認
変更後は、必ずブレードのクリアランスを確認してください。ギロチンブレードのセットアップにおいて、この手順は非常に重要です。これにより、きれいな切断が可能になり、機械の安全性も確保されます。平行度とクリアランスを調整することで、それぞれの材料に対して適切なブレードのクリアランスを確保できます。
まず、ブレード全体のクリアランスを確認します。隙間ゲージを使用して、左端、中央、右端を測定します。隙間は、目標とする材料の隙間と同じである必要があります。隙間が異なる場合は、ジャッキボルトを再度回します。隙間がすべての箇所で同じであれば、設定は正しく完了です。
ブレードのクリアランスを確認するために使用できるチェックリストは次のとおりです。
- 両方のブレードとそれらが取り付けられている領域を清掃します。
- 隙間ゲージを刃に沿って 3 か所以上に当てます。
- ギャップがマテリアルの値と一致しているかどうかを確認します。
- サンプルピースでテストカットを行ってください。
- 切り口にバリ、ざらつき、破れなどがないか確認します。
- 問題がある場合はクリアランスを変更してください。
- 次回のために最終クリアランス値を書き留めておきます。
ヒント:毎回同じ測定ツールを使って測定しましょう。この習慣は間違いを防ぎ、結果を一定に保つのに役立ちます。
この表を使用して、クリアランスの良し悪しの兆候を見つけることができます。
| 観察 | それが意味するもの | 必要な行動 |
|---|---|---|
| 滑らかでまっすぐなエッジ | クリアランスは正しい | 生産開始 |
| ぼやけた、または破れた端 | クリアランスが広すぎる | ギャップを縮める |
| バリや欠け | クリアランスが狭すぎる | ギャップを広げる |
| 不均一なカット | クリアランスまたは平行度がずれている | 両方の設定を再確認してください |
新しい作業を始める前や材料を交換する前には、必ずクリアランスを確認してください。ギロチンブレードのセットアップにおけるこのステップは、材料を節約し、機械の良好な動作を維持します。平行度とクリアランスの調整は一度で完了するものではありません。最良の結果を得るには、これらの設定を頻繁に確認する必要があります。
精密カットのテスト
作業を始める前に、ギロチンブレードのセットアップをテストしてください。このステップで、平行度とクリアランスが適切であることを確認できます。問題を早期に発見し、修正することで、より良い切断が可能になります。
テストカット
まず、切断したい材料のサンプルを用意します。機械にセットし、安全ガードが正しく取り付けられていることを確認します。ギロチンカッターで1回切断します。刃が材料を切る様子を観察し、異音がないか、刃が引っかかっていないかを確認します。切断した材料を取り出し、端面を確認します。
素材を変える予定がある場合は、異なる素材で試してみてください。紙、段ボール、プラスチック、金属はそれぞれ独自の反応を示します。テストを行うことで、それぞれの素材に適した設定かどうかを確認できます。
ヒント:必ず、製造材料と同じ厚さと種類のサンプルを使用してください。この習慣は、正しい結果を得るために役立ちます。
結果の評価
テストカットが終わったら、結果をよく確認してください。目と手で切り口をよく見てください。測定ツールを使えば、より詳細な情報を得ることができます。下の表は、テストカットを確認する際に確認すべき点を示しています。
| 基準 | 説明 |
|---|---|
| 機械性能 | 切断中に曲がったり方向が変わったりしないか確認してください。 |
| 応力解析 | 切り口に跡や不均一な圧力がないか確認してください。 |
| 切断面の品質 | 切り口が滑らかかどうかを確認し、バリや曲がった端がないか確認します。 |
適切なカットサイン
ギロチンの刃のセッティングが適切であることを示す兆候がいくつかあります。これらの兆候は、カットが正確であることを意味します。
- 切り口は滑らかで真っ直ぐです。
- バリやザラつきはありません。
- 切断部付近では素材が曲がったりねじれたりしません。
- 刃は材料の上を簡単に進みます。
これらの兆候が見られたら、生産を開始できます。機械は正確な作業を行う準備ができています。
欠陥指標
テストカット後に問題が見つかる場合があります。これらの不具合は、設定を調整する必要があることを意味します。
- ぼやけたり破れたりしたエッジは、クリアランスが広すぎることを意味します。
- バリや欠けはクリアランスが狭すぎることを示します。
- 不均一な切り口は刃が平行でないことを意味します。
- 曲がりや応力の跡は、ブレードの位置合わせや機械の圧力に問題があることを示します。
これらの欠陥を書き留めて、チェックリストと比較してください。これにより、何を変更すればよいかがわかります。
注意:必ず切り口の両側を確認してください。片側だけに問題が現れる場合もあります。
微調整
テストカット中に小さな問題が見つかった場合は、少し変更を加えることで修正できます。ギロチンブレードのセットアップを微調整するには、以下の手順に従ってください。
- 刃が揃っているか確認してください。刃が平行で、均等な間隔になっていることを確認してください。必要に応じて調整してください。
- 刃の切れ味を確認してください。鈍い部分がある場合は、刃を研ぐか交換してください。
- 材料の厚さと種類を確認してください。機械の限界値に合致していることを確認してください。
- 油圧システムを確認してください。オイルレベルが適切であること、漏れがないか確認してください。
- マシンを清掃し、オイルを注してください。清潔に保つことで、より良いカットが得られます。
変更するたびに再度テストを行いましょう。これにより、作業に最適な切断精度が得られます。変更内容と結果を記録してください。これらのメモは、次回の作業効率向上に役立ちます。
リマインダー:小さな変化が大きな違いを生むことがあります。ゆっくりと進め、変化のたびに結果を確認してください。
ギロチンブレードのセットアップをテスト、点検、微調整することで、正確で信頼性の高いカットを実現できます。このルーチンは、問題を回避し、マシンを良好な状態に保つのに役立ちます。
セットアップの問題のトラブルシューティング
ギロチンブレードのセットアップが完了した後でも、切断に問題が残る場合があります。よくある問題のトラブルシューティングは、これらの問題を迅速に特定し、解決するのに役立ちます。各ステップで何に注意し、どのように制御するかを知っておく必要があります。このセクションでは、欠陥の診断、平行度の修正、クリアランスの問題の解決について説明します。また、トルクの問題への対処方法を学び、精度と制御性を向上させる方法も学びます。
欠陥の診断
裁断面を見て、機械の音を聞くことで、多くの問題に気付くことができます。それぞれの欠陥は、あなたの機械のセットアップについて何かを物語っています。よくある問題のトラブルシューティングには、以下の表をご活用ください。
| 欠陥 | 考えられる原因と解決策 |
|---|---|
| 不均等なカット | – テーブルレベル:カッティングテーブルが水平になっていることを確認してください。必要に応じて調整してください。 – 材料の配置: 材料を刃の下にまっすぐ均等に置きます。 – 摩耗した部品:ギアとベルトの摩耗を点検し、損傷している場合は交換してください。 |
| 騒音と振動 | – 緩んだ部品: すべてのネジとボルトを締めます。 – 潤滑不足: マニュアルに示されているように可動部分に潤滑油を注してください。 – 内部損傷: ノイズが大きく続く場合は専門家の助けを求めてください。 |
| 安全機能が動作しない | – センサーの故障: センサーを清掃するか、交換してください。 – Safety Switch Problems: Test and replace bad switches. |
Fuzzy Edges
You might see fuzzy or torn edges after a cut. This usually means the blade clearance is too wide. You need to control the gap between the blades. Check your clearance with a feeler gauge. Make small changes until the edge looks clean. If the problem stays, check the blade sharpness. Dull blades can also cause fuzzy edges. Replace or sharpen the blade if needed.
Chipping/Burrs
Chipping or burrs on the cut edge show that the clearance is too tight. You need to control the space between the blades. Open the gap a little and test again. Burrs can also mean the blade is chipped or damaged. Inspect the blade for chips and replace it if you find any. Always use high-quality blades for better control and accuracy.
不均等なカット
Uneven cuts can happen for many reasons. The table might not be level, or the material might not sit straight. You need to control the placement of your material. Make sure the table is flat and the material lines up with the blade. Worn gears or belts can also cause uneven cuts. Check these parts and replace them if you see damage. If the problem stays, check the parallelism of your blades.
Correcting Parallelism
Parallelism means both blades move in a straight line together. If you see uneven cuts, you need to control the blade positions. Follow these steps to fix parallelism problems:
- Adjust the blade gap to match the thickness of your material. This reduces pressure and stops deformation.
- Set the shear pressure for your material and thickness. This gives you even shear force.
- Replace or grind blades often to keep them sharp and in good shape.
- Fix the sheet in place before cutting. This keeps the cut straight.
- Adjust the blade installation so the shear force spreads out evenly.
- Check blade wear often. Adjust the installation angle to keep the blades parallel.
Tip: Write down each change you make. This helps you control your setup and makes future troubleshooting easier.
Resolving Clearance Problems
Clearance problems can cause many defects. You need to control the gap between the blades for each material. Use these steps to fix clearance issues:
- Check blade sharpness often. Sharp blades give you neat cuts and better control.
- Inspect blades for chips. Keep them in good shape to stop defects in your work.
- 使用 high-quality materials. Cheap materials can cause more problems and are harder to control.
- Lubricate blades when cutting aluminum. This helps you get smooth cuts and reduces defects.
- Make sure the backgauge is parallel. Set the squaring arm square for better accuracy and control.
Note: Always check the clearance before you start a new job. This habit gives you more control and helps you avoid mistakes.
You can solve most problems by taking control of your guillotine blade setup. Troubleshooting helps you keep your cuts clean and your machine safe. When you know what to look for, you can fix issues fast and keep your accuracy high.
Torque Issues
Torque is very important when you set up a guillotine blade. You must tighten bolts with the right force. If you use too much, you might break the blade or the mount. If you use too little, the blade can move while cutting. Both of these problems can mess up parallelism and clearance.
You can find torque problems by watching for these signs:
| 症状 | それが意味するもの | あなたがすべきこと |
|---|---|---|
| Blade movement | Bolts are too loose | Retighten bolts with correct torque |
| Cracked blade or mount | Bolts are too tight | Replace damaged parts and use proper torque |
| 不均一なカット | Pressure is not even across blade | Check torque sequence and retighten bolts |
You should always use a torque wrench for this job. This tool helps you use the right amount of force. Look in the manual to find the correct torque value. If you skip this, the blade might not line up right and your cuts will be bad.
Here are steps to help you avoid torque mistakes:
- Clean all bolt threads before you start. Dirt can change how tight the bolts get.
- Use a torque wrench that is set right. Set it to the number in your manual.
- Tighten bolts in the order the manual says. Start in the middle and go out in a crisscross way.
- Check every bolt after you finish. Make sure none are too loose or too tight.
- Write down the torque numbers and order in your log book.
Tip: If you hear a click or see the blade move after cutting, stop and check all bolts. Fixing things fast can stop bigger problems.
Check the torque often, especially after you use the machine a lot or change the blade. The right torque keeps the blade safe and helps with parallelism and clearance. You get better cuts and protect your machine from harm.
If you find a torque problem, fix it right away. Use the right tools and follow these steps. Controlling torque keeps your guillotine blade setup safe and working well.
ブレード校正のメンテナンス
検査スケジュール
You need to check your guillotine blade often to keep it working well. Look at the blades every day for dirt, chips, or rust. Clean the blade area and put oil on moving parts. These steps help your machine run better.
Each week, sharpen the blades if they are dull. Change the blade gap and look at the electrical parts for damage. Doing this stops bigger problems before they start. Once a month, clean the machine very well and check all the parts. Calibrating parallelism and clearance during these checks keeps your cuts good.
Once a year, do a big checkup on your machine. If your guillotine has digital controls, update the software. This helps stop sudden breakdowns and keeps your machine safe.
Regular service stops accidents and makes your guillotine last longer. You get better work and fewer problems when you follow a schedule.
Here is an easy checklist for your inspection:
| 頻度 | Tasks to Complete |
|---|---|
| 毎日 | Visual inspection, lubrication, cleaning |
| 週刊 | Blade sharpening, gap adjustment, electrical check |
| 月次 | Deep cleaning, mechanical inspection, calibration |
| Annual | Overhaul, software updates, full system check |
洗浄と潤滑
You must keep your guillotine blades clean and oiled for the best results. Dirt and old oil can make the blade wear out faster. Wipe the blade with a lint-free cloth every day. Use 3-in-1 oil on both sides of the blade. This oil helps the blade move well and stops rust. Do not use WD-40 because it does not protect the blade and can cause more wear.
Spray oil on both sides of the blade after you use it. For hard jobs, use a stronger coolant, especially for thick or tough materials. Always keep blades in a dry place to stop rust and damage.
Cleaning and oiling your blade often helps it last longer. You will see smoother cuts and less machine trouble if you do this.
Blade Wear Monitoring
You need to check for blade wear so your guillotine does not break by surprise. Look at the blade edge for chips bigger than 0.5mm. Use a 10x magnifier to see small chips or cracks. Check for rust, dents, or rough spots on the blade. These signs mean the blade needs fixing.
Check if your blades line up using a laser tool. The blades should be within 0.02mm of each other. If the gap is bigger, recalibrate parallelism and clearance right away. Watch for rust or chipping. Replace or sharpen the blade if you see damage.
Tip: Write down what you find after each check. Keeping notes helps you see problems early and plan fixes before things get worse.
If you follow these steps, your guillotine blade setup will stay safe and accurate. Regular checks, cleaning, and watching for wear help your machine work its best.
Calibration Records
You should keep clear calibration records for every guillotine blade setup. These records help you see changes and find problems. They also help you make your work better. When you calibrate parallelism and clearance, write down each adjustment you make. Good records make your job easier and help you get better results.
You can use a logbook or a digital spreadsheet. Write the date, material type, blade clearance, and parallelism measurements. Also write the torque values and any problems you notice. If you change the blade or adjust the setup, record why you did it and what happened.
Here is a sample table for your calibration records:
| 日付 | 材質タイプ | ブレードクリアランス | Parallelism Reading | Torque Value | Notes/Issues Found |
|---|---|---|---|---|---|
| 2024-06-01 | 厚紙 | 0.15 mm | 0.02 mm | 45 Nm | Smooth cut, no defects |
| 2024-06-02 | 軟鋼 | 0.75 mm | 0.03 mm | 50 Nm | Minor burrs, adjusted |
| 2024-06-03 | プラスチック | 0.20 mm | 0.01ミリメートル | 40 Nm | Clean edge |
Tip: Always update your calibration records after you set up the guillotine blade. This habit helps you see patterns and fix problems faster.
Look at your records before you start a new job. Check for settings that worked well with the same materials. If you see the same problem more than once, use your notes to find out why. Calibration records help you keep your guillotine blade setup steady and reliable.
You can use your records to teach new workers. Show them how to calibrate parallelism and clearance by looking at old setups. This saves time and helps stop mistakes.
If you use digital records, back up your files often. You do not want to lose important data. If you use paper records, keep your logbook in a safe place.
Calibration records are important for guillotine blade setup. They help you keep high precision, improve safety, and make your machine last longer. When you calibrate parallelism and clearance, good records make every step easier.
CNCギロチンせん断機の構成
Factories use cnc guillotine shearing machines to cut things very accurately. These machines help you make the same cut over and over again. If you know how to set up the machine, you can make your work better. This section will show you how automatic calibration, blade setup, and custom options help you get great results.
自動校正
You do not have to adjust everything by hand with a cnc guillotine shearing machine. The machine can check and fix its own settings. This makes your job easier and helps you get better cuts. The machine moves the blades to the right spot by itself. You get the same good cut every time because of this.
- Automatic calibration helps the machine work its best.
- You get the same cut each time you use it.
- The machine checks itself often to stay accurate.
- Checking calibration often is important for good results.
You do not just calibrate once and forget about it. The cnc guillotine shearing machine does this job again and again. This saves you time when you set up the machine. You can trust the machine to cut well, even after many uses.
Tip: Look at your machine’s manual to see when to check calibration. Doing this often helps you avoid mistakes and keeps your cuts nice.
Integration with Precision Blades
You can use strong, sharp blades with your cnc guillotine shearing machine. Nanjing Metal Industrial blades work well with these machines. These blades fit many machines and can cut different materials. You can use them for paper, cardboard, plastic, or metal.
When you set up your cnc guillotine shearing machine, pick the right blade for your job. The machine lets you change the blade’s spot, angle, and gap very exactly. You can use the cnc controls to make small changes. This helps you get smooth, straight cuts.
The cnc system can also remember your favorite blade settings. This saves you time when you switch jobs. You do not have to set everything again. The machine remembers what you did last time and uses those settings.
Note: Always look at the blade before you start a new job. A sharp blade that fits well gives you the best cut.
カスタマイズオプション
You can pick from many custom choices with a cnc guillotine shearing machine. These choices help you make the machine fit your needs. You can pick different blade sizes, edge angles, and ways to mount the blade. The table below shows some common custom features:
| カスタマイズ機能 | 説明 |
|---|---|
| Tailored Dimensions | Custom sizes to fit specific machinery and operational needs. |
| Edge Angles | Options ranging from 15° to 45° to enhance cutting performance. |
| Mounting Configurations | Custom mounting options to ensure compatibility with different machines. |
| カスタマイズされたソリューション | Custom manufacturing to meet specific requirements for optimal performance. |
If you need to cut special materials, you can ask for a special blade. The cnc guillotine shearing machine lets you change settings for your job. You can set how the machine cuts, program the order, and pick the right machine for your work.
When you pay attention to these settings, your machine works better. You can get more done, waste less, and make better cuts. Picking the right machine and using the best settings helps you do well in your work.
Reminder: Write down any changes you make to your machine’s setup. This helps you do the same thing next time and not make old mistakes.
You can see how cnc guillotine shearing machine setup, automatic calibration, and custom blades all work together. These things help you cut with high accuracy and work faster.
精密セットアップの影響
Precision setup makes your guillotine blade work better every day. When you calibrate parallelism and clearance, your cuts look cleaner and are safer. Your equipment lasts longer and works more efficiently.
刃の寿命
You want blades to last a long time. Precision setup helps you do this. When you align and calibrate blades, you stop wear and early damage. You avoid chips and cracks from bad alignment. The blade edge stays sharp for more cuts.
Here are results from real factories:
| 証拠の種類 | 詳細 |
|---|---|
| ブレードの寿命 | Blade life went from 10 to 42 days, a 4x increase |
| ダウンタイムの削減 | Downtime dropped by 65%, blade changes by 50% |
| メンテナンス費用の節約 | Yearly blade costs went down by $18,000 |
Precision setup means fewer blade changes and less downtime. You spend less time fixing problems and more time cutting. High-concentricity blades break 67% less, so you work safer and more efficiently.
コスト効率
Save money with a precision guillotine blade setup. You waste fewer materials and produce less waste. You also need to buy fewer new blades and have fewer repairs. Companies that calibrate parallelism and clearance save a lot.
- Packaging companies saved $150,000 each year by wasting less.
- Better blades helped companies save 28% in costs.
- Meat plants had zero blade failures with custom blades.
Optimizing for efficiency leads to real savings. You spend less on maintenance and get more from each blade. You lower yearly blade costs and keep your budget steady.
Productivity Gains
精密なセットアップにより、作業がより迅速かつスマートになります。より短時間でより多くのピースを切断でき、機械の稼働を維持できます。修理や刃の交換のために機械を停止する必要も減ります。ボックスファクトリーでは、キャリブレーションと最適化により、ダウンタイムを14時間から5時間未満に短縮しました。
効率を高める方法は次のとおりです。
- 1 時間ごとにカットが増えます。
- 転職が早くなります。
- より少ない停止でマシンを稼働させ続けることができます。
- 無駄ややり直しを削減します。
完成品が増え、遅延が減ります。チームの生産性が向上し、日々の生産性が向上します。ギロチンブレードの正確なセットアップと、平行度とクリアランスの調整により、最適化と効率化の目標達成に貢献します。
ヒント:設定と結果の記録を残しておきましょう。精度と効率性を高めることで、時間の経過とともに作業の質が向上していくことがわかります。
ギロチンブレードのセットアップ手順をすべて守ることで、より良い結果が得られます。頻繁に確認と調整を行うことで、きれいな切断が可能になります。また、機械を損傷から守ることもできます。Nanjing Metal Industrialでは、様々な用途に対応するブレードを取り揃えており、カスタムメイドのブレードも製作可能です。ご不明な点やプロジェクトに関するご相談は、お気軽にお問い合わせください。 弊社の営業エンジニアにお問い合わせくださいこれらの良い習慣は、マシンの正常な動作とコストの節約に役立ちます。
よくある質問
ギロチンブレードのセットアップで最も重要なステップは何ですか?
まず、平行度とクリアランスを確認する必要があります。これらの手順は、きれいな切断に役立ちます。また、機械の安全性も確保します。何かを切断する前に、必ず平行度とクリアランスを測定し、調整してください。
平行度とクリアランスはどのくらいの頻度で調整する必要がありますか?
材料を交換する際は、これらの設定をキャリブレーションする必要があります。また、カットの仕上がりが悪い場合にもキャリブレーションを行ってください。定期的なチェックは、カットをきれいに保ち、マシンを保護するのに役立ちます。
すべての材料に同じクリアランスを使用できますか?
いいえ、すべての材料に同じクリアランスを適用することはできません。それぞれの材料には適切なクリアランスが必要です。柔らかい材料には小さなクリアランス、硬い材料には大きなクリアランスが必要です。切断する材料に合わせて、常にクリアランスを調整してください。
ギロチンブレードを正確にセットアップするにはどのようなツールが必要ですか?
トルクレンチと隙間ゲージが必要です。また、定規やダイヤルゲージなどの測定工具も必要です。清潔な工具を使うことで、平行度とクリアランスを正しく設定できます。
切り口にバリやざらざらした部分があるのはなぜですか?
バリや粗いエッジは、クリアランスが狭すぎることを意味します。また、刃が鈍くなっている可能性もあります。クリアランスを確認し、調整してください。必要に応じて刃を研ぐか交換してください。
ブレードが平行かどうかはどうすればわかりますか?
ダイヤルゲージまたは定規を使って確認します。刃の異なる箇所で隙間を測定します。隙間はどの箇所でも同じである必要があります。もし違う場合は、刃が合うように調整してください。
平行度とクリアランスを校正した後は何を記録すればよいですか?
日付と材料の種類を書き留めてください。クリアランス値と平行度の測定値を記録してください。発見した問題点はすべて記録してください。適切な記録は、適切な設定を繰り返すことや、問題をより迅速に解決することに役立ちます。
参照
ギロチン刃 vs. シャー刃:違いは何?あなたの仕事に最適なのは?