È necessario impostare la lama della ghigliottina con attenzione per garantire prestazioni ottimali. Questo installazione lame per ghigliottina ti aiuta a ottenere tagli puliti mantenendo la tua macchina sicura. Parallelismo e gioco sono fattori cruciali che influenzano sia la qualità dei tagli che la longevità della tua attrezzatura. Fai riferimento a la tabella sottostante, che illustra come piccole modifiche possano avere un impatto significativo sui risultati:
| Aspetto | Impatto sulla qualità del taglio | Impatto sulla durata della macchina |
|---|---|---|
| Distanza della lama | Un gioco eccessivo provoca bordi irregolari, mentre uno troppo piccolo provoca un'usura più rapida della lama. | La giusta distanza riduce l'usura e prolunga la durata della macchina. |
| Parallelismo della lama | Un disallineamento della lama provoca tagli irregolari. | Un corretto allineamento previene usura e danni eccessivi. |
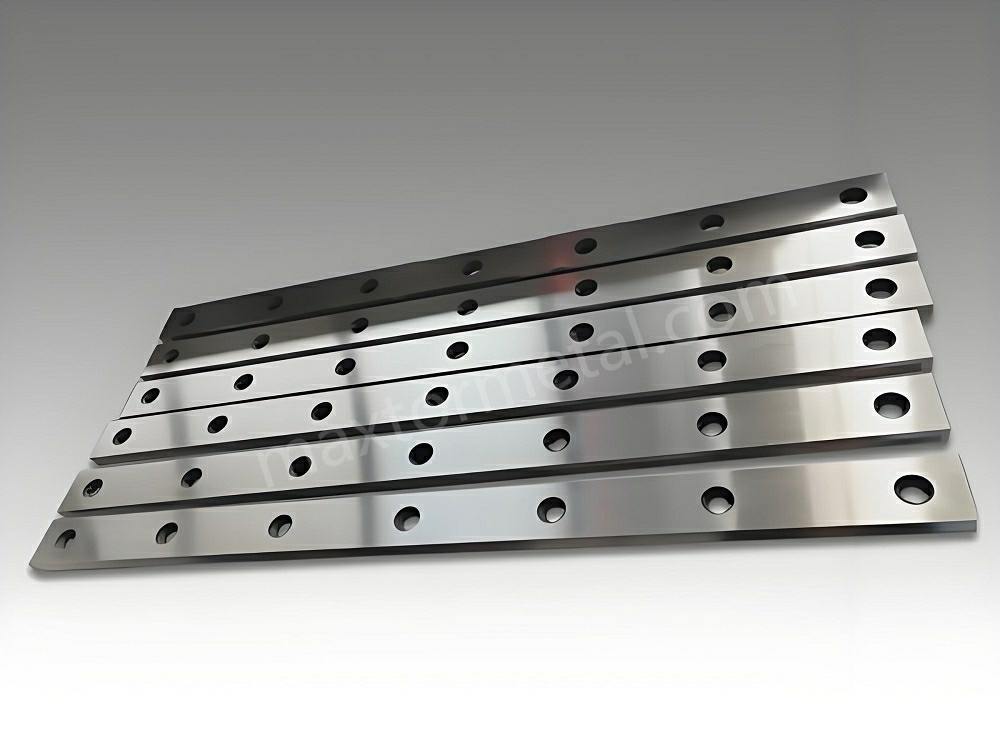
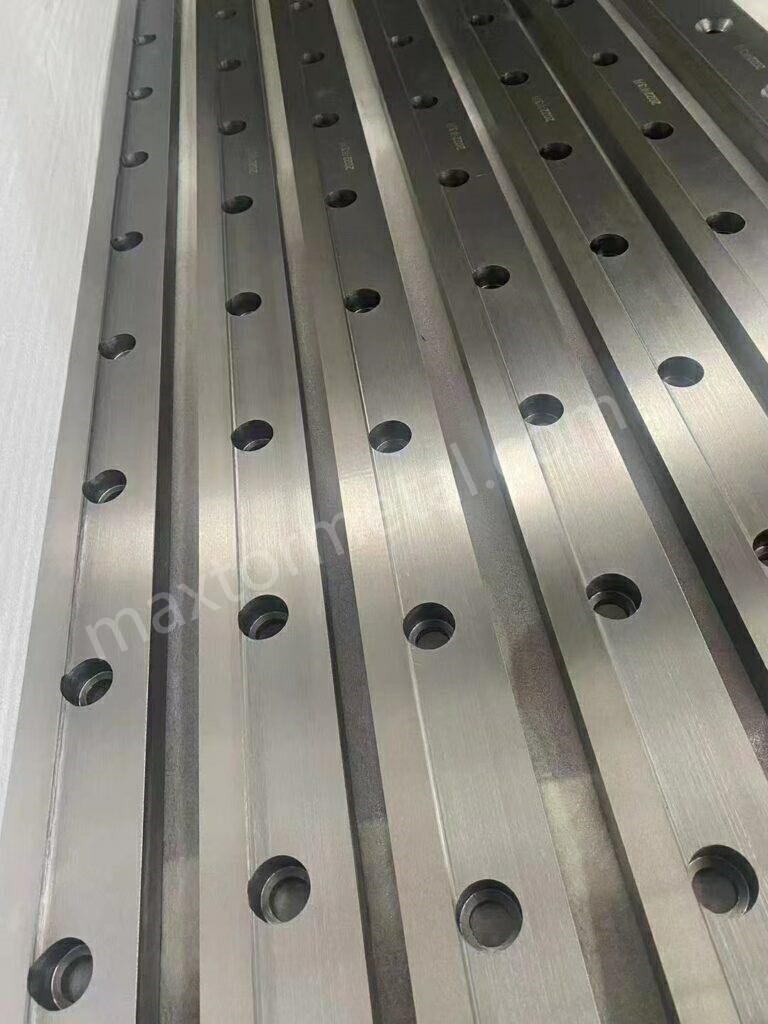
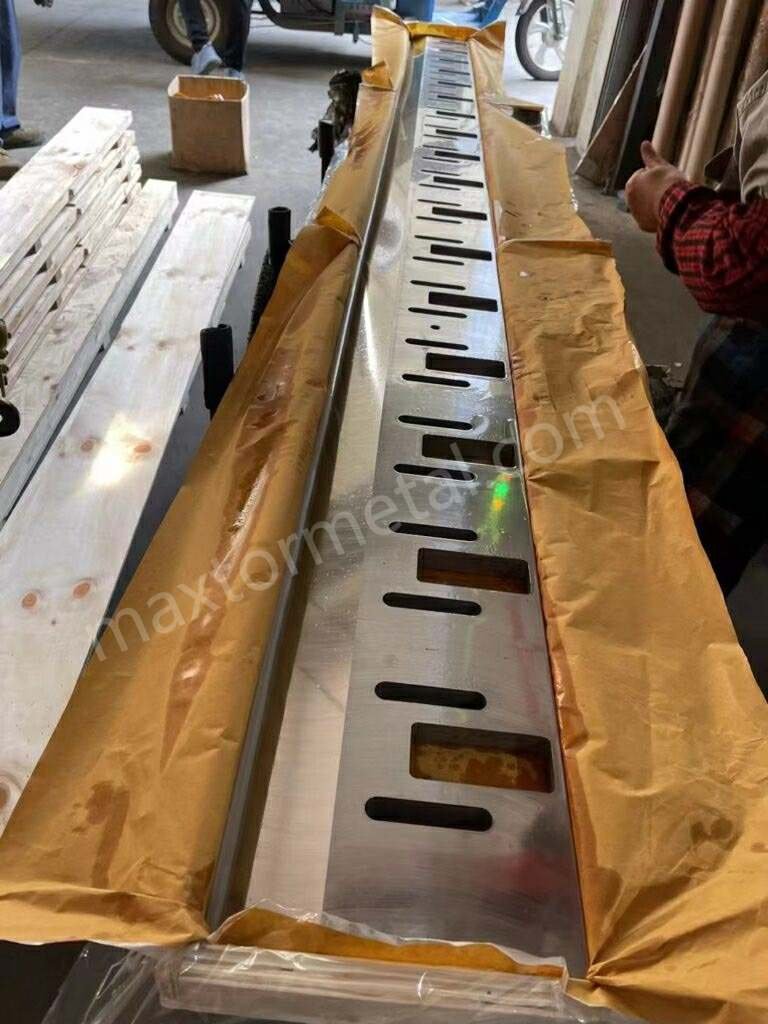
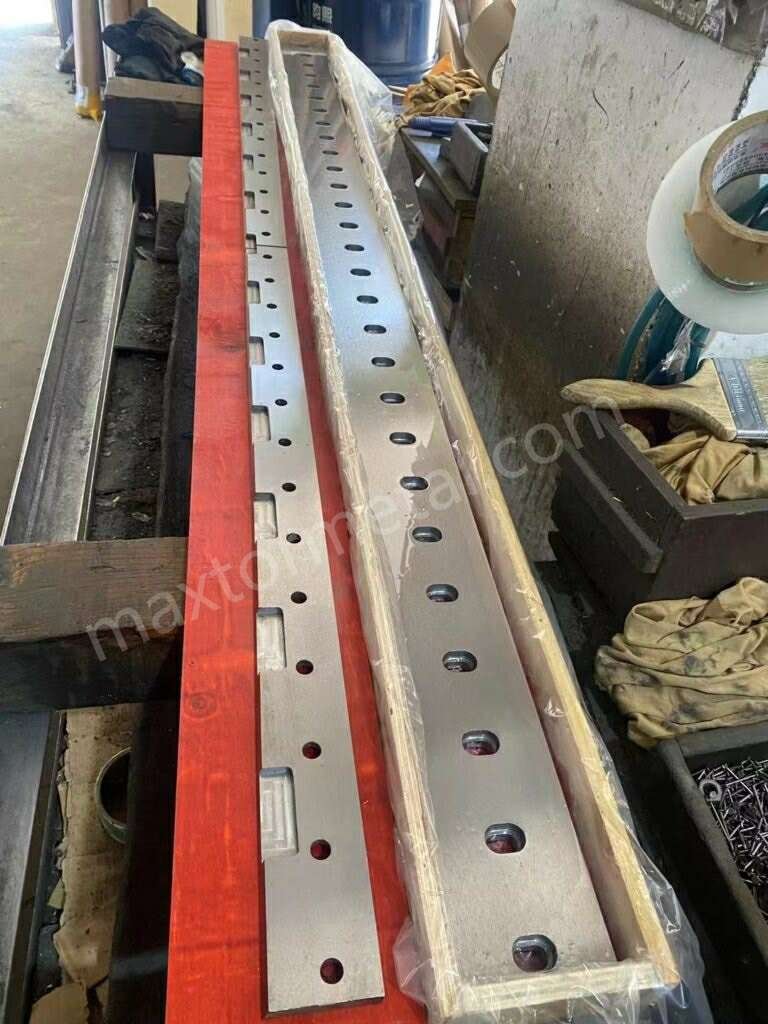
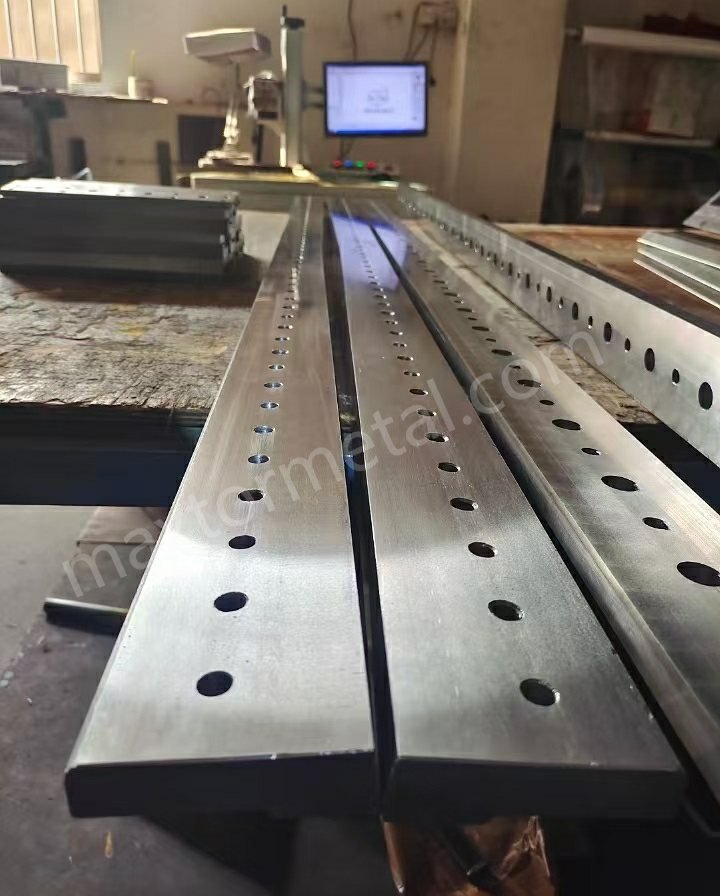
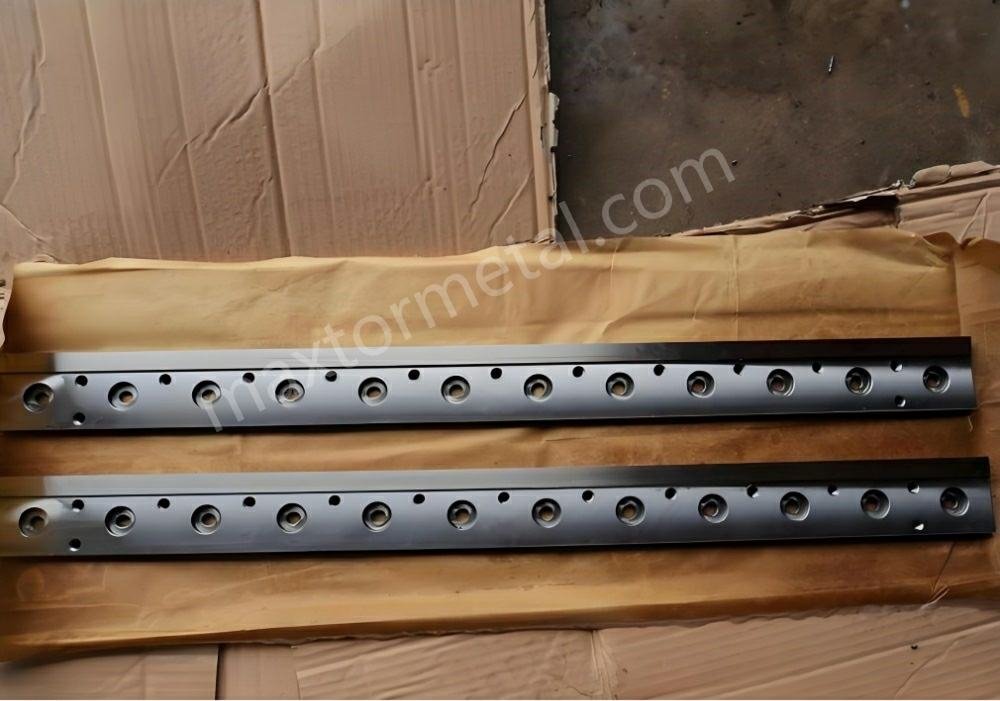
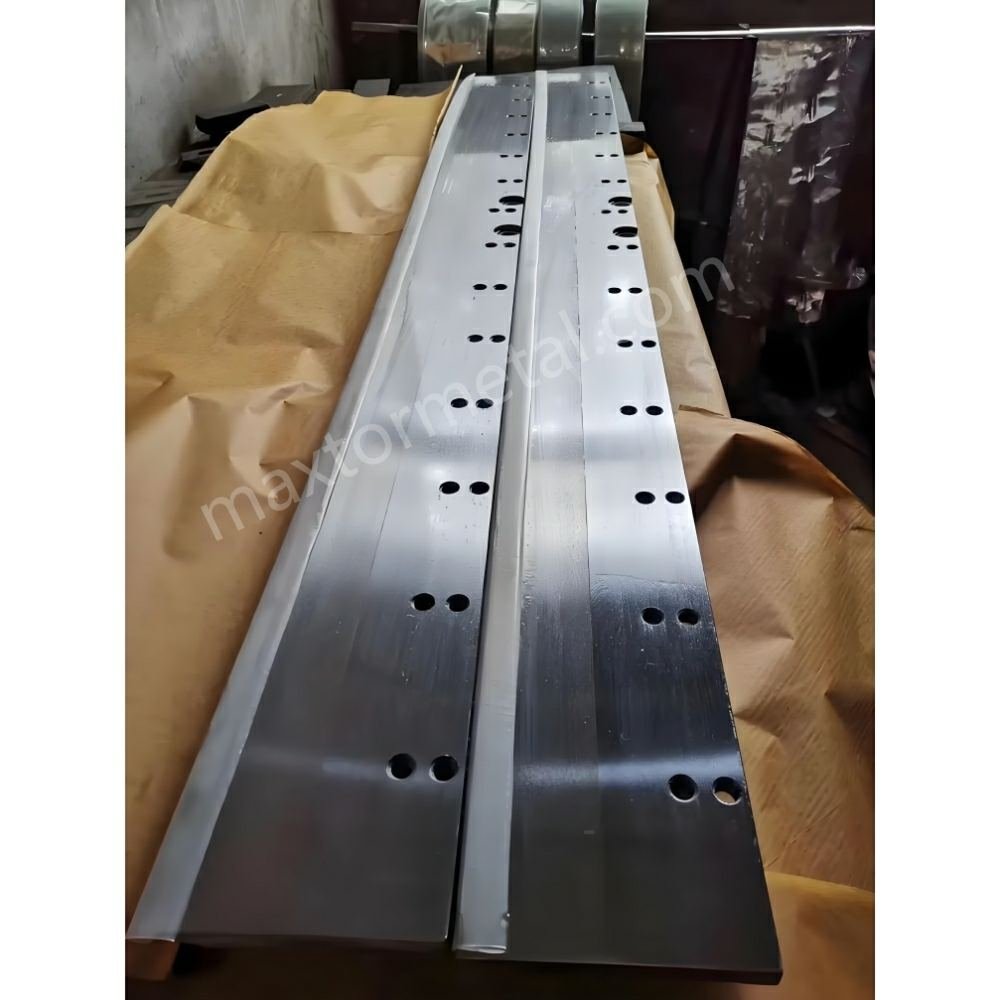
Nanjing Metal Industrial offre una varietà di lame adatte a numerose applicazioni, garantendoti il taglio giusto per ogni utilizzo della ghigliottina.
Punti chiave
- Una corretta impostazione della lama a ghigliottina garantisce tagli netti e contribuisce anche a una maggiore durata della macchina. Verificare sempre il parallelismo e il gioco prima di iniziare.
- La sicurezza viene prima di tutto. Indossare i DPI e seguire le procedure di blocco. Questo vi garantirà la massima sicurezza durante l'installazione.
- Utilizza strumenti precisi come comparatori e chiavi dinamometriche. Questi strumenti ti aiutano a verificare che il parallelismo e il gioco delle lame siano corretti.
- Mantieni pulito il tuo spazio di lavoro per evitare pericoli. Un'area ordinata ti aiuta a prestare attenzione. Riduce anche il rischio di incidenti durante l'installazione della lama.
- Modifica la distanza della lama in base al materiale da tagliare. I materiali più morbidi richiedono spazi più piccoli. I materiali più duri richiedono spazi più grandi per ottenere risultati ottimali.
- Controlla e pulisci spesso le lame della ghigliottina. Questo previene l'usura e ne mantiene il corretto funzionamento. Pianifica queste operazioni in modo da ricordarle.
- Annotare tutte le impostazioni e le modifiche di calibrazione. Tenere traccia di queste informazioni aiuta a ripetere le impostazioni corrette e a risolvere i problemi più velocemente.
- Prova la tua configurazione con dei tagli di prova prima di iniziare il lavoro vero e proprio. Questo passaggio individua i problemi in anticipo e ti aiuta a ottenere ottimi risultati.
Sicurezza nella configurazione della lama della ghigliottina

Ogni volta che si installa una lama a ghigliottina, bisogna pensare alla sicurezza. Seguendo i passaggi corretti, si protegge la propria sicurezza e quella degli altri. Se non si presta attenzione, ci si può fare male rapidamente. È necessario conoscere i pericoli prima di iniziare.
Procedure di DPI e di blocco
Indossare sempre dispositivi di protezione individuale (DPI) quando si lavora con le lame a ghigliottina. I guanti aiutano a proteggere le mani dai bordi taglienti. Gli occhiali di sicurezza proteggono gli occhi dai frammenti volanti. Gli stivali con punta in acciaio proteggono i piedi da oggetti pesanti. Se la macchina è rumorosa, indossare anche protezioni acustiche.
Le procedure di blocco impediscono l'avvio accidentale della macchina. Spegnere la macchina e scollegarla prima di installare la lama a ghigliottina. Utilizzare etichette di blocco in modo che gli altri sappiano che la macchina non è sicura da usare. Assicurarsi che tutte le parti mobili siano ferme prima di toccare la lama. Questo passaggio protegge da movimenti improvvisi.
Suggerimento: controlla sempre l'interruttore di alimentazione e l'etichetta di blocco prima di iniziare a lavorare. Questa abitudine può evitare di farti male gravemente.
Maneggio sicuro della lama
Bisogna fare molta attenzione quando si maneggiano le lame a ghigliottina. I bordi sono affilati e possono tagliare i guanti se non si presta attenzione. Usare sempre entrambe le mani per sollevare o spostare una lama. Tenere la lama lontana dal corpo. Appoggiarla delicatamente su una superficie piana.
Molte persone si fanno male quando le loro dita rimangono incastrate durante l'installazione della lama della ghigliottina. La tabella seguente mostra alcuni lesioni comuni e le loro cause:
| Tipo di lesione | Causa della lesione |
|---|---|
| dita schiacciate o amputate | Dita incastrate tra i morsetti che tengono la lamiera |
| Dita incastrate sotto il lenzuolo | Dita incastrate accidentalmente durante l'operazione |
| Lesioni da sforzo | Sollevamento di lamiere grandi o scomode |
È possibile prevenire questi infortuni rimanendo vigili e sollevando la lama nel modo giusto. Chiedere aiuto a qualcuno se la lama è pesante o difficile da impugnare. Non avere fretta quando si posiziona la lama.
Preparazione dell'area di lavoro
Un'area di lavoro pulita e ordinata contribuisce alla sicurezza durante l'installazione della lama della ghigliottina. Raccogli tutto ciò che non rientra nell'area. Assicurati che il pavimento sia asciutto e privo di olio o residui. Una buona illuminazione aiuta a vedere meglio. Tieni gli utensili vicini ma lontani dalle parti in movimento.
Delimitare uno spazio libero attorno alla macchina. Solo personale qualificato dovrebbe accedere a quest'area durante l'installazione della lama della ghigliottina. Questa regola aiuta a prevenire incidenti. Verificare che tutte le protezioni di sicurezza siano installate prima di iniziare la calibrazione del parallelismo e del gioco.
Nota: controlla spesso il tuo spazio di lavoro per individuare eventuali pericoli. Un luogo sicuro ti aiuta a lavorare con attenzione e ti protegge da infortuni.
Seguendo questi passaggi, il processo sarà più sicuro. La sicurezza tutela te, i tuoi colleghi e la tua attrezzatura. Metti sempre la sicurezza al primo posto quando installi una lama a ghigliottina.
Strumenti per l'installazione di precisione
Per installare una lama a ghigliottina, servono gli strumenti giusti. Strumenti precisi aiutano a regolare parallelismo e gioco. Questi strumenti garantiscono tagli puliti e mantengono la macchina sicura.
Strumenti di misura
Per questo lavoro è necessario utilizzare strumenti di misura precisi. Questi strumenti verificano parallelismo e allineamento. Ottime misurazioni consentono di ottenere tagli migliori e contribuiscono a una maggiore durata della macchina.
Nella tabella seguente sono elencati i due principali strumenti di misurazione:
| Tipo di strumento | Caratteristiche principali |
|---|---|
| AF-X | Misurazione senza contatto rapida e precisa, raccoglie fino a 20.000 punti dati al secondo, incertezza di 10 micron. |
| Macchina di misura a coordinate (CMM) | Maggiore precisione e flessibilità, possibilità di eseguire varie routine di ispezione senza bisogno di strumenti specifici per ogni tipo di pala. |
AF-X è veloce e fornisce risultati estremamente precisi. La CMM è flessibile e si adatta a molti tipi di lama. Entrambi gli strumenti aiutano a impostare correttamente parallelismo e gioco.
Suggerimento: controlla gli strumenti di misura prima di utilizzarli. Pulisci le lenti e le superfici per evitare errori.
Utilizzo della chiave dinamometrica
Per installare una lama a ghigliottina è necessaria una chiave dinamometrica. Questo strumento aiuta a applicare la giusta forza sui bulloni. Evita un serraggio irregolare e mantiene la lama in sicurezza.
- Utilizzare una chiave dinamometrica calibrata quando si installa la lama.
- Rispettare i valori di coppia indicati nel manuale della macchina.
- Non usare una forza non uniforme, altrimenti potresti danneggiare la lama.
Una chiave dinamometrica mantiene la lama salda e sicura. Previene anche problemi come deformazioni o crepe. Usare la coppia corretta è importante per il parallelismo e il gioco.
Nota: serrare i bulloni nell'ordine indicato nel manuale. Questo passaggio mantiene la pressione uniforme e aiuta a mantenere la configurazione corretta.
Prodotti per la pulizia
Strumenti e superfici pulite aiutano a ottenere buoni risultati. Polvere, olio e sporco possono compromettere le misurazioni e l'allineamento. Hai bisogno di prodotti per la pulizia per preparare la tua area di lavoro.
Inizia con panni privi di lanugine per pulire lame e supporti. Usa solventi delicati per rimuovere il grasso. Le spazzole ti aiutano a pulire i piccoli spazi. Pulisci gli strumenti di misurazione prima e dopo l'uso. Questa abitudine mantiene la tua attrezzatura efficiente.
Un'area pulita ti aiuta a impostare correttamente parallelismo e gioco. Commetti meno errori e proteggi la tua macchina.
Promemoria: conserva i prodotti per la pulizia in un luogo sicuro. Cambia spesso panni e spazzole vecchi.
Utilizzare gli strumenti giusti aiuta a tagliare meglio e a prolungare la durata della macchina. Strumenti di misura, chiavi dinamometriche e prodotti per la pulizia sono tutti elementi essenziali per la configurazione della lama della ghigliottina. Includi questi strumenti nella tua routine quando imposti parallelismo e gioco.
Installazione della lama della cesoia a ghigliottina
L'installazione di una lama a ghigliottina inizia con un'attenta manutenzione. È necessario seguire ogni passaggio per garantire la sicurezza e il corretto funzionamento della macchina. Questa parte mostra come rimuovere le vecchie lame, controllare i supporti e installare la nuova lama della cesoia a ghigliottina. Imparerai anche come evitare errori e utilizzare il corretto ordine di coppia.
Rimozione delle vecchie lame
È necessario rimuovere la vecchia lama della cesoia a ghigliottina prima di montarne una nuova. Questo mantiene la macchina in buone condizioni e contribuisce alla sicurezza. Seguire questi passaggi per rimuovere la lama in modo sicuro e rapido:
- Rimuovere la piastra anteriore del tavolo di lavoro, il braccio di supporto anteriore e il coperchio.
- Allentare un bullone al centro della lama. Non rimuoverlo ancora. Questo bullone impedisce alla lama di cadere.
- Rimuovere tutti gli altri bulloni. Sollevare lentamente la lama inferiore con l'aiuto di due persone.
- Cambia il pannello di controllo della tua macchina in "Modalità albero manuale".
- Allentare il bullone centrale sulla lama superiore ed estrarla.
- Pulisci le lame da olio e polvere. Controlla che non siano danneggiate o usurate.
- Se si desidera sostituire la lama di taglio in acciaio, ripetere i passaggi al contrario per installare la nuova lama.
Suggerimento: per sollevare la lama di una cesoia a ghigliottina, usate sempre due persone. La lama è pesante e molto affilata.
Ispezione dei supporti
Prima di installare una nuova lama per cesoia a ghigliottina, è necessario controllare i supporti. Supporti puliti aiutano a ottenere tagli di qualità e a mantenere la macchina in buone condizioni. Controlla questi aspetti:
- Controllare che i supporti non presentino sporco, olio o residui. Pulirli con un panno privo di lanugine.
- Cerca crepe, ammaccature o punti usurati. Montaggi difettosi possono rendere la lama storta.
- Assicurarsi che tutti i fori di montaggio siano adatti alla lama e alla macchina.
Se riscontri problemi, risolvili prima di procedere. Supporti puliti e resistenti ti aiutano a impostare correttamente parallelismo e gioco. Questo passaggio previene anche danni alla tua nuova lama.
Posizionamento e fissaggio
È fondamentale posizionare la lama della cesoia a ghigliottina nel punto giusto e fissarla saldamente. Questo passaggio influisce sulla qualità del taglio. Per ottenere i migliori risultati, seguite questi passaggi:
- Posizionare la lama sul supporto. Spostarla nella posizione finale.
- Segna i fori da praticare utilizzando la guida della tua macchina.
- Praticare i fori contrassegnati lentamente e con attenzione.
- Fissare la lama con bulloni e rondelle. Utilizzare la misura giusta per ogni componente.
Se hai bisogno di una lama speciale per materiali o esigenze diverse, puoi dare un'occhiata a opzioni di lama personalizzate per adattarsi al tuo lavoro.
Sequenza di coppia
È necessario serrare i bulloni nell'ordine corretto. In questo modo si mantiene la pressione uniforme e si impedisce alla lama di piegarsi. Seguire l'ordine di coppia di serraggio indicato nel manuale della macchina. Nella maggior parte dei casi, si inizia con i bulloni centrali e si procede in modo incrociato. Utilizzare una chiave dinamometrica calibrata per ottenere la coppia di serraggio necessaria.
Nota: una pressione uniforme aiuta a mantenere la macchina dritta e sicura.
Errori di montaggio
Errori di montaggio possono causare problemi con la configurazione della lama della ghigliottina. Fai attenzione a questi errori comuni:
- Utilizzo di bulloni di dimensioni o coppie errate.
- Saltare la pulizia dei supporti.
- Serraggio dei bulloni non uniforme o nell'ordine sbagliato.
- Non controllare l'allineamento dopo aver fissato la lama.
Se noti uno di questi errori, fermati e correggilo prima di continuare. Una configurazione accurata ti aiuta a evitare riparazioni e a mantenere la macchina in buone condizioni.
Puoi sempre consultare il manuale della tua macchina per conoscere i passaggi corretti. Se hai bisogno di una lama con caratteristiche speciali, valuta le opzioni personalizzate adatte alla tua macchina e alle tue esigenze di taglio.
Calibrazione del parallelismo della lama
È necessario controllare il parallelismo delle lame della ghigliottina. Questo aiuta a ottenere tagli molto precisi. Sia la lama superiore che quella inferiore devono muoversi insieme in linea retta. Quando le lame sono parallele, i tagli sono migliori. La macchina durerà anche più a lungo. Questo aiuta anche a mantenere le lame di affilatura funzionanti. Otterrai sempre gli stessi risultati.
Misurazione del parallelismo
Per prima cosa, misura il parallelismo tra le lame superiore e inferiore. Utilizza un comparatore a quadrante per questo lavoro. Posiziona il comparatore a quadrante sulla lama inferiore. Muovi la lama superiore lungo il suo percorso. Osserva il comparatore mentre la lama superiore si muove. Se il comparatore cambia, le lame non sono parallele. Ciò significa che la distanza tra le lame è diversa. Queste informazioni sono necessarie per aiutarti a risolvere il problema.
Suggerimento: annota le letture del quadrante in diversi punti della lama. Questo ti aiuterà a individuare i punti irregolari e a pianificare meglio le riparazioni.
Regolazione della posizione della lama
Per risolvere i problemi di parallelismo, è necessario apportare modifiche accurate. Seguire questi passaggi per allineare correttamente le lame:
- Togli la lama inferiore e pulisci ogni parte. Lo sporco può rovinare il tuo lavoro.
- Controlla che la lama sia dritta sia lateralmente che verticalmente. Per farlo, usa un righello.
- Modificare la distanza tra le lame spostando la lama inferiore. In questo modo si modifica lo spazio tra le lame.
- Se necessario, ruotare le viti sinistra e destra sulla lama inferiore per aumentare lo spazio.
- Ruotare le viti di fissaggio a sinistra e a destra per ridurre lo spazio.
- Allentare i bulloni sul tavolo inferiore della lama. Questo consente di spostare la lama per piccole modifiche.
- Abbassare la lama superiore fino al punto giusto per la regolazione. Assicurarsi che sia vicina ma non tocchi.
- Utilizzare uno spessimetro per impostare la distanza a circa 0,5 mm. Questo è un buon punto di partenza per molti materiali.
- Continuare a regolare finché lo spessimetro non misura tre fili ma non cinque. In questo modo si ottiene una distanza molto precisa.
Potrebbe essere necessario ripetere alcuni passaggi per ottenere il risultato migliore. Ogni passaggio aiuta a controllare l'efficacia del taglio della macchina. Se si notano tagli irregolari o è necessaria più forza, provare a modificare l'angolo di taglio.
Nota: apporta piccole modifiche e controlla dopo ciascuna. Se agisci di fretta, potresti commettere errori e perdere precisione.
Verifica dell'allineamento
When you finish adjusting, you need to check the alignment. Use the right tools and ways to check your work. The table below shows some good choices:
| Strumento/Tecnica | Purpose/Effectiveness |
|---|---|
| Calibration Probes | Achieve sub-millimeter accuracy |
| Laser Displacement Sensors | Provide high precision in alignment |
| Micrometri | Ensure precise measurements for alignment verification |
| Laser Scanners | High precision through point cloud registration |
| Straightedge | Check blade alignment visually |
Pick the tool that works best for your job and what you have. Calibration probes and laser sensors are the most exact. Micrometers and straightedges are good for quick checks. Always compare your results to what your material and machine need.
Reminder: Write down your alignment checks. This helps you see changes over time and makes future calibration easier.
You finish setting up the guillotine blade by measuring, adjusting, and checking alignment. This makes your cuts more accurate and keeps your machine working well. If you check and adjust often, your cuts will stay clean and your machine will last longer.
Configurazione della distanza della lama

Understanding Clearance
You need to understand what blade clearance means before you start making adjustments. Blade clearance, also called blade gap, is the space between the upper and lower blades in your guillotine shearing machine. This space is not random. You set it on purpose to match the material you want to cut. The right clearance helps you get clean and straight cuts. If you use the wrong clearance, you can get rough edges or even damage your blade.
Different materials need different parameters for clearance. Softer materials, like paper, need a small gap. This stops the edges from tearing or looking ragged. Harder materials, like steel, need a bigger gap. This helps the blade break the material cleanly. You must check the clearance every time you change the material. This step keeps your cuts sharp and your machine safe.
Tip: Always check the manufacturer’s guide for recommended clearance values. This helps you keep your machine working with high precision.
Setting Clearance for Materials
You must set the clearance based on what you want to cut. Each material has its own needs. If you use the wrong parameters, you can ruin your work or wear out your blade too fast. Here is how you can set the clearance for common materials.
Paper/Cardboard
Paper and cardboard are soft and thin. You need a small clearance to get a smooth cut. If the gap is too wide, the paper will tear or have fuzzy edges. If the gap is too tight, the blade can wear out quickly.
- Use a feeler gauge to measure the gap.
- Start with a clearance of about 0.1 mm for thin paper.
- For thicker cardboard, you can increase the gap a little, but keep it small.
- Make a test cut and check the edge. Adjust if you see ragged or uneven cuts.
Note: Small changes in clearance can make a big difference in cut quality. Always test before starting a big job.
Plastics/Metals
Plastics and metals need special care. Plastics can melt if the blade gets too hot or if the clearance is wrong. Metals, like steel or aluminum, need a bigger gap to break cleanly.
Here is a table to help you set the right clearance for different materials:
| Tipo di materiale | Optimal Blade Clearance |
|---|---|
| Acciaio dolce | 7.5% of material thickness |
| Alluminio | Use a high tooth count blade |
| Plastica | Use a blade with 60-80 teeth |
- For mild steel, set the clearance to about 7.5% of the sheet thickness.
- For aluminum, use a high tooth count blade and check the gap often.
- For plastics, use a blade with 60 or 80 teeth. This helps you avoid melting the edges.
You must always check the cut after your first try. If you see burrs or melted spots, adjust the clearance and try again. This process helps you reach the best precision for each job.
Tip: Write down the clearance you use for each material. This record helps you save time on future jobs.
Using Jacking Bolts
Jacking bolts help you make fine adjustments to the clearance. You find these bolts on the blade holder. When you turn a jacking bolt, you move the blade a tiny amount. This lets you set the clearance with high precision.
Follow these steps to use jacking bolts:
- Loosen the screws that hold the lower blade.
- Turn the jacking bolts slowly to move the blade closer or farther from the upper blade.
- Use a feeler gauge to check the gap at several points along the blade.
- Tighten the screws when you finish the adjustment of the clearance between blades.
- Make a test cut to confirm the clearance is correct.
You must check the clearance at both ends and in the middle. This step helps you keep the same gap along the whole blade. If you see a difference, adjust the jacking bolts again. This method gives you the best results and keeps your machine working with top precision.
Reminder: Always double-check your clearance before you start production. This habit helps you avoid mistakes and keeps your cuts clean.
Confirming Clearance
You have to check the blade clearance after making changes. This step is very important for guillotine blade setup. It helps you get clean cuts and keeps your machine safe. Calibrating parallelism and clearance makes sure the blades have the right gap for each material.
First, look at the clearance along the whole blade. Use a feeler gauge at the left end, center, and right end. The gap should be the same as your target for the material. If you find different gaps, turn the jacking bolts again. When the gap is the same everywhere, your setup is correct.
Here is a checklist you can use to confirm blade clearance:
- Clean both blades and the area where they are mounted.
- Put the feeler gauge in three or more places along the blade.
- Check if the gap matches the value for your material.
- Make a test cut with a sample piece.
- Look at the cut edge for burrs, rough spots, or tears.
- Change the clearance if you see any problems.
- Write down the final clearance value for next time.
Tip: Always use the same measuring tool every time you check. This habit helps you avoid mistakes and keeps your results the same.
You can use this table to spot signs of good or bad clearance:
| Observation | Cosa significa | Azione necessaria |
|---|---|---|
| Smooth, straight edge | Clearance is correct | Start production |
| Fuzzy or torn edge | Clearance is too wide | Reduce the gap |
| Burrs or chipping | Clearance is too narrow | Increase the gap |
| Uneven cut | Clearance or parallelism off | Recheck both settings |
You should always check clearance before a new job or when you change materials. This step in guillotine blade setup saves material and keeps your machine working well. Calibrating parallelism and clearance is not just done once. You need to check and confirm these settings often for the best results.
Test per tagli di precisione
You should test your guillotine blade setup before you start. This step helps you make sure parallelism and clearance are correct. You can find problems early and fix them for better cuts.
Prove di taglio
First, get a sample piece of the material you want to cut. Put it on the machine and check that safety guards are in place. Run the guillotine shear for one cut. Watch the blade as it cuts the material. Listen for odd sounds or if the blade gets stuck. Take out the cut piece and look at the edge.
Try this with different materials if you plan to switch. Paper, cardboard, plastics, and metals all react in their own way. Testing helps you see if your setup works for each type.
Tip: Always use a sample piece that is the same thickness and type as your production material. This habit helps you get the right results.
Evaluating Results
After you finish your test cuts, check the results closely. Use your eyes and hands to look at the cut edges. You can use measuring tools for more details. The table below shows what to look for when you check your test cuts:
| Criteri | Descrizione |
|---|---|
| Mechanical Performance | Look for bending or changes in direction during cutting. |
| Stress Analysis | Check for marks or uneven pressure along the cut. |
| Quality of Cut Surfaces | Look at how smooth the cut is, and check for burrs or bent edges. |
Proper Cut Signs
There are signs that show your guillotine blade setup is good. These signs mean your cuts are precise:
- The cut edge is smooth and straight.
- There are no burrs or rough spots.
- The material does not bend or twist near the cut.
- The blade moves easily through the material.
If you see these signs, you can start production. Your machine is ready for accurate work.
Defect Indicators
Sometimes, you may see problems after a test cut. These defects mean you need to adjust your setup:
- Fuzzy or torn edges mean the clearance is too wide.
- Burrs or chipping show the clearance is too narrow.
- Uneven cuts mean the blades are not parallel.
- Bending or stress marks show problems with blade alignment or machine pressure.
Write down these defects and compare them to your checklist. This helps you know what to change.
Note: Always check both sides of the cut. Some problems only show up on one side.
Fine-Tuning
If you find small problems during your test cuts, you can make little changes to fix them. Follow these steps to fine-tune your guillotine blade setup:
- Check if the blades are lined up. Make sure they are parallel and spaced evenly. Adjust them if needed.
- Look at the blade sharpness. If you see dull spots, sharpen or replace the blade.
- Check the material thickness and type. Make sure it matches your machine’s limits.
- Look at the hydraulic system. Make sure fluid levels are right and check for leaks.
- Clean and oil the machine. Keeping it clean helps you get better cuts.
Test again after each change. This helps you get the best cutting precision for your job. Write down each change and result. These notes help you do better next time.
Reminder: Small changes can make a big difference. Go slow and check your results after every change.
You can get precise and reliable cuts by testing, checking, and fine-tuning your guillotine blade setup. This routine helps you avoid problems and keeps your machine working well.
Risoluzione dei problemi di configurazione
When you finish your guillotine blade setup, you might still see problems with your cuts. Troubleshooting common issues helps you find and fix these problems fast. You need to know what to look for and how to take control of each step. This section guides you through diagnosing defects, correcting parallelism, and resolving clearance problems. You will also learn how to handle torque issues for better accuracy and control.
Diagnosing Defects
You can spot many problems by looking at the cut edges and listening to your machine. Each defect tells you something about your setup. Use the table below to help with troubleshooting common issues:
| Difetto | Possible Causes and Solutions |
|---|---|
| Tagli irregolari | – Table Level: Make sure the cutting table is level. Adjust if needed. – Material Placement: Place material straight and even under the blade. – Worn-Out Components: Check gears and belts for wear. Replace if damaged. |
| Rumore e vibrazioni | – Loose Parts: Tighten all screws and bolts. – Lack of Lubrication: Lubricate moving parts as shown in the manual. – Internal Damage: Get professional help if noise stays loud. |
| Safety Features Not Working | – Sensor Malfunction: Clean or replace sensors. – Safety Switch Problems: Test and replace bad switches. |
Bordi sfumati
You might see fuzzy or torn edges after a cut. This usually means the blade clearance is too wide. You need to control the gap between the blades. Check your clearance with a feeler gauge. Make small changes until the edge looks clean. If the problem stays, check the blade sharpness. Dull blades can also cause fuzzy edges. Replace or sharpen the blade if needed.
Chipping/Burrs
Chipping or burrs on the cut edge show that the clearance is too tight. You need to control the space between the blades. Open the gap a little and test again. Burrs can also mean the blade is chipped or damaged. Inspect the blade for chips and replace it if you find any. Always use high-quality blades for better control and accuracy.
Tagli irregolari
Uneven cuts can happen for many reasons. The table might not be level, or the material might not sit straight. You need to control the placement of your material. Make sure the table is flat and the material lines up with the blade. Worn gears or belts can also cause uneven cuts. Check these parts and replace them if you see damage. If the problem stays, check the parallelism of your blades.
Correcting Parallelism
Parallelism means both blades move in a straight line together. If you see uneven cuts, you need to control the blade positions. Follow these steps to fix parallelism problems:
- Adjust the blade gap to match the thickness of your material. This reduces pressure and stops deformation.
- Set the shear pressure for your material and thickness. This gives you even shear force.
- Replace or grind blades often to keep them sharp and in good shape.
- Fix the sheet in place before cutting. This keeps the cut straight.
- Adjust the blade installation so the shear force spreads out evenly.
- Check blade wear often. Adjust the installation angle to keep the blades parallel.
Tip: Write down each change you make. This helps you control your setup and makes future troubleshooting easier.
Resolving Clearance Problems
Clearance problems can cause many defects. You need to control the gap between the blades for each material. Use these steps to fix clearance issues:
- Check blade sharpness often. Sharp blades give you neat cuts and better control.
- Inspect blades for chips. Keep them in good shape to stop defects in your work.
- Utilizzo high-quality materials. Cheap materials can cause more problems and are harder to control.
- Lubricate blades when cutting aluminum. This helps you get smooth cuts and reduces defects.
- Make sure the backgauge is parallel. Set the squaring arm square for better accuracy and control.
Note: Always check the clearance before you start a new job. This habit gives you more control and helps you avoid mistakes.
You can solve most problems by taking control of your guillotine blade setup. Troubleshooting helps you keep your cuts clean and your machine safe. When you know what to look for, you can fix issues fast and keep your accuracy high.
Torque Issues
Torque is very important when you set up a guillotine blade. You must tighten bolts with the right force. If you use too much, you might break the blade or the mount. If you use too little, the blade can move while cutting. Both of these problems can mess up parallelism and clearance.
You can find torque problems by watching for these signs:
| Sintomo | Cosa significa | Cosa dovresti fare |
|---|---|---|
| Blade movement | Bolts are too loose | Retighten bolts with correct torque |
| Cracked blade or mount | Bolts are too tight | Replace damaged parts and use proper torque |
| Tagli irregolari | Pressure is not even across blade | Check torque sequence and retighten bolts |
You should always use a torque wrench for this job. This tool helps you use the right amount of force. Look in the manual to find the correct torque value. If you skip this, the blade might not line up right and your cuts will be bad.
Here are steps to help you avoid torque mistakes:
- Clean all bolt threads before you start. Dirt can change how tight the bolts get.
- Use a torque wrench that is set right. Set it to the number in your manual.
- Tighten bolts in the order the manual says. Start in the middle and go out in a crisscross way.
- Check every bolt after you finish. Make sure none are too loose or too tight.
- Write down the torque numbers and order in your log book.
Tip: If you hear a click or see the blade move after cutting, stop and check all bolts. Fixing things fast can stop bigger problems.
Check the torque often, especially after you use the machine a lot or change the blade. The right torque keeps the blade safe and helps with parallelism and clearance. You get better cuts and protect your machine from harm.
If you find a torque problem, fix it right away. Use the right tools and follow these steps. Controlling torque keeps your guillotine blade setup safe and working well.
Manutenzione per la calibrazione della lama
Programma di ispezione
You need to check your guillotine blade often to keep it working well. Look at the blades every day for dirt, chips, or rust. Clean the blade area and put oil on moving parts. These steps help your machine run better.
Each week, sharpen the blades if they are dull. Change the blade gap and look at the electrical parts for damage. Doing this stops bigger problems before they start. Once a month, clean the machine very well and check all the parts. Calibrating parallelism and clearance during these checks keeps your cuts good.
Once a year, do a big checkup on your machine. If your guillotine has digital controls, update the software. This helps stop sudden breakdowns and keeps your machine safe.
Regular service stops accidents and makes your guillotine last longer. You get better work and fewer problems when you follow a schedule.
Here is an easy checklist for your inspection:
| Frequenza | Tasks to Complete |
|---|---|
| Quotidiano | Visual inspection, lubrication, cleaning |
| Settimanale | Blade sharpening, gap adjustment, electrical check |
| Mensile | Deep cleaning, mechanical inspection, calibration |
| Annual | Overhaul, software updates, full system check |
Pulizia e lubrificazione
You must keep your guillotine blades clean and oiled for the best results. Dirt and old oil can make the blade wear out faster. Wipe the blade with a lint-free cloth every day. Use 3-in-1 oil on both sides of the blade. This oil helps the blade move well and stops rust. Do not use WD-40 because it does not protect the blade and can cause more wear.
Spray oil on both sides of the blade after you use it. For hard jobs, use a stronger coolant, especially for thick or tough materials. Always keep blades in a dry place to stop rust and damage.
Cleaning and oiling your blade often helps it last longer. You will see smoother cuts and less machine trouble if you do this.
Blade Wear Monitoring
You need to check for blade wear so your guillotine does not break by surprise. Look at the blade edge for chips bigger than 0.5mm. Use a 10x magnifier to see small chips or cracks. Check for rust, dents, or rough spots on the blade. These signs mean the blade needs fixing.
Check if your blades line up using a laser tool. The blades should be within 0.02mm of each other. If the gap is bigger, recalibrate parallelism and clearance right away. Watch for rust or chipping. Replace or sharpen the blade if you see damage.
Tip: Write down what you find after each check. Keeping notes helps you see problems early and plan fixes before things get worse.
If you follow these steps, your guillotine blade setup will stay safe and accurate. Regular checks, cleaning, and watching for wear help your machine work its best.
Calibration Records
You should keep clear calibration records for every guillotine blade setup. These records help you see changes and find problems. They also help you make your work better. When you calibrate parallelism and clearance, write down each adjustment you make. Good records make your job easier and help you get better results.
You can use a logbook or a digital spreadsheet. Write the date, material type, blade clearance, and parallelism measurements. Also write the torque values and any problems you notice. If you change the blade or adjust the setup, record why you did it and what happened.
Here is a sample table for your calibration records:
| Data | Tipo di materiale | Distanza della lama | Parallelism Reading | Torque Value | Notes/Issues Found |
|---|---|---|---|---|---|
| 2024-06-01 | Cartone | 0.15 mm | 0,02 mm | 45 Nm | Smooth cut, no defects |
| 2024-06-02 | Acciaio dolce | 0.75 mm | 0.03 mm | 50 Nm | Minor burrs, adjusted |
| 2024-06-03 | Plastica | 0.20 mm | 0,01 millimetri | 40 Nm | Clean edge |
Tip: Always update your calibration records after you set up the guillotine blade. This habit helps you see patterns and fix problems faster.
Look at your records before you start a new job. Check for settings that worked well with the same materials. If you see the same problem more than once, use your notes to find out why. Calibration records help you keep your guillotine blade setup steady and reliable.
You can use your records to teach new workers. Show them how to calibrate parallelism and clearance by looking at old setups. This saves time and helps stop mistakes.
If you use digital records, back up your files often. You do not want to lose important data. If you use paper records, keep your logbook in a safe place.
Calibration records are important for guillotine blade setup. They help you keep high precision, improve safety, and make your machine last longer. When you calibrate parallelism and clearance, good records make every step easier.
Configurazione della cesoia a ghigliottina CNC
Factories use cnc guillotine shearing machines to cut things very accurately. These machines help you make the same cut over and over again. If you know how to set up the machine, you can make your work better. This section will show you how automatic calibration, blade setup, and custom options help you get great results.
Calibrazione automatica
You do not have to adjust everything by hand with a cnc guillotine shearing machine. The machine can check and fix its own settings. This makes your job easier and helps you get better cuts. The machine moves the blades to the right spot by itself. You get the same good cut every time because of this.
- Automatic calibration helps the machine work its best.
- You get the same cut each time you use it.
- The machine checks itself often to stay accurate.
- Checking calibration often is important for good results.
You do not just calibrate once and forget about it. The cnc guillotine shearing machine does this job again and again. This saves you time when you set up the machine. You can trust the machine to cut well, even after many uses.
Tip: Look at your machine’s manual to see when to check calibration. Doing this often helps you avoid mistakes and keeps your cuts nice.
Integration with Precision Blades
You can use strong, sharp blades with your cnc guillotine shearing machine. Nanjing Metal Industrial blades work well with these machines. These blades fit many machines and can cut different materials. You can use them for paper, cardboard, plastic, or metal.
When you set up your cnc guillotine shearing machine, pick the right blade for your job. The machine lets you change the blade’s spot, angle, and gap very exactly. You can use the cnc controls to make small changes. This helps you get smooth, straight cuts.
The cnc system can also remember your favorite blade settings. This saves you time when you switch jobs. You do not have to set everything again. The machine remembers what you did last time and uses those settings.
Note: Always look at the blade before you start a new job. A sharp blade that fits well gives you the best cut.
Opzioni di personalizzazione
You can pick from many custom choices with a cnc guillotine shearing machine. These choices help you make the machine fit your needs. You can pick different blade sizes, edge angles, and ways to mount the blade. The table below shows some common custom features:
| Customization Feature | Descrizione |
|---|---|
| Tailored Dimensions | Custom sizes to fit specific machinery and operational needs. |
| Edge Angles | Options ranging from 15° to 45° to enhance cutting performance. |
| Mounting Configurations | Custom mounting options to ensure compatibility with different machines. |
| Soluzioni su misura | Custom manufacturing to meet specific requirements for optimal performance. |
If you need to cut special materials, you can ask for a special blade. The cnc guillotine shearing machine lets you change settings for your job. You can set how the machine cuts, program the order, and pick the right machine for your work.
When you pay attention to these settings, your machine works better. You can get more done, waste less, and make better cuts. Picking the right machine and using the best settings helps you do well in your work.
Reminder: Write down any changes you make to your machine’s setup. This helps you do the same thing next time and not make old mistakes.
You can see how cnc guillotine shearing machine setup, automatic calibration, and custom blades all work together. These things help you cut with high accuracy and work faster.
Impatto della configurazione di precisione
Precision setup makes your guillotine blade work better every day. When you calibrate parallelism and clearance, your cuts look cleaner and are safer. Your equipment lasts longer and works more efficiently.
Longevità della lama
You want blades to last a long time. Precision setup helps you do this. When you align and calibrate blades, you stop wear and early damage. You avoid chips and cracks from bad alignment. The blade edge stays sharp for more cuts.
Here are results from real factories:
| Tipo di prova | Dettagli |
|---|---|
| Durata della lama | Blade life went from 10 to 42 days, a 4x increase |
| Riduzione dei tempi di inattività | Downtime dropped by 65%, blade changes by 50% |
| Maintenance Savings | Yearly blade costs went down by $18,000 |
Precision setup means fewer blade changes and less downtime. You spend less time fixing problems and more time cutting. High-concentricity blades break 67% less, so you work safer and more efficiently.
Efficienza dei costi
Save money with a precision guillotine blade setup. You waste fewer materials and produce less waste. You also need to buy fewer new blades and have fewer repairs. Companies that calibrate parallelism and clearance save a lot.
- Packaging companies saved $150,000 each year by wasting less.
- Better blades helped companies save 28% in costs.
- Meat plants had zero blade failures with custom blades.
Optimizing for efficiency leads to real savings. You spend less on maintenance and get more from each blade. You lower yearly blade costs and keep your budget steady.
Aumenti di produttività
Precision setup helps you work faster and smarter. You cut more pieces in less time and keep your machine running. You do not stop for repairs or blade changes as much. A box factory cut downtime from 14 hours to under 5 hours by calibrating and optimizing.
Here are ways you boost efficiency:
- You make more cuts every hour.
- You switch jobs faster.
- You keep your machine running with fewer stops.
- You reduce waste and rework.
You see more finished products and fewer delays. Your team works better and gets more done each day. Precision in guillotine blade setup and calibrating parallelism and clearance helps you reach your goals for optimization and efficiency.
Tip: Keep records of your setup and results. You will see how precision and efficiency make your work better over time.
If you follow every step for guillotine blade setup, you get better results. Checking and adjusting often helps you make clean cuts. This also keeps your machine safe from harm. Nanjing Metal Industrial has blades for many jobs and can make custom ones too. If you want help or need to talk about your project, contact our sales engineer. These good habits help your machine work well and save you money.
Domande frequenti
What is the most important step in guillotine blade setup?
You need to check parallelism and clearance first. These steps help you make clean cuts. They also keep your machine safe. Always measure and adjust both before you cut anything.
How often should I calibrate parallelism and clearance?
You should calibrate these settings when you change materials. Also do it if your cuts look bad. Regular checks help you keep cuts neat and protect your machine.
Can I use the same clearance for all materials?
No, you cannot use one clearance for everything. Each material needs its own gap. Softer materials need a smaller gap. Harder ones need a bigger gap. Always change the clearance for what you are cutting.
What tools do I need for accurate guillotine blade setup?
You need a torque wrench and feeler gauges. You also need measuring tools like a straightedge or dial indicator. Clean tools help you set parallelism and clearance the right way.
Why do my cuts have burrs or rough edges?
Burrs or rough edges mean the clearance is too tight. It can also mean the blade is dull. Check and change the clearance. Sharpen or replace the blade if you need to.
How do I know if my blades are parallel?
Use a dial indicator or a straightedge to check. Measure the gap at different spots on the blade. The gap should be the same everywhere. If it is not, adjust the blades until they match.
What should I record after calibrating parallelism and clearance?
Write down the date and the type of material. Record the clearance value and parallelism reading. Note any problems you found. Good records help you repeat good setups and fix issues faster.
Vedi anche
Ottenere Tagli a Zero Bave con Lame da Taglio a Ghigliottina di Precisione
Come selezionare la lama della ghigliottina giusta per le tue esigenze
Scegliere tra Cesoie a Ghigliottina e Cesoie a Trave Oscillante: Un'Analisi Comparativa Completa