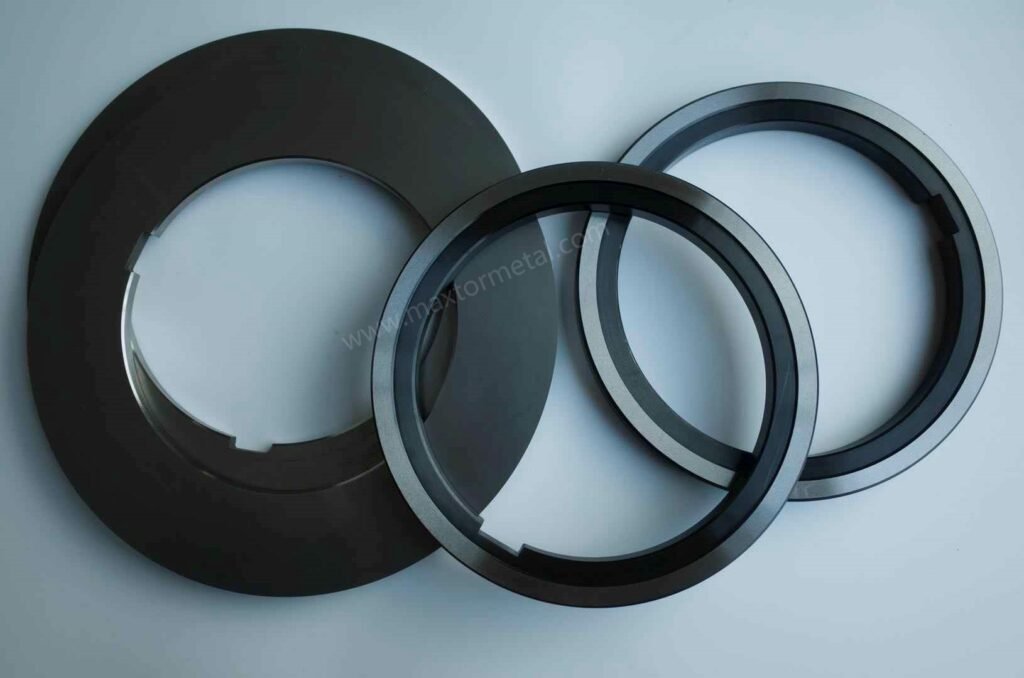
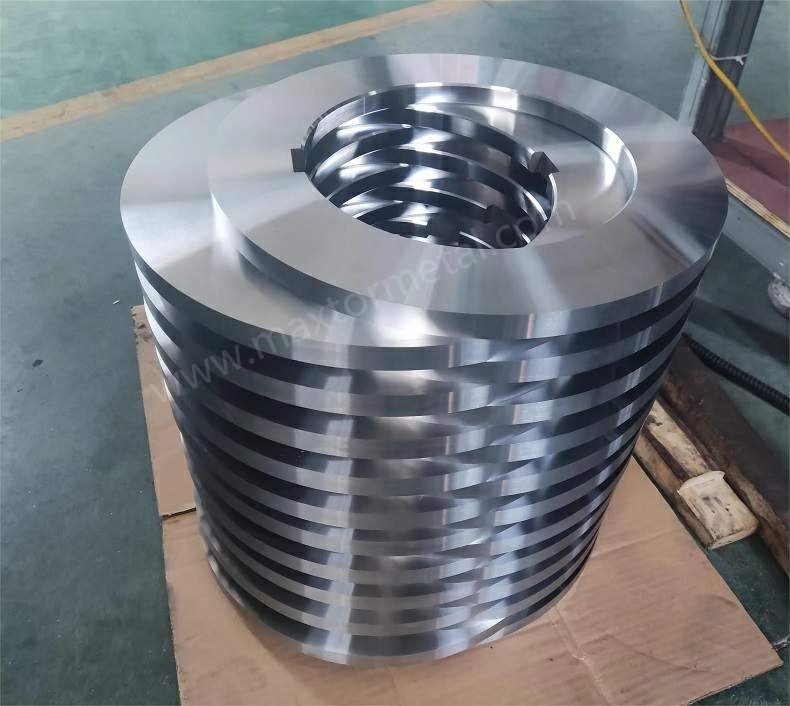
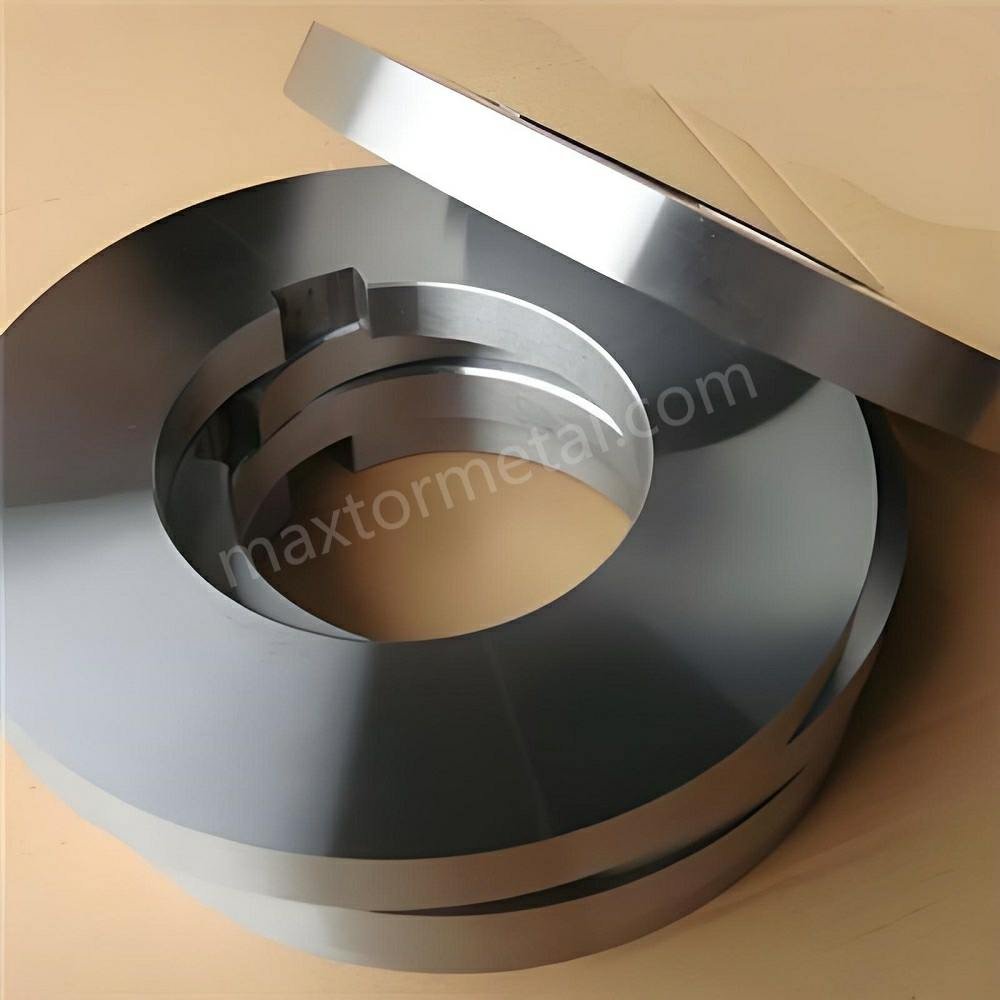
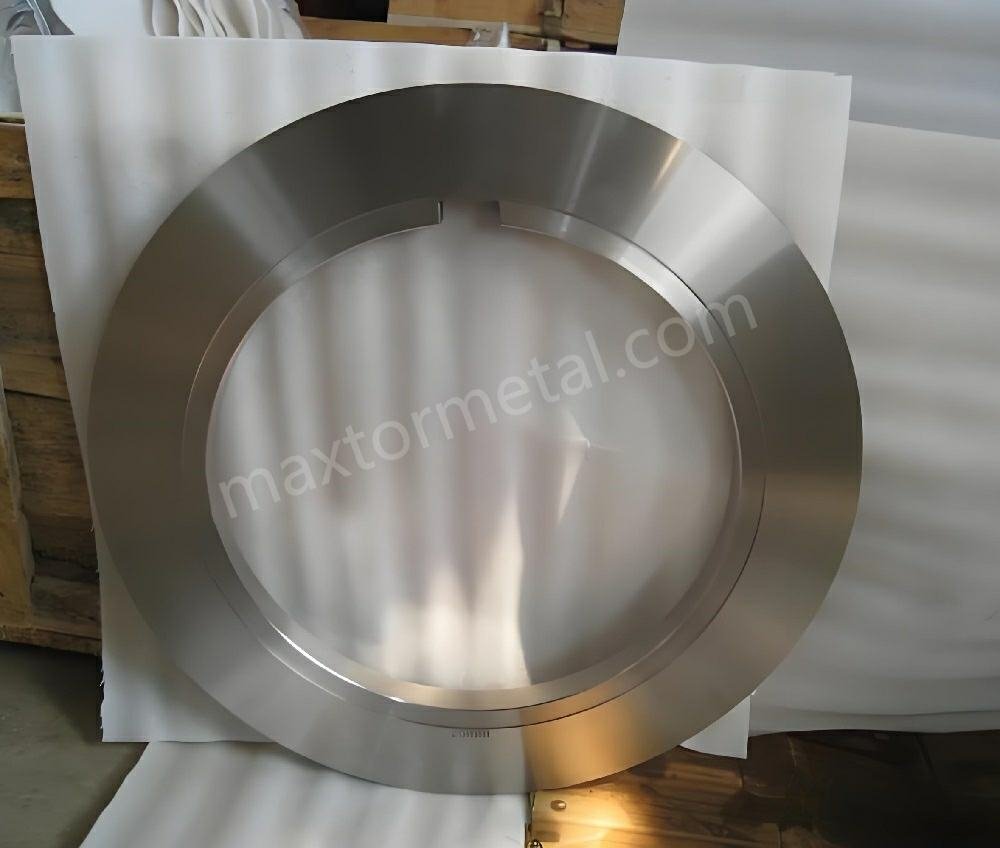
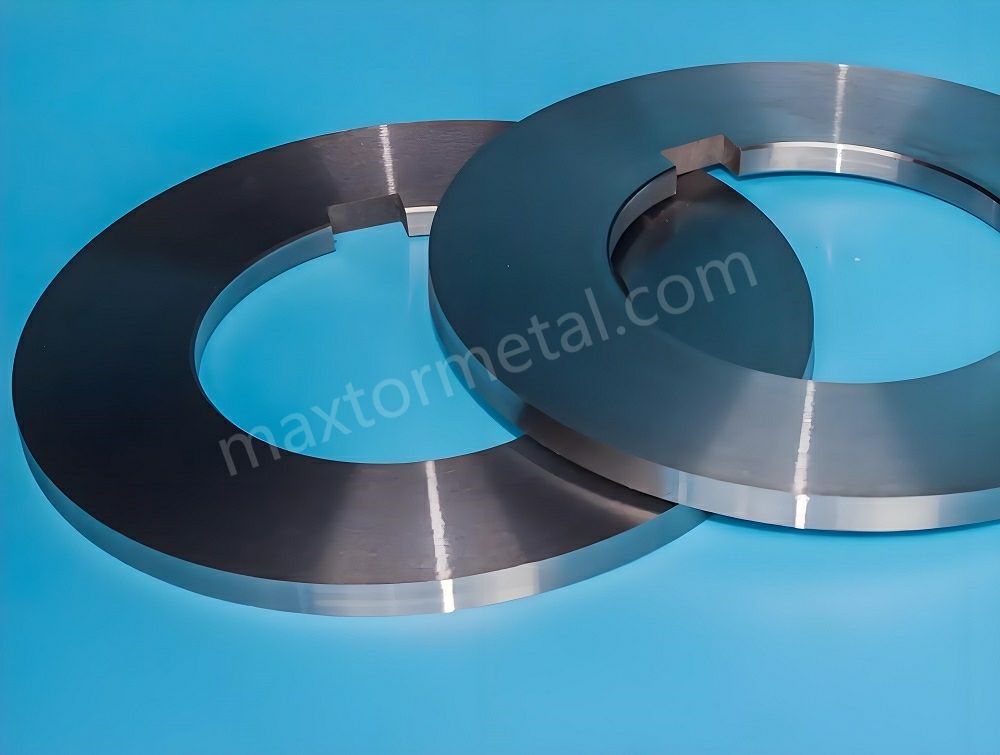
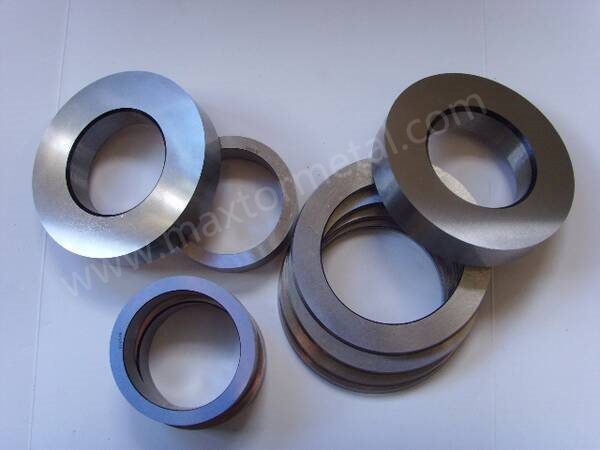
You can lower edge burrs by picking good blades and using good care. Nanjing Metal Industrial’s Roller Shearing Blades use top materials. This helps the cutting edges stay sharp and strong. These blades give you cleaner cuts. You will see fewer rough edges on your facas de corte de metal. You can also ask for special blade designs for your industry needs.
Principais conclusões
- Pick good blades to help stop edge burrs and get cleaner cuts. Use hand tools like files and scrapers for small jobs so you can control the work. Machines for deburring save time and give steady results for big batches. Clean and sharpen blades often to stop burrs from forming. Learn about different burr types to pick the best way to remove them each time. Watch how fast you cut and how much material you feed to lower burrs when slitting. Change blade shape and space settings to make cutting better and get fewer burrs. Use a quality check to find burrs early and keep products good.
Eliminating Edge Burrs in Metal Slitting Knives

Edge burrs are a common issue when using metal slitting knives. You should use good deburring methods and keep blades well maintained. This part explains easy ways to get rid of burrs and stop them from coming back.
Direct Deburring Methods
There are different ways to remove burrs from metal slitting knives. Each way has its own good points. Pick the method that works best for your job.
Manual Deburring Tools
Manual deburring tools let you control the work. You can use files, scrapers, or abrasive stones to fix rough edges. These tools are best for small jobs or fixing certain spots.
- Files help shape and smooth the edge.
- Scrapers take off thin metal layers fast.
- Abrasive stones make the surface smooth and clean.
Tip: Always wear gloves and safety glasses when using manual deburring tools.
Automated Deburring Systems
Automated systems save time and work, especially for big jobs. Machines use brushes, belts, or wheels to take off burrs from metal slitting knives. These systems give steady results and need less hand work.
| Método | Melhor para | Benefício principal |
|---|---|---|
| Manual Deburring | Small batches, repairs | Precision and control |
| Automated Deburring | High volume, speed | Consistency and efficiency |
You can change how fast your machines feed the metal. Slower speeds often make fewer burrs, so cuts are cleaner.
Preventive Maintenance for Edges
Taking care of your blades helps stop burrs before they start. Preventive maintenance is a great way to keep metal slitting knives working well.
Cleaning and Repair
Cleaning your blades often removes dirt and buildup. Clean blades stop material from sticking and making rough edges. If you see damage, fix it right away. Quick repairs keep small problems from getting worse.
- Regular checks keep blades working well and lower downtime.
- Maintenance helps keep product quality high and stops burrs.
- Finding wear early means you can fix it before it gets worse.
Note: Blades must be lined up right. If they are not, they wear unevenly and make more burrs.
Técnicas de Afiação
Sharp blades cut better and make fewer burrs. You should sharpen blades often to keep their edge. Use the right sharpening tools and follow the correct angle for your blade.
- Keeping blades sharp gives cleaner cuts and fewer burrs.
- Use a sharpening stone or machine made for your blades.
- After sharpening, check the edge to make sure it is smooth.
Nanjing Metal Industrial’s Roller Shearing Blades have many benefits for removing edge burrs. These blades are made for accuracy and strength in metal work. They use strong alloy steel and special heat treatment to last longer. The special tooth shape and cutting angle help stop metal from bending, so cuts are clean and burr-free. If you need something special, you can look at opções de lâmina personalizadas Para atender às suas necessidades.
Using good deburring methods and regular care keeps your metal slitting knives in great shape. This helps you get smooth edges and good results every time.
Understanding Metal Burrs and Edge Quality
What Are Edge Burrs?
After you cut or slit metal, you might see rough edges. These rough spots are called metal burrs. Burrs happen when the cutting tool pushes or tears the metal. The tool does not make a smooth cut. Metal burrs can show up on the edge of sheets, coils, or strips after slitting.
Edge burrs are rough edges left after slitting. These burrs can add extra weight. They can also change how the material works, especially when you need things to fit just right.
It is important to know about metal burrs. Burrs can change how your finished product works. If you want good results, you must pay attention to these small details.
Impact of Burrs on Metal Edges
Metal burrs can cause many problems in your work. You might have trouble putting parts together. Your products might not last as long. Burrs can also make your workplace less safe.
- Burrs can make it hard to put parts together.
- They can make the final product weaker.
- Sharp, uneven edges can be dangerous.
- Burrs can stop moving parts from working right.
- They can mess up finishing steps and lower quality.
If you leave burrs on metal edges, machines and tools can get damaged. Rough edges can make things unsafe. Burrs can make machines wear out faster. The final product might not be as strong. Smooth edges are safer and help stop damage.
Deburring is needed to take away extra material made during cutting. It helps the final product look better. Good deburring makes sure you meet safety and quality rules.
Types of Metal Burrs
There are different types of metal burrs in slitting. Each type forms in its own way. Some need special ways to remove them. Knowing the types helps you pick the best fix.
- Rollover Burr: This burr forms when metal bends, not breaks clean. You will see a rolled piece that stays on the edge. How deep you cut can change how thick this burr is.
- Tear Burr: This burr happens during punching. The cut starts but does not finish, leaving a sharp edge around the hole or shape.
- Cut-off Burr: This burr shows up when leftover metal falls off after a cut. It can be positive or negative. You see it in machine parts or saw cuts. Good support during cutting can help stop this burr.
- Thermal Burr: This burr is also called slag. It forms when hot metal cools and gets hard after laser or plasma cutting. You can take it off with brushing or grinding.
You should look for all types of burrs when you check your work. Each one can change your product in a different way. By knowing about these burrs, you can make better cuts and keep your tools working well.
Diagnosing Burrs in Metal Slitting Knives

Identifying Burr Symptoms
You need to spot edge burrs early to keep your metal slitting knives working well. If you catch problems soon, you can fix them before they get worse. Here are the most common symptoms that show edge burrs are present:
- You see rough or raised spots along the cut edge.
- The edge feels sharp or jagged when you touch it.
- There are small pieces of metal sticking out from the edge.
- The cut edge looks torn or uneven instead of smooth.
- You notice extra material that should not be there after slitting.
Tip: Always check your products right after slitting. Early detection of edge burrs helps you avoid bigger problems later.
You can also use a magnifier to look closer at the cut edge. If you see tiny teeth or tearing, this means edge burrs are forming. These signs tell you that your blade or machine setup may need attention.
Inspection Techniques for Edges
You must use good inspection methods to find edge burrs. Simple checks help, but advanced tools give you more detail. You want to make sure every edge is smooth and safe.
Visual and Microscopic Analysis
Start with your eyes. Look at the cut edge under good light. If you see any bumps or rough spots, you likely have edge burrs. For a closer look, use a magnifying glass or a microscope. This helps you see small burrs that are hard to spot.
You can also use special devices to measure and analyze the edge. For example, the EdgeInspect system scans the edge and finds edge burrs quickly. It works fast and covers a large area. Another tool, the 4D InSpec, lets you measure the edge break and angles by hand. It gives you instant feedback and is easy to use.
| Inspection Technique | Descrição | Precisão | Velocidade | Coverage/Usability |
|---|---|---|---|---|
| EdgeInspect | Scans and analyzes edge properties, detects edge burrs | 1µm | 30,000 points/second | Large area, robotic arm compatible |
| 4D InSpec | Handheld, measures edge break and angles | Alto | Immediate feedback | Easy alignment, portable |
Note: Using both your eyes and special tools helps you find all edge burrs, even the smallest ones.
Measurement Standards
You need to measure edge burrs to know how bad the problem is. Use clear standards so everyone checks the same way. You can use micrometers or lasers for very small measurements. These tools help you see if the edge burrs are within safe limits.
When you measure, check the height and width of each edge burr. Write down your results. Compare them to your company’s quality rules. If the edge burrs are too big, you must fix the problem right away.
You may face some challenges when you check for edge burrs. Sometimes, the blade is not set up right, or the knife edge is dull. These problems can make edge burrs worse. To solve this, check your blade alignment, sharpen your knives, and keep your machines level and stable.
- Make sure slitting heads and guides are lined up.
- Use precise tools like lasers or micrometers for adjustments.
- Check the machine’s base for stability.
If you keep up with regular checks and maintenance, you will find edge burrs before they cause trouble. Good inspection keeps your products safe and your machines running well.
Root Causes of Edge Burrs
Material Properties and Adaptability
You need to know how metals act when you cut them. The way a metal bends or stays hard can change how many burrs you get. Harder metals do not make as many burrs. Softer or bendy metals make more burrs. This table shows how these things matter:
| Material Property | Effect on Burr Formation |
|---|---|
| Dureza | Harder materials are less prone to burrs. |
| Ductilidade | Higher ductility increases the likelihood of burrs. |
When you work with steel, stainless steel, or alloys, you must change your process. Stainless steel is harder, so it makes fewer burrs. Mild steel and aluminum are softer and make more burrs. Always check what metal you have before you start. This helps you pick the right blade and settings.
Steel, Stainless, and Alloy Considerations
Steel comes in many types. Some are soft and easy to bend. Others are hard and strong. Stainless steel does not rust and is harder than mild steel. Alloys are mixes of metals for special jobs. Each kind acts differently when you cut it. If you use the same settings for all, you might get bad results.
- For hard steels, use sharp blades and small gaps.
- For soft metals, slow down the feed rate to stop burrs.
- Alloys may need special blade shapes or coatings.
Always test a small batch before you do a big job. This helps you find problems early. Change your process if the metal acts different. Good planning gives you cleaner cuts and fewer burrs.
Tooling Wear and Blade Condition
Your tools must stay sharp and in good shape. Dull blades or worn tools make more burrs. When your blade gets dull, it pushes the metal instead of cutting it. This makes burrs bigger and rougher.
Effects of Dull Edges
You will see more burrs when blades get old. Worn tools make the gap between blade and die bigger. This lets more metal slip out and makes bigger burrs. A new blade keeps the gap small and cuts clean.
- Tool wear makes the gap bigger, so you get more burrs.
- A new die keeps the gap small, so you get fewer burrs.
- Burrs can get twice as big if tools are worn out.
Check your blades often. If you see more burrs, sharpen or change the blade. Regular checks help you fix problems before they get worse.
Grinding and Maintenance
Grinding and taking care of blades keeps them sharp. Make a plan to sharpen your blades often. Do not wait until you see big burrs. Even small changes in blade shape can change the edge.
If you see tall burrs, your gap or tools may be wrong. Sharpen and take care of your tools to keep the gap right and burrs small. This is important for good edges.
Lubrication helps too. It makes things slippery and keeps blades cool. This means less wear and fewer burrs. Clean your blades after each use. Dirt can make blades dull and cause problems.
Slitting Speed and Feed Rate
How fast you cut and how fast you feed the metal both matter. If you go too fast or too slow, you can get more burrs.
Speed Impact on Burrs
Cutting speed changes how the metal breaks. Fast speeds can make the metal snap and give short burrs. Slow speeds let the metal bend and make taller burrs. Match the speed to the metal and blade.
Blade shape and speed also change how many burrs you get. Fast speeds can make short burrs. Slow speeds can make tall burrs. Lubrication helps by making things smooth and lowering burrs.
Feed Rate Adjustments
Feed rate is how fast you push metal through the machine. If you go too fast, the blade may not cut all the way. This leaves rough edges and burrs. If you go too slow, the metal can get hot and stick.
Change the feed rate for the metal and blade you use. Try different speeds to find what works best. Look at the edges after each change. Small changes can make a big difference.
The main reasons for edge burrs are wrong knife gaps, tool shape, and machine setup. Fixing these means checking knife gaps, keeping tools in good shape, and doing regular machine checks. You also need to know how the metal acts inside to stop burrs.
Tip: Write down your settings and results. This helps you get better and have fewer burrs next time.
Die and Blade Geometry
The way you set up your die and blade shapes can change how many burrs you get. Good geometry helps your metal slitting knives make clean cuts. Poor geometry can cause rough edges and more burrs. You need to pay attention to two main things: clearance and overlap.
Clearance and Overlap
Clearance is the space between the cutting edges of your metal slitting knives. If you set the clearance too wide, the metal bends before it cuts. This makes big burrs. If you set the clearance too tight, the blades can rub and wear out fast. You want to find the right balance.
Overlap is how much the top blade covers the bottom blade during the cut. Too much overlap can crush the metal. Too little overlap can leave the cut unfinished. Both problems can make more burrs.
Tip: Always check your machine’s manual for the best clearance and overlap settings for your material.
Here is a simple table to help you remember:
| Contexto | Result if Too Much | Result if Too Little | Melhores práticas |
|---|---|---|---|
| Liquidação | Big burrs, rough edges | Blade wear, poor cuts | Match to material thickness |
| Overlap | Crushed edges, burrs | Incomplete cuts, burrs | Follow blade guidelines |
You should adjust these settings every time you change materials. Thicker metals need more clearance. Thin metals need less. Always test a small piece first.
Fracture vs. Shear Zone
When you cut metal, two zones form at the edge: the fracture zone and the shear zone. The fracture zone is where the metal breaks. The shear zone is where the blade slices cleanly.
If the fracture zone is too big, you get rough, jagged burrs. If the shear zone is bigger, you get smooth, clean edges. You want your metal slitting knives to make a large shear zone and a small fracture zone.
You can control these zones by changing your blade geometry. Sharper blades and the right angle help make a bigger shear zone. Dull blades or wrong angles make the fracture zone bigger.
- Use sharp blades for a clean shear zone.
- Set the right angle for your blades.
- Check your cuts often to see the size of each zone.
Note: If you see more jagged edges, check your blade sharpness and angle. Small changes can make a big difference.
Understanding die and blade geometry helps you get better results from your metal slitting knives. You will see fewer burrs and smoother edges when you set up your machine the right way.
Troubleshooting and Preventing Metal Burrs
Protocolos de manutenção
You need good maintenance steps to keep your metal slitting knives working well. These steps help you find problems early and keep blades sharp.
Scheduled Inspections
Check your equipment often. Regular checks help you find dull blades or worn parts before they cause trouble. Make a checklist for your team. Look for rough edges and uneven cuts. If you see problems, fix them right away.
- Check blades for sharpness and damage.
- Look at knife gaps and alignment.
- Review machine speed and pressure.
- Write down inspection results.
Tip: Teach your team to spot burrs and know when to adjust the machine. This keeps things running smoothly and helps with deburring.
Lubrificação e Limpeza
Lubrication and cleaning help keep blades sharp and cuts clean. Use the right lubricant for your machine. Clean blades after each shift to remove dirt and metal bits. This stops buildup that can dull the edge and make deburring harder.
- Put on lubricant before each job.
- Wipe blades clean after every use.
- Remove debris from the cutting area.
- Deep clean every week.
Clean and well-lubricated blades cut better and help stop metal burrs. You spend less time on deburring when your tools are in good shape.
Blade Geometry Optimization
Geometria da lâmina changes how your knives cut and how many burrs you see. Set the right angles and gaps for each job. This helps you get smooth edges and makes deburring easier.
| Ponto de Evidência | Descrição |
|---|---|
| Role of Blade Geometry | Changing blade geometry affects cutting angles and edge quality. It helps lower burrs. |
| Constant Lateral Force | Keeping a steady and low side force during cuts gives straight edges and better quality. |
| Impact of Scrap Curvature | Keeping scrap curved the same way during cuts helps keep the side force steady and lowers edge defects. |
Ajuste de folga
Clearance is the space between your blades. Change this gap for each material and thickness. Too much clearance makes big burrs. Too little clearance wears out blades. Always check the manufacturer’s guide before starting a new job.
- Set blades with a tiny gap called micro-clearance for smooth cuts.
- Make sure the gap is even for accurate cuts.
- Check the blade gap often and change blades when needed.
Note: If you use Nanjing Metal Industrial’s Roller Shearing Blades, you can ask for lâmina personalizada geometry to match your material and help with deburring.
Overlap Calibration
Overlap means how much the top blade covers the bottom blade. Set this just right. Too much overlap crushes metal. Too little overlap leaves unfinished cuts. Both make deburring harder.
- Adjust overlap for each material type.
- Test a small batch before a full job.
- Use precise tools to measure overlap.
You get cleaner cuts and spend less time on deburring when you set overlap correctly.
Die Alignment and Equipment Precision
Die alignment and equipment precision help you stop metal burrs and make deburring easier. Set up your machine with care and check it often.
Arbor Deflection
Arbor deflection happens when the shaft holding blades bends or moves. This can cause uneven cuts and more burrs. Use strong arbors and check for movement during setup.
- Use formed or extruded parts instead of machined parts.
- Plan for large exit angles on edges.
- Cast edges instead of machining them.
- Try ultra high-speed machining when possible.
- Use selective hardening to make edges less bendy.
Tip: Try to make burrs only in spots that are easy to deburr. This saves time and effort.
Spacer and Bearing Play
Spacers and bearings keep blades in the right spot. If they move too much, you get uneven cuts and more burrs. Check these parts often and replace them if they wear out.
- Stop cutters from leaving the part.
- Use form tools instead of tools that face and turn.
- Use push-back blanking for materials like aluminum, mild steel, or stainless steel.
- Mudar blade clearance for each material and thickness.
Regular maintenance and careful setup help you stop metal burrs and make deburring faster. You get better results when you follow these steps.
If you want more advice or need custom solutions, you can visit Nanjing Metal Industrial for expert help. Their team can help you pick the best blades and setup for your needs.
Quality Assurance for Edges
You need strong quality assurance steps to keep your metal edges smooth and burr-free. Good quality checks help you spot problems early. This means you can fix issues before they slow down your work or hurt your products. You want to make sure every edge meets your standards. Quality assurance works best when you use it during and after the slitting process.
In-Process Monitoring
You should watch your slitting process closely. In-process monitoring helps you catch burrs as soon as they form. This lets you adjust your machines right away. You do not have to wait until the job is done to start deburring. You can use sensors and cameras to check the edges while the machine runs. These tools give you real-time feedback. If you see a problem, you can stop and fix it before it gets worse.
Automated edge geometry measurement systems help you a lot. These systems measure burr size and shape as you cut. You get alerts if the burrs get too big. You can then change the blade or adjust the speed. This keeps your deburring work small and easy. You also save time because you do not have to check every piece by hand.
You should also check your cutting parameters often. If you change the speed or feed rate, you might see more or fewer burrs. Write down what works best for each material. This helps you set up your machines faster next time. Good in-process monitoring means less deburring later.
Tip: Use a checklist for your team. Write down what to look for during the slitting process. This keeps everyone focused on quality and safety.
Post-Slitting Evaluation
After you finish slitting, you need to check the edges again. Post-slitting evaluation helps you find any burrs that slipped through. You should use both your eyes and special tools. Look at the edges under good light. Feel for sharp spots with your fingers. Use a magnifier if you need to see small burrs.
You can also use advanced inspection tools. These tools scan the edge and measure burr height and width. They help you decide if you need more deburring. If you find burrs, you can use files, brushes, or machines to remove them. This step makes sure your products are safe and ready for the next process.
You should follow a clear inspection protocol. This means you check every batch the same way. You write down your results and compare them to your standards. If you find too many burrs, you go back and check your machines. You might need to sharpen your blades or change your deburring method.
Here is a table that shows the best quality assurance measures for burr-free edges:
| Quality Assurance Measure | Descrição |
|---|---|
| Tool Selection and Maintenance | Choosing sharp blades and dies, along with regular maintenance, minimizes edge defects. |
| Optimizing Cutting Parameters | Adjusting cutting speed and feed rates based on material properties helps reduce burr formation. |
| Quality Assurance Inspection Protocols | Implementing rigorous QA protocols with advanced technologies ensures early detection of edge imperfections. |
| Edge Geometry Measurement Systems | Automated tools provide real-time feedback on burr dimensions, allowing for rapid adjustments. |
You should use these steps in your workflow. Good deburring starts with sharp tools and the right machine settings. It continues with careful checks during and after slitting. If you keep up with these steps, you will see fewer burrs and spend less time on deburring.
Note: Training your team on deburring and quality checks helps everyone work better. When everyone knows what to look for, you get better results.
You can make deburring easier by using the right tools and checking your work often. This keeps your products safe and your machines running well. Quality assurance is not just one step. It is a process you follow from start to finish. You will see the benefits in smoother edges and less rework.
Solutions for Deburring Metal Edges
When you use metal slitting knives, you need good ways to get rid of burrs. Burrs can slow down your work and make your parts look bad. You can pick manual or automated deburring methods. Each way has its own good points. Choose the one that fits your job and how much you need to make.
Manual Deburring Techniques
Manual deburring is good for small jobs or fixing certain spots. You use your hands and simple tools to take off burrs from the edges. This way gives you control and lets you focus on rough areas.
Files, Scrapers, Brushes
You can use files, scrapers, and brushes to clean up edges. Each tool works best for different burrs. Files help shape and smooth rough spots. Scrapers take off thin metal layers fast. Brushes with metal wires scrape off loose burrs and make the edge cleaner.
Here is a table that shows common manual deburring ways and how well they work:
| Técnica | Descrição | Efficiency and Limitations |
|---|---|---|
| Brushing | Uses metal filaments or wires on a rotating disc to scrape burrs | Fast and low-cost, but results can change based on many factors |
| Sanding | Uses bonded abrasives to remove raised material | Gives different finishes, but can be slow for some slitting jobs |
| Sheet Metal Edging | Uses grinding wheels or pinch rolls to smooth edges | Makes chamfers or fillets, but needs careful control to avoid warping |
Pick the tool that matches your metal and the size of the burrs. Brushing is fast for light burrs. Sanding is better for a smooth finish. Sheet metal edging helps when you want a rounded or angled edge.
Safety Practices
Manual deburring can be risky if you do not follow safety rules. Always wear gloves and safety glasses. Burrs can be sharp and cut your hands. Keep your work area clean so you do not slip or trip. Hold your tools tight and work slowly to stay safe.
Tip: Check your tools before you start. Dull or broken tools can slip and hurt you.
Wear a dust mask if you sand or grind edges. Fine metal dust can hurt your lungs. Good lighting helps you see burrs and avoid mistakes.
Automated Deburring Technologies
If you have lots of parts to clean, you may want to use machines. Machines can take off burrs faster and more evenly than by hand. You save time and get the same results every time.
Mechanical Deburring Machines
Mechanical deburring machines use brushes, belts, or wheels to clean edges. You put your parts in the machine, and it removes burrs in seconds. This way is good for big batches and keeps your line moving.
Automated deburring saves money on workers. You do not need as many people for cleanup. Machines can finish a part in less than a minute. By hand, it can take five to ten minutes for each part. You get the same results every time, so every edge looks the same.
Automated machines also make it safer. Workers do not have to touch sharp edges as much. You can set the machine for different metals and thicknesses. This makes it easy to switch jobs.
Polishing and Abrasive Methods
Polishing and abrasive ways use special belts, pads, or wheels to smooth edges. These machines can make the edge shiny or dull, depending on what you want. You can change the speed and pressure for each job.
Abrasive ways work well for tough burrs that brushing cannot take off. You can use different grades to match your metal. Polishing helps when you want a smooth, nice-looking edge.
Some machines can brush, sand, and polish all at once. This saves time and makes your work faster.
Integrating Deburring in Workflow
You need to add deburring to your work steps for the best results. If you skip this step, burrs can cause problems later. They can make your parts weak, slow down machines, and make your products look bad.
Here is a table that shows important things to think about when adding deburring:
| Consideração fundamental | Explicação |
|---|---|
| Ensuring part integrity | Burrs create weak points in materials, increasing the risk of failure under stress. |
| Improving efficiency | Burrs can cause inefficiencies in automated systems, leading to production slowdowns and errors. |
| Enhancing aesthetic quality | Burrs detract from the visual appeal of products, impacting customer satisfaction and brand reputation. |
| Maintaining compliance with standards | Many industries have strict deburring requirements to avoid penalties and ensure safety. |
| Achieving cost savings | Investing in deburring processes can prevent costly repairs and downtime caused by defects. |
Keep these points in mind too:
- If you do not remove burrs, your parts may not fit right.
- You want every part to meet your quality rules.
- Worn tools can change how well deburring works.
- Safety is important. Make sure your team knows how to use tools safely.
You can add deburring right after slitting or as a last step before packing. Machines fit well in a line. Manual ways are best for small jobs or special parts. Check your edges often and change your process if needed.
Note: Good deburring makes your work smoother and your products stronger. You save money by not having to fix mistakes or broken machines.
When you use the right deburring ways, you get clean, safe, and high-quality edges. Your work goes faster, and your products meet the rules.
Best Practices for Edge Burr Prevention
Continuous Improvement
You can keep your metal slitting process strong by always looking for ways to improve. When you check your work often, you find new ways to make your edges smoother and your products better. You should focus on process optimization and ongoing evaluation. This helps you reach higher quality and better cutting performance.
- Adjust blanking parameters. For example, keeping the clearance between blades at 10-13.1% of the sheet thickness can lower burrs. One supplier saw a 70% drop in burr height by reducing clearance from 15% to 10%. This small change made a big difference in edge quality.
- Try laser polishing for edge smoothing. This method melts and smooths the edges, making them much cleaner. Some factories have seen a 90% reduction in burr height using this technique.
- Use two-stage counter-cutting. This process can give you an 80% clean cut surface with no burrs. Many manufacturers use this for stainless steel flanges to get burr-free edges.
- Add advanced technologies to your high-speed slitting lines. Smart systems and AI can predict when you need new tools. They help you spot defects early and keep your edges in top shape.
You should write down your results and compare them over time. This helps you see what works best for your materials and machines. When you use these strategies, you boost your cutting efficiency and keep your edge quality high.
Tip: Review your process every month. Small changes can lead to big gains in edge quality and less rework.
Training and Skill Development
You need skilled operators to get the best results from your metal slitting knives. Training helps your team make smart choices about tool paths and machine settings. This leads to better edges and higher quality.
- Operators who get in-depth training make better decisions. They can lower burrs by 25% just by adjusting how they work.
- Companies with strong training programs see a 30% jump in productivity. They also waste less material, which means better quality and lower costs.
You should teach your team how to spot problems with edges and how to fix them. Show them how to use inspection tools and how to adjust machines for high-speed slitting. When your team knows what to look for, you get better edge quality and safer products.
Note: Hold regular training sessions. Update your team on new tools and techniques for high-speed slitting and deburring.
Custom Solutions for Industry Needs
Every industry has its own needs for edge quality and cutting performance. You can use custom solutions to meet these needs and get the best results from your high-speed slitting knives. Custom blades and special setups help you reach the right balance of precision and durability.
| Tipo de solução | Descrição |
|---|---|
| Tighter Burr Tolerance | Some suppliers keep burrs under 5% of material thickness. This is better than the usual 10% standard. |
| Proprietary Dike Nut | This tool lets you fine-tune the clearance on your slitter arbor. You get better edge quality. |
| Engineered Stagger on Slitter Rubbers | This setup removes knife marks on surface-critical materials. It meets high-end application needs. |
You can also use specialized slitter knives to get tighter burr tolerances. Some companies make custom knives for your exact job. You can ask for special coatings, shapes, or materials. These options help you get the right edges for your products.
If you want help picking the best blade or setup, you can visit Nanjing Metal Industrial’s custom blade page. Their engineers can help you choose the right material, geometry, and surface treatment for your high-speed slitting needs.
- Use proprietary tools for precise adjustments in your slitting process.
- Order custom knives for special materials or shapes.
- Work with your supplier to match your edge quality needs.
Callout: Custom solutions help you meet strict industry standards and keep your edges smooth, even in high-speed slitting.
You should always look for ways to improve your process, train your team, and use custom solutions. This keeps your edge quality high and your products strong. When you follow these best practices, you get better results and fewer problems with burrs.
You can get rid of edge burrs on metal slitting knives by doing a few important things:
- Make sure your cutting tools are sharp and the blades line up right.
- Pick the best speed for cutting and move the metal at the right pace.
- Hold your material steady while you cut so it does not bend.
- Look at the clearance settings often and change them if needed.
- Teach your team how to find and fix burrs fast.
If you take care of your tools and keep making your process better, your cuts will stay smooth and your products will be strong. If you want help or special answers for your work, entre em contato com nossa equipe.
Perguntas frequentes
What causes burrs on metal edges?
You see burrs when the cutting tool pushes or tears the metal instead of making a clean cut. Dull blades, wrong speed, or poor alignment can all cause burrs on metal edges.
How do I prevent burrs during metal slitting?
You should keep your blades sharp and set the right clearance. Check your machine often. Use the best speed for your metal. Clean and align your tools before you start slitting metal.
Why is deburring important for metal parts?
Deburring removes sharp edges from metal. This makes your parts safer to handle. It also helps metal pieces fit together better and last longer. Deburring improves the look and quality of your metal products.
What tools work best for manual metal deburring?
You can use files, scrapers, and wire brushes for manual deburring. Each tool helps you remove burrs from metal edges. Pick the tool that matches your metal and the size of the burrs.
Can I automate the deburring process for metal?
Yes, you can use machines with brushes, belts, or wheels to remove burrs from metal. Automated deburring works well for large batches of metal parts. It saves time and gives you even results.
How often should I inspect my metal slitting knives?
You should check your metal slitting knives before and after each job. Regular inspection helps you find dull spots or damage. This keeps your metal cuts clean and reduces burrs.
Does the type of metal affect burr formation?
Yes, different metals act in different ways. Hard metals make fewer burrs. Softer metals like aluminum or mild steel make more burrs. Always adjust your process for the type of metal you use.
What safety steps should I follow when deburring metal?
Wear gloves and safety glasses when you deburr metal. Sharp burrs can cut your hands. Keep your work area clean. Use the right tool for your metal. Work slowly and check your edges often.
Veja também
Lâminas Circulares para Corte Longitudinal de Metal
O Que São Lâminas de Tesoura Rotativa e Como Elas Funcionam?
Explorando as aplicações das lâminas de corte Metal na fabricação
Como selecionar a lâmina de corte de rolo certa para suas necessidades
Lâminas de Corte Rotativas Aftermarket vs. OEM: Uma Análise Custo-Benefício