
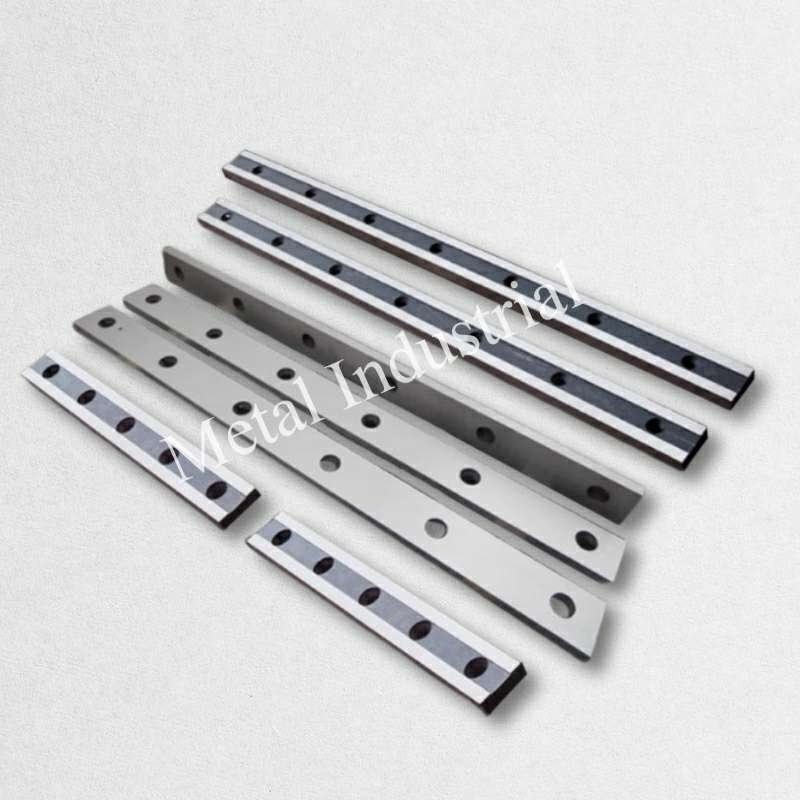
ستحصل على نتائج رائعة عندما تقوم بـ سن شفرات القصحافظ على شكل الشفرة الصحيح واستخدم الزاوية المناسبة. حافظ على شكل الشفرة الأصلي. أزل كمية قليلة فقط من المادة. تتميز شفرات القص الصناعية Metal بتصميم حافة خاص ومواد متينة. يساعد الشحذ الدقيق على تحسين القطع وزيادة عمرها. استخدم الطريقة الصحيحة للشحذ لتجنب الأخطاء، مما يوفر لك المال على المدى الطويل.
النقاط الرئيسية
- يساعد شحذ شفرات المقصات بالطريقة الصحيحة على تحسين أدائها وإطالة عمرها. وهذا يعني الحصول على قطع أنظف وتقليل وقت الإصلاح.
- يُعد الحفاظ على الشكل الأصلي للشفرة أمراً بالغ الأهمية. فهو يُسهّل عملية القطع، ويُساعد على جعل القطع ناعمة، ويمنع هدر المواد.
- غالباً ما يوفر شحذ الشفرات المال، إذ لا تحتاج إلى شراء شفرات جديدة بكثرة، كما يقلّ توقف آلاتك.
- اختر أداة التجليخ المناسبة لحجم وشكل شفرتك. استخدم آلات التجليخ المكتبية للشفرات الصغيرة، بينما تُعدّ آلات التجليخ الشريطية الأنسب للشفرات الكبيرة والمنحنية.
- احرص دائمًا على اختيار قرص التجليخ المناسب ودرجة خشونة سطحه لمادة شفرتك. هذا يمنع الشفرة من السخونة الزائدة ويحافظ على حدتها.
- السلامة أمر بالغ الأهمية. ارتدِ معدات السلامة. تأكد من أن مكان عملك نظيف ومضاء جيدًا. هذا يساعدك على تجنب الإصابة.
- افحص الشفرات بانتظام بحثًا عن أي تلف. اضبط الخلوص قبل الشحذ. هذا يساعد في الحفاظ على شكل الشفرة الصحيح.
- بعد الشحذ، افحص وجود أي نتوءات واختبر حدة النصل. هذا يضمن جاهزية النصل للاستخدام.
لماذا يجب شحذ شفرات المقص بشكل صحيح؟
الأداء وطول العمر
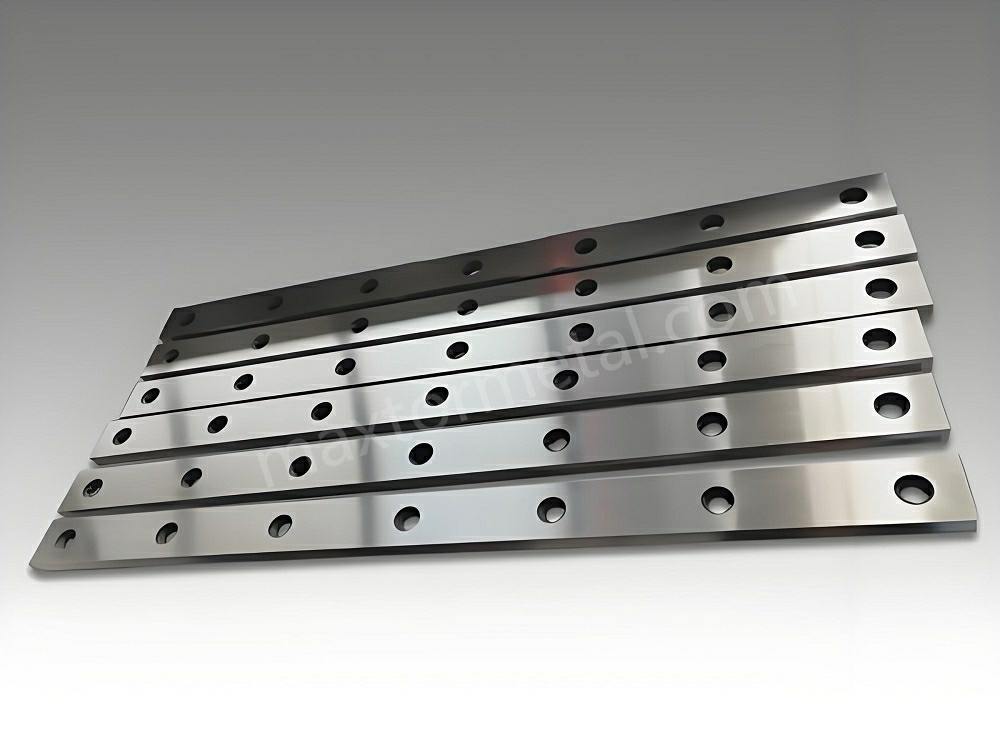
يساعد شحذ شفرات المقص بالطريقة الصحيحة على تحسين أدائها. كما أنه يجعلها أكثر متانة. تستمر لفترة أطولتتميز شفرات القص الصناعية Metal بموادها المتينة وحوافها الخاصة. هذه الشفرات قوية ومتينة، وتؤدي العديد من المهام بكفاءة عالية. تمنحك الشفرات الحادة قطعًا نظيفة، مما يقلل من توقف العمل. أما الشفرات غير الحادة، فقد تُسبب قطعًا خشنة أو تُبطئ من وتيرة العمل.
انظر إلى الجدول أدناه. يوضح كيف يساعد الشحذ شفرات القص الصناعية Metal على تحسين أدائها:
| نوع التحسين | وصف |
|---|---|
| مقاومة التآكل المحسنة | تساعد الطلاءات الخاصة على إطالة عمر الشفرات بمقدار 2-3 مرات في الأعمال الشاقة. |
| متانة ممتدة | تتيح جودة التصنيع للشفرات تحمل العمل الشاق والحفاظ على حدتها. |
| الصيانة الفعالة | يسهل شحذ الشفرات وطلائها، مما يوفر لك الوقت والمال. |
لا يقتصر دور الشحذ على جعل الشفرات حادة فحسب، بل يحافظ عليها قوية لأداء المهام الشاقة.
الحفاظ على الشكل الهندسي
يُعد الحفاظ على شكل النصل أمرًا بالغ الأهمية. يجب عليك حماية زاوية القطع، والتوازي، والاستواء. إذا كان الشكل غير صحيح، فقد تتكون نتوءات أو شظايا. وقد تلاحظ أيضًا قطعًا غير متساوية. هذه المشاكل تُصعّب عملك وقد تُلحق الضرر بالنصل.
- الحفاظ على الشكل الصحيح يعني أنك:
- استخدم جهدًا أقل للقطع.
- احصل على قصات أكثر سلاسة وسرعة.
- فقدان كمية أقل من مادة الشفرة.
تشير الدراسات إلى أن فقدان الشكل الصحيح للشفرات يؤدي إلى تآكلها بسرعة. وقد تصبح حافتها غير حادة نتيجة احتكاكها بالقطع الصغيرة، مما يجعلها أقل حدة وأقل فائدة.
إجمالي تكلفة الملكية وتوفير التكاليف
شحذ الشفرات بالطريقة الصحيحة يوفر المال، إذ لا تحتاج لشراء شفرات جديدة باستمرار، كما يقلل من الوقت الضائع في إصلاح الأعطال أو توقف العمل. يوفر الكثير ممن يستخدمون هذه الشفرات الكثير من المال بشحذها بانتظام.
- يساعدك الشحذ المنتظم على:
- تجنب شراء شفرات جديدة في وقت مبكر جدًا.
- قلل من نفقات العناية بالشفرات.
- حافظ على تشغيل الآلات لفترة أطول دون توقف.
يساعد تنظيف الشفرات وفحصها بانتظام على إطالة عمرها. يوضح الجدول أدناه كيف تُسهم طرق الشحذ المختلفة في إطالة عمر الشفرات:

عندما تقوم بشحذ شفرات المقص والعناية بها، فإنك تستفيد منها لفترة أطول. كما أنك تحافظ على سلامة عملك وكفاءة أدائه.
الأدوات والتحضيرات اللازمة للشحذ
قبل البدء بشحذ شفرات القص، جهّز الأدوات المناسبة. تأكد من أن مكان عملك آمن وجاهز. شفرات القص الصناعية Metal مصنوعة من مواد متينة، لذا اختر أدواتك بعناية. يمكنك الاطلاع على شفرة مخصصة خيارات. إذا كنت ترغب في معرفة المزيد عن مواد الشفرات، فراجع شركة نانجينغ Metal الصناعية.
اختيار معدات الطحن
مقارنة بين آلات التجليخ المكتبية وآلات التجليخ الشريطية
توجد أنواع مختلفة من المطاحن التي يمكنك استخدامها. كل واحدة منها مناسبة لمهام معينة.
- آلات تجليخ المقاعد
- مزاياتوفر لك هذه المطحنة سطحاً ثابتاً للعمل، وتساعدك على الطحن بعناية. يوجد منها في العديد من المحلات.
- سلبياتلا تُعدّ آلات التجليخ المكتبية مناسبة للشفرات الكبيرة أو المنحنية، لأنها قد تُسخّن الشفرات بسرعة.
- الأفضل لـاستخدم آلة تجليخ الطاولة للشفرات الصغيرة أو المتوسطة. وهي الأنسب للحواف المستقيمة وعندما تحتاج إلى تحكم دقيق.
- آلات تجليخ الأحزمة
- مزاياتتميز آلات التجليخ الشريطية بسهولة استخدامها للعديد من الأشكال، وهي فعالة مع الشفرات الكبيرة أو المنحنية، وتزيل المعدن بسرعة.
- سلبياتيجب عليك الحفاظ على ثبات الزاوية. قد تتلف الأحزمة بسرعة.
- الأفضل لـاستخدم آلة تجليخ الأحزمة للشفرات الكبيرة أو ذات الأشكال المعقدة. كما أنها مناسبة للتجليخ السريع.
نصيحة: استخدم آلة تجليخ الطاولة في ورشة العمل للشفرات الصغيرة والمستقيمة. استخدم آلة تجليخ الحزام في المصنع للشفرات الكبيرة والمنحنية.
تُعدّ آلات التجليخ السطحي مفيدة أيضاً في شحذ الشفرات. وهي تعمل بكفاءة على أجزاء الشفرات المسطحة المتلامسة. اضبطها زاوية الطحن بين 2 و 7 درجات للحصول على أفضل النتائج.
اختيار العجلات حسب المادة
اختر قرص التجليخ المناسب لمادة الشفرة. هذا يمنع الشفرة من السخونة الزائدة ويحافظ على نعومة الحافة.
| مادة الشفرة | نوع العجلات الموصى به | حجم الحبيبات | درجة الصلابة |
|---|---|---|---|
| فولاذ D2 | السيراميك أو CBN | 60–120 | ك–ن |
| فولاذ H13 | أكسيد الألومنيوم أو CBN | 80–120 | جيه-إم |
| كربيد التنغستن | الماس | 100–180 | R–S |
- بالنسبة للفولاذ D2، استخدم عجلات سيراميك أو عجلات CBN. اختر درجة خشونة تتراوح من 60 إلى 120.
- بالنسبة للفولاذ H13، استخدم عجلات أكسيد الألومنيوم أو عجلات CBN. اختر درجة خشونة تتراوح من 80 إلى 120.
- بالنسبة لكربيد التنجستن، استخدم عجلات الماس. اختر حجم حبيبات من 100 إلى 180.
استخدم دائمًا عجلة الشحذ المناسبة ونوع حبيبات الشحذ المناسبين للشفرة. فهذا يحافظ على حدة الشفرة ويمنع تلفها بفعل الحرارة.
السلامة وإعداد مكان العمل
معدات الحماية الشخصية (PPE)
يجب توخي الحذر عند شحذ شفرات المقصات، فالطحن يُنتج شرارات وغباراً.
- ارتدِ نظارات واقية لحماية عينيك.
- استخدم قفازات مقاومة للقطع لحماية يديك.
- ارتدِ واقيات الأذن لحماية أذنيك.
- ارتدِ قناعًا للغبار أو جهاز تنفس لمنع دخول الغبار.
- تأكد من أن مكان عملك مضاء جيدًا.
- حافظ على نظافة وترتيب المكان الذي تتواجد فيه.
تحميك معدات الوقاية الشخصية من الشرر والقطع المتطايرة ولمس الشفرة عن طريق الخطأ.
تُعد أنظمة التبريد مهمة أيضاًفهي تمنع الشفرات من أن تصبح ساخنة للغاية وتفقد حدتها.
- يُعد التبريد الهوائي مناسباً للأعمال الخفيفة، حيث تعمل المراوح على طرد الحرارة.
- يُعد التبريد السائل أفضل للشفرات السميكة، حيث يمتص سائل التبريد الحرارة.
- يستخدم التبريد المبرد النيتروجين السائل للتبريد السريع. وهذا يقلل الضغط على الشفرة ويساعدها على البقاء لفترة أطول.
تُقلل مساحة العمل الثابتة من الاهتزاز، مما يُساعدك على إجراء قطع دقيقة ويُطيل عمر الشفرات.
فحص الشفرة وضبط الخلوص
افحص الشفرة قبل شحذها. تساعدك عمليات الفحص على اكتشاف المشاكل مبكراً وتوفير الوقت.
| طريقة الفحص | وصف |
|---|---|
| الفحص العيني | ابحث عن الحواف المستديرة، أو الشقوق، أو الكسور، أو التآكل غير المتساوي. |
| تتبع الأداء | راقب كمية القطع التي تقوم بها. لاحظ ما إذا كنت بحاجة إلى شحذ الشفرة بشكل متكرر. |
| التوثيق | دوّن كيفية عمل الشفرة. سيساعدك هذا على التخطيط لموعد استبدالها. |
- افحص الشفرات بانتظام للتأكد من عدم وجود تآكل أو تلف أو عدم استقامتها.
- الفحوصات المبكرة تمنع المشاكل الكبيرة من أن يحدث.
- ابحث عن الشقوق والكسور الصغيرة، وتأكد من أن النصل مستقيم.
احرص دائمًا على ضبط خلوص الشفرة قبل شحذها. فهذا يساعدك على إزالة الجزء المطلوب فقط ويحافظ على شكل الشفرة الصحيح.
عندما تُجهّز أدواتك ومساحة عملك ومعدات السلامة، تكون جاهزاً للانطلاق. يمكنك شحذ شفرات المقصات جيداً والحفاظ على أداء آلاتك بكفاءة عالية.
كيفية شحذ شفرات المقص كالمحترفين
التنظيف والإعداد
قم بإزالة الحطام ومواد التشحيم القديمة
يجب البدء بشفرة نظيفة قبل شحذ شفرات المقص. فالأوساخ والزيوت القديمة والصدأ قد تخفي التلف وتجعل عملية الشحذ أصعب. استخدم طرق التنظيف التالية:
- اغسل الشفرة بالماء الدافئ وسائل غسل الأطباق لتنظيفها تنظيفاً خفيفاً.
- امسح الشفرة بالكحول الطبي (70% إيزوبروبيل) لإزالة الشحوم وتطهيرها.
- لإزالة الأوساخ الصعبة، استخدم محلول بيروكسيد الهيدروجين المخفف (امزج أجزاء متساوية من بيروكسيد الهيدروجين 3% والماء).
- إذا رأيت أوساخاً عنيدة، جرب استخدام منظف فوسفات ثلاثي الصوديوم. ارتدِ قفازات ونظارات واقية حفاظاً على سلامتك.
تساعدك الشفرة النظيفة على رؤية الحافة بوضوح وتجعل عملية الشحذ أكثر سلاسة.
ثبّت الشفرة لشحذها
يجب تثبيت النصل جيدًا أثناء العمل. فالحركة قد تُسبب حوافًا غير متساوية أو حوادث. ضع النصل في ملزمة متينة أو أداة شحذ خاصة. تأكد من عدم اهتزاز النصل. فالتثبيت الثابت يُتيح لك التحكم بشكل أفضل في الزاوية والضغط.
نصيحة: استخدم قطعة قماش ناعمة أو وسادات مطاطية في الملزمة لحماية سطح الشفرة من الخدوش.
افحص بحثًا عن أي تلف أو اعوجاج
تفحّص النصل جيدًا. افحصه بحثًا عن أي شقوق أو كسور أو انحناءات. مرّر إصبعك برفق على طول الحافة لتتحسس أي خشونة. إذا وجدت تلفًا عميقًا أو اعوجاجًا، فقد تحتاج إلى إصلاح النصل أو استبداله. لا تشحذ نصلًا به عيوب خطيرة، فقد ينكسر أو يقطع بشكل غير صحيح.
تحديد وقياس الزوايا
حدد الزاوية الموصى بها من قبل الشركة المصنعة
لكل شفرة زاوية مثالية للشحذ. تحافظ هذه الزاوية على قوة الشفرة وحدتها. يستخدم المصنّعون طرقًا مختلفة لضبط هذه الزوايا. إليك بعضها: جدول يوضح الطرق الشائعة لقياسها:
| طريقة القياس | مرجع الزاوية | الزاوية الناتجة |
|---|---|---|
| الطريقة الألمانية | 0° from inside edge | 35° from inside, 55° from outside |
| Japanese Method | 90° from inside edge | 35° from inside, 55° from outside |
| US Method | 90° – angle gage result | 35° from inside, 55° from outside |
Check your blade’s manual or the company’s website for the exact angle. Using the right angle helps you sharpen shear blades like a pro.
Use Angle Gauges or Protractors for Accuracy
You want to keep the sharpening angle exact. Use these tools to help:
- An angle-setting jig holds the blade at the right angle.
- A tilt box lets you measure and adjust the angle easily.
- A protractor helps you line up the blade and set the guide.
These tools make sure you do not change the blade’s shape by mistake.
Mark the Bevel with a Permanent Marker
Take a permanent marker and color the edge of the blade. This mark shows you where you are grinding. As you sharpen, the marker will disappear from the spots you touch. This trick helps you keep the angle even and avoid grinding too much metal.
Note: Marking the bevel is a simple way to track your progress and keep the edge straight.
Grinding Technique
Maintaining Bevel and Flatness
When you grind, you want to keep the blade’s original shape. Use these tips:
- Use a bevel jig to hold the angle steady.
- Try the push stick method to guide the blade and keep your hands safe.
- Check the grinding surface often. If you use a platen, resurface it to keep it flat.
- Mark grind heights and centerlines with layout fluid or a marker for better accuracy.
You can also:
- Use a solid belt grinder for better control.
- Choose a Variable Frequency Drive (VFD) for fine grinding.
- Replace worn-out belts to avoid uneven grinding.
Fresh abrasives give you a smoother finish and help you sharpen shear blades without making them uneven.
Preventing Overheating
Grinding can make blades hot. Too much heat can soften the metal and ruin the edge. You can stop this by:
- Dipping the blade in water often during grinding.
- Using water-cooled sharpening tools.
- Grinding by hand to keep heat low.
- Picking grinding wheels with larger grains for better heat control.
- Using CBN or diamond wheels to cut down on friction.
- Dressing the grinding wheel often to keep it sharp.
You can also slow down the feed rate and take shallow cuts. This keeps the blade cool, even if it takes a bit longer.
Always watch for blue spots on the blade. Blue means the blade got too hot and may have lost its hardness.
By following these steps, you keep the blade strong and sharp for a long time.
Honing and Polishing
Use Fine Grit Stones or Honing Wheels
After you finish grinding, you need to refine the edge. This step makes the blade sharper and smoother. You can use different types of honing stones or wheels for this job:
- Blackstone silicone wheels work well for very hard steels. They help shape the bevel and remove rough spots.
- Japanese waterstones, such as 1000 or 6000 grit, are great for final edge refinement. They remove tiny scratches and burrs, leaving a sharp edge.
- King Japanese waterstones are also a good choice for sharpening many types of blades.
Start with a coarser stone if the edge feels rough. Move to a finer stone or wheel to finish. Always keep the stone wet if you use waterstones. This helps the stone cut better and keeps the blade cool.
Tip: Use light pressure when honing. Let the stone or wheel do the work. This helps you avoid removing too much metal and keeps the blade’s shape.
Polish the Edge for a Mirror Finish
Polishing the edge is the last step before you use the blade. When you polish the edge to a mirror finish, you make the blade glide through materials with less effort. The smooth edge cuts cleaner and more precisely. This is important for delicate jobs where you need accuracy.
Polishing also removes small imperfections. These tiny flaws can cause chipping or rust if you leave them. By polishing, you help the blade last longer and stay sharp. Use a fine honing wheel or a polishing compound for this step. Work slowly and check the edge often. You want to see a shiny, mirror-like surface along the bevel.
Final Inspection
Check for Burrs and Consistent Edge
After you hone and polish, you need to check the blade for burrs and a consistent edge. Burrs are small pieces of metal that stick out from the edge after sharpening. They can make the blade cut poorly or even damage the material you are cutting.
Here are some ways to check for burrs and edge consistency:
- Feel along the edge with your fingertip. You might notice a rough spot or a tiny hook.
- Look at the edge under a bright light or with a magnifier. Burrs can look like shiny lines or small bumps.
- Alternate honing sides with light pressure to help remove any remaining burrs.
A good edge should feel smooth and even from end to end. If you find a burr, go back to the honing stone and gently remove it.
Test Blade Sharpness and Alignment
You should always test the blade before you put it back to work. There are several simple ways to check sharpness and alignment:
- Visual inspection: Look for nicks, chips, or bends along the edge.
- Paper test: Try slicing a piece of paper. A sharp blade will cut cleanly without tearing.
- Tomato test: Slice a tomato. If the blade glides through easily, it is sharp.
- Arm hair test: Carefully try to shave a small patch of arm hair. If the blade cuts hair without pulling, it is ready.
- Vegetable or fruit test: Use a firm vegetable or fruit to see how the blade performs in real use.
If the blade passes these tests, you have finished the sharpening process. If not, repeat the honing and polishing steps until you get the results you want.
Note: Always handle the blade with care during testing. A sharp edge can cut you easily.
By following these steps, you make sure you sharpen shear blades to a professional standard. You get a blade that cuts cleanly, lasts longer, and works safely every time.
تجنب أخطاء الطحن الشائعة
Wrong Angle and Geometry Loss
You need to keep the correct angle when you sharpen shear blades. If you grind at the wrong angle, you change the blade’s geometry. This mistake can cause many problems:
- The blade may tear the material instead of cutting it cleanly.
- You can overheat the edge, which weakens the blade.
- The blade will wear out faster and may even damage your machine.
ال زاوية حافة القطع is very important. It decides how well the blade cuts. If you use the wrong angle, you lose cutting power and accuracy. Always check the manufacturer’s guide for the right angle. Use angle gauges or jigs to help you keep the correct shape.
Tip: Match the blade’s pitch and profile to the material and machine speed. Fine teeth work best for fast jobs. Coarse teeth are better for slow, heavy cuts.
If you use a blade with the wrong geometry, you risk tip breakage, especially with brittle materials. Always align the blade’s shape with its limits.
Over-Grinding
Over-grinding happens when you remove too much material from the blade. This mistake can shorten the blade’s life and damage its surface. You need to avoid grinding too much at once.
Here is what can happen if you over-grind:
| النتائج الرئيسية | وصف |
|---|---|
| Fatigue Life Impact | The blade becomes weaker and does not last as long. |
| Surface Integrity Damage | The blade’s surface gets damaged, which can lead to cracks or chips. |
| Grinding Conditions | Wet grinding helps the blade last longer than dry grinding. |
You should always use light pressure and check your progress often. Take breaks to cool the blade and inspect the edge. If you see deep scratches or uneven spots, you may have removed too much material.
Note: Over-grinding can also change the blade’s balance. This can cause vibration and poor cutting results.
Heat Damage and Softening
Grinding creates heat. If the blade gets too hot, it can lose its hardness. The edge becomes soft and dulls quickly. You need to keep the blade cool while you work.
The danger zone for heat damage starts at 400°F (about 204°C). Most industrial shear blades are tempered at this temperature. If you go over this limit, you can ruin the blade’s heat treatment.
- The cutting edge is thin and heats up fast.
- Buffing and grinding can easily push the temperature too high.
- Once the blade softens, it will not hold an edge.
You can prevent heat damage by dipping the blade in water, using coolant, or grinding in short bursts. Watch for blue or purple colors on the edge. These colors mean the blade got too hot.
Always keep coolant levels high and check the blade’s temperature often. This simple step protects your blade and keeps it sharp.
Here is a table of common grinding mistakes found in industrial blade maintenance:
| خطأ | توضيح |
|---|---|
| Inadequate coolant levels | Causes overheating and premature wear, leading to poor cut quality. |
| Operating at excessive speeds | Leads to increased friction and premature wear. |
| Failure to dress wheels | Results in poor blade tracking and reduced precision. |
| Continued use of dull blades | Leads to poor cut quality and increased material waste. |
You can avoid these mistakes by following best practices and checking your work often. This will help you sharpen shear blades like a pro and keep your tools working longer.
Burrs, Chipping, and Bowed Blades
When you sharpen shear blades, you need to watch out for burrs, chipping, and bowed blades. Burrs are tiny pieces of metal that stick out from the edge after sharpening. If you leave a burr, your blade will not cut smoothly. It can also cause resistance and make your cuts rough. Chipping happens when small pieces break off the edge. Bowed blades bend out of shape and do not cut straight.
You can prevent these problems by following best practices during sharpening. Always check for a burr after sharpening one side. Flip the blade and sharpen the other side. Use gentle swiping motions with less pressure. This helps you avoid making a new burr. Run your finger along the edge to check for smoothness. If you feel a hook or rough spot, you still have a burr.
Proper burr removal is important. If you do not remove the burr, the blade will not work well. You can use different techniques to get rid of burrs and keep your shear blades in top shape.
| تقنية | وصف |
|---|---|
| Elevate Angle | Raise the sharpening angle slightly until the burr is almost gone, then finish at the original angle. |
| Fold Burr | Lightly drag the edge across hard plastic or wood at 90° to lift the burr for easier removal. |
| Strop on Paper | Use plain paper wrapped around a hard surface to polish and remove leftover burrs. |
| Quick Method | Drag the edge through plastic or wood during final strokes to help remove burrs. |
| Alternate Passes | Sharpen both sides equally to avoid undoing your work. |
| Backdrag Test | Lightly drag the edge on plastic or wood to check for burrs. If nothing catches, the edge is clean. |
| Micro-burr Consideration | Sometimes leaving tiny burrs is better than overworking the edge or making the angle too wide. |
نصيحة: Always alternate sides when sharpening. This keeps the edge even and helps prevent chipping.
If you notice chipping, you may be using too much pressure or the wrong angle. Use lighter strokes and check your progress often. Bowed blades often result from uneven grinding or too much force. Secure the blade well and use steady, even pressure. If a blade bows, it will not cut straight and may need professional repair.
- After sharpening one side, feel for the burr and then switch to the other side.
- Use lighter pressure to avoid making a new burr.
- Check for a smooth edge by running your finger along the blade after a few swipes.
By following these steps, you keep your shear blades sharp, straight, and ready for any job.
Coarse Stones and Ryde Line Damage
The type of sharpening stone you use can affect the quality of your shear blades. Coarse stones remove material quickly, but they can also cause damage if you are not careful. The ryde line is the fine line along the edge of the blade. If you use a stone that is too coarse, you risk damaging this line.
If the stone used to rebalance the shears is too coarse, the ryde line can be damaged or the shears won’t polish up to a high shine and will catch and pull.
A damaged ryde line means your shear blades will not cut smoothly. The edge may catch on materials or pull instead of slicing cleanly. You will also have trouble getting a polished, shiny finish on the blade. Always start with a coarser stone only if the blade is very dull or damaged. Move to finer stones as you get closer to the final edge.
- Use coarse stones only for heavy reshaping or repair.
- Switch to medium and fine stones for sharpening and finishing.
- Check the ryde line often. If you see scratches or roughness, use a finer stone.
- Finish with a polishing step to get a smooth, shiny edge.
Choosing the right stone and using the correct technique will help you avoid ryde line damage. Your shear blades will stay sharp, smooth, and ready for precise cutting.
رؤوس شحذ خاصة بالمواد
فولاذ D2
Recommended Grinding Wheels and Grits
D2 steel is a popular choice for industrial shear blades because it is tough and holds an edge well. You need to use the right grinding wheels and grits to sharpen D2 steel. Choose ceramic or CBN (Cubic Boron Nitride) wheels. These wheels work best for hard steels like D2. Pick a grit size between 60 and 120. Use a hardness grade from K to N. This combination helps you remove just enough material without damaging the blade.
If you need a custom blade for a special job or material, you can explore خيارات الشفرات المخصصة to match your needs.
Cooling and Overheating Prevention
D2 steel can lose its hardness if it gets too hot during sharpening. You must keep the blade cool to protect the edge. Use light pressure when grinding. Do not push too hard. Cool the steel often by dipping it in water or using a coolant system. This stops the edge from overheating and keeps the blade strong.
Here is a table that shows the best cooling techniques for D2 steel:
| تقنية | وصف |
|---|---|
| Use Light Pressure | Apply moderate pressure to avoid overheating the steel. |
| Cool the Steel Frequently | Periodically cool the steel to prevent overheating and damage. |
Always watch for color changes on the edge. Blue or purple means the blade got too hot.
Angle and Geometry Considerations
You need to keep the original angle and shape of the shear blade. Check the manufacturer’s guide or the نانجينغ Metal الصناعية website for the correct angle. Use an angle gauge or protractor to set the bevel. Mark the edge with a permanent marker to track your progress. Take off as little material as possible. This helps the blade last longer and keeps the cutting edge strong.
فولاذ H13
Suitable Abrasives and Wheel Types
H13 steel is another common material for shear blades. It is strong and resists heat. You need special abrasives to sharpen H13 steel. Superabrasives like diamond and CBN wheels are ideal. These wheels are very hard and cut H13 steel well. You can find them in many grit sizes, from 46 to 2,000. The wheels come with different bonds, such as resinoid and vitrified. These bonds help the wheel cut smoothly and stay cool.
- Superabrasives like diamond and CBN are ideal for sharpening H13 steel blades due to their extreme hardness.
- These materials are specifically designed for grinding hard work materials, making them suitable for high-performance applications.
- Superabrasive wheels come in various grit sizes (typically 46 through 2,000 grit) and types of bonds, such as resinoid and vitrified, which enhance cutting efficiency and reduce overheating.
Heat Management and Surface Finish
H13 steel can crack if it gets too hot. You need to use light pressure and keep the blade cool. Dip the blade in water often or use a coolant system. This prevents micro-cracks and keeps the edge sharp. After grinding, check the surface finish. A smooth finish means the blade will cut better and last longer. Use finer grits for the last few passes to get a polished edge.
Tip: Always inspect the blade for heat checks or surface burns after sharpening.
Common Pitfalls in Sharpening H13
Many people make mistakes when sharpening H13 shear blades. They use too much pressure or grind too fast. This can cause cracks or burns on the edge. Always use gentle strokes and check your progress often. If you see any cracks or dark spots, stop and let the blade cool. Use the right wheel and grit for H13 steel to avoid these problems.
كربيد التنغستن
Diamond Wheels and Grit Selection
Tungsten carbide is very hard and needs special care when sharpening. Use diamond wheels for the best results. Pick a grit size between 100 and 180. Choose a hardness grade from R to S. Diamond wheels cut carbide smoothly and help you get a sharp edge without chipping.
Avoiding Chipping and Edge Fracture
Carbide edges can chip if you use too much pressure. Always grind slowly and gently. Do not force the blade against the wheel. Use a steady hand and let the diamond wheel do the work. Check the edge often for chips or cracks. If you see any, use lighter strokes and a finer grit.
Note: Avoid aggressive grinding. This keeps the edge strong and prevents fractures.
Polishing for Maximum Sharpness
After grinding, you need to polish the edge for the best cutting performance. Use fine diamond paste or a honing wheel. Work slowly and check the edge for a mirror finish. A polished edge cuts cleaner and lasts longer. This step is important for high-precision jobs.
If you need a special blade for a unique material, you can look at حلول الشفرة المخصصة to get the right tool for your work.
By following these material-specific tips, you keep your shear blades sharp, strong, and ready for any job.
Japanese vs. German Shears
Typical Blade Angles and Steel Types
Japanese and German shear blades are not the same. Japanese shears have a convex edge. This edge is very sharp and cuts smoothly. The angle is finer, between 40° and 50°. These blades use high-quality steel. This helps them stay sharp for a long time.
German shear blades have a beveled edge. This edge is not as sharp but is easier to care for. The angle is steeper, between 50° and 60°. German shears use strong steel. They can handle tough jobs and lots of sharpening.
وفيما يلي جدول يوضح الاختلافات الرئيسية:
| ميزة | Japanese Shears | German Shears |
|---|---|---|
| نوع الشفرة | Convex edge blades | Bevel-edge blades |
| حدة | Extremely sharp for precise cuts | Less sharp, easier to maintain |
| تردد الصيانة | Requires sharpening less frequently | Easier to maintain but less sharp |
| جودة المواد | High-quality materials for longevity | Durable and practical construction |
Sharpening Techniques for Each Style
You need to sharpen Japanese and German shears in different ways. For Japanese shears, use a flat hone or fine whetstone. Hold the blade at the same angle as before. Move it gently across the stone. Keep the convex shape. Do not make the edge flat. Use light pressure and check your work often. This keeps the blade sharp and smooth.
For German shear blades, use a grinding wheel or medium-grit stone. Hold the blade at the steeper angle. Move it in a steady way. You do not need to keep a convex edge. The beveled edge is easier to sharpen. You can use a little more pressure. Always check to make sure the edge is even.
Tip: Always follow the manufacturer’s rules for sharpening angles. This helps you keep the right shape and get the best cuts from your blades.
الأخطاء الشائعة وكيفية تجنبها
People often make mistakes when sharpening these blades. One mistake is using the wrong angle. If you change the angle, the blade can get dull. Another mistake is pressing too hard. This can chip the edge or make it uneven.
Here are some ways to avoid mistakes:
- Use the right sharpening tool for each blade.
- Keep the original angle. Use an angle guide if you need it.
- Use light, even strokes. Do not rush.
- Check your work often. Look for burrs or rough spots.
- Clean the blade before and after sharpening.
Note: If you are not sure about the angle or how to sharpen, ask a pro or check the manufacturer’s instructions. This helps you keep your blades sharp and avoid damage.
When you know the differences between Japanese and German shear blades, you can pick the right way to sharpen. This helps you get sharp blades that last a long time.
استكشاف الأعطال واستبدال الشفرات
Heat Checking and Surface Burns
You may notice small cracks or dark spots on your blade after grinding. These marks are called heat checks and surface burns. They happen when the blade gets too hot during sharpening. Heat checks look like tiny lines that run across the edge. Surface burns show up as blue, purple, or black spots. These signs mean the blade lost some hardness.
To prevent heat damage, always cool the blade often. Dip it in water or use a coolant. Use light pressure when you grind. If you see any color changes, stop and let the blade cool down. You can use a magnifying glass to check for small cracks. If you find many heat checks, the blade may not cut well anymore.
Tip: Always check for heat damage before you put the blade back to work. This helps you avoid poor cuts and keeps your machine safe.
Diagnosing Bowed Blades
A bowed blade does not stay flat. It bends in the middle or at the ends. You can spot a bowed blade by laying it on a flat table. If you see a gap under the blade, it is bowed. You may also notice uneven cuts or hear strange sounds during use.
Here are steps to check for a bowed blade:
- Place the blade on a flat surface.
- Press down gently at each end.
- Look for any space between the blade and the table.
- Use a straightedge or ruler to check for gaps.
A bowed blade can cause jams or crooked cuts. If you find a bow, do not try to fix it by force. You may need to replace the blade or ask a professional for help.
When to Rotate or Replace Blades
You should know when to rotate or replace your shear blades. Regular checks help you get the best results and keep your machines safe. Here are signs that you need to take action:
| لافتة | ماذا يعني ذلك | ما يجب القيام به |
|---|---|---|
| Dull edge | Blade does not cut cleanly | Sharpen or rotate blade |
| Deep chips or cracks | Blade is damaged | استبدال الشفرة |
| Bowed or warped shape | Blade is not flat | استبدال الشفرة |
| Frequent sharpening needed | Blade wears out quickly | استبدال الشفرة |
| Uneven wear | One side is thinner than the other | Rotate or replace blade |
You can rotate blades if they have more than one cutting edge. This helps you use all sides before replacing them. If you see deep damage, replace the blade right away. Always follow the manufacturer’s guide for safe blade care.
Note: If you sharpen shear blades often but still see poor results, it may be time for a new blade.
By checking your blades often and knowing when to replace them, you keep your work safe and your machines running well.
الصيانة لتحقيق أقصى تكلفة إجمالية للملكية
Routine Cleaning and Lubrication
You should clean your shear blades after every use. Dirt and old oil can stick to the blade. Metal shavings can also build up. This can make the blade rust or get dull faster. Use a soft brush or cloth to wipe off the dirt. If you see sticky stuff, use a gentle cleaner. Dry the blade well after cleaning.
Lubrication helps the blade move easily and stops rust. Put a thin layer of machine oil or the right lubricant on the blade edge and moving parts. Do not use too much oil. Too much oil can make dust and dirt stick. Always look for chips or cracks when you clean. If you see damage, fix it before sharpening the blade again.
Tip: Clean and oil your blades after each use. This easy step stops rust and keeps your cuts neat.
التخزين والمناولة
Storing your blades the right way keeps them safe. Put blades in a dry place. Use blade guards or cases to stop nicks or chips. Keep blades away from water to stop rust. If you store blades for a long time, check them sometimes for rust.
Handle blades carefully. Always wear gloves when you move or put in blades. Place blades on something soft so they do not bend. Never drop a blade or put heavy things on it. Careful handling helps blades last longer and keeps them safe to use.
Quick-Reference Maintenance Checklist
You can use this checklist to keep your blades in good shape:
| إجراءات الصيانة | Recommended Interval/Condition |
|---|---|
| التنظيف المنتظم | After each use to stop rust and keep cuts sharp. |
| شحذ الشفرات | When cuts get rough or harder to make. Use the right angle. |
| افحص وجود أي تآكل | Look for chips, cracks, or uneven edges every time you clean. |
| تشحيم الأجزاء المتحركة | After cleaning and before you put blades away. |
| فحوصات المحاذاة | Check often to make sure cuts are even and blades wear less. |
| Replace Blades | If you see cracks, big chips, or if the blade gets too thin. |
- Clean blades after every use to get rid of dirt.
- Check for chips, cracks, or other damage.
- Oil the blade edge and moving parts.
- Store blades in a dry, safe place.
- Check if blades are straight and replace them if needed.
Remember: Taking care of your blades helps them last longer and keeps your work safe and easy.
You can sharpen shear blades like a pro when you follow the right steps. Use the correct angle and check your work often. Avoid common mistakes to keep your blades sharp and strong. Clean and store your blades after each use. Regular care helps you save money and work safely. If you want expert advice or need help, تواصل مع مهندسي المبيعات لدينا اليوم.
التعليمات
How often should you sharpen shear blades?
You should sharpen shear blades when you notice rough cuts or increased effort. Most users sharpen blades after every 500 to 1,000 cuts. Regular inspection helps you decide the best schedule.
What is the best angle for sharpening shear blades?
You need to follow the manufacturer’s recommended angle. Most shear blades work best at angles between 35° and 55°. Use an angle gauge for accuracy.
Can you sharpen shear blades at home?
You can sharpen shear blades at home with the right tools. Use a bench grinder or belt grinder. Always wear safety gear and follow proper techniques.
Why do shear blades lose sharpness quickly?
Shear blades lose sharpness from cutting hard materials, improper sharpening, or lack of cleaning. Regular maintenance and correct sharpening help blades stay sharp longer.
What is the safest way to handle shear blades during sharpening?
You should wear cut-resistant gloves and safety goggles. Secure the blade in a vise. Keep your hands away from the edge and work slowly.
How do you know when to replace shear blades?
Replace shear blades when you see deep chips, cracks, or warping. If sharpening does not restore performance, it is time for a new blade.
Which grinding wheel works best for D2 steel shear blades?
Ceramic or CBN wheels work best for D2 steel shear blades. Use grit sizes between 60 and 120. This combination gives you a sharp edge and prevents overheating.
Do you need to lubricate shear blades after sharpening?
You should apply a thin layer of machine oil after sharpening. Lubrication protects the edge from rust and keeps the blade moving smoothly.
انظر أيضا
تحقيق قطع خالٍ من الشوائب باستخدام شفرات مقصلة القص الدقيقة
شفرات القص المصنوعة من D2: لماذا يعتبر فولاذ D2 ملكًا لقطع المعادن البارد
شفرات المقصلة مقابل شفرات القص: ما الفرق بينهما وأيهما الأفضل لعملك؟
دليل مواد شفرات القص: D2 مقابل A2 مقابل 5160 مقابل الكربيد — ما هو الخيار الأفضل؟
كيفية استكشاف الأخطاء الشائعة وإصلاحها في شفرات مقص الخردة الهيدروليكي في عام 2025
استجابة واحدة