


You get great results when you Affûter les lames de cisaille. Keep the blade shape correct and use the right angle. Keep the blade’s original shape. Take off only a little bit of material. Metal Industrial Shear Blades have special edge design and strong materials. Careful sharpening helps them cut better and last longer. Use the right way to sharpen to avoid mistakes. This helps you save money over time.
Principaux points à retenir
- Sharpening shear blades the right way helps them work better and last longer. This means you get cleaner cuts and spend less time fixing things.
- Keeping the blade’s original shape is very important. It makes cutting easier, helps cuts stay smooth, and stops you from wasting material.
- Sharpening often saves money. You do not need to buy new blades as much. Your machines also stop less often.
- Pick the right grinding tool for your blade’s size and shape. Use bench grinders for small blades. Belt grinders work best for big, curved blades.
- Always pick the right grinding wheel and grit for your blade’s material. This stops the blade from getting too hot and keeps it sharp.
- Safety matters a lot. Wear safety gear. Make sure your workspace is clean and bright. This helps you avoid getting hurt.
- Check blades often for damage. Adjust the clearance before sharpening. This helps keep the blade’s shape right.
- After sharpening, look for burrs and test if the blade is sharp. This makes sure the blade is ready to use.
Why Sharpen Shear Blades Properly
Performance et longévité
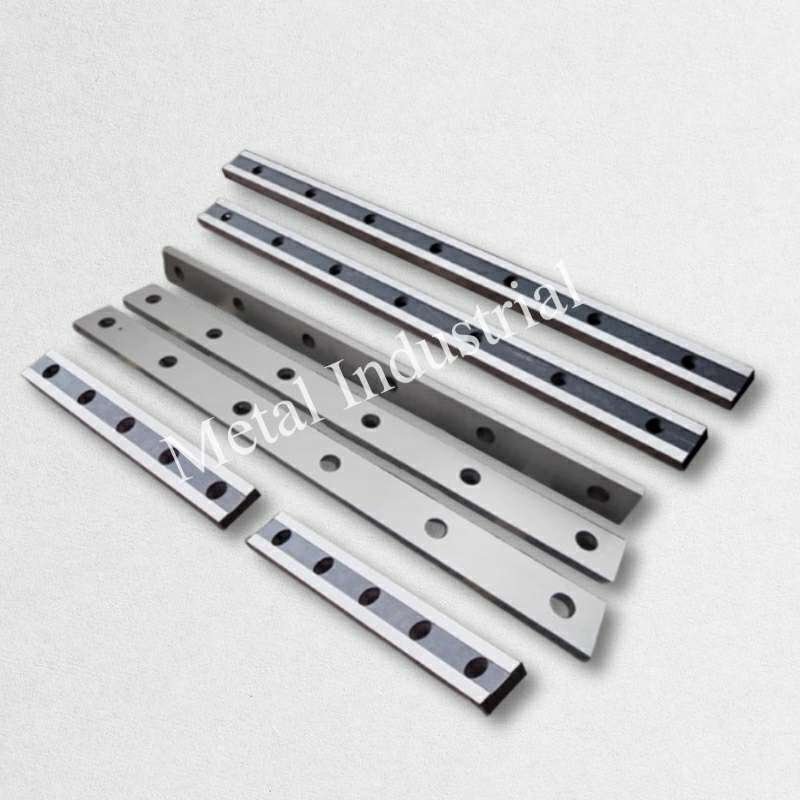
Sharpening shear blades the right way helps them work well. It also makes them durer plus longtemps. Metal Industrial Shear Blades use strong materials and special edges. These blades are tough and can do many jobs. Sharp blades give you clean cuts. You will not have to stop work as much. Dull blades can make rough cuts or slow down your work.
Look at the table below. It shows how sharpening helps Metal Industrial Shear Blades do better:
| Improvement Type | Description |
|---|---|
| Résistance à l'usure améliorée | Special coatings help blades last 2-3 times longer in tough jobs. |
| Extended Durability | Good manufacturing lets blades handle hard work and stay sharp. |
| Efficient Maintenance | Blades are easy to sharpen and coat, so you save time and money. |
Sharpening does more than just make blades sharp. It keeps them strong for hard jobs.
Geometry Preservation
Keeping the blade’s shape is very important. You must protect the rake angle, parallelism, and flatness. If the shape is wrong, you can get burrs or chips. You might also see uneven cuts. These problems make your job harder and can hurt the blade.
- Keeping the right shape means you:
- Use less effort to cut.
- Get smoother and quicker cuts.
- Lose less blade material.
Studies show that losing the right shape makes blades wear out fast. The edge can get dull from rubbing against small bits. This makes the blade less sharp and less useful.
TCO and Cost Savings
Sharpening blades the right way saves money. You do not need to buy new blades often. You also spend less time fixing problems or stopping work. Many people who use these blades save a lot by sharpening them often.
- Regular sharpening helps you:
- Avoid buying new blades too soon.
- Spend less on blade care.
- Keep machines running longer without stops.
Cleaning and checking blades often helps them last longer. The chart below shows how different sharpening ways help blades last longer:

When you sharpen and care for shear blades, you get more use from each blade. You also keep your work safe and running well.
Tools and Preparation for Sharpening
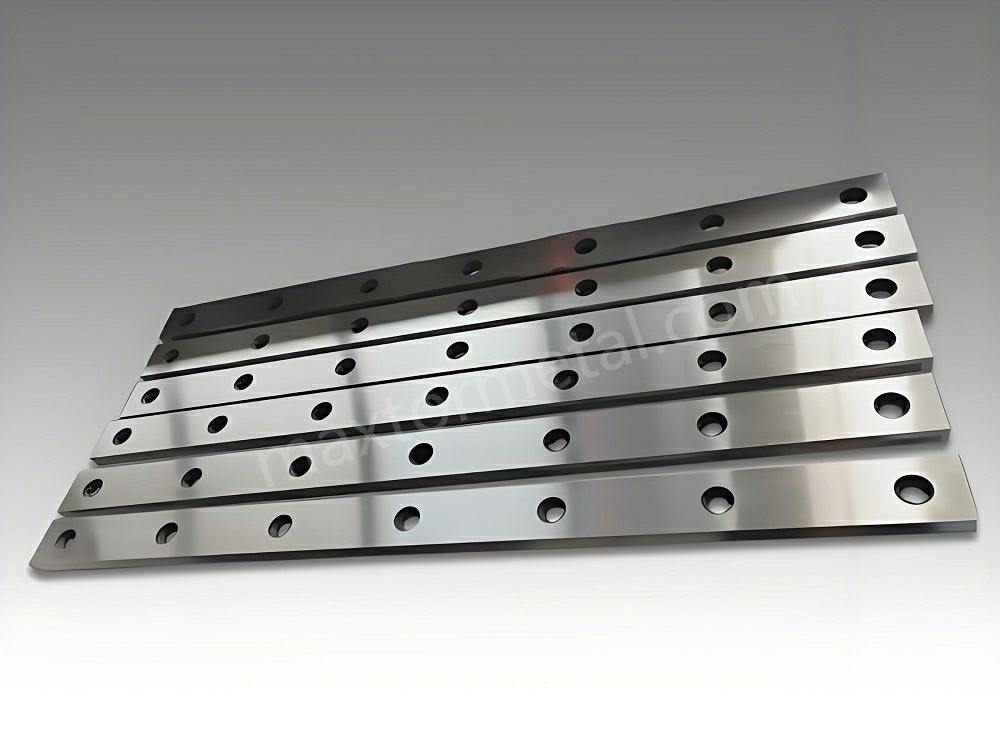
Before you start sharpening shear blades, gather the right tools. Make sure your workspace is safe and ready. Metal Industrial Shear Blades use strong materials, so pick your tools carefully. You can look at lame personnalisée choices. If you want to know more about blade materials, check Nanjing Metal Industrial.
Choosing Grinding Equipment
Bench vs. Belt Grinders
There are different grinders you can use. Each one is good for certain jobs.
- Bench Grinders
- Avantages: This grinder gives you a steady place to work. It helps you grind with care. Many shops have one.
- Désavantages: Bench grinders are not good for big or curved blades. They can make blades hot fast.
- Idéal pour: Use a bench grinder for small or medium shear blades. It works best for straight edges and when you need control.
- Belt Grinders
- Avantages: Belt grinders are easy to use for many shapes. They work well for big or curved blades. They take off metal quickly.
- Désavantages: You need to keep the angle steady. The belts can wear out quickly.
- Idéal pour: Use a belt grinder for big blades or blades with tricky shapes. It is also good for quick grinding.
Conseil: Use a bench grinder in a shop for small, straight blades. Use a belt grinder in a factory for big, curved blades.
Surface grinders are also helpful for sharpening. They work well on flat blade parts that touch each other. Set the grinding angle between 2 and 7 degrees for the best results.
Wheel Selection by Material
Pick the right grinding wheel for the blade material. This stops the blade from getting too hot and keeps the edge smooth.
| Matériau de la lame | Recommended Wheel Type | Grit Size | Hardness Grade |
|---|---|---|---|
| Acier D2 | Ceramic or CBN | 60–120 | K–N |
| Acier H13 | Aluminum Oxide or CBN | 80–120 | J–M |
| Carbure de tungstène | Diamond | 100–180 | R–S |
- For D2 steel, use ceramic or CBN wheels. Pick a grit size from 60 to 120.
- For H13 steel, use aluminum oxide or CBN wheels. Choose a grit size from 80 to 120.
- For tungsten carbide, use diamond wheels. Pick a grit size from 100 to 180.
Always use the right wheel and grit for the blade. This keeps the blade sharp and stops heat damage.
Safety and Workspace Setup
Personal Protective Equipment (PPE)
You need to stay safe when sharpening shear blades. Grinding makes sparks and dust.
- Wear safety goggles to protect your eyes.
- Use cut-resistant gloves for your hands.
- Put on hearing protection for your ears.
- Wear a dust mask or respirator to keep out dust.
- Make sure your workspace is bright.
- Keep your area clean and tidy.
PPE keeps you safe from sparks, flying bits, and touching the blade by mistake.
Cooling systems are important too. They stop blades from getting too hot and losing their edge.
- Air cooling is good for light jobs. Fans blow away heat.
- Liquid cooling is better for thick blades. Coolant soaks up heat.
- Cryogenic cooling uses liquid nitrogen for fast cooling. This lowers stress on the blade and helps it last longer.
A steady workspace cuts down on shaking. This helps you make careful cuts and keeps blades working longer.
Blade Inspection and Clearance Adjustment
Check the blade before you sharpen it. Inspections help you find problems early and save time.
| Méthode d'inspection | Description |
|---|---|
| Inspection visuelle | Look for rounded edges, chips, cracks, or uneven wear. |
| Performance Tracking | Track how much you cut. Notice if you need to sharpen more often. |
| Documentation | Write down how the blade works. This helps you plan when to replace it. |
- Check blades often to find wear, damage, or if they are not straight.
- Early checks stop big problems from happening.
- Look for cracks, tiny breaks, and make sure the blade is straight.
Always set the blade clearance before sharpening. This helps you only take off what you need and keeps the blade shape right.
When you get your tools, workspace, and safety gear ready, you are set to go. You can sharpen shear blades well and keep your machines working great.
How to Sharpen Shear Blades Like a Pro
Nettoyage et préparation
Élimination des débris et des anciens lubrifiants
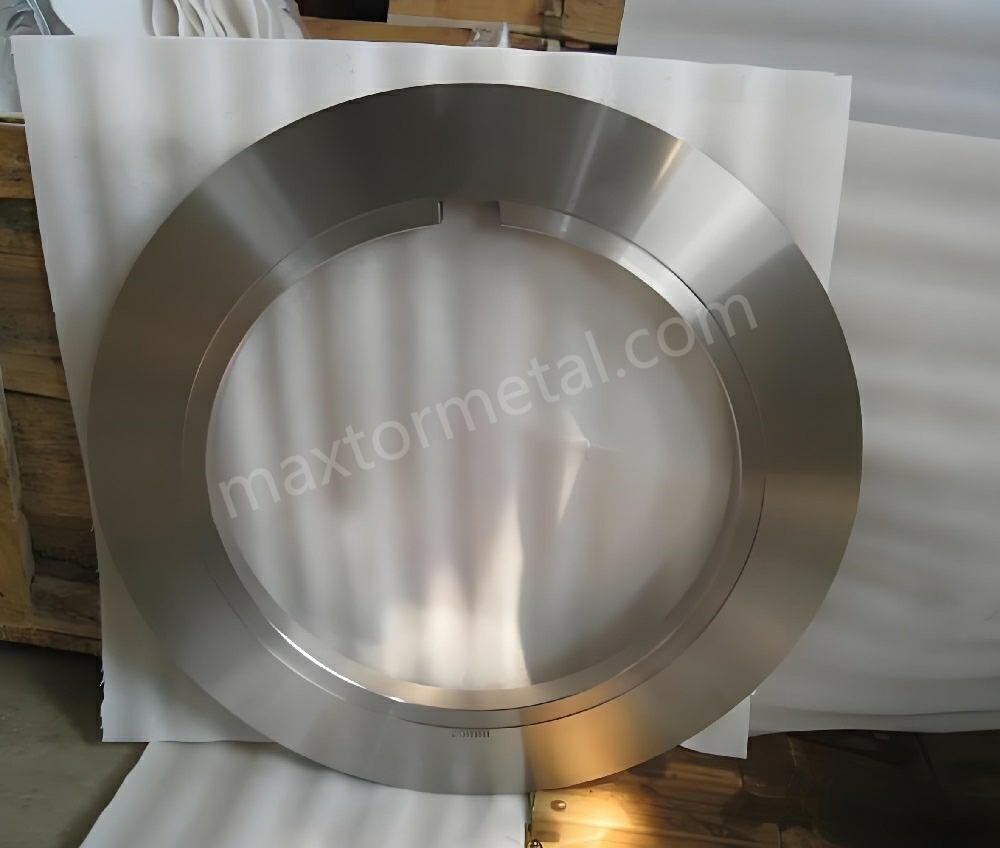
Avant d'affûter des lames de cisailles, il est indispensable de commencer avec une lame propre. La saleté, l'huile usagée et la rouille peuvent masquer les dommages et rendre l'affûtage plus difficile. Utilisez les méthodes de nettoyage suivantes :
- Lavez la lame à l'eau tiède et au liquide vaisselle pour un nettoyage léger.
- Essuyez la lame avec de l'alcool à friction (isopropylique à 70%) pour dégraisser et désinfecter.
- Pour la saleté tenace, utilisez une solution diluée de peroxyde d'hydrogène (mélangez à parts égales du peroxyde d'hydrogène à 3% et de l'eau).
- En cas de saleté récalcitrante, essayez un nettoyant à base de TSP (phosphate trisodique). Portez des gants et des lunettes de protection pour votre sécurité.
Une lame propre permet de bien voir le tranchant et facilite le processus d'affûtage.
Fixation de la lame pour l'affûtage
Vous devez maintenir la lame parfaitement immobile pendant le travail. Tout mouvement peut provoquer un tranchant irrégulier ou des accidents. Placez la lame dans un étau robuste ou un montage d'affûtage spécifique. Assurez-vous que la lame ne bouge pas. Une installation stable permet de mieux contrôler l'angle et la pression.
Conseil : utilisez un chiffon doux ou des patins en caoutchouc dans l'étau pour protéger la surface de la lame contre les rayures.
Inspection des dommages ou des déformations
Inspectez attentivement la lame. Vérifiez l'absence d'ébréchures, de fissures ou de déformations. Passez délicatement le doigt le long du tranchant pour repérer les aspérités. Si vous constatez des dommages profonds ou un voilage, il peut être nécessaire de réparer ou de remplacer la lame. N'affûtez pas une lame présentant des défauts majeurs, car elle risque de se briser ou de réaliser des coupes de mauvaise qualité.
Marquage et mesure des angles
Identification de l'angle recommandé par le fabricant
Chaque lame possède un angle d'affûtage optimal. Cet angle préserve la résistance et le tranchant de la lame. Les fabricants utilisent différentes méthodes pour définir ces angles. Voici un tableau présentant les méthodes courantes pour les mesurer ::
| Méthode de mesure | Référence d'angle | Angle obtenu |
|---|---|---|
| Méthode allemande | 0° à partir du bord intérieur | 35° à partir de l'intérieur, 55° à partir de l'extérieur |
| Méthode japonaise | 90° à partir du bord intérieur | 35° à partir de l'intérieur, 55° à partir de l'extérieur |
| Méthode américaine | 90° – résultat de la jauge d'angle | 35° à partir de l'intérieur, 55° à partir de l'extérieur |
Consultez le manuel de votre lame ou le site web du fabricant pour connaître l'angle exact. Utiliser le bon angle vous permettra d'affûter vos lames de cisailles comme un professionnel.
Utilisation de jauges d'angle ou de rapporteurs pour plus de précision
Pour conserver un angle d'affûtage rigoureusement exact, utilisez ces outils :
- Un gabarit de réglage d'angle maintient la lame au bon angle.
- Une boîte d'inclinaison permet de mesurer et d'ajuster facilement l'angle.
- Un rapporteur aide à aligner la lame et à régler le guide.
Ces outils garantissent de ne pas altérer la forme de la lame par erreur.
Marquer le biseau avec un marqueur permanent
Prenez un marqueur permanent et colorez le biseau de la lame. Cette marque indique où s'effectue le meulage. À mesure que vous affûtez, le marqueur disparaît des zones en contact. Cette astuce permet de maintenir un angle régulier et d'éviter de retirer trop de métal.
Remarque : marquer le biseau est un moyen simple de suivre la progression et de conserver un tranchant rectiligne.
Technique de meulage
Maintien du biseau et de la planéité
Lors du meulage, il convient de préserver la forme d'origine de la lame. Suivez ces conseils :
- Utilisez un gabarit de biseautage pour maintenir l'angle constant.
- Utilisez un poussoir pour guider la lame en toute sécurité pour vos mains.
- Vérifiez régulièrement la surface de meulage. Si vous utilisez un plateau (platen), rectifiez-le pour maintenir sa planéité.
- Marquez les hauteurs de meulage et les lignes médianes avec du fluide de traçage ou un marqueur pour une meilleure précision.
Vous pouvez également :
- Utiliser une ponceuse à bande rigide pour un meilleur contrôle.
- Opter pour un variateur de fréquence (VFD) pour un meulage de précision.
- Remplacer les bandes usées pour éviter un meulage irrégulier.
Des abrasifs neufs offrent un état de surface plus lisse et vous aident à affûter les lames de cisaille sans créer d'irrégularités.
Prévention de la surchauffe
Le meulage peut faire chauffer les lames. Une chaleur excessive peut adoucir le métal et détruire le taillant. Vous pouvez l'éviter en :
- Trempant fréquemment la lame dans l'eau pendant le meulage.
- Utilisant des outils d'affûtage refroidis à l'eau.
- Meulant à la main pour maintenir une température basse.
- Choisissant des meules à gros grains pour une meilleure dissipation thermique.
- Utilisant des meules en CBN ou diamant pour réduire le frottement.
- Dressant la meule fréquemment pour conserver son tranchant.
Vous pouvez également réduire la vitesse d'avance et effectuer des passes peu profondes. Cela préserve la fraîcheur de la lame, même si le procédé prend un peu plus de temps.
Surveillez toujours l'apparition de taches bleues sur la lame. La couleur bleue indique une surchauffe pouvant entraîner une perte de dureté.
En suivant ces étapes, vous préservez la résistance et le tranchant de la lame pour une longue durée.
Affilage et polissage
Utilisez des pierres à grain fin ou des meules d'affilage
Une fois le meulage terminé, vous devez affiner le taillant. Cette étape rend la lame plus tranchante et plus lisse. Vous pouvez utiliser différents types de pierres ou de meules d'affilage pour cette tâche :
- Meules en silicone Blackstone conviennent parfaitement aux aciers très durs. Elles aident à façonner le biseau et à éliminer les aspérités.
- Les pierres à eau japonaises, telles que les grains 1000 ou 6000, sont idéales pour la finition du taillant. Elles éliminent les micro-rayures et les bavures, laissant un tranchant net.
- Les pierres à eau japonaises King constituent également un bon choix pour l'affûtage de nombreux types de lames.
Commencez avec une pierre à gros grain si le taillant paraît rugueux. Passez ensuite à une pierre ou une meule plus fine pour la finition. Veillez à toujours maintenir la pierre humide si vous utilisez des pierres à eau. Cela améliore le travail de la pierre et maintient la lame à basse température.
Conseil : Exercez une légère pression lors de l'affilage. Laissez la pierre ou la meule travailler. Cela permet d'éviter un enlèvement excessif de matière et de préserver la géométrie de la lame.
Polissez le taillant pour obtenir un fini miroir
Le polissage du taillant est la dernière étape avant l'utilisation de la lame. En polissant le taillant pour obtenir un fini miroir, vous permettez à la lame de glisser à travers les matériaux avec moins d'effort. Un taillant lisse offre une coupe plus nette et plus précise, ce qui est essentiel pour les travaux délicats exigeant de la précision.
Le polissage élimine également les micro-imperfections. Ces légers défauts peuvent provoquer des ébréchures ou de la rouille s'ils subsistent. En polissant, vous prolongez la durée de vie de la lame et préservez son tranchant. Utilisez une meule d'affilage fine ou de la pâte à polir pour cette étape. Travaillez lentement et contrôlez souvent le taillant. Vous devez obtenir une surface brillante et spéculaire le long du biseau.
Inspection finale
Contrôle des bavures et de l'uniformité du taillant
Après l'affilage et le polissage, vous devez vérifier l'absence de bavures et l'uniformité du taillant. Les bavures sont de petits résidus de métal qui dépassent de l'arête après l'affûtage. Elles peuvent nuire à la qualité de coupe de la lame ou même endommager le matériau coupé.
Voici quelques méthodes pour vérifier la présence de bavures et l'uniformité du taillant :
- Passez doucement le bout du doigt le long du taillant. Vous pourriez remarquer une zone rugueuse ou un léger morfil.
- Inspectez le taillant sous une lumière vive ou à la loupe. Les bavures peuvent apparaître sous forme de lignes brillantes ou de petites aspérités.
- Alternez le rodage des côtés en exerçant une pression légère pour éliminer tout morfil résiduel.
Un bon taillant doit être lisse et uniforme d'un bout à l'autre. Si vous détectez une bavure, repassez sur la pierre d'affilage et éliminez-la délicatement.
Test du tranchant et de l'alignement de la lame
Vous devez toujours tester la lame avant de la remettre en service. Il existe plusieurs méthodes simples pour vérifier le tranchant et l'alignement :
- Inspection visuelle : Recherchez les encoches, ébréchures ou déformations le long du taillant.
- Test du papier : Essayez de couper une feuille de papier. Une lame bien affûtée coupera de manière nette sans déchirer.
- Test de la tomate : Coupez une tomate. Si la lame glisse sans effort, elle est bien affûtée.
- Test des poils du bras : Essayez prudemment de raser une petite zone de poils du bras. Si la lame coupe les poils sans tirer, elle est prête.
- Test du légume ou du fruit : Utilisez un légume ou un fruit ferme pour évaluer les performances de la lame en conditions réelles.
Si la lame réussit ces tests, le processus d'affûtage est terminé. Dans le cas contraire, répétez les étapes d'affilage et de polissage jusqu'à obtenir le résultat souhaité.
Remarque : Manipulez toujours la lame avec précaution lors des tests. Un taillant aiguisé peut provoquer de graves coupures.
En suivant ces étapes, vous garantissez un affûtage des lames de cisaille conforme aux normes professionnelles. Vous obtenez une lame qui coupe de façon nette, dure plus longtemps et fonctionne en toute sécurité à chaque utilisation.
Avoiding Common Grinding Mistakes
Angle incorrect et perte de géométrie
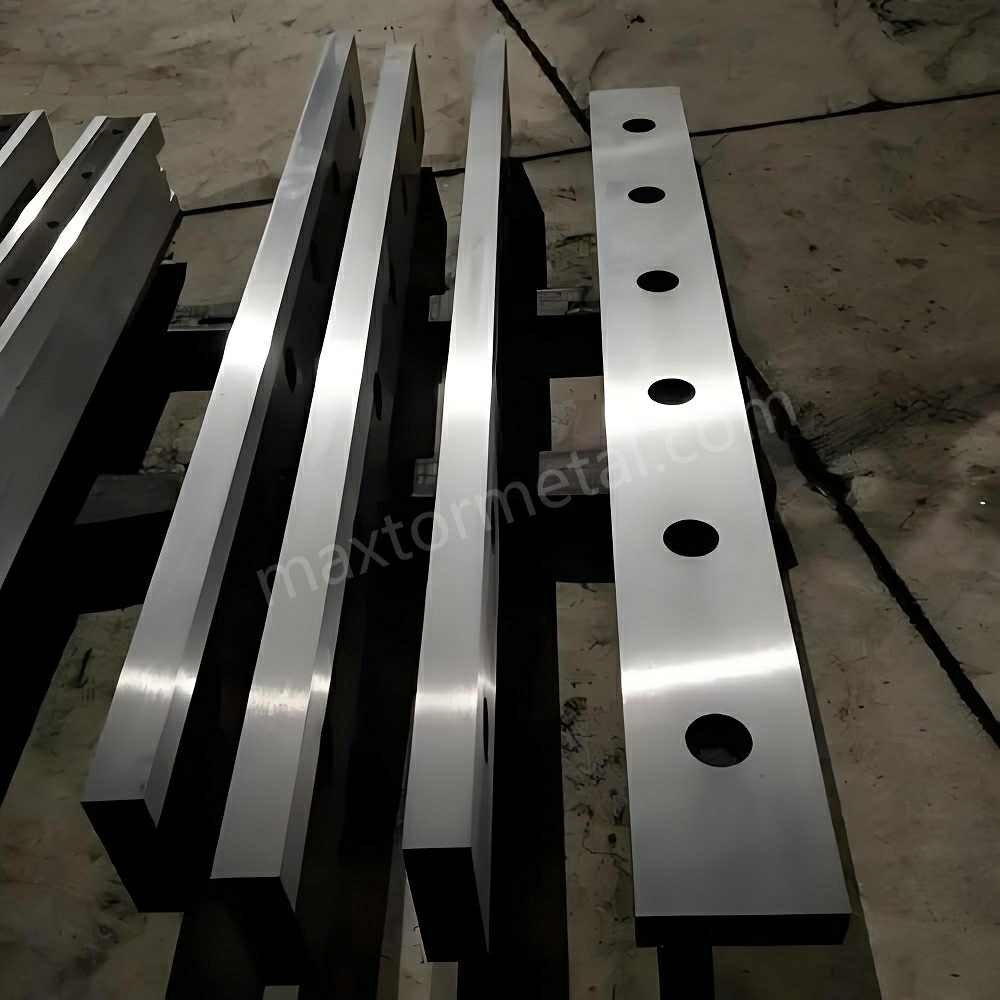
Vous devez maintenir un angle correct lors de l'affûtage des lames de cisaille. Un meulage sous un mauvais angle altère la géométrie de la lame. Cette erreur peut entraîner de nombreux problèmes :
- La lame risque de déchirer le matériau au lieu de le couper nettement.
- Le taillant risque de surchauffer, ce qui fragilise la lame.
- La lame s'usera plus rapidement et pourrait même endommager votre machine.
Le angle du tranchant is very important. It decides how well the blade cuts. If you use the wrong angle, you lose cutting power and accuracy. Always check the manufacturer’s guide for the right angle. Use angle gauges or jigs to help you keep the correct shape.
Tip: Match the blade’s pitch and profile to the material and machine speed. Fine teeth work best for fast jobs. Coarse teeth are better for slow, heavy cuts.
If you use a blade with the wrong geometry, you risk tip breakage, especially with brittle materials. Always align the blade’s shape with its limits.
Over-Grinding
Over-grinding happens when you remove too much material from the blade. This mistake can shorten the blade’s life and damage its surface. You need to avoid grinding too much at once.
Here is what can happen if you over-grind:
| Principales conclusions | Description |
|---|---|
| Fatigue Life Impact | The blade becomes weaker and does not last as long. |
| Surface Integrity Damage | The blade’s surface gets damaged, which can lead to cracks or chips. |
| Grinding Conditions | Wet grinding helps the blade last longer than dry grinding. |
You should always use light pressure and check your progress often. Take breaks to cool the blade and inspect the edge. If you see deep scratches or uneven spots, you may have removed too much material.
Note: Over-grinding can also change the blade’s balance. This can cause vibration and poor cutting results.
Heat Damage and Softening
Grinding creates heat. If the blade gets too hot, it can lose its hardness. The edge becomes soft and dulls quickly. You need to keep the blade cool while you work.
The danger zone for heat damage starts at 400°F (about 204°C). Most industrial shear blades are tempered at this temperature. If you go over this limit, you can ruin the blade’s heat treatment.
- The cutting edge is thin and heats up fast.
- Buffing and grinding can easily push the temperature too high.
- Once the blade softens, it will not hold an edge.
You can prevent heat damage by dipping the blade in water, using coolant, or grinding in short bursts. Watch for blue or purple colors on the edge. These colors mean the blade got too hot.
Always keep coolant levels high and check the blade’s temperature often. This simple step protects your blade and keeps it sharp.
Here is a table of common grinding mistakes found in industrial blade maintenance:
| Erreur | Explication |
|---|---|
| Inadequate coolant levels | Causes overheating and premature wear, leading to poor cut quality. |
| Operating at excessive speeds | Leads to increased friction and premature wear. |
| Failure to dress wheels | Results in poor blade tracking and reduced precision. |
| Continued use of dull blades | Leads to poor cut quality and increased material waste. |
You can avoid these mistakes by following best practices and checking your work often. This will help you sharpen shear blades like a pro and keep your tools working longer.
Burrs, Chipping, and Bowed Blades
When you sharpen shear blades, you need to watch out for burrs, chipping, and bowed blades. Burrs are tiny pieces of metal that stick out from the edge after sharpening. If you leave a burr, your blade will not cut smoothly. It can also cause resistance and make your cuts rough. Chipping happens when small pieces break off the edge. Bowed blades bend out of shape and do not cut straight.
You can prevent these problems by following best practices during sharpening. Always check for a burr after sharpening one side. Flip the blade and sharpen the other side. Use gentle swiping motions with less pressure. This helps you avoid making a new burr. Run your finger along the edge to check for smoothness. If you feel a hook or rough spot, you still have a burr.
Proper burr removal is important. If you do not remove the burr, the blade will not work well. You can use different techniques to get rid of burrs and keep your shear blades in top shape.
| Technique | Description |
|---|---|
| Elevate Angle | Raise the sharpening angle slightly until the burr is almost gone, then finish at the original angle. |
| Fold Burr | Lightly drag the edge across hard plastic or wood at 90° to lift the burr for easier removal. |
| Strop on Paper | Use plain paper wrapped around a hard surface to polish and remove leftover burrs. |
| Quick Method | Drag the edge through plastic or wood during final strokes to help remove burrs. |
| Alternate Passes | Sharpen both sides equally to avoid undoing your work. |
| Backdrag Test | Lightly drag the edge on plastic or wood to check for burrs. If nothing catches, the edge is clean. |
| Micro-burr Consideration | Sometimes leaving tiny burrs is better than overworking the edge or making the angle too wide. |
Conseil: Always alternate sides when sharpening. This keeps the edge even and helps prevent chipping.
If you notice chipping, you may be using too much pressure or the wrong angle. Use lighter strokes and check your progress often. Bowed blades often result from uneven grinding or too much force. Secure the blade well and use steady, even pressure. If a blade bows, it will not cut straight and may need professional repair.
- After sharpening one side, feel for the burr and then switch to the other side.
- Use lighter pressure to avoid making a new burr.
- Check for a smooth edge by running your finger along the blade after a few swipes.
By following these steps, you keep your shear blades sharp, straight, and ready for any job.
Coarse Stones and Ryde Line Damage
The type of sharpening stone you use can affect the quality of your shear blades. Coarse stones remove material quickly, but they can also cause damage if you are not careful. The ryde line is the fine line along the edge of the blade. If you use a stone that is too coarse, you risk damaging this line.
If the stone used to rebalance the shears is too coarse, the ryde line can be damaged or the shears won’t polish up to a high shine and will catch and pull.
A damaged ryde line means your shear blades will not cut smoothly. The edge may catch on materials or pull instead of slicing cleanly. You will also have trouble getting a polished, shiny finish on the blade. Always start with a coarser stone only if the blade is very dull or damaged. Move to finer stones as you get closer to the final edge.
- Use coarse stones only for heavy reshaping or repair.
- Switch to medium and fine stones for sharpening and finishing.
- Check the ryde line often. If you see scratches or roughness, use a finer stone.
- Finish with a polishing step to get a smooth, shiny edge.
Choosing the right stone and using the correct technique will help you avoid ryde line damage. Your shear blades will stay sharp, smooth, and ready for precise cutting.
Material-Specific Sharpening Tips
Acier D2
Recommended Grinding Wheels and Grits
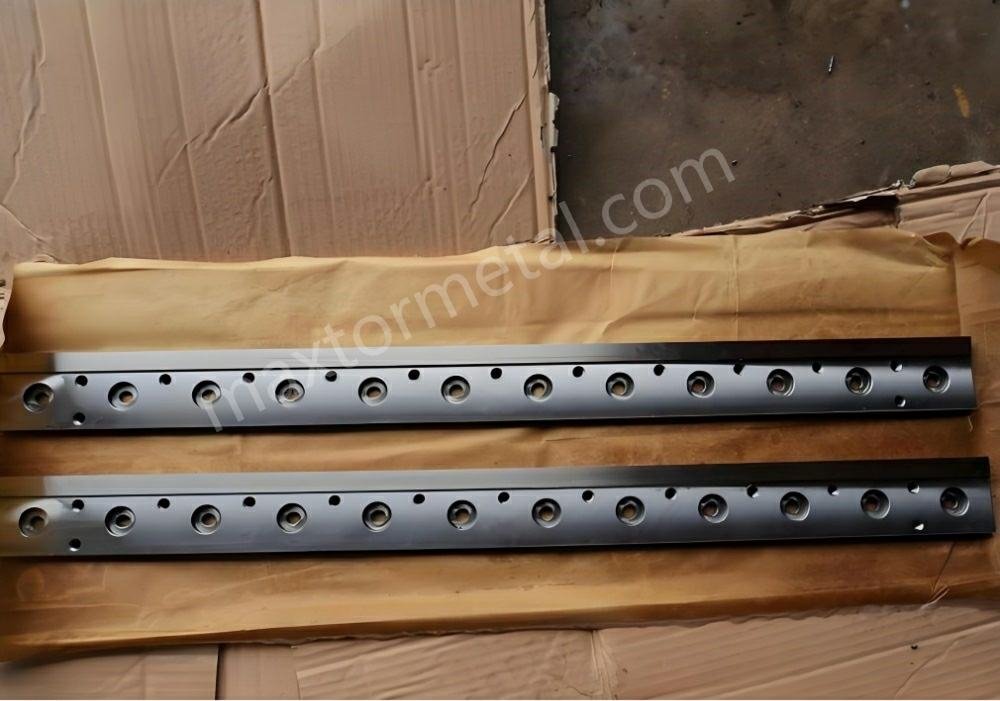
D2 steel is a popular choice for industrial shear blades because it is tough and holds an edge well. You need to use the right grinding wheels and grits to sharpen D2 steel. Choose ceramic or CBN (Cubic Boron Nitride) wheels. These wheels work best for hard steels like D2. Pick a grit size between 60 and 120. Use a hardness grade from K to N. This combination helps you remove just enough material without damaging the blade.
If you need a custom blade for a special job or material, you can explore options de lames personnalisées to match your needs.
Cooling and Overheating Prevention
D2 steel can lose its hardness if it gets too hot during sharpening. You must keep the blade cool to protect the edge. Use light pressure when grinding. Do not push too hard. Cool the steel often by dipping it in water or using a coolant system. This stops the edge from overheating and keeps the blade strong.
Here is a table that shows the best cooling techniques for D2 steel:
| Technique | Description |
|---|---|
| Use Light Pressure | Apply moderate pressure to avoid overheating the steel. |
| Cool the Steel Frequently | Periodically cool the steel to prevent overheating and damage. |
Always watch for color changes on the edge. Blue or purple means the blade got too hot.
Angle and Geometry Considerations
You need to keep the original angle and shape of the shear blade. Check the manufacturer’s guide or the Nanjing Metal Industrial website for the correct angle. Use an angle gauge or protractor to set the bevel. Mark the edge with a permanent marker to track your progress. Take off as little material as possible. This helps the blade last longer and keeps the cutting edge strong.
Acier H13
Suitable Abrasives and Wheel Types
H13 steel is another common material for shear blades. It is strong and resists heat. You need special abrasives to sharpen H13 steel. Superabrasives like diamond and CBN wheels are ideal. These wheels are very hard and cut H13 steel well. You can find them in many grit sizes, from 46 to 2,000. The wheels come with different bonds, such as resinoid and vitrified. These bonds help the wheel cut smoothly and stay cool.
- Superabrasives like diamond and CBN are ideal for sharpening H13 steel blades due to their extreme hardness.
- These materials are specifically designed for grinding hard work materials, making them suitable for high-performance applications.
- Superabrasive wheels come in various grit sizes (typically 46 through 2,000 grit) and types of bonds, such as resinoid and vitrified, which enhance cutting efficiency and reduce overheating.
Heat Management and Surface Finish
H13 steel can crack if it gets too hot. You need to use light pressure and keep the blade cool. Dip the blade in water often or use a coolant system. This prevents micro-cracks and keeps the edge sharp. After grinding, check the surface finish. A smooth finish means the blade will cut better and last longer. Use finer grits for the last few passes to get a polished edge.
Tip: Always inspect the blade for heat checks or surface burns after sharpening.
Common Pitfalls in Sharpening H13
Many people make mistakes when sharpening H13 shear blades. They use too much pressure or grind too fast. This can cause cracks or burns on the edge. Always use gentle strokes and check your progress often. If you see any cracks or dark spots, stop and let the blade cool. Use the right wheel and grit for H13 steel to avoid these problems.
Carbure de tungstène
Diamond Wheels and Grit Selection
Tungsten carbide is very hard and needs special care when sharpening. Use diamond wheels for the best results. Pick a grit size between 100 and 180. Choose a hardness grade from R to S. Diamond wheels cut carbide smoothly and help you get a sharp edge without chipping.
Avoiding Chipping and Edge Fracture
Carbide edges can chip if you use too much pressure. Always grind slowly and gently. Do not force the blade against the wheel. Use a steady hand and let the diamond wheel do the work. Check the edge often for chips or cracks. If you see any, use lighter strokes and a finer grit.
Note: Avoid aggressive grinding. This keeps the edge strong and prevents fractures.
Polishing for Maximum Sharpness
After grinding, you need to polish the edge for the best cutting performance. Use fine diamond paste or a honing wheel. Work slowly and check the edge for a mirror finish. A polished edge cuts cleaner and lasts longer. This step is important for high-precision jobs.
If you need a special blade for a unique material, you can look at solutions de lames personnalisées to get the right tool for your work.
By following these material-specific tips, you keep your shear blades sharp, strong, and ready for any job.
Japanese vs. German Shears
Typical Blade Angles and Steel Types
Japanese and German shear blades are not the same. Japanese shears have a convex edge. This edge is very sharp and cuts smoothly. The angle is finer, between 40° and 50°. These blades use high-quality steel. This helps them stay sharp for a long time.
German shear blades have a beveled edge. This edge is not as sharp but is easier to care for. The angle is steeper, between 50° and 60°. German shears use strong steel. They can handle tough jobs and lots of sharpening.
Here is a table that shows the main differences:
| Fonctionnalité | Japanese Shears | German Shears |
|---|---|---|
| Type de lame | Convex edge blades | Bevel-edge blades |
| Acuité | Extremely sharp for precise cuts | Less sharp, easier to maintain |
| Fréquence de maintenance | Requires sharpening less frequently | Easier to maintain but less sharp |
| Qualité des matériaux | High-quality materials for longevity | Durable and practical construction |
Sharpening Techniques for Each Style
You need to sharpen Japanese and German shears in different ways. For Japanese shears, use a flat hone or fine whetstone. Hold the blade at the same angle as before. Move it gently across the stone. Keep the convex shape. Do not make the edge flat. Use light pressure and check your work often. This keeps the blade sharp and smooth.
For German shear blades, use a grinding wheel or medium-grit stone. Hold the blade at the steeper angle. Move it in a steady way. You do not need to keep a convex edge. The beveled edge is easier to sharpen. You can use a little more pressure. Always check to make sure the edge is even.
Tip: Always follow the manufacturer’s rules for sharpening angles. This helps you keep the right shape and get the best cuts from your blades.
Common Mistakes and How to Avoid Them
People often make mistakes when sharpening these blades. One mistake is using the wrong angle. If you change the angle, the blade can get dull. Another mistake is pressing too hard. This can chip the edge or make it uneven.
Here are some ways to avoid mistakes:
- Use the right sharpening tool for each blade.
- Keep the original angle. Use an angle guide if you need it.
- Use light, even strokes. Do not rush.
- Check your work often. Look for burrs or rough spots.
- Clean the blade before and after sharpening.
Note: If you are not sure about the angle or how to sharpen, ask a pro or check the manufacturer’s instructions. This helps you keep your blades sharp and avoid damage.
When you know the differences between Japanese and German shear blades, you can pick the right way to sharpen. This helps you get sharp blades that last a long time.
Troubleshooting and Blade Replacement
Heat Checking and Surface Burns
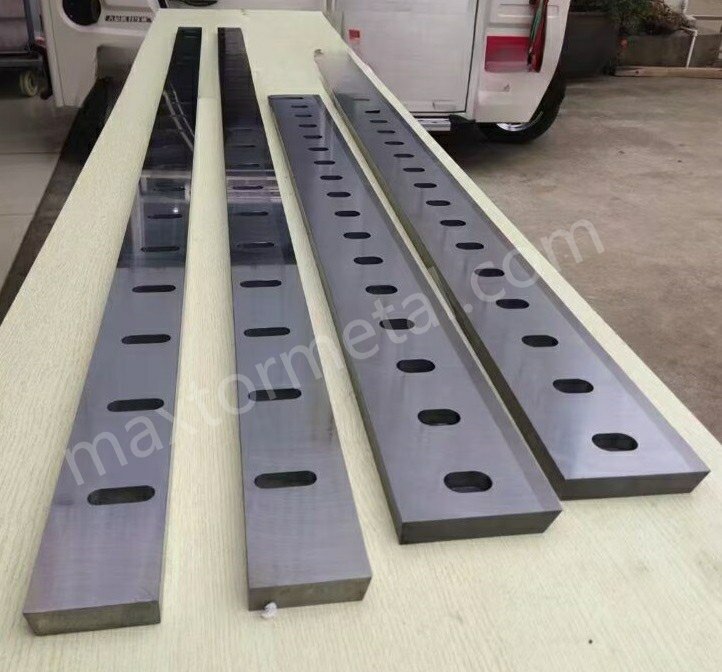
You may notice small cracks or dark spots on your blade after grinding. These marks are called heat checks and surface burns. They happen when the blade gets too hot during sharpening. Heat checks look like tiny lines that run across the edge. Surface burns show up as blue, purple, or black spots. These signs mean the blade lost some hardness.
To prevent heat damage, always cool the blade often. Dip it in water or use a coolant. Use light pressure when you grind. If you see any color changes, stop and let the blade cool down. You can use a magnifying glass to check for small cracks. If you find many heat checks, the blade may not cut well anymore.
Tip: Always check for heat damage before you put the blade back to work. This helps you avoid poor cuts and keeps your machine safe.
Diagnosing Bowed Blades
A bowed blade does not stay flat. It bends in the middle or at the ends. You can spot a bowed blade by laying it on a flat table. If you see a gap under the blade, it is bowed. You may also notice uneven cuts or hear strange sounds during use.
Here are steps to check for a bowed blade:
- Place the blade on a flat surface.
- Press down gently at each end.
- Look for any space between the blade and the table.
- Use a straightedge or ruler to check for gaps.
A bowed blade can cause jams or crooked cuts. If you find a bow, do not try to fix it by force. You may need to replace the blade or ask a professional for help.
When to Rotate or Replace Blades
You should know when to rotate or replace your shear blades. Regular checks help you get the best results and keep your machines safe. Here are signs that you need to take action:
| Signe | Ce que cela signifie | Ce qu'il faut faire |
|---|---|---|
| Dull edge | Blade does not cut cleanly | Sharpen or rotate blade |
| Deep chips or cracks | Blade is damaged | Remplacer la lame |
| Bowed or warped shape | Blade is not flat | Remplacer la lame |
| Frequent sharpening needed | Blade wears out quickly | Remplacer la lame |
| Uneven wear | One side is thinner than the other | Rotate or replace blade |
You can rotate blades if they have more than one cutting edge. This helps you use all sides before replacing them. If you see deep damage, replace the blade right away. Always follow the manufacturer’s guide for safe blade care.
Note: If you sharpen shear blades often but still see poor results, it may be time for a new blade.
By checking your blades often and knowing when to replace them, you keep your work safe and your machines running well.
Maintenance for Maximum TCO
Routine Cleaning and Lubrication
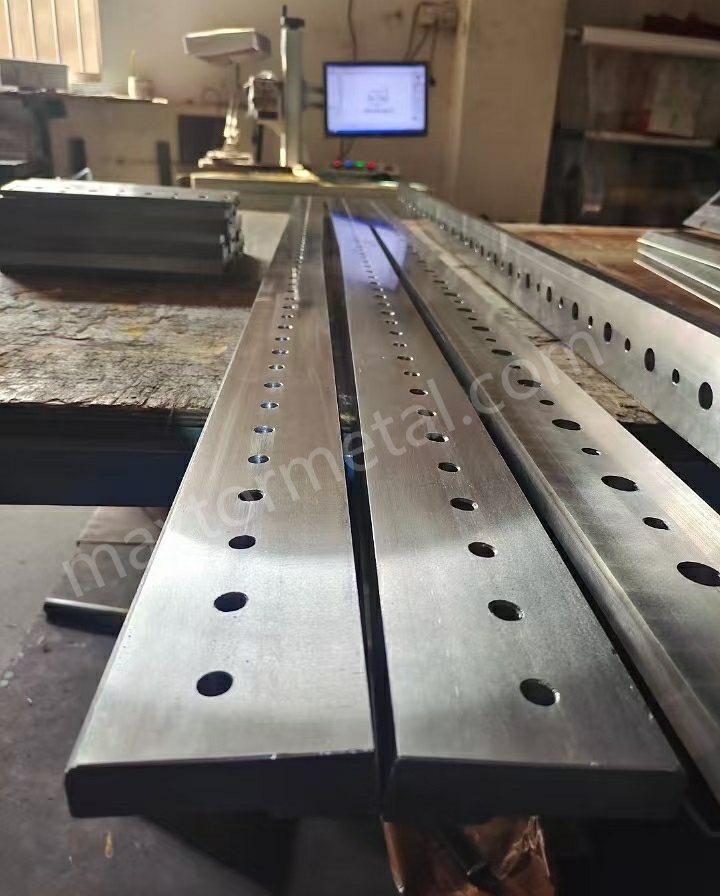
You should clean your shear blades after every use. Dirt and old oil can stick to the blade. Metal shavings can also build up. This can make the blade rust or get dull faster. Use a soft brush or cloth to wipe off the dirt. If you see sticky stuff, use a gentle cleaner. Dry the blade well after cleaning.
Lubrication helps the blade move easily and stops rust. Put a thin layer of machine oil or the right lubricant on the blade edge and moving parts. Do not use too much oil. Too much oil can make dust and dirt stick. Always look for chips or cracks when you clean. If you see damage, fix it before sharpening the blade again.
Tip: Clean and oil your blades after each use. This easy step stops rust and keeps your cuts neat.
Stockage et manutention
Storing your blades the right way keeps them safe. Put blades in a dry place. Use blade guards or cases to stop nicks or chips. Keep blades away from water to stop rust. If you store blades for a long time, check them sometimes for rust.
Handle blades carefully. Always wear gloves when you move or put in blades. Place blades on something soft so they do not bend. Never drop a blade or put heavy things on it. Careful handling helps blades last longer and keeps them safe to use.
Quick-Reference Maintenance Checklist
You can use this checklist to keep your blades in good shape:
| Maintenance Action | Recommended Interval/Condition |
|---|---|
| Nettoyage régulier | After each use to stop rust and keep cuts sharp. |
| Affûter les lames | When cuts get rough or harder to make. Use the right angle. |
| Vérifier l'usure | Look for chips, cracks, or uneven edges every time you clean. |
| Lubrifier les pièces mobiles | After cleaning and before you put blades away. |
| Contrôles d'alignement | Check often to make sure cuts are even and blades wear less. |
| Replace Blades | If you see cracks, big chips, or if the blade gets too thin. |
- Clean blades after every use to get rid of dirt.
- Check for chips, cracks, or other damage.
- Oil the blade edge and moving parts.
- Store blades in a dry, safe place.
- Check if blades are straight and replace them if needed.
Remember: Taking care of your blades helps them last longer and keeps your work safe and easy.
You can sharpen shear blades like a pro when you follow the right steps. Use the correct angle and check your work often. Avoid common mistakes to keep your blades sharp and strong. Clean and store your blades after each use. Regular care helps you save money and work safely. If you want expert advice or need help, Contactez nos ingénieurs commerciaux aujourd'hui.
FAQ
À quelle fréquence faut-il affûter les lames de cisaille ?
You should sharpen shear blades when you notice rough cuts or increased effort. Most users sharpen blades after every 500 to 1,000 cuts. Regular inspection helps you decide the best schedule.
What is the best angle for sharpening shear blades?
You need to follow the manufacturer’s recommended angle. Most shear blades work best at angles between 35° and 55°. Use an angle gauge for accuracy.
Can you sharpen shear blades at home?
You can sharpen shear blades at home with the right tools. Use a bench grinder or belt grinder. Always wear safety gear and follow proper techniques.
Why do shear blades lose sharpness quickly?
Shear blades lose sharpness from cutting hard materials, improper sharpening, or lack of cleaning. Regular maintenance and correct sharpening help blades stay sharp longer.
What is the safest way to handle shear blades during sharpening?
You should wear cut-resistant gloves and safety goggles. Secure the blade in a vise. Keep your hands away from the edge and work slowly.
How do you know when to replace shear blades?
Replace shear blades when you see deep chips, cracks, or warping. If sharpening does not restore performance, it is time for a new blade.
Which grinding wheel works best for D2 steel shear blades?
Ceramic or CBN wheels work best for D2 steel shear blades. Use grit sizes between 60 and 120. This combination gives you a sharp edge and prevents overheating.
Do you need to lubricate shear blades after sharpening?
You should apply a thin layer of machine oil after sharpening. Lubrication protects the edge from rust and keeps the blade moving smoothly.
Voir aussi
Réaliser des Coupes Sans Bavure avec des Lames de Cisaille à Guillotine de Précision
Lames de Cisaille D2 : Pourquoi l'Acier D2 Est le Roi de la Coupe de Métaux à Froid
Comment Dépanner les Problèmes Courants des Lames de Cisaille à Ferraille Hydraulique en 2025

 English
 Spanish
 Italian
 French
 Portuguese
 Russian
 German
 Arabic
 Hindi
 Vietnamese
 Indonesian
 Japanese
 Korean
Une réponse