
If you do not perform a Remplacement des lames de coupe rotatives the right way, you can lose time making products. About 25% of machine downtime occurs because tools break, such as blades. Good blades help you cut better and waste less. These blades also enhance workplace safety by reducing accident risks. There are many blade types and custom options available for different jobs and materials. If you take care of your blades regularly, your work remains efficient and safe.
Principaux points à retenir
- Check rotary slitter blades often. Replace them when needed. This helps stop machine problems. It also keeps cuts neat.
- Wear safety gear every time. Use cut-resistant gloves and goggles. This keeps you safe when changing blades.
- Get all your tools ready before you start. This saves time. It also helps you avoid mistakes.
- Pick the right blade for the job. Think about the material and how thick it is. This helps the blade cut well.
- Clean the blade mounts very well before you put in new blades. This makes sure the blades fit and work right.
- Read and follow the manufacturer’s instructions. Make sure the blade lines up right. Use the correct torque. This stops damage.
- Look at the blades after you install them. Do a slow test run. This helps you find problems early.
- Keep blades in a dry place. Make sure it is not humid. This stops rust and keeps blades safe.
Tools and Safety for Rotary Slitter Blade Replacement
You must get ready before changing a rotary slitter blade. You need the right tools and safety gear. Picking the correct blade is also important. These steps help you work safely and quickly.
Essential Tools
Gather all your tools before you start. This stops you from wasting time or making mistakes. Most rotary slitter machines need some basic tools:
- Wrenches and screwdrivers that fit your machine’s fasteners
- Allen keys for the bolts on the blade assembly
- Torque wrench to tighten bolts just right
- Blade removal tool or puller if your machine needs it
- Clean cloths to wipe blade mounts
- Safe containers for old and new blades
Tip: Always read your machine’s manual for tool advice. The right tools keep your machine parts safe from harm.
Safety Gear
You must protect yourself when changing rotary slitter blades. Blades are very sharp and can hurt you badly. Safety experts say to wear cut-resistant gloves and arm guards. The table below lists some top safety gear:
| Product Name | Cut Protection Level | Description |
|---|---|---|
| Helix® 2080 | ANSI/ISEA level A6 | 13-gauge Kevlar® and steel blend shell with foam nitrile palm for grip and dexterity. |
| Chrome Series® 4018 | ANSI/ISEA level A6 | Enhanced comfort with synthetic leather palm, replicating traditional glove feel. |
| Chrome Series® 4023 | ANSI/ISEA level A8 | Full coverage mechanics glove for palm and back of hand protection during blade changing. |
| HexArmor® Arm Guards | ANSI/ISEA level A7-A8 | SuperFabric® provides high cut and puncture resistance, ideal for slabbing and knife changing. |
Wear safety goggles to keep your eyes safe from flying pieces. Closed-toe shoes and long sleeves give you more protection.
Sélection de lames
Picking the right blade is very important. The blade must fit your machine and the material you cut. Think about these things:
- Material Compatibility: Choose a blade that matches your material’s hardness.
- Blade Geometry: Check the blade’s size and edge shape for good cuts.
- Coating and Surface Treatment: Some blades have special coatings for longer use.
- Cutting Speed and Feed Rate: Set these right to stop blade damage.
- Machine Compatibility and Alignment: Make sure the blade fits and lines up right.
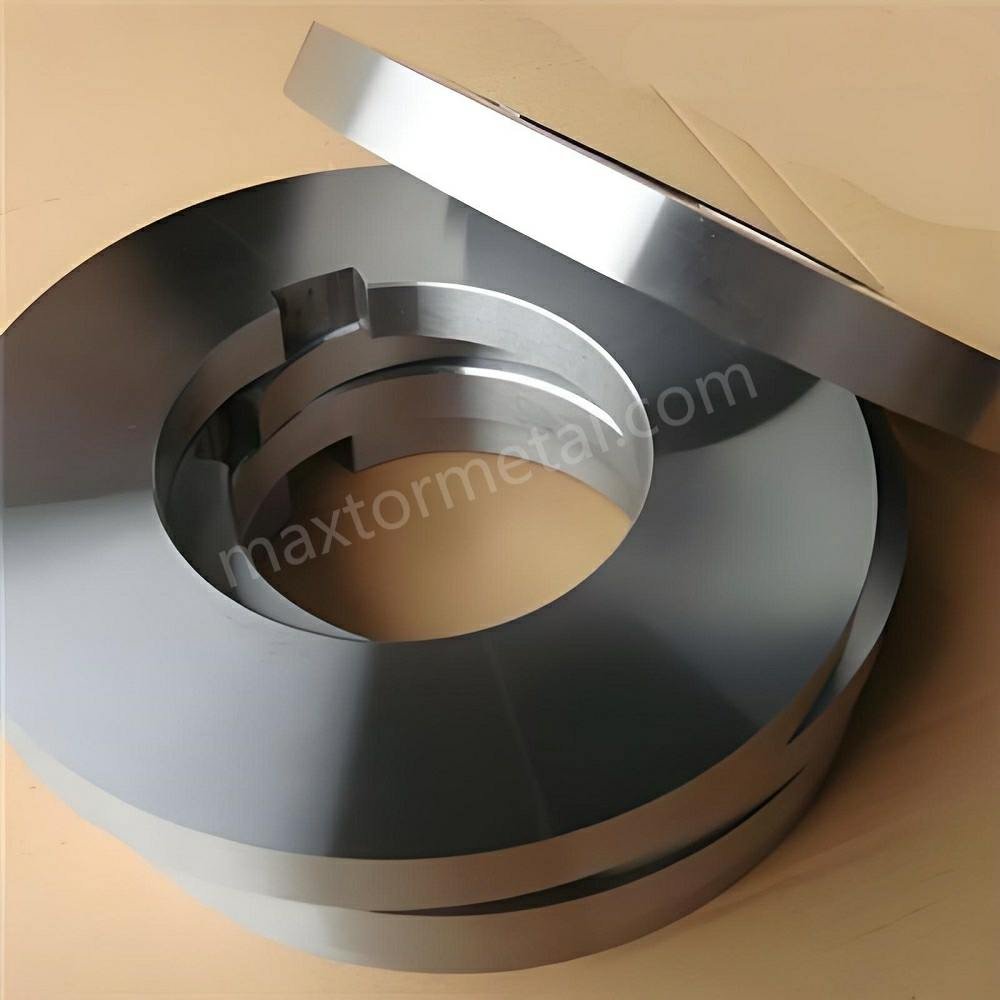
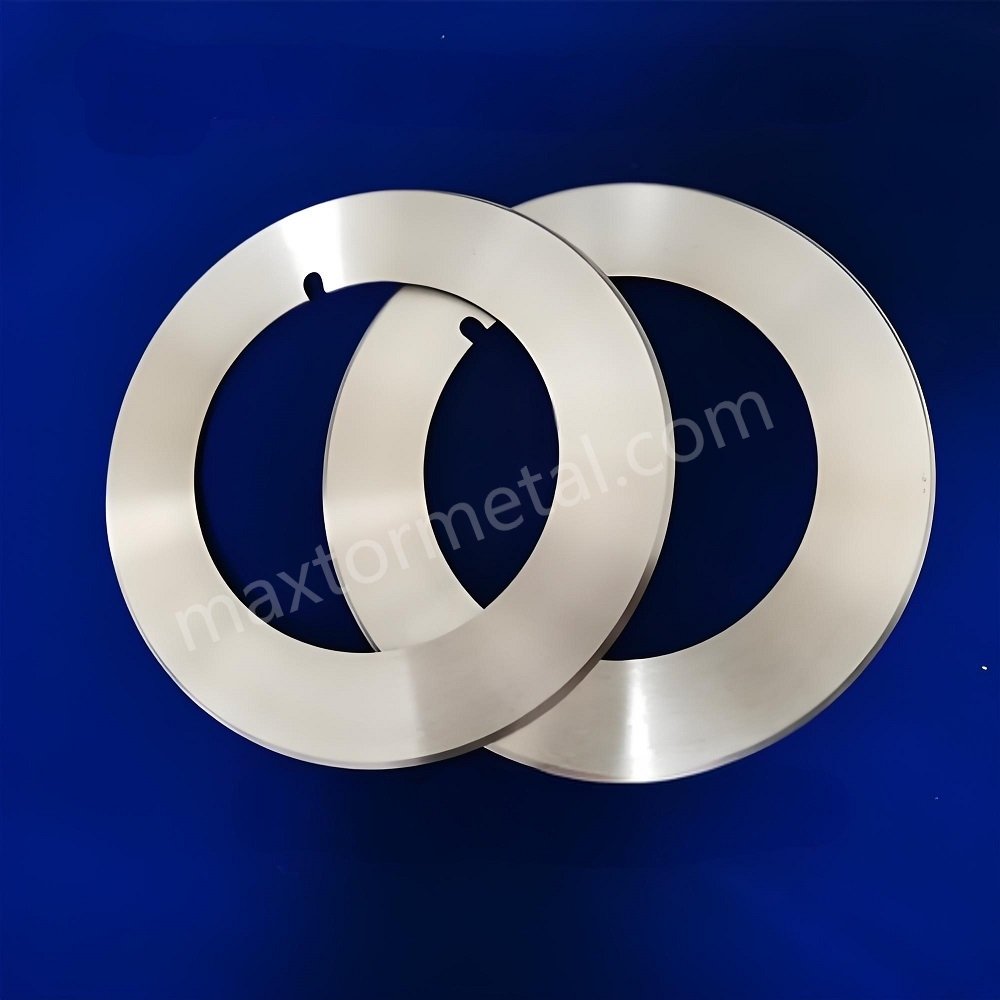
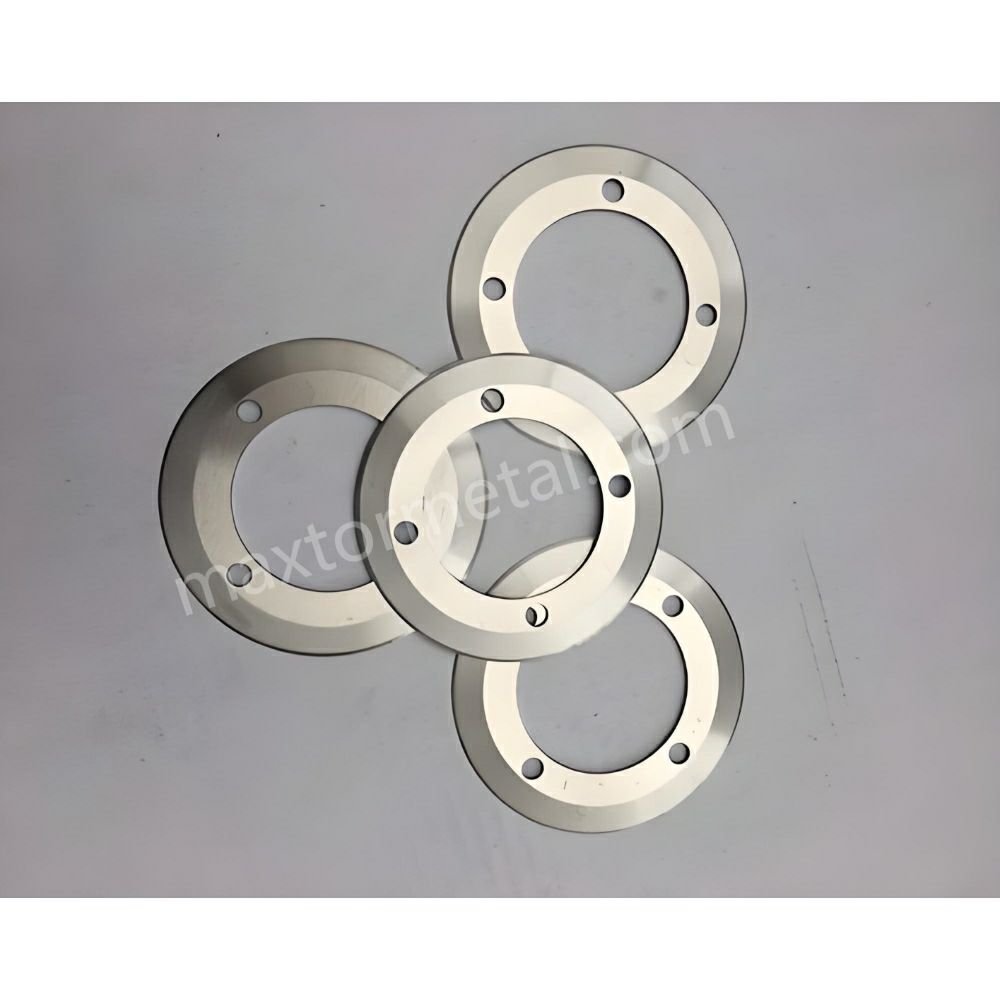
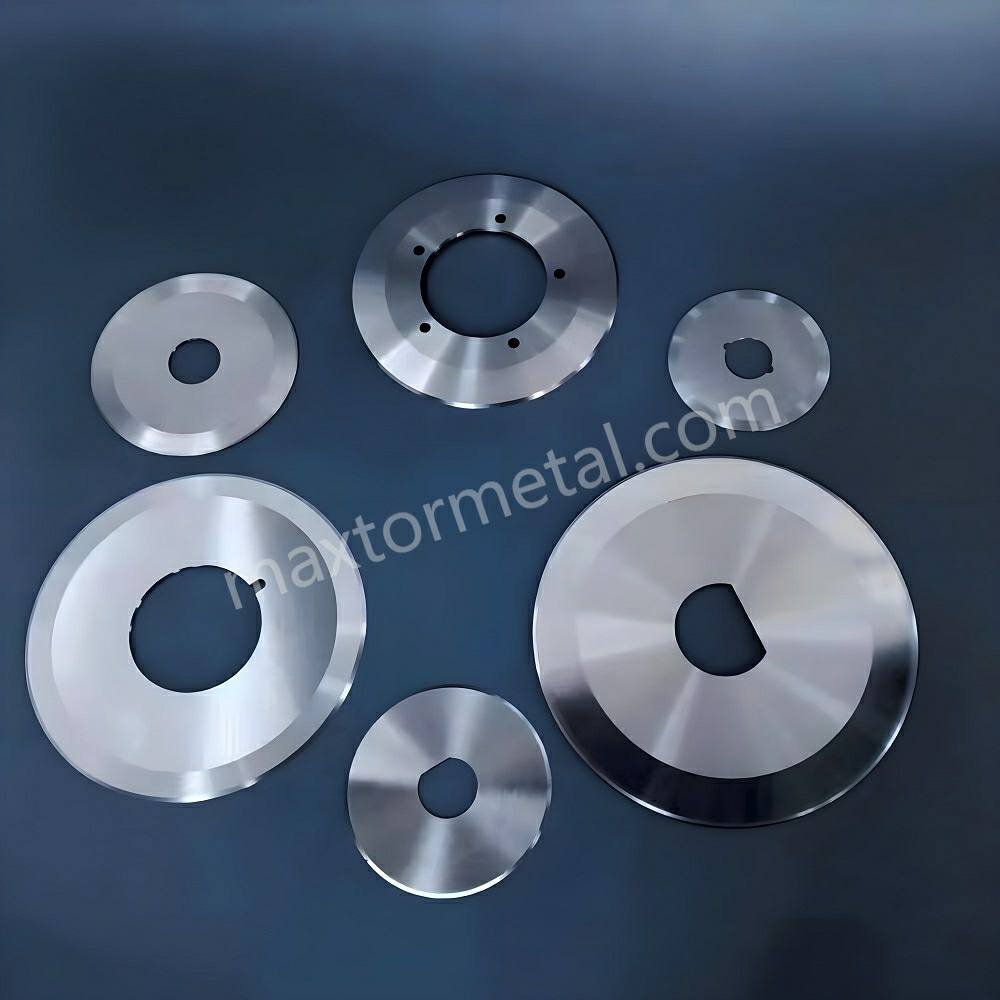
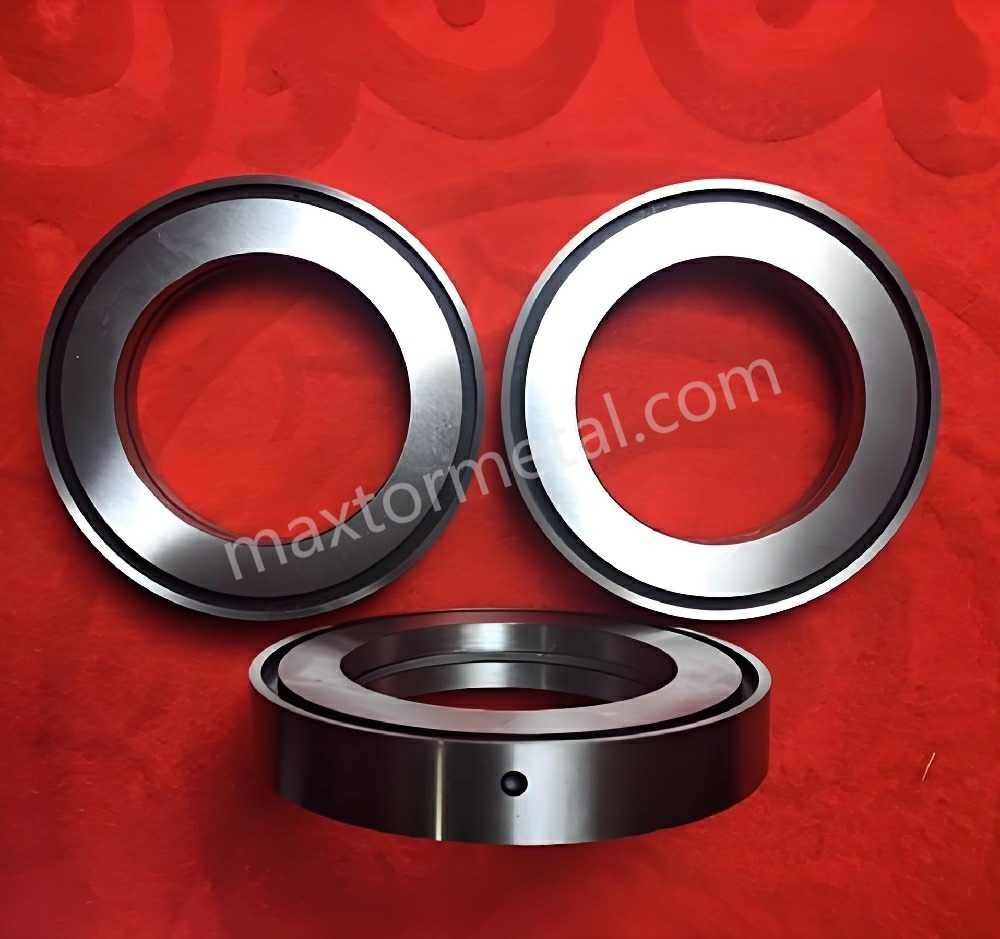
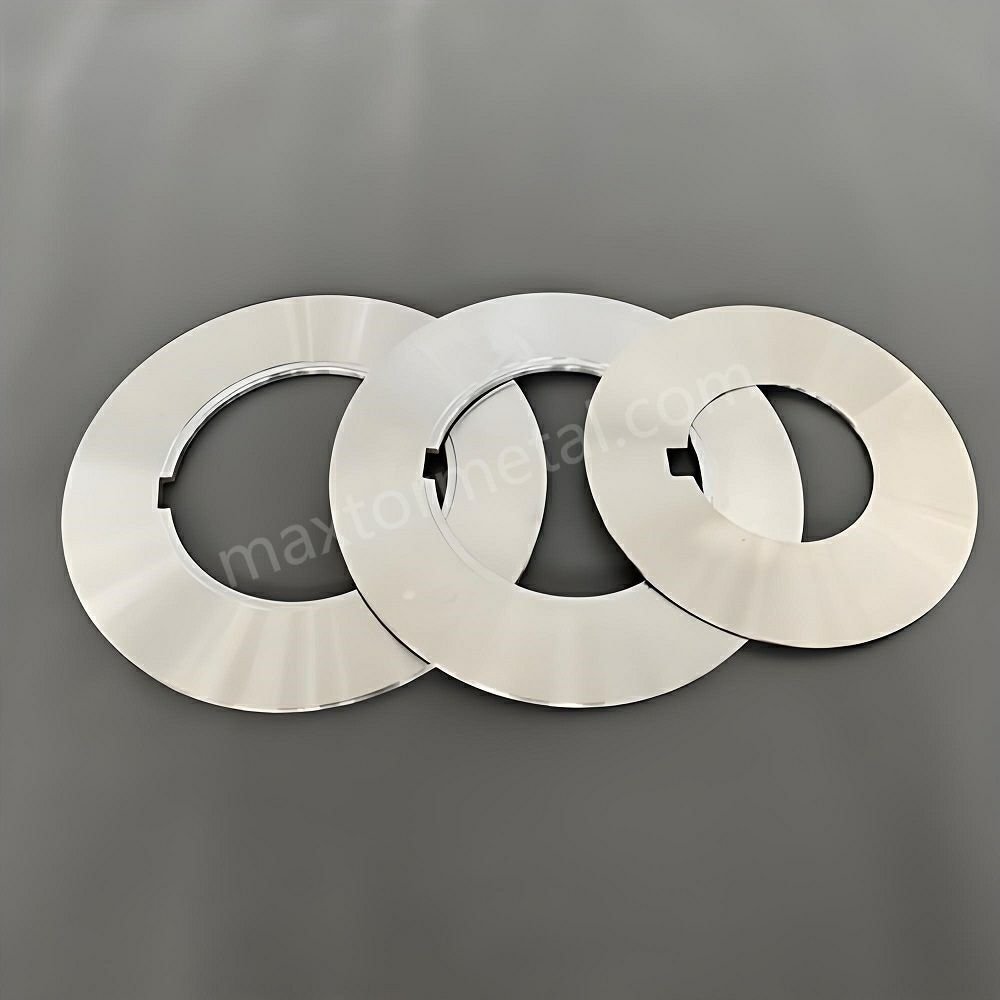
Blades come in high-carbon steel, tool steel, high-speed steel, and tungsten carbide. Nanjing Metal Industrial has many blade types and custom choices. You can order blades made to your own drawings or pick different edge shapes.
Many brands also sell OEM and aftermarket blades. Custom blades can fit your needs better. OEM blades sometimes work best for special jobs. Always check the blade’s quality and fit before you put it in.
Note: Good blades and the right choice help you cut better and save time.
Preparing for Blade Replacement
Getting ready for rotary slitter blade replacement helps you work safely and quickly. You need to follow a few important steps before you start. These steps protect you and your machine.
Power Shutdown
You must turn off the machine before you touch any blades. This step keeps you safe from accidents. Follow these best practices:
- Unplug the machine or switch off the main power.
- Use lockout devices to make sure no one turns the machine on by mistake.
- Check that all moving parts have stopped.
- Wait for the machine to cool down if it was running.
Tip: Always double-check the power switch and lockout tag before you begin. Safety comes first.
Work Area Setup
A clean and organized workspace helps you avoid mistakes. You need to set up your area before you start the blade change. Here is a simple checklist:
| Étape | Pourquoi c'est important |
|---|---|
| Remove debris and scraps | Prevents blade damage and accidents |
| Lay out tools and new blades | Saves time and keeps you organized |
| Place containers for old blades | Keeps used blades safe and out of the way |
| Wipe down machine surfaces | Stops dirt from getting into the assembly |
You should clean all parts, including the spindle and flange. This step helps you install the new blade smoothly.
Contrôles de sécurité
Before you begin rotary slitter blade replacement, you need to check your safety gear and workspace. Follow these steps:
- Make sure the machine is powered off and locked out.
- Put on cut-resistant gloves, safety goggles, and non-slip shoes.
- Clear the area of any clutter or loose items.
- Inspect the blade for chips, dents, or cracks.
- Listen for strange noises from the machine.
- Store blades in protective sleeves until you need them.
Note: You should always handle blades gently. Nicks and drops can ruin a blade and cause poor cuts.
You need to sharpen blades regularly and select the right blade for your material. Proper storage and handling keep your blades in good shape. These steps help you avoid injuries and keep your machine running well.
By following these steps, you prepare for a safe and efficient rotary slitter blade replacement. You protect yourself, your team, and your equipment.
Removing Old Slitter Blades
Rotary slitter blade replacement needs you to be careful. You must pay attention to safety and each step. This keeps you safe and your machine working well.
Safety Note: Always wear cut-resistant gloves and safety goggles. Make sure all moving parts have stopped before you start.
Accessing Blade Assembly
You need to get to the blade assembly first. Follow these steps to stay safe and work well:
- Turn off the machine and lock it out. This stops it from starting by accident.
- Take off any covers or guards from the blade assembly. Use the right tools for your machine.
- Find the blade housing. Clean away any debris or leftover material that blocks your way.
- Use the manufacturer’s manual to find all access points and fasteners.
- Stand in a steady position. This helps you avoid slipping or falling.
Wear safety glasses, cut-resistant gloves, and sturdy shoes. Stand up straight and check your table height. This helps you avoid neck and back pain. Keep your workspace clean and neat to lower risks.
| Étape | Pourquoi c'est important |
|---|---|
| Power off machine | Stops accidental startup |
| Remove covers | Lets you reach the blade easily |
| Clear debris | Prevents blade damage and accidents |
| Find fasteners | Makes removal safe and simple |
| Stable stance | Stops slips and injuries |
Loosening Fasteners
You need to loosen the fasteners holding the blade. Use the right tools so you do not hurt your machine.
- Use wrenches or screwdrivers that fit your fasteners. This stops them from breaking or stripping.
- Loosen each fastener in a cross-pattern or as the manual says. This spreads tension evenly and keeps the assembly from bending.
- Put all removed fasteners in a safe container. This keeps them together and stops mix-ups.
- If a fastener is stuck, use a lubricant. Wait for it to work before trying again.
- Check each fastener for damage or wear. Replace any that look worn for safe reassembly.
Never reach into the machine while blades are moving. Always follow the manufacturer’s rules for safe removal. If you are unsure, ask someone for help.
Tip: Keep your hands away from the cutting edge. Hold the blade by the hub or body to avoid cuts.
Retrait de la lame en toute sécurité
You need to remove the blade carefully to stay safe.
- Hold the blade with both hands. Keep your fingers away from the sharp edge.
- Slowly slide the blade out of its mount. Support its weight so you do not drop it.
- Put the removed blade in a safe container for used blades.
Common mistakes are using bare hands, dropping the blade, and not checking for leftover tension. You can stop these by wearing gloves, keeping a firm grip, and making sure all fasteners are loose before you take out the blade.
If the blade feels stuck, do not force it. Look for hidden fasteners or things in the way. Handle blades very carefully. Use safe lifting to avoid hurting yourself. Cuts on fingers or hands are the most common injuries when removing blades. You can avoid these by changing blades often, using the right size, and always cutting away from your body.
Note: Rotary slitter blade replacement is safest when you follow every step and use the right safety gear. Ask for help if you are unsure about any part.
Installing New Rotary Slitter Blades
Rotary slitter blade replacement works best if you follow each step. You need to clean the mounts first. Then, you must line up the blades and make sure they are tight. These steps help you get smooth cuts and keep your machine working well.
Cleaning Mounts
Removing Debris and Residue
Begin by cleaning the blade mounts. Use a clean cloth to wipe away dust and oil. Old material can also stick to the mounts. Dirt and rust can make the blade sit wrong. Check every part for sticky stuff or scraps from past jobs.
Cleaning blade mounts is very important. It helps rotary slitter blades last longer and work better. Cleaning makes sure there is no dirt, rust, or damage. Even sharp blades will not work well if the mounts are dirty.
Inspecting Mounting Surfaces for Damage or Wear
Look closely at the mounting surfaces. Search for cracks, dents, or worn spots. Damaged mounts can make the blade wobble or cut badly. If you see any problems, fix them before you put in the new blade. This step helps you stop future breakdowns.
Ensuring Dryness and Cleanliness Before Installation
Make sure the mounts are dry and clean before you install the new blade. Water or oil can make the blade slip or rust. Use a dry cloth to finish cleaning. A clean mount helps the blade last longer and cut better.
Alignement des lames
Positioning the Blade According to Manufacturer Specifications
Put the blade in the right spot. Follow your machine’s manual for instructions. Each machine has its own rules for blade position and spacing. If you use the wrong spot, you might get crooked cuts or break the blade.
- Install rotary slitter blades on the holder or arbor. Make sure they are lined up and tight.
- Adjust blade spacing and position for the number and width of slit lanes you want.
- Control web tension before the cutting zone for smooth flow.
- Line up the web with the blades to waste less and get even slit widths.
Adjusting Blade Height and Lateral Placement
Set the blade height to match the material thickness. Move the blade sideways to line up with the cut path. Use the knobs or screws on your machine. If the blade is too high or low, you might get rough edges or miss the cut line.
Verifying Parallelism and Clearance with Adjacent Blades
Check that all blades are parallel. Use a ruler or gauge to measure the space between blades. Make sure there is enough room so blades do not touch. If blades are too close, they can rub and wear out fast.
Using Alignment Tools or Gauges for Precision
Use alignment tools or gauges for the best results. These tools help you set the blade exactly where it needs to go. Being exact matters for smooth cuts and long blade life. If you do not have alignment tools, ask your supplier for help.
Securing Blades
Selecting Proper Fasteners and Torque Settings
Pick the right bolts or screws for your blade and machine. Use ones that match the size and thread type. Tighten each fastener to the torque setting in your manual. If you use the wrong fastener or torque, the blade can come loose or bend.
Tightening Sequence to Prevent Blade Distortion
Tighten the fasteners in a cross-pattern. This spreads the pressure evenly and keeps the blade flat. If you tighten one side too much, the blade can bend. Follow the order in your manual for best results.
Double-Checking Security and Stability
After you tighten the fasteners, check that the blade does not move. Wiggle the blade gently to see if it feels loose. If you find any movement, tighten the fasteners again. A tight blade helps you avoid accidents and bad cuts.
Documenting Installation for Maintenance Records
Write down the blade type, installation date, and torque settings in your maintenance log. Good records help you track blade life and plan future rotary slitter blade replacement. You can also note any problems or changes you made during installation.
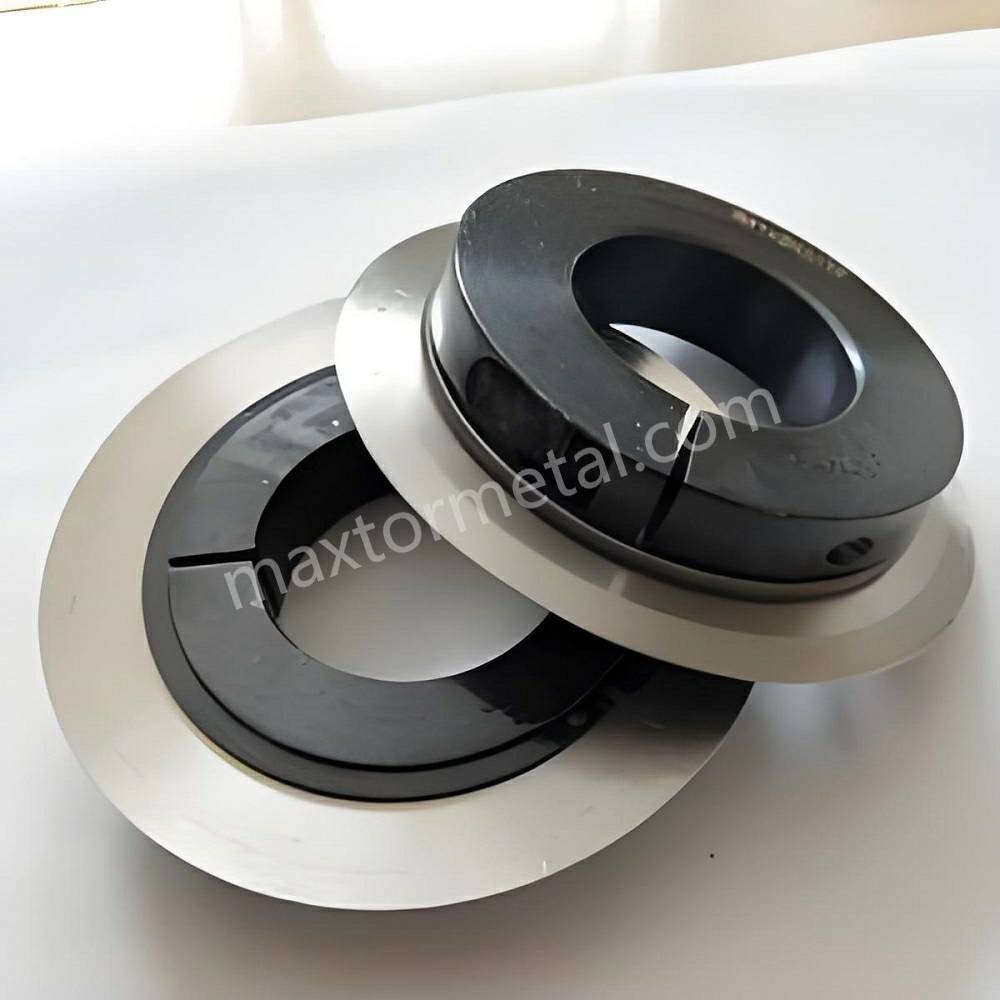
Choosing the Right Blade for Your Material
Pick the correct blade type and edge for your job. Paper, metal, and plastic need different blades. For example, single-layer small edge blades work well for hard materials. Double-layer large edge blades give you precise cuts on thin materials. If you want a blade made for your needs, you can order custom blades from Nanjing Metal Industrial. Custom blades help you get the best results for your machine and material.
Quality is important for every rotary slitter blade replacement. Always check that your new blade matches your machine and material. Look for blades made from high-carbon steel, tool steel, high-speed steel, or tungsten carbide. These materials last longer and cut better. Before you install the blade, check it for chips or cracks. Make sure it fits your machine and lines up with the other blades. Good quality and fit checks help you avoid problems and keep your machine running smoothly.
Final Checks and Testing
You should check your work before using the machine. Careful checking and testing help you find problems early. This keeps your cuts neat and safe. Follow these steps to make sure your rotary slitter blade replacement works well.
Inspection visuelle
Inspecting Blade Installation
Look at the blades closely for any chips or scratches. Check the locating hole for flat spots, burrs, or bent areas. If you see damage, do not use that blade.
Checking for Proper Alignment and Spacing
Use a ruler or gauge to measure space between blades. Make sure each blade is straight and does not touch others. Blades that are too close can rub and wear out fast.
Verifying Fastener Tightness
Check every bolt and screw with your hand. Make sure they feel tight. Loose bolts can make blades wobble or fall off. Tighten any that feel loose.
Tip: Always check your work twice before moving on. Careful checking helps you find mistakes early.
Here is a table showing what you need to check during visual inspection:
| Inspection Type | Critères |
|---|---|
| Inspection visuelle | Look for chips or scratches on the edge; check the knife’s locating hole for flat spots, burrs, or bent areas. |
| Dimension Verification | Measure the knife’s diameter and thickness with calipers; make sure sizes match the old knife. |
| Material Confirmation | Make sure the new knife’s material matches what you are cutting to stop fast wear. |
Manual Rotation
Rotating the Blade Assembly by Hand
Turn the blade assembly slowly with your hand. Wear gloves to protect your fingers. The blades should move smoothly and not stick.
Observing for Smooth Movement
Watch the blades as they turn. They should spin evenly and not shake. If you see wobbling, check the alignment again.
Listening for Unusual Sounds
Listen while you turn the blades. You should not hear grinding, scraping, or clicking sounds. Strange noises mean something is wrong with the installation.
Note: If you notice any problems, fix them before turning on the machine.
Essai
Powering Up the Machine
Turn on the machine after you finish all checks. Stay alert and keep your hands away from moving parts.
Conducting a Low-Speed Test
Start with a slow test run. This helps you spot problems before they get worse. Watch the blades and listen for odd sounds.
Monitoring for Vibration and Noise
Pay attention to shaking and loud sounds. Use your senses or sensors to check for vibration or noise. Too much shaking can hurt the blades and the machine.
Checking Initial Cut Quality
Look at the first cuts. Check the edges for tearing, rough spots, or uneven lines. Good cuts mean your blades are installed right.
Here is a table showing what you should watch during a slow test run:
| Paramètre | Monitoring Technique |
|---|---|
| Cut Edges | Check for tearing, rough spots, or uneven cuts |
| Vibration | Use sensors to measure shaking |
| Sound Changes | Use sensors to listen for strange sounds |
| Force de coupe | Use gauges to measure how hard it is to cut |
| Blade Temperature | Use sensors to check for overheating |
Callout: Always stop the machine if you see bad cuts, hear loud noises, or feel strong shaking. Fix the problem before you keep going.
You can keep your machine working well by following these steps. Careful final checks and testing help you get the best results from rotary slitter blade replacement.
Common Mistakes and Troubleshooting
Rotary slitter blade replacement can be tricky. If you skip steps or use the wrong tools, things can go wrong. You should learn about common mistakes and how to fix them. This section helps you avoid problems and keep your machine working well.
Removal Errors
Failing to Fully Power Down the Machine
If you do not turn off the machine, you could get hurt. Machines might start by accident and cause injuries. Always check the power switch and use lockout devices. Make sure all moving parts have stopped before you touch anything.
Not Wearing Proper Safety Gear
You need to wear cut-resistant gloves and safety goggles. If you do not wear safety gear, you can get cuts or hurt your eyes. Gloves protect your hands from sharp blades. Goggles keep your eyes safe from flying pieces. Never work without safety gear.
Skipping the Step of Marking Blade Positions
If you do not mark blade positions, you might put new blades in the wrong spot. Marking helps you put each blade back where it belongs. Use a marker or tape to show each blade’s place. This step saves time and stops mistakes.
Using Incorrect Tools for Fastener Removal
Using the wrong tools can break bolts or damage the blade assembly. Always use wrenches and screwdrivers that fit your fasteners. If you use the wrong size, you might break the fastener or harm your machine. Check your manual for the right tools.
Forcing Stuck Blades or Fasteners
If a blade or fastener is stuck, do not force it. Forcing can bend the blade or break the fastener. Use a lubricant and wait for it to work. Look for hidden fasteners or debris blocking the blade. Take your time and work slowly.
Solutions and Prevention Tips
Tip: You can avoid most removal mistakes by using a checklist.
- Always follow lockout/tagout steps before you start.
- Wear cut-resistant gloves and safety goggles every time.
- Mark blade positions before you take them out.
- Use the tools the manufacturer recommends for fasteners.
- If something is stuck, look for hidden fasteners or blockages instead of forcing it.
Installation Issues
Incorrect Blade Alignment
If you do not line up the blade right, you might get crooked cuts or damage the blade. Misalignment can happen if you rush or skip measuring. You need to check the blade from different angles and use shims if needed.
Uneven Fastener Tightening
If you tighten bolts unevenly, the blade can bend or move during use. You must tighten bolts in a cross-pattern to spread pressure. Uneven tightening can cause shaking and bad cuts.
Installing Incompatible or Damaged Blades
If you use a blade that does not match your machine or material, you might get poor cuts and fast wear. Damaged blades can break or cause accidents. Always check new blades for chips or cracks before you put them in.
Overlooking Manufacturer Specifications
If you ignore the manual, you might use the wrong torque or install the blade wrong. Manufacturer instructions help you get the best results and stay safe. Always follow the steps for your machine and blade.
Solutions and Prevention Tips
You can fix installation problems by doing these steps:
- Check if the blade is lined up at different angles.
- Use U-shaped shims of different thicknesses to adjust alignment.
- For cabinet saws, add shims to the rear or front corners if needed.
- Loosen one bolt at a time, adjust shims, and check measurements.
- Check blade alignment at both 90 and 45 degrees.
- Make sure all bolts are tight after you finish.
- Put covers back on after making changes.
- Double-check blade alignment with alignment tools or gauges.
- Tighten bolts in a cross-pattern to spread pressure.
- Check new blades for damage and make sure they fit before installing.
- Follow the manual for torque and installation steps.
Cut Quality Problems
Burrs or Rough Edges on Cut Material
Burrs and rough edges happen when the blade setup is wrong or the blade is dull. Compressive force during cutting causes burrs. If you set up the blade right and use sharp blades, you get fewer burrs.
Material Wrinkling or Deformation
Material can wrinkle or bend if blade clearance is wrong or pressure is too high. Damaged rubber bonded spacers can also cause shaking, which leads to bad cuts and short blade life.
Crooked or Inconsistent Cut Lines
Crooked cuts happen if blades are not lined up or if the material moves while cutting. You need to check alignment and make sure the material feeds smoothly.
Solutions and Troubleshooting Steps
You can make cut quality better by doing these things:
- Make sure blades are sharp, clean, and lined up right.
- Adjust blade clearance and pressure for your material.
- Replace worn or damaged blades quickly.
- Test cut on sample material and adjust settings before full production.
- Check rubber bonded spacers and replace them if damaged.
- Set up the blade to lower compressive force on the material.
Note: Good setup and regular checks help you avoid burrs, rough edges, and other cut problems.
Bruit et vibrations
Rotary slitter blade replacement can fix many problems. Sometimes, you still hear loud sounds or feel shaking. These signs mean something is wrong with your machine. You should learn what causes these issues and how to fix them.
Excessive Operational Noise
You might hear grinding, squealing, or rattling when the slitter runs. These sounds show that parts are not moving smoothly. Worn bearings, dry gears, or loose bolts can make the machine noisy. If you ignore these sounds, you could damage your blades or machine.
Conseil: Listen for new or louder noises after rotary slitter blade replacement. If you act early, you can stop bigger problems.
Unusual Vibrations During Cutting
If your machine shakes while cutting, stop and check it. Vibrations can make cuts uneven or hurt the blades. Sometimes, you feel the table or floor move. Other times, you see the material shift as it goes through the slitter. Vibrations can also make the blade wear out faster.
Possible Causes (e.g., Worn Bearings, Loose Fasteners, Misalignment)
Many things can cause noise and vibration during rotary slitter blade replacement:
- Worn Bearings: Bearings help parts spin smoothly. If they wear out, you hear grinding and feel shaking.
- Loose Fasteners: Bolts and screws hold the machine together. If they get loose, parts can move and make noise.
- Blade Misalignment: If blades are not lined up, they can rub or hit each other.
- Improper Roller Tension: Rollers guide the material. If tension is wrong, the material can slip or wrinkle.
- Lack of Lubrication: Dry gears and rollers make friction. This leads to noise and wear.
- Damaged Belts: Belts move parts inside the machine. If they crack or stretch, you hear slapping or squealing.
Solutions and Maintenance Tips
You can lower noise and vibration by keeping up with maintenance. Here are some steps you should follow:
- Lubricate moving parts often. Use the lubricant your manual says to use.
- Check roller alignment and tension. Adjust them for the material you cut.
- Look at bearings and belts for wear. Replace them if you see cracks or feel rough spots.
- Tighten all fasteners after rotary slitter blade replacement. Use a torque wrench for best results.
- Realign blades with gauges or alignment tools. Make sure each blade sits straight and does not touch others.
- Plan regular checks. Write down what you inspect and when you change parts.
The table below shows how to keep your machine working well:
| Conseil d'entretien | Importance | Method of Execution | Routine Checkpoints |
|---|---|---|---|
| Lubrication of Moving Parts | Cuts down friction and wear in gears, rollers, bearings | Use the right lubricants at set times | Look for signs of wear or dry spots |
| Roller Alignment and Tension | Helps you get even cuts and stops wrinkling | Check and adjust roller tension for each material type | Watch tension settings often |
| Bearing and Belt Inspections | Keeps the slitter working smoothly | Check for wear or bad tension every month | Monthly checks to catch problems early |
Note: Good maintenance helps you avoid most noise and vibration problems. If you hear new sounds or feel shaking after rotary slitter blade replacement, stop the machine and check all parts before you keep going.
By following these tips, you keep your rotary slitter quiet and smooth. You also help your blades last longer and get better cuts every time.
Maintenance Tips for Slitter Blades
Inspection régulière
Check your slitter blades often. This helps you find problems early. Look for chips, cracks, or dull spots on each blade. Use a flashlight to see small damage. If you see any damage, change the blade right away. Check the blade mounts and bolts for wear. Loose bolts can make blades shake and cut badly. Write your inspection notes in a logbook. This helps you plan when to change blades and see how long they last.
Tip: Make a schedule for checking blades. Busy machines need weekly checks. Machines used less can be checked once a month.
Nettoyage et lubrification
Clean blades and machine parts often to keep them working well. Dust, dirt, and scraps can build up and cause problems. Use a soft brush or air blower to clean the slitting area. Wipe blades with a clean cloth to get rid of oil and dirt. Lubricate moving parts like shafts and bearings with good oil. Lubrication helps blades spin easily and last longer.
Here are some cleaning and lubrication steps you should follow:
- Use a soft brush or air blower to clean away dust and scraps.
- Wipe blades and mounts with a clean cloth to remove oil and dirt.
- Lubricate shafts and bearings with the right oil for your machine.
- Check oil spots every time you inspect the machine.
A clean and oiled machine helps you avoid breakdowns and makes blade changes easier.
Scheduling Replacements
Plan to change blades before they get too dull or damaged. Waiting too long can make cuts bad and hurt the machine. Use your logbook to track blade wear. Change blades after a set number of hours or cuts. Some companies can sharpen blades to make them last longer. You can send blades to a service center for sharpening and testing. If you use custom blades, ask your supplier when to replace them.
| Méthode de remplacement | Avantage | When to Use |
|---|---|---|
| Remplacement programmé | Stops sudden breakdowns | After set hours or cut cycles |
| On-Demand Replacement | Fixes problems fast | When you see damage or dullness |
| Sharpening Service | Prolonge la durée de vie des lames | When blades have small wear |
Note: Changing blades on time keeps your machine safe and your cuts neat. Good planning saves you time and money.
If you follow these tips, your blades last longer and your rotary slitter works better. Regular care and smart planning make blade changes easier and help your machine run smoothly.
Storing Blades
You must store rotary slitter blades the right way. This keeps them sharp and safe. Good storage stops damage, rust, and accidents. If you store blades well, changing them is easier and faster.
Pick a dry place to keep your blades. Moisture and humidity can cause rust. The room should be between 68°F and 72°F. Try to keep the humidity under 50%. If the room feels wet, use a dehumidifier to keep blades dry.
Always use gloves when you touch blades. Fingerprints can leave oil that causes rust. Never touch the blade edge with bare hands. Gloves also keep your hands safe from cuts. Before storing, wipe blades with a clean cloth. Put a thin layer of oil on each blade. The oil keeps water away and stops rust.
Put blades in a case or drawer with foam or felt. Soft lining stops scratches and dents. Wrap each blade in oiled paper or a sleeve. If your blades do not have oil, seal them in tight packaging. This keeps out air and moisture. Lay each blade flat in storage. Do not stack blades on top of each other. Stacking can bend or chip the edges.
Here is a simple checklist for storing rotary slitter blades:
- Use gloves when you handle blades.
- Clean blades and put on a thin layer of oil.
- Wrap blades in oiled paper or sleeves.
- Store blades in foam-lined cases or drawers.
- Keep blades in a dry, low-humidity room.
- Do not stack blades on top of each other.
- Use sealed packaging for blades without oil.
Check the storage area often for problems. Look for moisture, dust, or pests. If you see rust or damage, clean the area and replace bad blades. Good storage keeps blades ready for rotary slitter blade replacement. It also helps you get clean cuts every time.
Nanjing Metal Industrial uses strict rules for storing and shipping blades. Their team can give you tips for storage and blade care. Other brands can help with sharpening and replacement if you need it. Always store blades safely to protect your money and keep your rotary slitter working well.
Tip: Safe storage means fewer accidents and longer blade life. Good habits make rotary slitter blade replacement easier and safer.
If you follow every step, you can change rotary slitter blades safely. Always put on safety gear before you start. Pick the blade that matches your material. Check your blades often and store them the right way. This helps blades last longer. Good blades from Nanjing Metal Industrial help you get better cuts. You can choose blades that fit your needs. Learning new skills and talking to suppliers helps you do a better job.
Want to make your slitting better? Contact our sales engineer pour obtenir l'aide d'experts.
FAQ
How often should you perform rotary slitter blade replacement?
Check your blades every week if you use the machine a lot. Change blades when you see dull edges or chips. If cuts look bad, replace the blade. Regular rotary slitter blade replacement keeps your machine safe. It also helps you get clean cuts.
What safety gear do you need for rotary slitter blade replacement?
Wear cut-resistant gloves, safety goggles, and closed-toe shoes. These keep your hands, eyes, and feet safe from sharp blades. They also protect you from flying debris. Always put on safety gear before rotary slitter blade replacement.
Can you reuse old slitter blades after sharpening?
You can use blades again if they have no cracks or deep chips. Sharpening makes blades last longer. Always look at blades before you put them back. If you see damage, pick a new blade for rotary slitter blade replacement.
What signs show you need rotary slitter blade replacement?
Watch for rough edges, burrs, or uneven cuts on your material. Listen for new sounds or feel more shaking when cutting. These signs mean you need rotary slitter blade replacement soon.
How do you choose the right blade for your material?
Look at your material type and thickness. Use harder blades for tough materials like metal. Pick the right edge shape for clean cuts. Always match the blade to your job for the best rotary slitter blade replacement.
What should you do if a blade gets stuck during removal?
Stop and look for hidden fasteners or debris. Do not force the blade out. Use a lubricant if you need to. Always follow safe steps during rotary slitter blade replacement to stay safe.
Why is blade alignment important in rotary slitter blade replacement?
Good alignment keeps cuts straight and your machine safe. Blades that are not lined up can make rough edges and loud noises. They also wear out faster. Always check alignment during rotary slitter blade replacement for the best results.
Voir aussi
Les Principales Erreurs dans le Dépannage des Lames de Coupe Rotatives et Comment les Corriger
Lames de Coupe Rotatives de Haute Précision pour le Fendage de Films et de Feuilles
Les Meilleures Lames de Coupe Rotatives pour le Coupe de Métal
Comment Réaliser des Coupes Parfaites avec des Lames de Coupe Rotatives pour Papier