

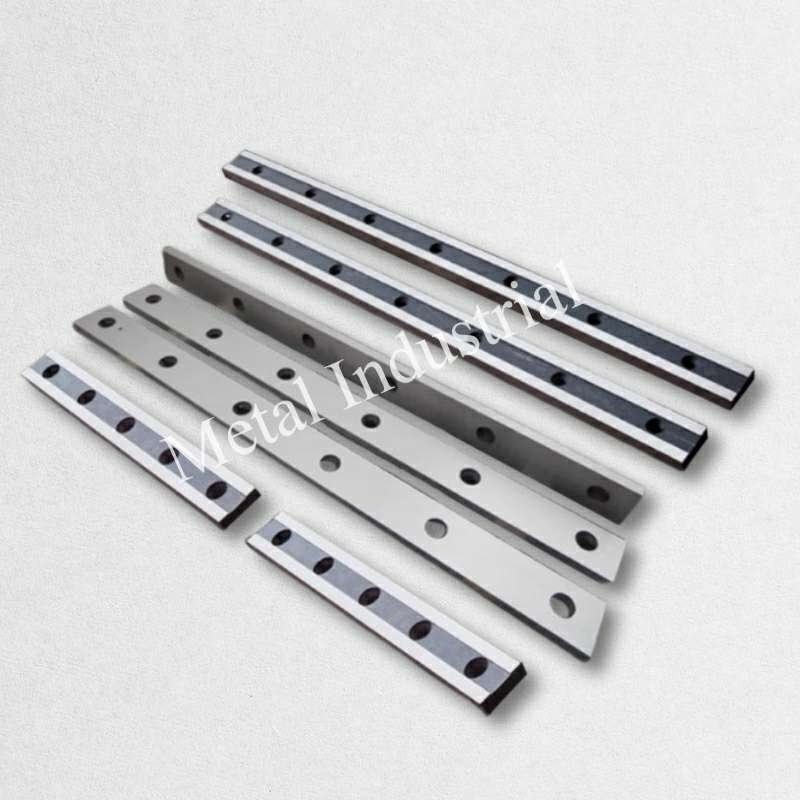
आपको अक्सर अप्रत्याशित समस्याओं का सामना करना पड़ता है मेटल शियर ब्लेड्स औद्योगिक मशीनरी में। साझेदारी करना Nanjing Metal त्वरित समस्या निवारण सुनिश्चित करता है ताकि आपकी उत्पादन लाइन चलती रहे और महंगी डाउनटाइम कम हो। मैकिन्से (McKinsey) के एक अध्ययन से पता चलता है कि प्रेडिक्टिव मेंटेनेंस का उपयोग करने वाली कंपनियां डाउनटाइम को 50% तक कम कर सकती हैं और रखरखाव लागत को 30% तक घटा सकती हैं. । बर्स (burrs), वॉरपिंग (warping), और चिपिंग (chipping) जैसी समस्याएं शीट मेटल शियरिंग को बाधित करती हैं, लेकिन कस्टम ब्लेड Nanjing Metal से, प्रत्येक ब्लेड लाखों चक्रों को सहन करता है और कंपन, सतह के तनाव और दरारों का प्रतिरोध करता है। अधिक जानकारी के लिए या संपर्क Nanjing Metal से संपर्क करें, अपने ब्लेड को उनके सर्वोत्तम प्रदर्शन पर बनाए रखने के लिए आज ही संपर्क करें।.
चाबी छीनना
- बर्स (burrs), वॉरपिंग (warping), चिपिंग (chipping) और भोथरापन (dullness) जैसी सामान्य समस्याओं से बचने के लिए मेटल शियर ब्लेड्स को तेज, साफ और अच्छी तरह से संरेखित (aligned) रखें।.
- प्रत्येक शिफ्ट से पहले ब्लेड का नियमित रूप से निरीक्षण करें और समस्याओं को जल्दी पकड़ने और कट की गुणवत्ता बनाए रखने के लिए साप्ताहिक और मासिक रखरखाव करें।.
- घिसाव को कम करने, दोषों को रोकने और ब्लेड के जीवनकाल को बढ़ाने के लिए सही ब्लेड सामग्री का उपयोग करें और उचित ब्लेड क्लीयरेंस सेट करें।.
- डाउनटाइम और क्षति से बचने के लिए जब आप घिसाव के लक्षण जैसे कि चिप्स, दरारें, भोथरे किनारे (dull edges), या बढ़े हुए कटिंग बल को देखें, तो तुरंत ब्लेड बदलें।.
- अपनी विशिष्ट उत्पादन आवश्यकताओं के अनुरूप बेहतर कटिंग गति, लंबे ब्लेड जीवनकाल और कम रखरखाव लागत के लिए कस्टम ब्लेड पर विचार करें।.
सामान्य समस्याएं
बर्र
आप कटे हुए मेटल के किनारे पर बर्स (burrs) देख सकते हैं। बर्स छोटे, खुरदरे उभार होते हैं जो शियर एज की गुणवत्ता गिरने पर बनते हैं। मेटल शियरिंग में बर्स का बनना सबसे आम दोषों में से एक है। ये बर्स आपके तैयार उत्पाद की गुणवत्ता को कम कर सकते हैं और आगे की प्रोसेसिंग को कठिन बना सकते हैं। बर्स अक्सर ब्लेड के तीखेपन या संरेखण (alignment) में समस्याओं का संकेत देते हैं। यदि आप बर्स देखते हैं, तो ब्लेड के घिसाव या अनुचित क्लीयरेंस की जांच करें। बर्स का बनना आयामी सटीकता (dimensional accuracy) को भी प्रभावित करता है और यदि इस पर ध्यान न दिया जाए तो अधिक दोष पैदा हो सकते हैं।.
मुड़ने
वॉरपिंग (warping) तब होती है जब कटने के बाद मेटल मुड़ या ऐंठ जाता है। यह सामग्री विरूपण (material distortion) आपके पुर्जों की सटीकता को खराब कर सकता है। वॉरपिंग एक आम दोष है जो कटिंग के दौरान असमान बल या घिसे हुए ब्लेड के कारण होता है। आप मेटल को मुड़ते या ऐंठते हुए देख सकते हैं, जिससे आपके काम की समग्र गुणवत्ता कम हो जाती है। वॉरपिंग आयामी सटीकता (dimensional accuracy) को बनाए रखना भी कठिन बनाती है और बाद के चरणों में समस्याएं पैदा कर सकती है।.
छिल
चिपिंग (chipping) का अर्थ है कटिंग के दौरान ब्लेड या मेटल से छोटे टुकड़ों का टूटकर अलग होना। यह दोष ब्लेड और वर्कपीस दोनों को नुकसान पहुंचा सकता है। चिपिंग अक्सर गलत ब्लेड सामग्री का उपयोग करने या बहुत कठोर धातुओं को काटने के कारण होती है। आप शियर एज के साथ चिप्स देख सकते हैं, जिससे शियर एज की गुणवत्ता और सटीकता कम हो जाती है। चिपिंग से बर्स बनने की संभावना भी बढ़ जाती है और इससे अधिक दोष हो सकते हैं।.
मंदता
भोथरापन (dullness) तब होता है जब ब्लेड अपना तीखा किनारा खो देता है। एक भोथरा ब्लेड साफ कट नहीं लगा सकता, जिससे शियर एज की गुणवत्ता कम हो जाती है। भोथरापन के कारण अधिक बर्स बनते हैं और आयामी सटीकता (dimensional accuracy) खराब होती है। आप बढ़े हुए कटिंग बल और अधिक सामग्री विरूपण (material distortion) को नोटिस कर सकते हैं। भोथरे ब्लेड अधिक दोषों का कारण भी बनते हैं और आपके उत्पादों की समग्र गुणवत्ता को कम करते हैं।.
आयामी त्रुटियां (Dimensional Errors)
आयामी त्रुटियां (dimensional errors) तब होती हैं जब कटा हुआ हिस्सा आवश्यक आकार से मेल नहीं खाता है। ये त्रुटियां आपके काम की सटीकता और गुणवत्ता को प्रभावित करती हैं। आयामी त्रुटियां अक्सर ब्लेड के घिसाव, गलत संरेखण (misalignment), या सामग्री विरूपण (material distortion) के कारण होती हैं। आप ऐसे पुर्जे देख सकते हैं जो बहुत लंबे, बहुत छोटे या असमान हैं। ये त्रुटियां अधिक दोषों का कारण बन सकती हैं और आपके तैयार उत्पादों के मूल्य को कम कर सकती हैं।.
असमान कटौती
असमान कट (uneven cuts) का मतलब है कि कटी हुई सतह सीधी या चिकनी नहीं है। यह समस्या आपके पुर्जों की गुणवत्ता और सटीकता दोनों को प्रभावित करती है। असमान कट अक्सर ब्लेड के गलत संरेखण (misalignment), भोथरापन (dullness), या सामग्री विरूपण (material distortion) के कारण होते हैं। आप दांतेदार किनारे या तिरछे कट देख सकते हैं, जिससे बर्स का बनना और अन्य दोष बढ़ जाते हैं। असमान कट अच्छी शियर एज गुणवत्ता और आयामी सटीकता (dimensional accuracy) प्राप्त करना कठिन बनाते हैं।.
समस्या निवारण
मुद्दों की पहचान
बर्र
आप कट लाइन के साथ खुरदरे, उभरे हुए किनारों को देखकर बर्स (burrs) की पहचान कर सकते हैं। ये छोटे उभार अक्सर शियरिंग प्रक्रिया के बाद दिखाई देते हैं और शियर एज की गुणवत्ता में गिरावट का संकेत देते हैं। निरीक्षण के दौरान, कट के दोनों किनारों पर बर्स की जांच करें। तीखेपन या असमानता को महसूस करने के लिए अपनी उंगलियों का उपयोग करें।. स्वचालित निरीक्षण प्रणालियाँ (Automated inspection systems), जैसे कि मशीन विज़न, आपको वास्तविक समय (real time) में बर्स का पता लगाने में मदद कर सकती हैं। सेटअप के समय और उत्पादन के दौरान नियमित जांच से आपको बर्स बनने की शुरुआत में ही पकड़ने में मदद मिलती है।.
मुड़ने
आप वॉरपिंग (warping) की पहचान तब करते हैं जब कटने के बाद धातु मुड़ या ऐंठ जाती है। पुर्जे को ऊपर उठाएं और लंबाई के साथ घुमाव या ऐंठन की जांच करें। कटे हुए टुकड़े को एक सपाट सतह पर रखें और देखें कि क्या यह डगमगाता है या सपाट नहीं बैठता है। वॉरपिंग आयामी सटीकता (dimensional accuracy) को प्रभावित करती है और आपके तैयार उत्पाद की गुणवत्ता को खराब कर सकती है। तकनीशियन अक्सर विरूपण (distortion) की मात्रा को मापने के लिए स्ट्रेटएज या गेज का उपयोग करते हैं।.
छिल
चिपिंग (chipping) ब्लेड या कटे हुए किनारे पर छोटे गायब टुकड़ों के रूप में दिखाई देती है। आप ब्लेड पर ही छोटे निशान या दरारें देख सकते हैं। अच्छी रोशनी में ब्लेड का निरीक्षण करें और यदि आवश्यक हो तो मैग्नीफायर का उपयोग करें। चिपिंग शियर एज की गुणवत्ता को कम करती है और शियरिंग प्रक्रिया में अधिक दोष पैदा कर सकती है। सेटअप और नियमित जांच दोनों के दौरान चिप्स पर नज़र रखें।.
मंदता
आपको कुंदपन का पता तब चलता है जब ब्लेड का किनारा गोल या घिसा हुआ दिखाई देता है। एक कुंद ब्लेड साफ कट नहीं लगा सकता, जिससे आपको अधिक बर (burrs) और खुरदरे किनारे दिखाई दे सकते हैं। आप शियरिंग प्रक्रिया के दौरान बढ़ा हुआ प्रतिरोध भी महसूस कर सकते हैं। धार की कमी की जांच करने के लिए ब्लेड की तुलना एक नए ब्लेड से करें। कुंदपन के कारण अक्सर खराब आयामी सटीकता और निम्न उत्पाद गुणवत्ता होती है।.
आयामी त्रुटियां (Dimensional Errors)
आयामी त्रुटियां तब दिखाई देती हैं जब कटा हुआ हिस्सा आवश्यक आकार से मेल नहीं खाता। कटे हुए टुकड़े की लंबाई, चौड़ाई और मोटाई मापने के लिए कैलीपर्स या माइक्रोमीटर का उपयोग करें। इन मापों की तुलना अपने विनिर्देशों से करें। छोटी त्रुटियां भी आपके काम की सटीकता और गुणवत्ता को प्रभावित कर सकती हैं। नियमित नमूनाकरण और सांख्यिकीय जांच आपको इन दोषों को जल्दी पकड़ने में मदद करती है।.
असमान कटौती
आप असमान कटों की पहचान आरीदार या तिरछे किनारों को देखकर कर सकते हैं। कटी हुई सतह सीधी या चिकनी नहीं हो सकती है। उभार या गड्ढों को महसूस करने के लिए किनारे पर अपनी उंगली चलाएं। असमान कट शियर एज की गुणवत्ता को कम करते हैं और आयामी सटीकता बनाए रखना कठिन बनाते हैं। स्वचालित सेंसर और विज़ुअल जांच आपको उत्पादन के दौरान इस समस्या का पता लगाने में मदद करते हैं।.
कारण
बर्र
बर (burrs) अक्सर तब बनते हैं जब ब्लेड कुंद या गलत संरेखित हो जाता है। गलत ब्लेड क्लीयरेंस भी बर बनने का कारण बन सकता है। यदि आप गलत ब्लेड सामग्री का उपयोग करते हैं या मशीन को गलत तरीके से सेट करते हैं, तो आपको अधिक बर दिखाई दे सकते हैं। उच्च कटिंग बल और घिसे हुए डाइस बर के जोखिम को बढ़ाते हैं। सामग्री की मोटाई या कठोरता में बदलाव से शियरिंग प्रक्रिया के दौरान अधिक बर भी बन सकते हैं।.
मुड़ने
वॉर्पिंग आमतौर पर तब होती है जब कटिंग बल असमान होता है। घिसे हुए या क्षतिग्रस्त ब्लेड धातु को मोड़ने या मरोड़ने का कारण बन सकते हैं। गलत मशीन सेटिंग्स, जैसे कि अनुचित होल्ड-डाउन प्रेशर, भी वॉर्पिंग का कारण बनती हैं। यदि सामग्री बहुत पतली या नरम है, तो यह अधिक आसानी से मुड़ सकती है। शियरिंग प्रक्रिया के दौरान हाई-स्पीड कट और खराब सपोर्ट इस जोखिम को बढ़ाते हैं।.
छिल
चिपिंग तब होती है जब आप गलत ब्लेड सामग्री का उपयोग करते हैं या बहुत कठोर धातुओं को काटते हैं। अत्यधिक कटिंग बल और अनुचित ब्लेड क्लीयरेंस के कारण चिप्स हो सकते हैं। यदि ब्लेड में माइक्रो-क्रैक या दोष हैं, तो उपयोग के दौरान यह चिप हो सकता है। मशीन सेटिंग्स या सामग्री के गुणों में बदलाव भी चिपिंग में योगदान करते हैं। खराब रखरखाव और स्नेहन की कमी समस्या को बदतर बना देती है।.
मंदता
कुंदपन समय के साथ सामान्य घिसावट के कारण होता है। अपघर्षक या कठोर सामग्रियों को काटने से ब्लेड का घिसना तेज हो जाता है। खराब स्नेहन और सफाई की कमी भी कुंदपन का कारण बनती है। यदि आप ब्लेड का उपयोग उसके सेवा जीवन से अधिक करते हैं, तो यह अपनी तेज धार खो देगा। नियमित रखरखाव के बिना बार-बार काटने से ब्लेड तेजी से कुंद होता है।.
आयामी त्रुटियां (Dimensional Errors)
आयामी त्रुटियां अक्सर ब्लेड के घिसने या गलत संरेखण के कारण होती हैं। गलत मशीन अंशांकन और खराब सेटअप के कारण पुर्जे बहुत लंबे या बहुत छोटे हो जाते हैं। शियरिंग प्रक्रिया के दौरान सामग्री की हलचल भी सटीकता को प्रभावित कर सकती है। सामग्री की मोटाई या कठोरता में बदलाव से असंगत कट हो सकते हैं। नियमित निरीक्षण की कमी से आयामी त्रुटियों का जोखिम बढ़ जाता है।.
असमान कटौती
असमान कट तब होते हैं जब ब्लेड गलत संरेखित या कुंद होता है। घिसे हुए गाइड या सपोर्ट काटने के दौरान सामग्री को खिसकने का कारण बन सकते हैं। गलत ब्लेड क्लीयरेंस और खराब मशीन सेटअप भी असमान कट का कारण बनते हैं। यदि सामग्री को मजबूती से नहीं पकड़ा जाता है, तो यह हिल सकती है और आरीदार किनारे बना सकती है। सामग्री की मोटाई या कठोरता में भिन्नता समस्या को बदतर बना देती है।.
समाधान
बर्र
बर (burrs) को ठीक करने के लिए, सबसे पहले ब्लेड के घिसने या गलत संरेखण की जांच करें। सामग्री की मोटाई के अनुसार ब्लेड क्लीयरेंस को समायोजित करें। यदि आवश्यक हो तो ब्लेड को बदलें या तेज करें। ब्लेड को साफ करें और किसी भी मलबे को हटा दें। बर बनने को कम करने के लिए उचित मशीन सेटिंग्स का उपयोग करें। पूर्ण उत्पादन फिर से शुरू करने से पहले एक टेस्ट कट चलाएं और शियर एज की गुणवत्ता की जांच करें।.
मुड़ने
ब्लेड की स्थिति की जांच करके और घिसे हुए ब्लेड को बदलकर वॉर्पिंग को ठीक करें। शियरिंग प्रक्रिया के दौरान सामग्री को समतल रखने के लिए होल्ड-डाउन प्रेशर को समायोजित करें। सुनिश्चित करें कि सपोर्ट टेबल समतल और मलबे से मुक्त हो। पतली या नरम सामग्रियों के लिए धीमी कटिंग गति का उपयोग करें। एक सैंपल कट चलाएं और समतलता तथा आयामी सटीकता को मापें।.
छिल
अपने अनुप्रयोग के लिए सही ब्लेड सामग्री का उपयोग करके चिपिंग की समस्या का समाधान करें। दरारों या चिप्स के लिए ब्लेड का निरीक्षण करें और क्षतिग्रस्त होने पर इसे बदल दें। ब्लेड पर तनाव को कम करने के लिए कटिंग बल और ब्लेड क्लीयरेंस को समायोजित करें। ओवरहीटिंग को रोकने के लिए ब्लेड को नियमित रूप से लुब्रिकेट करें। शियरिंग प्रक्रिया शुरू करने से पहले मशीन सेटिंग्स और सामग्री के गुणों की जांच करें।.
मंदता
ब्लेड को हटाकर और निर्माता के दिशानिर्देशों के अनुसार इसे तेज करके ब्लेड की धार को बहाल करें। यदि तेज करने से धार वापस नहीं आती है तो ब्लेड को बदल दें। दोबारा स्थापित करने से पहले ब्लेड सीट को साफ और लुब्रिकेट करें। कुंदपन को रोकने के लिए नियमित रखरखाव का समय निर्धारित करें। शियर एज की गुणवत्ता बनाए रखने के लिए हमेशा अपनी सामग्री के लिए सही ब्लेड का उपयोग करें।.
आयामी त्रुटियां (Dimensional Errors)
मशीन को पुन: अंशांकित करके और ब्लेड संरेखण की जांच करके आयामी त्रुटियों को ठीक करें। सामग्री की मोटाई के लिए ब्लेड क्लीयरेंस को मापें और समायोजित करें। सपोर्ट गाइड का निरीक्षण करें और घिसे होने पर बदलें। कटे हुए आयामों को सत्यापित करने के लिए सटीक मापने वाले उपकरणों का उपयोग करें। सटीकता बनाए रखने के लिए नियमित नमूनाकरण और सांख्यिकीय जांच लागू करें।.
असमान कटौती
ब्लेड को संरेखित करके और घिसाव की जांच करके असमान कटाई की समस्या को हल करें। कुंद या क्षतिग्रस्त ब्लेड को बदलें। शियरिंग प्रक्रिया के दौरान सामग्री को खिसकने से रोकने के लिए मटेरियल सपोर्ट और गाइड को समायोजित करें। सही ब्लेड क्लीयरेंस और मशीन सेटिंग्स सेट करें। एक टेस्ट कट चलाएं और किनारे की चिकनाई और सीधेपन की जांच करें।.
समस्या निवारण चेकलिस्ट
तकनीशियन की ट्रबलशूटिंग चेकलिस्ट
- सेटअप के समय और उत्पादन के दौरान ब्लेडों में दिखाई देने वाले घिसाव, बर्र (burrs), चिपिंग और कुंदता की जांच करें।.
- प्रत्येक शिफ्ट से पहले ब्लेड संरेखण (alignment) और क्लीयरेंस की जांच करें।.
- कट के आयामों को मापने और सटीकता को सत्यापित करने के लिए कैलीपर्स या माइक्रोमीटर का उपयोग करें।.
- कटे हुए हिस्सों को समतल सतह पर रखकर टेढ़ेपन (warping) की निगरानी करें।.
- प्रति ब्लेड कट की संख्या को ट्रैक करें और ऐतिहासिक औसत से तुलना करें।.
- लागू करें Acceptable Quality Level (AQL) sampling for final inspection.
- Segregate nonconforming parts and maintain traceability.
- Use machine vision or sensors for real-time defect detection.
- Record all findings and corrective actions in a maintenance log.
- Always follow safety procedures and use personal protective equipment.
रोकथाम
बर्र
You can prevent burrs by keeping blades sharp and properly aligned. Set the correct blade clearance for each material. Clean and lubricate the blade regularly. Use the right blade material for your application. Monitor the shearing process and inspect parts for burr formation.
मुड़ने
Prevent warping by using even hold-down pressure and supporting the material during cutting. Replace worn or damaged blades promptly. Adjust machine settings for each material type. Keep the support table clean and level. Run test cuts to check for flatness and dimensional accuracy.
छिल
Reduce chipping by selecting the right blade material and maintaining proper blade clearance. Avoid excessive cutting force. Inspect blades for cracks or chips before use. Lubricate the blade to reduce heat and stress. Schedule regular maintenance to catch early signs of chipping.
मंदता
Prevent dullness by sharpening or replacing blades on a regular schedule. Clean and lubricate blades after each use. Avoid cutting materials that exceed the blade’s rated hardness. Store blades in a dry, safe place to prevent corrosion. Keep a maintenance log to track blade performance.
आयामी त्रुटियां (Dimensional Errors)
Maintain dimensional accuracy by calibrating machines regularly and checking blade alignment. Use precise measuring tools for setup and inspection. Replace worn guides and supports. Monitor the shearing process for changes in material properties. Implement statistical process control to catch errors early.
असमान कटौती
Prevent uneven cuts by aligning blades and supports before each shift. Replace dull or damaged blades. Set the correct blade clearance and machine settings. Hold the material firmly during the shearing process. Inspect cut edges for smoothness and straightness.
त्वरित-संदर्भ तालिका
| संकट | रोकथाम के सुझाव | निरीक्षण आवृत्ति |
|---|---|---|
| बर्र | Keep blades sharp, set correct clearance, clean blade | Before each shift |
| मुड़ने | Use even hold-down, support material, replace blades | साप्ताहिक |
| छिल | Select right blade, avoid excess force, lubricate | प्रत्येक उपयोग से पहले |
| मंदता | Sharpen/replace blades, clean after use, store safely | After each shift |
| आयामी त्रुटियां (Dimensional Errors) | Calibrate machine, use precise tools, replace guides | साप्ताहिक |
| असमान कटौती | Align blades/supports, hold material firmly | Before each shift |
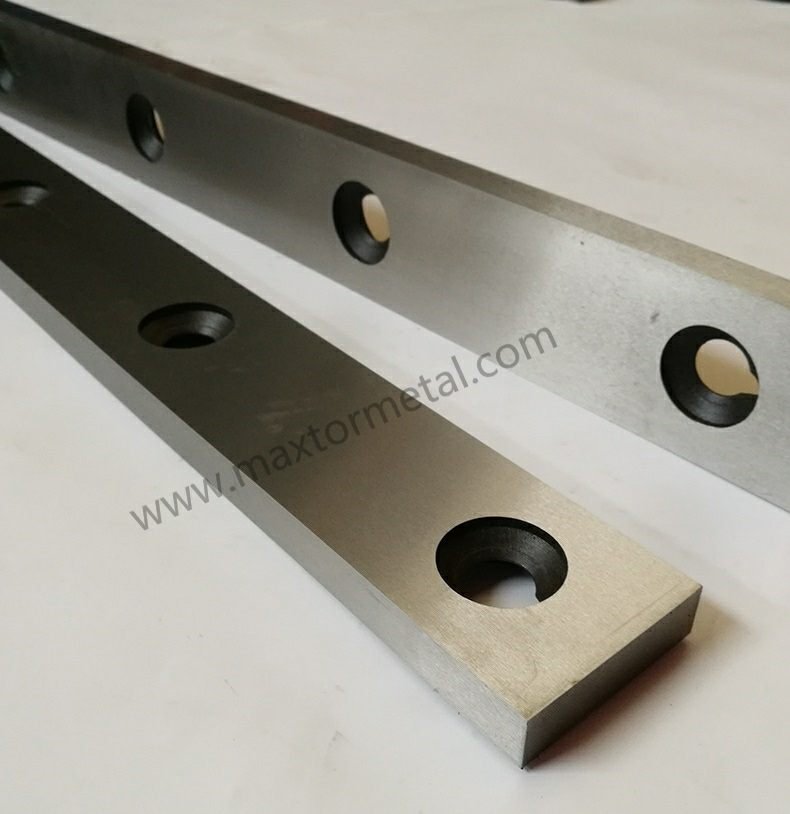
रखरखाव
सफाई और स्नेहन
Recommended Cleaning Frequency and Methods
You should clean your metal shear blades after every shift. Daily cleaning helps remove metal dust, oil, and adhesive residue. Studies show that blades cleaned daily last 25–35% longer than those cleaned less often. Use a soft cloth or brush to wipe away debris. For sticky residues, use ultrasonic cleaning or a mild detergent solution. Avoid using abrasive pads that can scratch the blade surface.
Suitable Cleaning Agents and Tools
Choose cleaning agents that do not corrode metal. Mild detergents, isopropyl alcohol, and specialized blade cleaners work well. Use soft brushes, microfiber cloths, or ultrasonic cleaners for best results. Avoid steel wool or harsh chemicals, as these can damage the blade’s protective layer.
Lubrication Points and Types of Lubricants
Apply lubricant to the blade edge and pivot points before and after each shift. PTFE-based lubricants reduce friction by up to 55% and can extend blade life by 40%. Proper lubrication also lowers cutting force and improves energy efficiency. Always follow the manufacturer’s recommendations for lubricant type and application frequency.
Common Mistakes to Avoid During Cleaning and Lubrication
Do not skip cleaning or lubrication, even during busy periods. Improper lubrication causes 30–40% of premature blade failures. Never use abrasive tools or harsh chemicals. Avoid over-lubricating, which can attract dust and debris. Always dry blades thoroughly before storage to prevent rust.
संरेखण और अंशांकन
Step-by-Step Alignment Procedure
- Power off the machine and lock it out for safety.
- Loosen the blade mounting bolts.
- Use a straightedge to check blade alignment.
- Adjust the blade position until it is parallel to the cutting bed.
- Tighten bolts to the specified torque.
- Run a test cut and inspect the result.
Calibration Tools and Equipment
You can use calibration probes, laser displacement sensors, and micrometers. These tools help you achieve sub-millimeter accuracy. For example, a semi-automatic calibration probe can keep relative error within 0.1 mm. Laser scanners and point cloud registration methods also provide high precision.
| तरीका | विवरण | Quantitative Accuracy |
|---|---|---|
| Calibration probe | Robot touches feature points | Error ≤ 0.1 mm |
| Laser scanner + ICP | Fine matching for small blades | उच्च सटीकता |
| Displacement sensor | Nine-point fitting | Error ≤ 2 mm |
Signs of Misalignment
Watch for uneven cuts, increased burrs, or parts that do not meet size requirements. Misalignment can also cause extra noise or vibration during operation.
Preventive Measures for Maintaining Alignment
Check alignment weekly as part of your maintenance routine. Use precise tools and follow a step-by-step procedure. Record all adjustments in your maintenance log.
Inspection Schedule
Daily, Weekly, and Monthly Inspection Tasks
- Daily: Clean blades, check for visible wear, and lubricate.
- Weekly: Inspect alignment, check blade clearance, and review cut quality.
- Monthly: Perform a full blade maintenance check, including calibration and detailed inspection.
Key Inspection Points for Blade Condition
Look for dullness, chips, cracks, and rust. Measure blade thickness and check for straightness. Inspect mounting bolts for tightness.
Record-Keeping and Maintenance Logs
Keep a maintenance log for each blade. Record cleaning, lubrication, alignment, and any repairs. Good records help you spot patterns and plan replacements.
Indicators for Immediate Attention
Replace blades if you see deep chips, cracks, or severe rust. Stop the machine if you notice sudden changes in cut quality or loud noises.
भंडारण और रखरखाव
Proper Storage Environment Requirements
Store blades in a dry, humidity-controlled area. Use cabinets with humidity below 40% and add desiccant packs. This slows rust formation and extends blade life.
Safe Handling Techniques
Always wear gloves when handling blades. Use blade covers or cases to prevent accidental drops or contact with hard surfaces.
Rust Prevention and Protective Measures
Apply rust inhibitors after cleaning. Regular cleaning with mild detergents helps maintain the protective layer. Avoid storing blades near other metals to prevent contamination.
Transportation Guidelines for Blades
Transport blades in padded containers. Secure them to prevent movement and avoid stacking blades directly on top of each other.
मेटल शियर ब्लेड्स की बुनियादी बातें
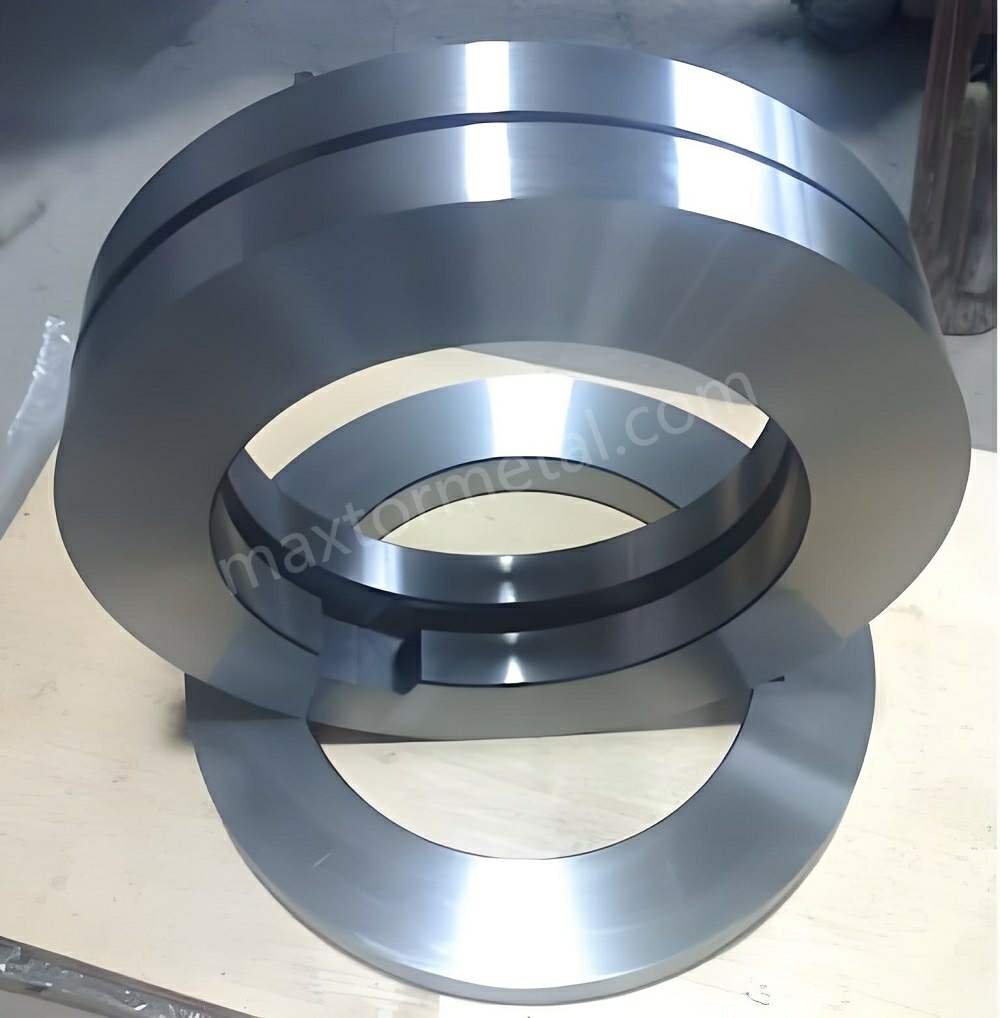
वैकल्पिक नाम
You may hear different names for metal shear blades in the industry. These names often depend on the machine type or the specific use.
- Metal Shears
- Rotary Metal Shear
- Sheet Metal Shear
- शीयर ब्लेड
- गिलोटिन ब्लेड
- Chopper Blades
- Shear Cutters
- High Hardness Shear Blades
Each name highlights a unique feature or application. For example, guillotine blades and chopper blades are common in recycling and heavy-duty cutting. High hardness shear blades stand out for their durability and precision.
काम के सिद्धांत
The shearing process uses sharp blades to cut or deform metal by applying shear stress. You place the metal between two blades. The upper blade moves down with force, while the lower blade stays still. This action causes the metal to break along a straight line.
- You prepare the metal sample and position it in the machine.
- The machine applies a controlled load using the upper blade.
- The metal experiences shear stress and begins to deform.
- The cut happens when the metal cannot resist the force anymore.
- The machine records data like shear strength and stress curves.
Sharpness and hardness of the blades play a big role in the shearing process. Engineers use this method to test how metals behave under force.
Applications in Sheet Metal Shearing
You use metal shear blades in many industries that need precise cuts.
In aerospace, advanced shearing techniques help you achieve tight tolerances on high-strength steel sheets.
In automotive manufacturing, the shearing process increases production speed and reduces waste. You can see these blades in action when cutting panels, frames, and brackets.
Statistical process control helps you maintain quality and efficiency during sheet metal shearing. Optimizing blade geometry, clearance, and cutting angle leads to smoother edges and longer blade life.
| आवेदन क्षेत्र | Benefit of Shearing Process |
|---|---|
| एयरोस्पेस | High precision, tight tolerances |
| ऑटोमोटिव | Fast production, less material waste |
| Metal निर्माण | Consistent quality, efficient workflow |
सामान्य सामग्री
You will find several materials used to make shearing blades.
- High-Speed Steel (HSS): Offers toughness and wear resistance. Handles over 2,000 cuts on low-carbon steel.
- Tungsten Carbide: Extremely hard and durable. Lasts about three times longer than HSS when cutting stainless steel.
- Alloy Steel: Cost-effective for moderate wear resistance. Performs well on softer metals like aluminum.
- Carbon Steel: Used for softer materials due to its lower cost.
- Specialty Alloys: Designed for specific needs like corrosion resistance.
Most metal shear blades have a hardness between 60 and 70 HRC. Heat treatment and surface nitriding increase durability and lifespan. You should choose the blade material based on the type of metal and the demands of your shearing process.
कस्टम ब्लेड
फ़ायदे
Custom metal shear blades give you many advantages in industrial settings. You can match the blade design to your exact needs, which leads to better results.
- You get precise cutting for your specific materials and production lines.
- Custom blades reduce maintenance costs and the time you spend changing blades.
- Special designs, like flying or cold shears, boost your productivity and energy efficiency.
- Engineering teams can adjust the cutting force and blade length for your plant’s requirements.
- Heat-treated custom blades last about 15% longer and handle higher stress, so you spend less on replacements.
- Industry research shows that premium custom blades can cut operational costs by 15% over two years.
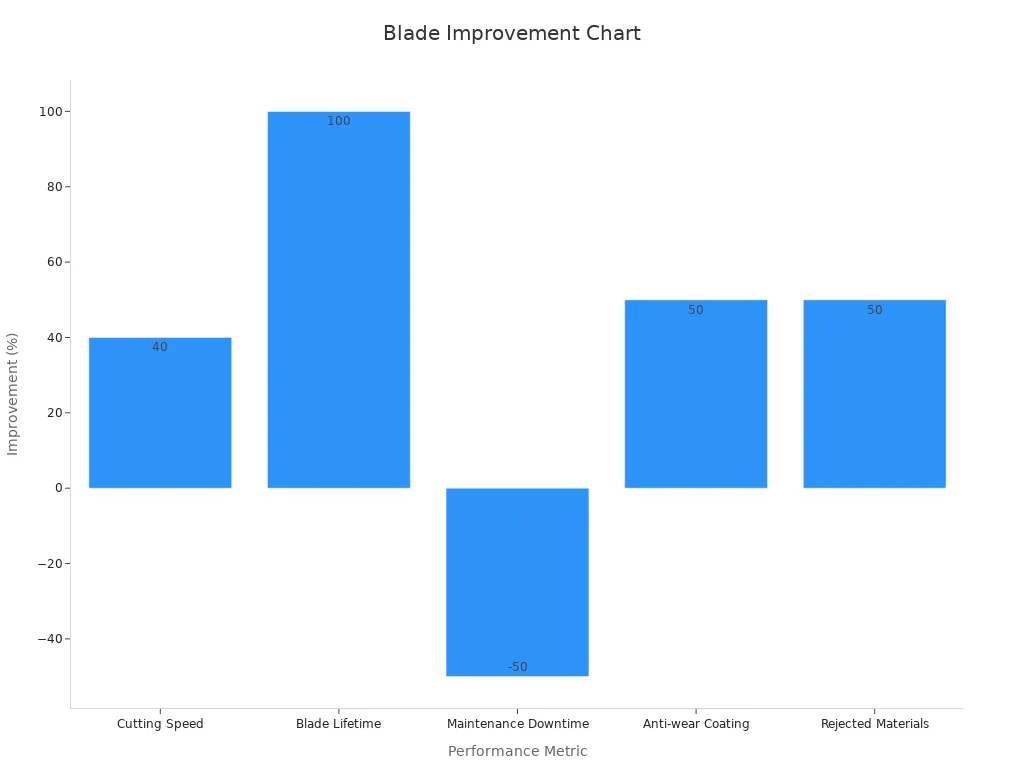
You also see measurable improvements in your operations. The table below shows how custom blades compare to standard blades:
| प्रदर्शन मीट्रिक | मानक ब्लेड | कस्टम ब्लेड | सुधार |
|---|---|---|---|
| काटने की गति | 100 यूनिट/घंटा | 140 यूनिट/घंटा | +40% |
| ब्लेड का जीवनकाल | 1,000 चक्र | 2,000 चक्र | +100% (2 गुना लंबा) |
| रखरखाव डाउनटाइम | 10 घंटे/माह | 5 घंटे/माह | -50% |
Custom blades with anti-wear coatings last up to 50% longer in tough jobs. Precision blades help you reduce waste by up to 25%. Operators also report a 15% drop in energy use.
अनुकूलन कब करें
You should consider custom blades when you need:
- Special shapes or sizes for unique machines
- Higher cutting speed or longer blade life
- Less downtime and fewer rejected parts
- Better results with hard-to-cut materials
- Lower energy use and waste
Custom blades help you reach optimal performance, especially if your production line faces frequent changes or tough materials.
Nanjing Metal Company
Nanjing Metal stands out as a trusted industrial blade supplier with 18 years of experience. The company has a skilled design and manufacturing team focused on custom industrial blades. They use strict quality control, including ISO9001 standards and advanced testing tools. Many industries trust their technical support and after-sales service. Their reputation comes from reliable products, fast response, and a customer-first approach.
Ordering Process
Ordering custom blades is simple and efficient.
- You share your requirements with the team.
- Experts help you choose the right design and materials.
- You receive a clear quote and timeline.
- The company produces your blades with strict quality checks.
- You track your order and get updates until delivery.
Studies show that custom blade orders can reduce production costs by over 50% and improve accuracy. If you want to learn more or discuss your needs, reach out to a sales engineer here.
ब्लेड प्रतिस्थापन
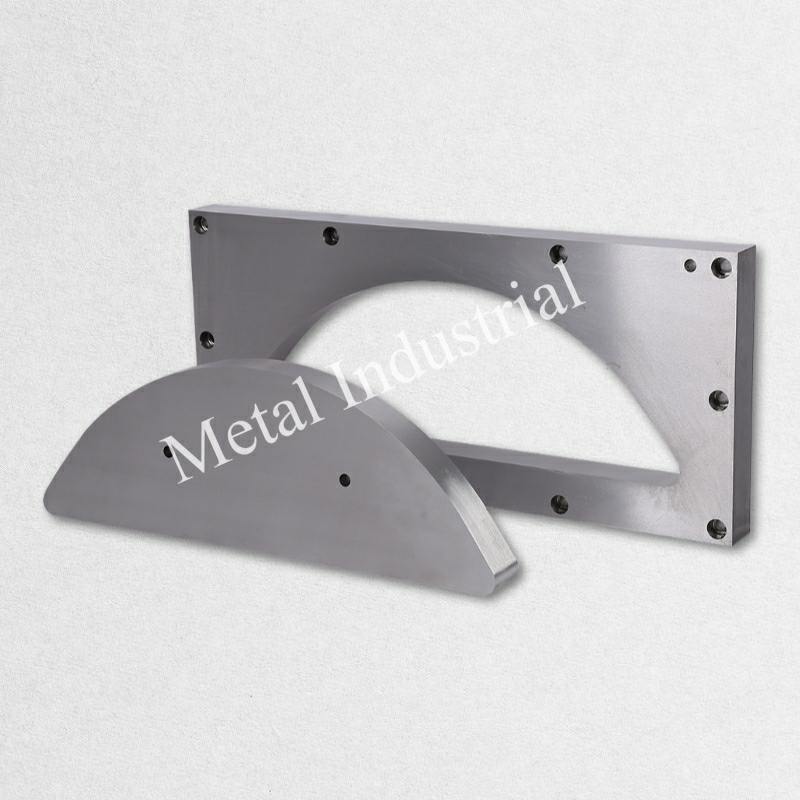
इस्तेमाल में होने के संकेत
Visible Edge Deformation
You may see the blade edge bend or lose its straight shape. This deformation affects the way the blade cuts and lowers the overall quality of your work.
Chipping or Cracks
Look for small chips or cracks along the blade. These flaws can quickly grow and cause more serious problems during cutting.
Excessive Burr Formation
If you notice more burrs on your cut metal, the blade may have worn down. Too many burrs mean the blade cannot keep up with the required shear quality.
Dull Cutting Edge
A dull edge makes it hard to achieve clean cuts. You will need to use more force, and the blade sharpness will drop.
असमान पहनने के पैटर्न
Check for spots where the blade wears down faster than others. Uneven wear leads to poor cutting and reduces product quality.
Increased Cutting Force Required
If you feel more resistance when cutting, the blade may need replacement. This extra force can damage both the blade and the machine.
Surface Discoloration or Rust
Rust or dark spots on the blade signal that it is time to inspect or replace it. Corrosion weakens the blade and affects performance.
प्रतिस्थापन मानदंड
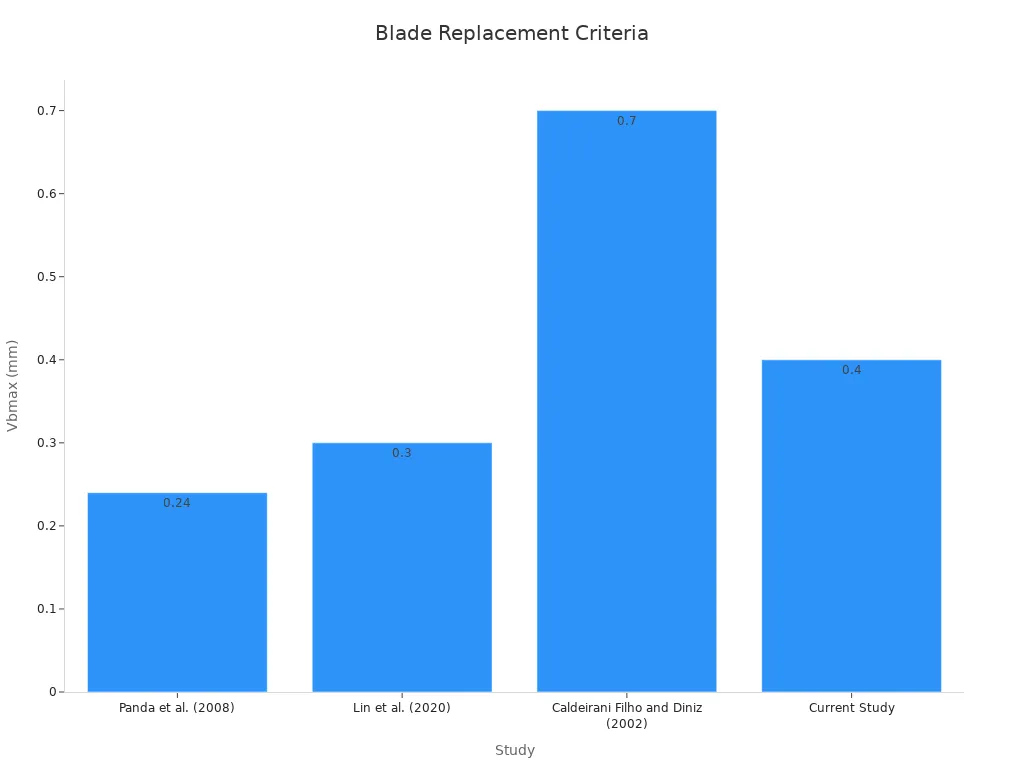
| Criterion/Study | Vbmax Threshold (mm) | Basis/Notes |
|---|---|---|
| Panda et al. (2008) | 0.24 | Previous study reference |
| Lin et al. (2020) | 0.3 | Previous study reference |
| Caldeirani Filho and Diniz (2002) | 0.7 | Previous study reference |
| Current Study | 0.4 | Expert consensus and visual inspection |
Normal operation wear ranges from 0 mm to 0.4 mm. You should replace the blade when flank wear (Vbmax) reaches about 0.4 mm. Predictive warning systems alert you before reaching this limit.
Minimum Blade Thickness Threshold
Replace the blade if it becomes thinner than the manufacturer’s minimum value.
Maximum Allowable Chipping Size
Do not use blades with chips larger than the recommended size.
Tolerance for Edge Straightness
Check that the blade edge stays within the allowed straightness tolerance.
Frequency of Required Sharpening
If you need to sharpen the blade too often, consider replacing it.
Manufacturer’s Recommended Service Life
Follow the service life guidelines for best shear quality.
Safety Compliance Standards
Always meet safety standards when deciding to replace blades.
Risks of Delay
Poor Shearing Quality and Increased Scrap Rate
Delaying replacement lowers shear quality and increases waste.
Damage to Machine Components
Worn blades can harm other machine parts.
Increased Operator Injury Risk
A damaged blade raises the risk of accidents.
Unexpected Downtime and Production Loss
Blade failure can stop production without warning.
Higher Maintenance and Repair Costs
Ignoring blade wear leads to expensive repairs.
Compromised Product Consistency
Old blades make it hard to keep product quality steady.
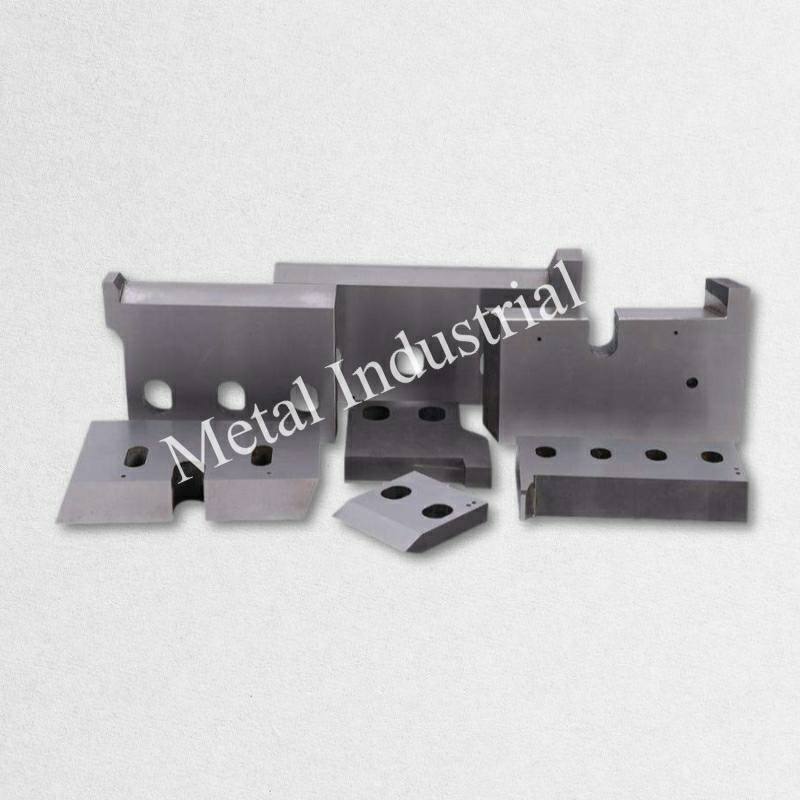
प्रतिस्थापन चरण
तैयारी
Gather all tools and materials. Wear gloves, goggles, and safety shoes. Lock out the machine before starting.
ब्लेड हटाना
Loosen bolts and carefully remove the blade. Hold the blade firmly to avoid drops.
निरीक्षण और सफाई
Clean the blade seat and check for hidden damage or debris.
New Blade Installation
Place the new blade in the correct position. Tighten bolts to the right torque. Check alignment and calibration.
Post-Installation Checks
Run a test cut to check quality. Update your maintenance log.
सुरक्षा सावधानियां
Stay alert during each step. Know emergency procedures.
आम गलतियाँ और उनसे बचने के तरीके
Do not misalign the blade. Always use the right torque. Never skip safety checks. Use only compatible tools and parts.
You can keep your metal shearing operations efficient by following a clear troubleshooting and maintenance routine. Regular inspection and timely blade replacement help you avoid unexpected breakdowns. Studies show that preventive maintenance reduces operational costs by up to 18% compared to reactive repairs. This approach extends equipment life and improves reliability. For ongoing problems, consult industry experts or explore custom blade solutions.
Want expert advice or a custom solution? संपर्क a sales engineer today.
सामान्य प्रश्न
What should you do if your metal shear blade gets dull quickly?
You should check if you use the right blade for your material. Clean and lubricate the blade after each use. Sharpen or replace the blade when you see signs of wear.
How often should you inspect industrial shear blades?
Inspect blades before each shift. Look for chips, cracks, or rust. Weekly, check alignment and clearance. Monthly, perform a full maintenance check.
Regular inspections help you catch problems early and keep your machine running smoothly.
Can you use the same blade for different metals?
You should not use one blade for all metals. Harder metals need stronger blades. Using the wrong blade can cause damage or poor cuts.
- Use high-speed steel for soft metals
- Use tungsten carbide for hard metals
Why do you see burrs after shearing?
Burrs often appear when the blade is dull or misaligned. Incorrect clearance also causes burrs.
| कारण | समाधान |
|---|---|
| सुस्त ब्लेड | तेज करें या बदलें |
| मिसलिग्न्मेंट | Adjust blade |
| Wrong clearance | Reset clearance |
What safety steps should you follow when changing blades?
Always turn off and lock out the machine. Wear gloves and safety glasses. Use the right tools.
Safety first! Never skip these steps to avoid injury.
यह भी देखें
औद्योगिक श्रेडर ब्लेड और उनके अनुप्रयोगों के लिए एक गाइड
गोल ब्लेड क्या हैं और उद्योगों में उनका उपयोग कैसे किया जाता है

 English
  Spanish
  Italian
  French
  Portuguese
  Russian
  German
  Arabic
  Hindi
Hindi  Vietnamese
  Indonesian
  Japanese
  Korean
5 प्रतिक्रियाएं