When you work with metal, you need tools that help you bend it into the right shape. The Punzone e matrice per piegatrici act like a mold and a hammer, shaping sheet metal with care. These tools matter because they give you:
- Piegature precise ogni volta
- Consistent results across all your pieces
- The chance to get the best quality by choosing the right tool
Punti chiave
- Press brake punches and dies are important tools for bending metal. They help you bend metal the same way every time. Picking the right punch and die stops mistakes. It also makes your metalwork look better. Knowing about different punches, like standard and gooseneck, helps you choose the right tool. There are different dies, like V-dies and U-dies, for special bending jobs. These dies help you get better results. Always check and take care of your tools. This makes them last longer and helps you bend metal correctly. Follow each step when using a press brake. This helps you get the same good results every time. Wear the right safety gear and follow safety rules. This keeps you safe when using press brake tools. Start with easy projects and use helpful guides. This will help you get better at bending metal.
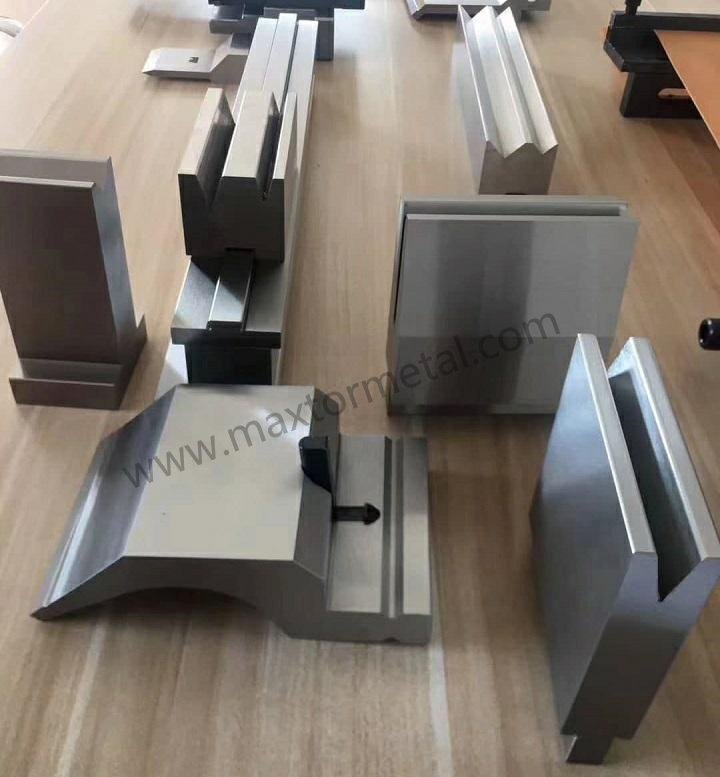
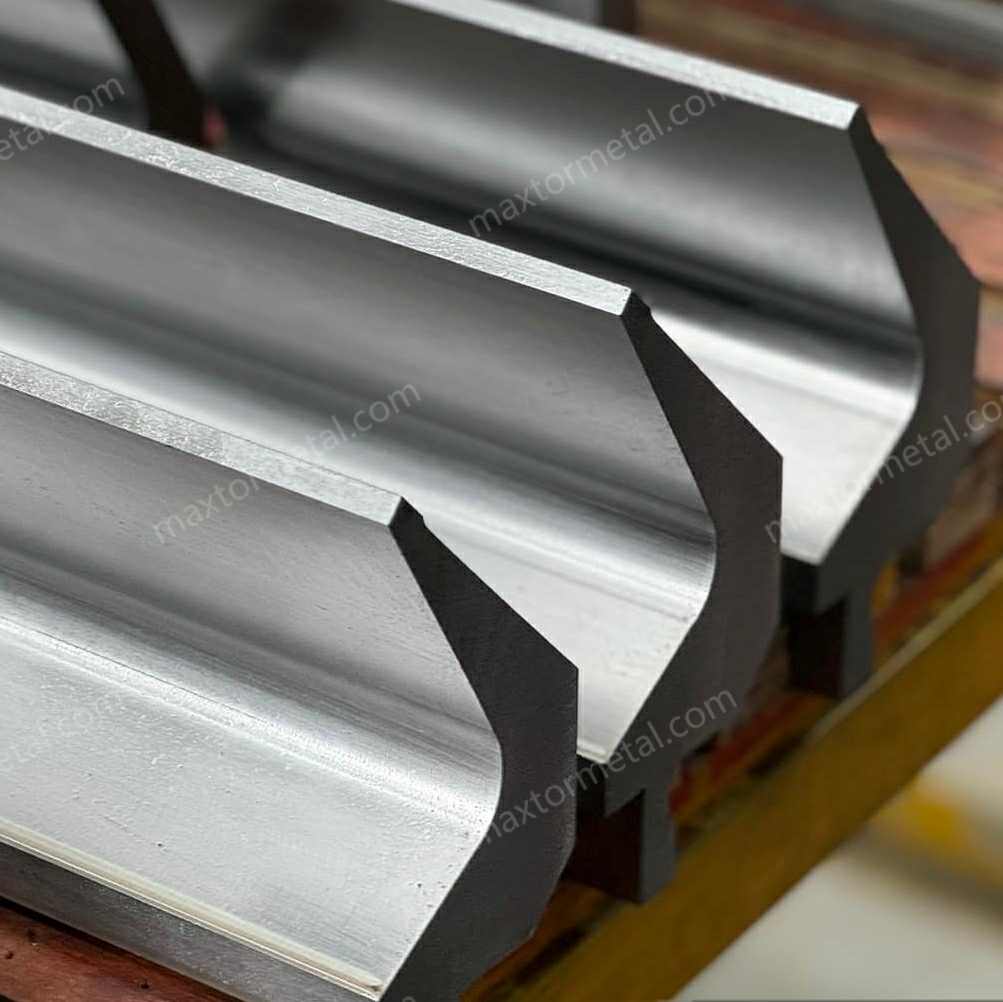
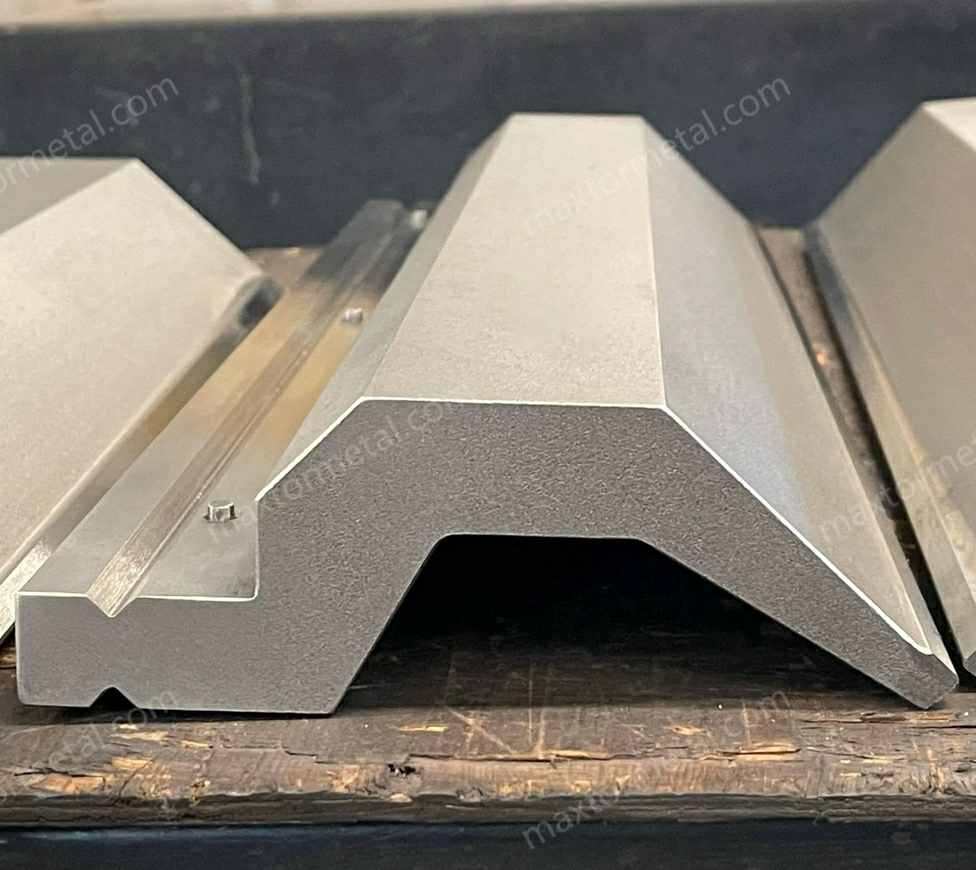
Punzone e matrice per piegatrici
What Are They
When you work with metal, you need to change its shape. The press brake punch and die help you do this job. The punch is like a strong finger that pushes down. The die sits under the metal and helps guide it. You put the sheet metal between the punch and die. When the press brake moves, the punch pushes the metal into the die. This makes the metal bend.
You use the press brake punch and die in almost every part of metalwork. These tools help you make each bend just right. You can make simple bends or more tricky shapes. The punch and die work together to control how the metal bends. This teamwork lets you shape metal the way you want.
Why They Matter
You want your metal parts to look nice and fit well. The press brake punch and die help you do this. They let you control how you bend the metal. You can make the same bend over and over. Each time, you get the same result. This is important for good quality work.
Tip: Picking the right punch and die helps you avoid mistakes and saves material.
Press brake punches and dies are very important in metalwork. They help you bend metal the right way every time. This is needed for good products. If you use the wrong tools, your bends may not be straight or even. Good tools help you meet the rules for your work, especially when you need very exact bends.
Here is how the press brake punch and die help you bend better:
| Tipo di prova | Descrizione |
|---|---|
| Finitura superficiale | A die with a smooth surface of 0.2 Ra gives softer metals a better finish, lowers friction, and stops marks. |
| Precisione dell'angolo | The die’s angle is usually within ±0.5 degrees, which is needed for exact work, like in airplanes. |
| Reduction in Bending Errors | Good dies lower bending mistakes by about 35% compared to regular dies, so your work is better. |
| Distorsione del materiale | High-precision dies cut down on metal warping by 20% in thin steel. |
You want your tools to last a long time and work well. Nanjing Metal has press brake punch and die sets made from strong steel like 42CrMo alloy. These materials help the tools last longer and keep their shape after many uses. Here are some things that make Nanjing Metal’s tools special:
- Material choice: Strong steel can make your dies last 30% to 50% longer. Special alloys can make them last over 60% longer.
- Tool steel types: Steels like 42CrMo and H13 are very tough. High-speed steel and carbide are good for very exact jobs.
- Maintenance: Cleaning, oiling, heat treatment, and hardening help your tools stay in good shape.
When you pick the right press brake punch and die, your bending projects get better. You get smoother metal, better angles, and fewer mistakes. This means your finished parts look good and work well.
Press Brake Bending
The Process
You use press brake bending to shape metal sheets into useful forms. This process helps you create strong parts for many industries. You start by loading the metal sheet onto the press brake. You make sure the sheet lines up with the tooling. You secure the sheet so it does not move during the bend.
You set up the press brake by choosing the right punch and die. You adjust the machine for the angle and force you need. You want to get precise bends, so you check your settings carefully. When you begin the bending operation, the punch moves down and pushes the metal into the die. You watch the process to make sure the bend matches your plan.
After you finish the bend, you inspect the part. You look for accuracy and quality. If you see any problems, you make adjustments. You repeat these steps for each bend you need. This method gives you control over the shape and size of your metal parts.
Here is a simple step-by-step guide for press brake bending:
- Load the metal sheet onto the press brake. Align and secure it.
- Set up the press brake. Select the punch and die. Adjust the angle and force.
- Start the bending operation. Use the punch to bend the sheet into the die.
- Inspect the bent part. Make adjustments if needed.
You use press brake bending for many shapes. You can make straight bends, angles, and curves. You can also use different methods like air bending, bottom bending, and coining. Each method gives you a different result. Air bending lets you control the angle by how deep the punch goes into the die. Bottom bending presses the metal between the punch and die but does not fully imprint it. Coining uses high force to shape and thin the metal.
During press brake bending, the punch and die work together. The punch pushes the metal sheet into the die. The die supports the metal and guides the bend. This teamwork helps you get the shape you want. You can achieve precision bending by choosing the right tools and settings.
Tip: Always check your setup before starting press brake bending. This helps you avoid mistakes and get better results.
Key Terms
You will see many terms when you learn about press brake bending. These words help you understand the process and talk about your work. Here is a table with common terms and their meanings:
| Term | Definizione |
|---|---|
| Piegatura in aria | A bending method where the punch creates a bend without the part’s outside radius contacting the die. |
| Coniazione | A process that creates a sharp bend by forcing the punch nose radius into the material under heavy tonnage. |
| Toccare il fondo | Similar to coining but only stamps the punch nose radius into the material, with angular clearance between the die. |
| Spring Back | The tendency of material to return to its original shape after bending, affecting the final shape of the part. |
| Daylight | The distance between the upper and lower beams of the press brake when fully open, determining material height limits. |
| Deflection Compensation | Ensures even force distribution to counteract inaccuracies caused by beam flexing during bending. |
| Ripetibilità | The ability of a press brake to consistently return to the same position for uniform part production. |
| Elasticity | The material’s ability to return to its original shape when influenced by external forces. |
| Elongation | The amount of material deformation during bending, expressed as a percentage. |
| Flange | The unbent part of the material that provides stability during the bending operation. |
| K Factor | A modulus used in bending calculations to determine the neutral axis position and bend allowance. |
| Minimum Inside Radius | The smallest radius achievable during bending without damaging the material. |
| Neutral Axis | The axis that remains constant during bending, experiencing minimal deformation. |
| Outside Setback | The distance from the material edge to the bend line outside the bend, ensuring accurate positioning. |
You use these terms to describe your press brake bending projects. You talk about the bend angle, the radius, and the spring back. You check the repeatability to make sure each bend looks the same. You measure the daylight to see if your material fits in the press brake. You use the K Factor for calculations. You learn these words to help you get better at press brake bending.
Press brake bending gives you the power to shape metal with accuracy. You use the punch and die to make each bend. You learn the process and the key terms to improve your skills. You can create strong, useful parts for many jobs.
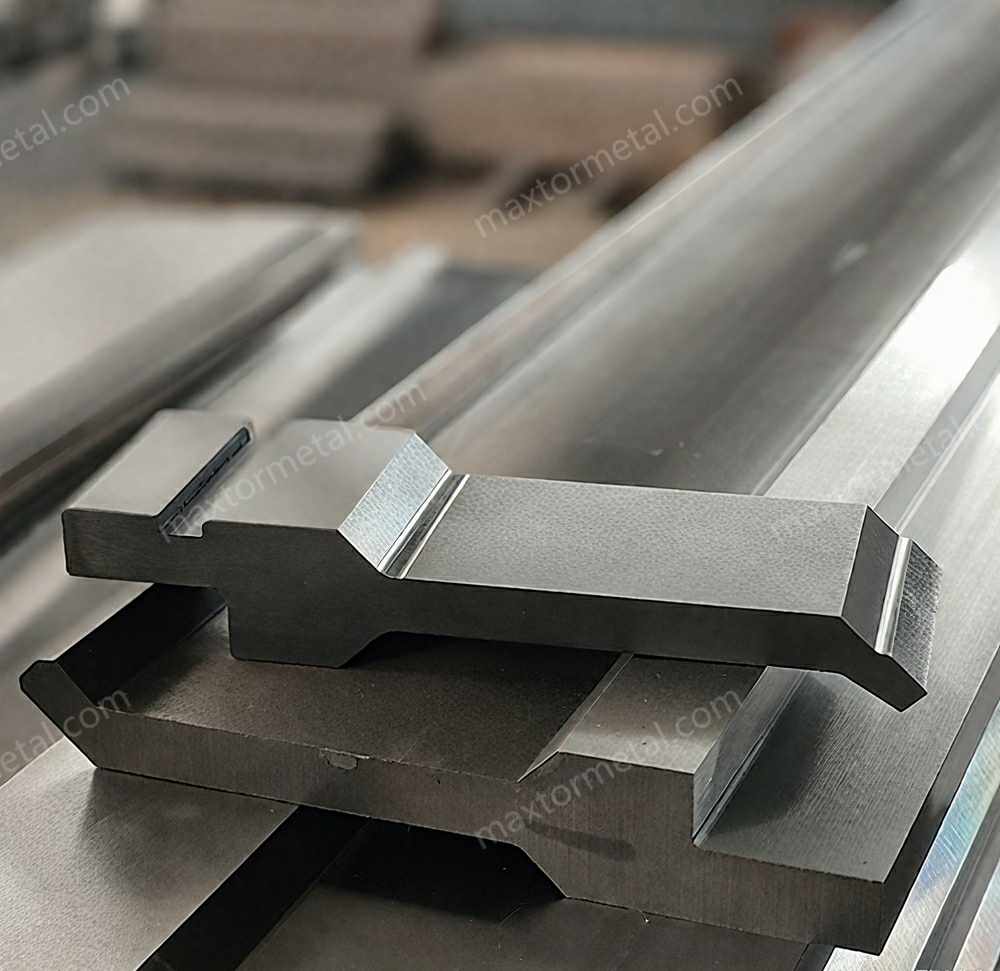
Press Brake Punches and Dies
When you start working with press brake punches and dies, you will see that there are many shapes and styles. Each type helps you make different bends in metal. You need to know which punch or die to use for your project. This knowledge helps you get the best results and avoid mistakes.
Types of Punches
Press brake punches come in many forms. Each one has a special job in bending. Here are the main types you will use:
Standard
Standard punches have a thick body and a narrow tip. You use them for most bending jobs, especially when you work with thicker materials. These punches give you strong, straight bends. You will find them in many shops because they work for most basic tasks.
Collo d'oca
Gooseneck punches have a curved neck. This shape lets you bend metal with large flanges or channels. The curve gives space for the metal to move, so you can make U-profiles or boxes without the punch hitting the part. You use gooseneck punches when you need to make complex shapes.
Acute Angle
Acute angle punches have a sharp tip, usually around 30 degrees. You use them for tight, sharp bends. These punches help you make precise angles and are great for hemming operations. If you need to bend metal past 90 degrees, choose an acute angle punch.
Offset
Offset punches, sometimes called Z-shape punches, let you make two bends in one stroke. You use them to create Z-shaped or stepped parts. This saves time and makes your work more efficient. Offset punches are helpful when you need brackets or parts with two levels.
Costume
Sometimes, your project needs a special shape. Custom punches are made just for your job. You can ask for a punch that matches your drawing or idea. Custom punches help you solve unique bending problems. If you need a special blade or tool, you can learn more about Lame Personalizzate per la tua pressa piegatrice.
Here is a table to help you see how each punch type works:
| Tipo di punzone | Il migliore per | Special Feature |
|---|---|---|
| Standard | General bending, thick materials | Strong, simple shape |
| Collo d'oca | Channels, U-profiles, large flanges | Curved neck for clearance |
| Acute Angle | Sharp bends, hemming | Small tip angle for tight bends |
| Offset | Z-bends, stepped parts | Two bends in one stroke |
| Costume | Unique shapes, special projects | Made to your exact needs |
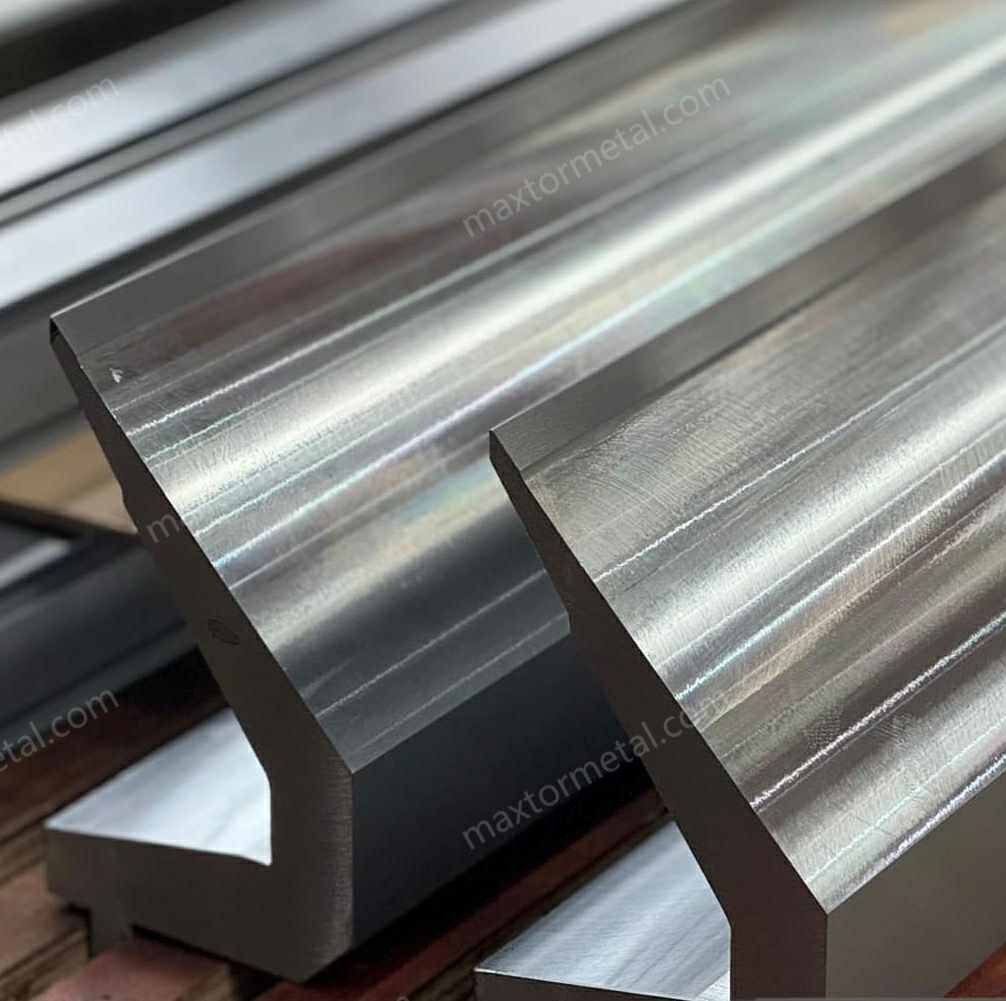
Types of Dies
You also need to choose from many types of dies. Each die helps you make a different kind of bend. Here are the main types of press brake dies you will see:
V-Die
V-dies are the most common. They have a V-shaped groove. You use them for most bending jobs. The size of the V opening depends on your material thickness. V-dies help you make strong, clean bends. You can use the “rule of 8” to pick the right V-die: the V opening should be about eight times the thickness of your metal.
U-Die
U-dies look like V-dies but have a U-shaped groove. You use them when you want a rounder bend or need to match a special shape. U-dies work well for soft metals or when you want a smooth curve.
Hemming
Hemming dies help you fold the edge of the metal flat against itself. You use them to make strong, neat edges. Hemming is common in doors, panels, and parts that need a smooth finish. There are different hemming dies for open, flat, or rolled hems.
Radius
Radius dies have a rounded groove. You use them when you want a smooth, curved bend instead of a sharp angle. These dies help you avoid cracks in the metal and make your parts look better. Radius dies are important for parts that need to be strong and look good.
Specialty
Specialty dies include many shapes for special jobs. Some examples are:
- Beading dies for adding strength to panels
- Box dies for making boxes and trays
- Channel dies for making channels in one step
- Curling dies for rolling the edge of the metal
- Offset dies for making Z-shaped bends
You can also order custom dies if you have a unique project. Custom dies help you get the exact shape you need. Learn more about Lame Personalizzate if you need a special die for your press brake.
Tip: Always match your die to your punch and the type of bend you want. This helps you get the best results and keeps your tools in good shape.
Here is a table to show how some dies work:
| Die Type | Applicazione | Caratteristica principale |
|---|---|---|
| V-Die | Most bending jobs | V-shaped groove, many sizes |
| U-Die | Smooth, round bends | U-shaped groove, gentle curves |
| Hemming | Folding edges flat | Makes strong, neat hems |
| Radius | Curved bends | Rounded groove for smooth bends |
| Specialty | Unique shapes and jobs | Custom or special grooves for special projects |
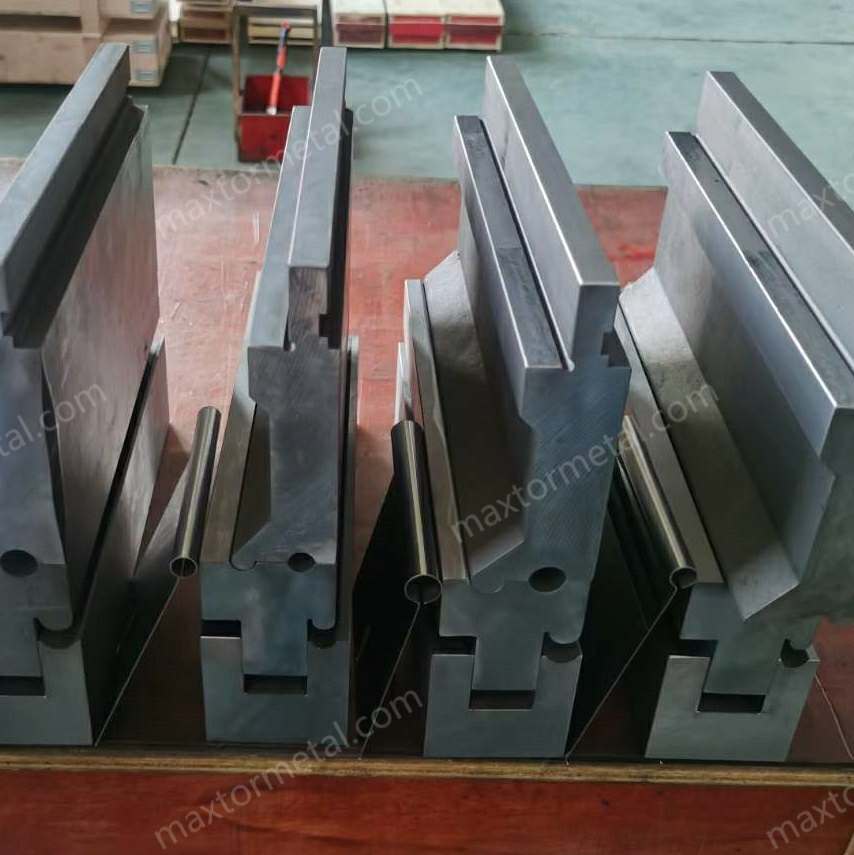
You will use many types of press brake punches and dies as you learn more about bending. Each tool helps you shape metal in a different way. Nanjing Metal offers a wide range of punches and dies, including custom options for special projects. When you know how to choose the right tool, you can make strong, accurate, and good-looking parts every time.
Choosing Press Brake Tooling

Picking the right press brake tooling is very important. It helps you make good, accurate bends in metal. You must choose tools that fit your project. This part will show you what to think about, how to match your tools, and mistakes to watch out for.
Factors
When you pick tools for bending sheet metal, you need to look at some main things. Each one can change how safe and good your work is.
Materiale
The kind of metal you bend changes what tools you need. Hard metals like stainless steel need stronger punches and dies. Softer metals, like aluminum, can use regular tools. Copper and brass are soft, so they need smooth tools to stop marks.
Here is a quick chart to help you pick the right tool material:
| Materiale | Applicazione |
|---|---|
| Acciaio temprato | Best for bending stainless steel |
| Aluminum-Bronze | Good for ferrous and titanium tubing |
| Hard-Chrome Plated Steel | Works well for aluminum and copper tubing |
Tip: Always use the right tool material for your metal. This makes your tools last longer and gives you better bends.
If you bend mild steel or stainless, use a punch tip radius about half as thick as your metal. For soft aluminum, match the punch tip radius to the inside bend radius. The smallest punch radius should be at least 63% of your metal’s thickness to stop damage.
Spessore
How thick your metal is changes your die opening and punch radius. Thin sheets (3 mm or less) need small V-die openings and less force. Medium thickness (3–10 mm) needs balanced tools and V-dies about 8–10 times the thickness. Thick sheets (over 10 mm) need big V-die openings and more force.
- Thin aluminum sheets: Use V-die openings 6–8 times the thickness.
- Medium thickness: Use V-die openings 8–10 times the thickness.
- Thick sheets: Use V-die openings 10–12 times the thickness.
Bend Type
The bend you want—sharp, radius, Z-bend, or hem—changes your tool choice. For sharp bends, use acute angle punches and matching dies. For radius bends, pick a punch and die with the right radius. Offset and hemming bends need special tools.
Radius
The bend radius is very important. If your punch has too small a radius, the metal can crack or get too thin. The punch radius should not be bigger than the natural bend radius of your metal. For most jobs, keep the punch radius between 63% and 100% of your metal’s thickness.
Note: Always check the smallest bend radius for your metal to stop problems.
Here is a checklist to help you remember the main things:
- Tipo di materiale
- Spessore del materiale
- Lunghezza del materiale
- Angolo di piegatura
- Tonnage load
- Tooling compatibility
- Cost considerations
Matching Tooling
You must match your press brake tools to your project. First, find out what metal you have and measure its thickness. Pick the bend type and radius you want. Make sure your press brake is strong enough for the job.
Here is a simple flowchart to help you:
- Find the material (steel, aluminum, copper, etc.).
- Measure the thickness.
- Pick the bend type (sharp, radius, offset, hem).
- Choose the bend radius you want.
- Check your press brake’s tonnage.
- Pick the punch and die that fit your needs.
- If you need a special shape, think about custom blades.
- For tricky projects, ask Nanjing Metal for help with custom tools.
| Caratteristica | Descrizione |
|---|---|
| Utensili personalizzati | Made for tricky or special part shapes. |
| Modification of Designs | You can change designs to fit what you need. |
Nanjing Metal has many standard and custom press brake tools. Their team can help you make custom punches and dies for your job.
Tip: Matching your tools to your project gives you better results and less waste.
Errori da evitare
Many people make the same mistakes when picking press brake tools. Try not to make these errors so your parts and tools stay safe.
| Errore | Consequences |
|---|---|
| Wrong Die Size | Parts may not fit, metal can crack, tools or press brake may get damaged, risk of injury. |
| Sovraccarico | Permanent damage to press brake, tooling may crack, material may not bend, risk of injury. |
| Ignoring Material Properties | More force needed for hard metals, parts may not meet specs, risk of cracking. |
| Skipping Calculations | Bends may not fit, potential damage, material waste. |
If you pick the wrong tools, you can get thin spots, broken parts, and bends that do not match. Always pick tools based on your metal, thickness, bend type, and machine. There are many tool types, and each one is for a different job.
Callout: Always check your numbers and setup before you bend. This helps you stop mistakes and keeps your press brake tools working well.
If you follow these steps and tips, you can pick good press brake tools for your project. You will get strong, accurate bends and your bending machine will last longer.
Press Brake Dies: Use and Safety
When you work with press brake dies, you need to know how to set them up, use them safely, and fix common problems. This section will help you understand each step so you can get the best results and stay safe.
Impostare
Preparing the Press Brake
You must prepare your press brake before you install any press brake dies. Start by choosing a good spot for your machine. Make sure the floor is flat and strong. Gather all the tools you need. Check that your electrical system matches the machine’s needs. Use a crane or forklift to move the press brake into place. Secure the base to the ground so it does not move. Attach the columns and beam, then align the workbench with the base. Adjust the ram to the right height. These steps help you build a solid foundation for your press brake dies.
Installing the Die
You need to install the press brake dies carefully. Fix the upper punch on the ram. Place the bottom die on the workbench and secure it tightly. Connect the hydraulic system, including the pump, cylinder, valve, and tank. Make sure all electrical connections are safe and tight. Install the back gauge system and check its position. Level the machine using a spirit level. Calibrate all parts so the press brake dies line up correctly. Always follow the manufacturer’s instructions for each step.
Alignment and Adjustment
Proper alignment is key when you use press brake dies. Use a laser alignment tool or an alignment block to make sure the upper and lower dies match up. Adjust the ram and back gauge so everything lines up straight. For large or odd-shaped parts, use support arms or side stops to keep the metal steady. After you finish, check your work. Look for gaps or uneven spots. If you find any, adjust the dies until everything fits perfectly. Always double-check your settings before you start bending.
Tip: Following the ANSI B11.3-2022 standard helps you set up your press brake dies safely and accurately. This standard covers important safety rules, control systems, and emergency stops.
Consigli di sicurezza
Dispositivi di protezione individuale (DPI)
You must wear the right gear when you work with press brake dies. Here is what you need:
- Safety glasses to protect your eyes from flying metal.
- Heavy-duty gloves to keep your hands safe from cuts.
- Steel-toed boots to protect your feet if something falls.
- Ear protection if the machine is loud.
Machine Safety Checks
Before you use press brake dies, check your machine. Follow these steps:
- Look over the whole machine for rust, wear, or damage.
- Test the control system to make sure it works.
- Check the back gauge for proper movement.
- Inspect hydraulic hoses and fittings for leaks.
- Look at all mechanical parts for signs of wear.
- Check the condition of your press brake dies and punches.
- Test emergency stop buttons.
- Inspect the ram and bed for damage.
- Make sure all electrical parts work.
- Check the lubrication system and add oil if needed.
Safe Operating Procedures
You need to follow safe habits every time you use press brake dies. Use safety guards, light curtains, and two-hand controls to keep your hands away from danger. Always clamp your workpiece tightly. Stand clear of moving parts. Never bypass safety devices. Train yourself in safe lifting and use lifting tools for heavy metal. Inspect and maintain your machine often. Wear your PPE every time. Know how your press brake dies work and check all safety features before you start. Always follow the manufacturer’s setup and calibration rules.
Callout: Know where the emergency exits and first aid kits are in your shop. This knowledge can save lives.
Emergency Protocols
If something goes wrong while using press brake dies, you need a plan. Create an emergency plan for accidents like injuries or fires. Make sure everyone knows what to do. Assign roles, such as a team leader and first aid helpers. Train everyone in basic first aid, including CPR. Keep first aid kits and AEDs nearby. Make sure all workers know where to find them.
Risoluzione dei problemi
Common Setup Issues
You may face problems when setting up press brake dies. Some common issues include inconsistent bends, the machine not reaching full power, a misaligned back gauge, slow or jerky ram movement, control errors, or loud noises. These problems can affect your work and safety.
Die Misalignment
If your press brake dies do not line up, you will get bad bends. To fix this, use a laser alignment tool or alignment block to match the upper and lower dies. Use support arms or side stops for large parts. Have a qualified engineer check the machine’s accuracy often. This keeps your press brake dies working right.
Inconsistent Bends
When your bends do not match, check your press brake dies for wear or damage. Make sure the dies are clean and free of debris. Check the alignment again. Adjust the back gauge and ram if needed. Use the right die for your material and thickness. If you still have trouble, inspect the hydraulic and electrical systems.
Tooling Wear or Damage
Press brake dies can wear out or get damaged over time. Look for cracks, chips, or worn edges. Replace damaged dies right away. Clean your dies after each use. Keep a log of problems and repairs. This helps you spot patterns and fix issues faster.
Tip: Keep a troubleshooting log for your press brake dies. Write down every problem and how you fixed it. This habit helps you learn and improve your process.
You can use these steps and tips to set up, use, and maintain your press brake dies safely. Good habits and regular checks help you get the best results and keep your shop safe.
Manutenzione
Taking care of your press brake tooling helps you get the best results and keeps your tools working longer. Good maintenance means you spend less money on repairs and replacements. You also get more accurate bends and safer work conditions.
Pulizia
You should clean your press brake tooling after every use. Metal dust, oil, and small pieces of material can build up on your punches and dies. If you leave these residues, they can cause rust or make your bends less accurate. Use a soft cloth to wipe down each tool. For stubborn dirt, use a mild cleaner that does not harm steel. Always dry your tools completely before storing them.
Tip: Cleaning your tooling right after use prevents contamination and rust. This simple habit keeps your tools in top shape.
Ispezione
Regular inspection helps you spot problems before they get worse. Look at your press brake tooling for signs of wear, cracks, or chips. Check for any misalignment between the punch and die. If you find damage, replace or repair the tool right away. Inspections also help you keep your bends accurate. When you catch issues early, you avoid bigger problems later.
Here are some things you should check during inspection:
- Look for worn edges or rounded corners on punches and dies.
- Check for cracks or chips in the tooling.
- Make sure the punch and die line up correctly.
- Inspect for rust or other signs of corrosion.
You should inspect your tools at the end of each shift or after a big job. Keeping a log of your inspections helps you track tool condition over time.
Longevità
You want your press brake tooling to last as long as possible. Cleaning and inspection both help extend tool life. When you remove dirt and check for damage, you stop small problems from turning into big ones. Storing your tools in a dry, safe place also helps prevent rust and accidental damage.
Choosing high-quality tooling makes a big difference. Nanjing Metal uses 42CrMo alloy steel for their press brake tooling. This material stands up to high pressure and resists wear. You get tools that keep their shape and accuracy, even after many uses.
Here are some ways to make your tooling last longer:
- Clean and dry tools after every use.
- Store punches and dies in a dry, organized cabinet.
- Use the right tool for each job to avoid overloading.
- Follow the manufacturer’s guidelines for care and use.
Note: Regular cleaning and inspection help you spot wear, damage, or misalignment. These steps keep your press brake tooling accurate and reliable for years.
With good maintenance, you get the most from your press brake tooling. You save money, work safely, and produce better parts every time.
Beginner Tips

Simple Projects
When you start with press brake tooling, choose easy projects first. Simple shapes help you learn how the tools work. You can try making a straight bend in a small piece of sheet metal. Practice bending a right angle. Try to make a basic bracket or a small tray. These projects do not need many steps, but they teach you how to set up your press brake and use the punch and die.
Tip: Use scrap metal for your first bends. This way, you do not waste good material if you make a mistake.
You will see how different punches and dies change the shape of the metal. You can test how much force you need for each bend. If you make a mistake, look at what happened. Did the metal crack? Did the bend go too far? Each mistake helps you learn. Write down what you did and what you learned. This habit will help you improve faster.
Learning
You can learn a lot by watching others and asking questions. If you work in a shop, ask someone with experience to show you how to set up press brake tooling. Watch how they choose the right punch and die. Notice how they check the alignment and adjust the machine. You can also find many videos online that show each step.
Try to learn the names of each part of the press brake. Know what each type of punch and die does. Practice setting up the tooling by yourself. If you do not understand something, ask for help. Do not worry about making mistakes. Every expert started as a beginner.
Callout: Keep a notebook for your press brake projects. Write down the tools you used, the settings, and the results. This record will help you solve problems in the future.
Resources
You have many resources to help you with press brake tooling. Here are some good places to start:
- Instruction manuals: Always read the manual for your press brake. It shows you how to use the machine safely.
- Online videos: Many websites have step-by-step videos for beginners.
- Forums and groups: Join online groups where people talk about press brake tooling. You can ask questions and share your work.
- Tooling suppliers: Companies like Nanjing Metal offer guides and support for choosing the right press brake tooling. You can Contatti their team if you need help with a special project.
- Local classes: Some schools or shops offer classes on metalworking and press brake use.
| Resource Type | What You Learn |
|---|---|
| Manuals | Safety and setup steps |
| Videos | Step-by-step bending demonstrations |
| Forums | Tips and answers from other users |
| Suppliers | Tool selection and technical support |
| Classes | Hands-on practice and expert advice |
Note: Use more than one resource. The more you learn, the better your results with press brake tooling.
You can build your skills step by step. Start simple, learn from each project, and use all the resources you can find. This approach will help you become confident with press brake tooling.
Understanding press brake punches and dies helps you make accurate bends and strong metal parts. When you follow safety tips and use the right press brake tooling, your projects turn out better. Keep learning and practicing these skills. If you want expert advice or need help choosing the best press brake tooling, contatta i nostri tecnici commerciali. Your next project can be your best one yet!
Domande frequenti
What is press brake tooling?
Press brake tooling includes the punches and dies you use in a press brake machine. These tools help you bend and shape sheet metal into different forms. You need the right tooling for accurate and safe metal fabrication.
How do I choose the right press brake tooling?
You should check your material type, thickness, and the bend you want. Pick punches and dies that match your project. Always follow the press brake machine’s guidelines for safe and accurate results.
Posso usare gli stessi utensili per tutti i metalli?
No, you cannot. Hard metals like stainless steel need stronger tooling. Softer metals like aluminum work with standard tools. Always match your press brake tooling to the metal for best results.
How often should I inspect my press brake tooling?
Inspect your tooling before each use. Look for cracks, chips, or worn edges. Regular checks help you spot problems early and keep your bends accurate.
What safety gear do I need when using press brake tooling?
You should wear safety glasses, gloves, and steel-toed boots. Ear protection helps if your shop is noisy. Always follow your shop’s safety rules.
Why do my bends look uneven?
Uneven bends can happen if your tooling is worn, dirty, or misaligned. Check your press brake tooling for damage. Clean and align your tools before you start bending.
Can I get custom press brake tooling for special projects?
Yes, you can order custom punches and dies for unique shapes or jobs. Custom press brake tooling helps you solve special bending challenges.
How do I make my press brake tooling last longer?
Clean your tools after each use. Store them in a dry place. Inspect them often. Use the right tool for each job. These habits help your press brake tooling stay in good shape.
Vedi anche
Come Decidere tra Attrezzatura per Piegatrici Nuova, Usata e Personalizzata
Soluzioni Pratiche per lo Stoccaggio Efficiente dell'Attrezzatura per Piegatrici
Manutenzione dell'Attrezzatura per Piegatrici 101: Prolungare la Durata delle Tue Matrici e Punzoni
Perché i Set di Matrici per Piegatrici Sono Importanti per Proteggere i Tuoi Materiali
Gradi di Acciaio per Attrezzature per Piegatrici e Prestazioni