

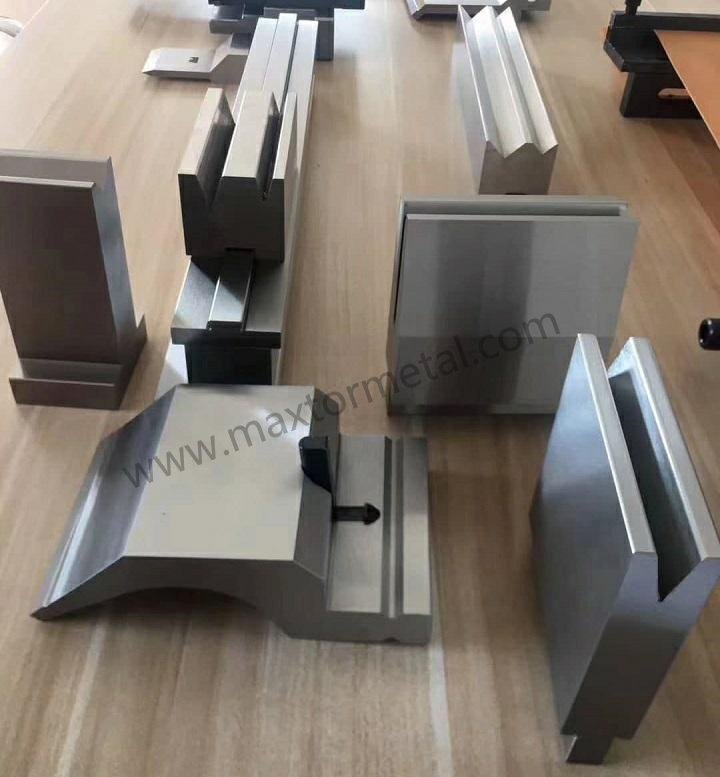
Quando você trabalha com metal, precisa de ferramentas que ajudem a dobrá-lo no formato correto. Eles Punção e matriz de prensa dobradeira atuam como um molde e um martelo, moldando a chapa metálica com precisão. Essas ferramentas são importantes porque proporcionam:
- Dobras precisas sempre.
- Resultados consistentes em todas as suas peças
- A oportunidade de obter a melhor qualidade ao escolher a ferramenta certa
Principais conclusões
- Os punções e matrizes para dobradeira são ferramentas essenciais para a dobra de metal. Eles ajudam a dobrar o metal da mesma forma todas as vezes. A escolha do punção e da matriz corretos evita erros e melhora o acabamento do seu trabalho em metal. Conhecer os diferentes tipos de punções, como os padrão e pescoço de ganso, ajuda a escolher a ferramenta certa. Existem diferentes matrizes, como matrizes em V e matrizes em U, para trabalhos de dobra especiais. Essas matrizes ajudam a obter melhores resultados. Sempre inspecione e faça a manutenção de suas ferramentas. Isso aumenta a vida útil delas e ajuda a dobrar o metal corretamente. Siga cada etapa ao usar uma dobradeira para garantir resultados consistentes e de qualidade sempre. Use o equipamento de proteção adequado e siga as regras de segurança para se manter protegido ao operar as ferramentas de dobradeira. Comece com projetos simples e utilize guias práticos para aprimorar suas habilidades na dobra de metais.
Punção e matriz de prensa dobradeira
O Que São
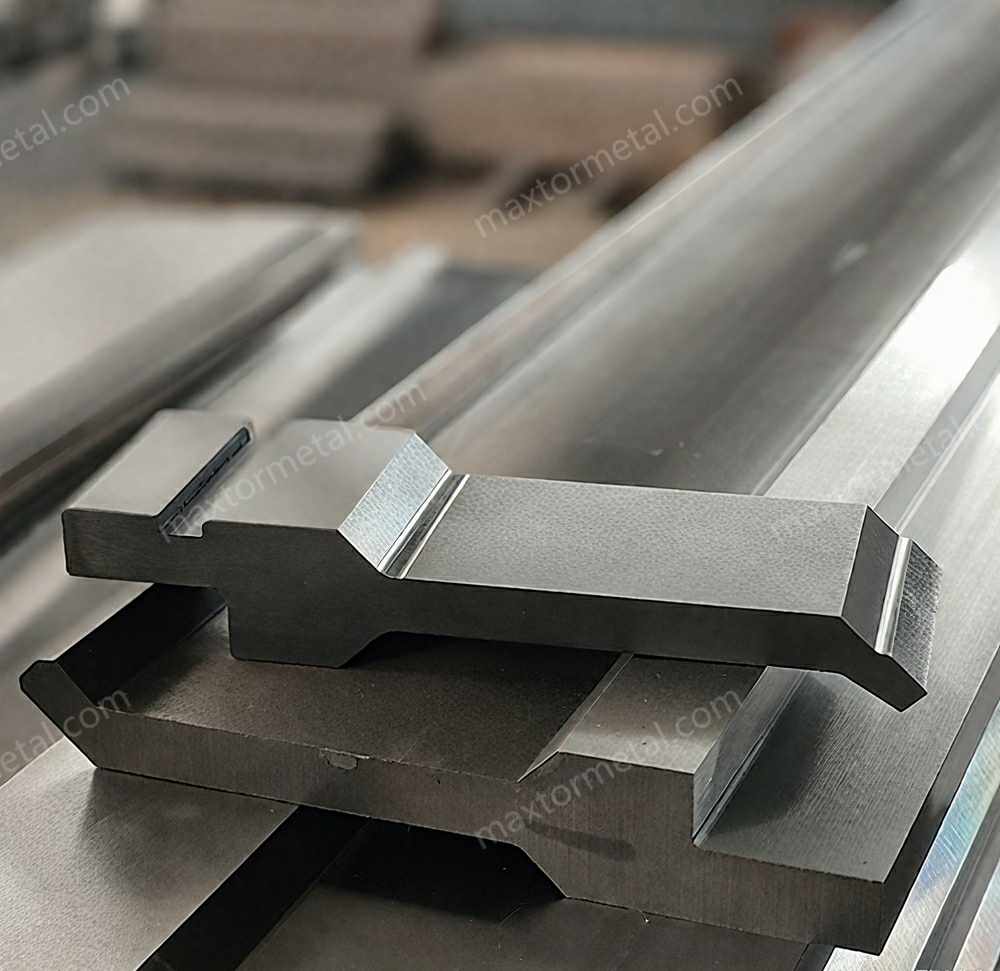
Quando se trabalha com metal, é necessário alterar sua forma. O punção e a matriz de dobradeira ajudam a realizar esse trabalho. O punção funciona como um pistão forte que empurra para baixo, enquanto a matriz fica sob o metal e ajuda a guiá-lo. A chapa metálica é colocada entre o punção e a matriz. Quando a dobradeira é acionada, o punção empurra o metal para dentro da matriz, realizando a dobra.
O punção e a matriz para dobradeira são utilizados em quase todas as etapas do trabalho com metal. Essas ferramentas ajudam a realizar cada dobra com precisão, permitindo criar desde dobras simples até formatos mais complexos. O punção e a matriz trabalham em conjunto para controlar a deformação do metal, permitindo moldá-lo exatamente como desejado.
Por que eles são importantes
Para que as peças metálicas tenham um excelente acabamento e encaixe perfeito, o punção e a matriz para dobradeira são fundamentais. Eles oferecem controle total sobre o processo de dobra, permitindo repetir a mesma dobra sucessivas vezes com o mesmo resultado, o que é essencial para um trabalho de alta qualidade.
Dica: Escolher o punção e a matriz corretos ajuda a evitar erros e economiza material.
Os punções e matrizes para dobradeira são extremamente importantes no trabalho com metais. Eles ajudam a dobrar o metal de forma correta todas as vezes, o que é essencial para obter produtos de qualidade. Se você utilizar as ferramentas erradas, as dobras podem não ficar retas ou uniformes. Ferramentas de qualidade ajudam a cumprir as especificações do projeto, especialmente quando são necessárias dobras de alta precisão.
Veja como o punção e a matriz para dobradeira ajudam a melhorar o processo de dobra:
| Tipo de evidência | Descrição |
|---|---|
| Acabamento de superfície | Uma matriz com superfície lisa de 0.2 Ra proporciona um melhor acabamento em metais mais macios, reduz o atrito e evita marcas. |
| Precisão do ângulo | O ângulo da matriz geralmente fica dentro de ±0.5 graus, o que é necessário para trabalhos de alta precisão, como na indústria aeroespacial. |
| Redução de Erros de Dobra | Matrizes de qualidade reduzem os erros de dobra em cerca de 35% em comparação com matrizes comuns, melhorando o seu trabalho. |
| Distorção de material | Matrizes de alta precisão reduzem o empenamento do metal em 20% em aços finos. |
Para garantir que suas ferramentas durem muito e funcionem perfeitamente, a Nanjing Metal oferece conjuntos de punção e matriz para dobradeira fabricados com aços de alta resistência, como a liga 42CrMo. Esses materiais aumentam a vida útil das ferramentas e mantêm sua geometria mesmo após uso intenso. Veja alguns diferenciais das ferramentas da Nanjing Metal:
- Escolha do material: Aços de alta resistência podem fazer suas matrizes durarem de 30% a 50% a mais. Ligas especiais podem aumentar a durabilidade em mais de 60%.
- Tipos de aço ferramenta: Aços como 42CrMo e H13 são extremamente tenazes. Aço rápido e metal duro são ideais para trabalhos de alta precisão.
- Manutenção: Limpeza, lubrificação, tratamento térmico e têmpera ajudam a manter suas ferramentas em excelentes condições.
Ao escolher o punção e a matriz para dobradeira corretos, seus projetos de dobra alcançam outro nível. Você obtém superfícies mais lisas, ângulos mais precisos e menos desperdício, resultando em peças acabadas com excelente estética e funcionalidade.
Dobra em Dobradeira
O Processo
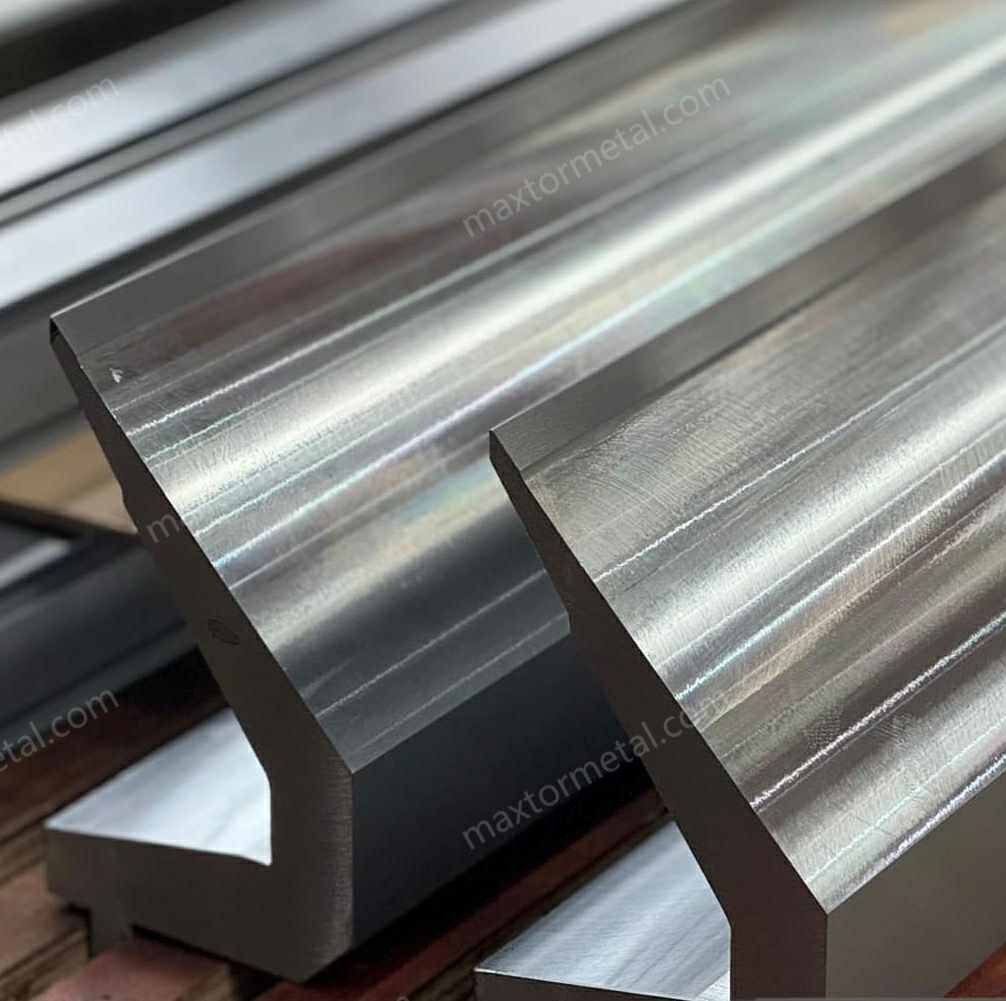
A dobra em dobradeira é utilizada para moldar chapas metálicas em formatos úteis, permitindo a criação de peças resistentes para diversos setores industriais. O processo começa com o carregamento da chapa metálica na dobradeira, garantindo o alinhamento correto com o ferramental e fixando a chapa para que não se mova durante a dobra.
A preparação da dobradeira envolve a escolha do punção e da matriz adequados, além do ajuste da máquina para o ângulo e a força necessários. Para obter dobras precisas, as configurações devem ser verificadas cuidadosamente. Ao iniciar a operação de dobra, o punção desce e empurra o metal para dentro da matriz. O processo deve ser monitorado para garantir que a dobra saia conforme o planejado.
Após concluir a dobra, a peça é inspecionada para verificar a precisão e a qualidade. Caso haja qualquer inconformidade, realizam-se os ajustes necessários. Essas etapas são repetidas para cada dobra necessária, garantindo total controle sobre a forma e as dimensões das peças metálicas.
Aqui está um guia passo a passo simples para a dobra em dobradeira:
- Carregue a chapa metálica na dobradeira. Alinhe e fixe-a.
- Prepare a dobradeira. Selecione o punção e a matriz. Ajuste o ângulo e a força.
- Inicie a operação de dobra. Utilize o punção para dobrar a chapa na matriz.
- Inspecione a peça dobrada. Faça ajustes se necessário.
A dobra em prensa dobradeira é utilizada para diversos formatos. É possível realizar dobras retas, ângulos e curvas. Também é possível utilizar diferentes métodos, como dobra no ar, dobra de fundo e cunhagem. Cada método proporciona um resultado diferente. A dobra no ar permite controlar o ângulo pela profundidade de penetração do punção na matriz. A dobra de fundo pressiona o metal entre o punção e a matriz, mas sem estampá-lo totalmente. A cunhagem utiliza alta força para moldar e reduzir a espessura do metal.
Durante a dobra em prensa dobradeira, o punção e a matriz trabalham em conjunto. O punção empurra a chapa metálica para dentro da matriz. A matriz apoia o metal e guia a dobra. Essa ação conjunta ajuda a obter o formato desejado. É possível alcançar uma dobra de precisão escolhendo as ferramentas e configurações corretas.
Dica: Sempre verifique o setup antes de iniciar a dobra em prensa dobradeira. Isso ajuda a evitar erros e a obter melhores resultados.
Termos-Chave
Existem diversos termos técnicos associados à dobra em prensa dobradeira. Estas palavras ajudam a compreender o processo e a comunicar-se tecnicamente. Abaixo está uma tabela com termos comuns e seus significados:
| Termo | Definição |
|---|---|
| Dobra de ar | A bending method where the punch creates a bend without the part’s outside radius contacting the die. |
| Cunhagem | A process that creates a sharp bend by forcing the punch nose radius into the material under heavy tonnage. |
| Fundo | Similar to coining but only stamps the punch nose radius into the material, with angular clearance between the die. |
| Spring Back | The tendency of material to return to its original shape after bending, affecting the final shape of the part. |
| Daylight | The distance between the upper and lower beams of the press brake when fully open, determining material height limits. |
| Deflection Compensation | Ensures even force distribution to counteract inaccuracies caused by beam flexing during bending. |
| Repeatability | The ability of a press brake to consistently return to the same position for uniform part production. |
| Elasticity | The material’s ability to return to its original shape when influenced by external forces. |
| Elongation | The amount of material deformation during bending, expressed as a percentage. |
| Flange | The unbent part of the material that provides stability during the bending operation. |
| K Factor | A modulus used in bending calculations to determine the neutral axis position and bend allowance. |
| Minimum Inside Radius | The smallest radius achievable during bending without damaging the material. |
| Neutral Axis | The axis that remains constant during bending, experiencing minimal deformation. |
| Outside Setback | The distance from the material edge to the bend line outside the bend, ensuring accurate positioning. |
You use these terms to describe your press brake bending projects. You talk about the bend angle, the radius, and the spring back. You check the repeatability to make sure each bend looks the same. You measure the daylight to see if your material fits in the press brake. You use the K Factor for calculations. You learn these words to help you get better at press brake bending.
Press brake bending gives you the power to shape metal with accuracy. You use the punch and die to make each bend. You learn the process and the key terms to improve your skills. You can create strong, useful parts for many jobs.
Punções e Matrizes para Dobradeira
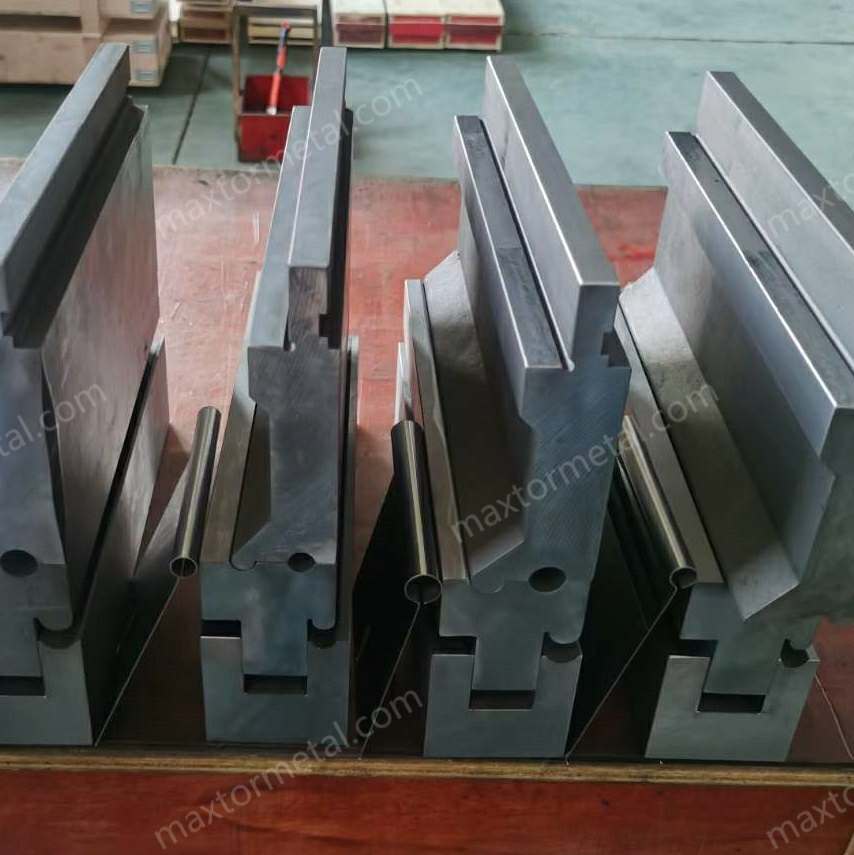
When you start working with press brake punches and dies, you will see that there are many shapes and styles. Each type helps you make different bends in metal. You need to know which punch or die to use for your project. This knowledge helps you get the best results and avoid mistakes.
Types of Punches
Press brake punches come in many forms. Each one has a special job in bending. Here are the main types you will use:
Padrão
Standard punches have a thick body and a narrow tip. You use them for most bending jobs, especially when you work with thicker materials. These punches give you strong, straight bends. You will find them in many shops because they work for most basic tasks.
Gooseneck
Gooseneck punches have a curved neck. This shape lets you bend metal with large flanges or channels. The curve gives space for the metal to move, so you can make U-profiles or boxes without the punch hitting the part. You use gooseneck punches when you need to make complex shapes.
Acute Angle
Acute angle punches have a sharp tip, usually around 30 degrees. You use them for tight, sharp bends. These punches help you make precise angles and are great for hemming operations. If you need to bend metal past 90 degrees, choose an acute angle punch.
Desvio
Offset punches, sometimes called Z-shape punches, let you make two bends in one stroke. You use them to create Z-shaped or stepped parts. This saves time and makes your work more efficient. Offset punches are helpful when you need brackets or parts with two levels.
Personalizado
Sometimes, your project needs a special shape. Custom punches are made just for your job. You can ask for a punch that matches your drawing or idea. Custom punches help you solve unique bending problems. If you need a special blade or tool, you can learn more about Lâminas Personalizadas para sua prensa dobradeira.
Here is a table to help you see how each punch type works:
| Tipo de soco | Melhor para | Special Feature |
|---|---|---|
| Padrão | General bending, thick materials | Strong, simple shape |
| Gooseneck | Channels, U-profiles, large flanges | Curved neck for clearance |
| Acute Angle | Sharp bends, hemming | Small tip angle for tight bends |
| Desvio | Z-bends, stepped parts | Two bends in one stroke |
| Personalizado | Unique shapes, special projects | Made to your exact needs |
Types of Dies
You also need to choose from many types of dies. Each die helps you make a different kind of bend. Here are the main types of press brake dies you will see:
V-Die
V-dies are the most common. They have a V-shaped groove. You use them for most bending jobs. The size of the V opening depends on your material thickness. V-dies help you make strong, clean bends. You can use the “rule of 8” to pick the right V-die: the V opening should be about eight times the thickness of your metal.
U-Die
U-dies look like V-dies but have a U-shaped groove. You use them when you want a rounder bend or need to match a special shape. U-dies work well for soft metals or when you want a smooth curve.
Hemming
Hemming dies help you fold the edge of the metal flat against itself. You use them to make strong, neat edges. Hemming is common in doors, panels, and parts that need a smooth finish. There are different hemming dies for open, flat, or rolled hems.
Radius
Radius dies have a rounded groove. You use them when you want a smooth, curved bend instead of a sharp angle. These dies help you avoid cracks in the metal and make your parts look better. Radius dies are important for parts that need to be strong and look good.
Especialidade
Specialty dies include many shapes for special jobs. Some examples are:
- Beading dies for adding strength to panels
- Box dies for making boxes and trays
- Channel dies for making channels in one step
- Curling dies for rolling the edge of the metal
- Offset dies for making Z-shaped bends
You can also order custom dies if you have a unique project. Custom dies help you get the exact shape you need. Learn more about Lâminas Personalizadas if you need a special die for your press brake.
Tip: Always match your die to your punch and the type of bend you want. This helps you get the best results and keeps your tools in good shape.
Here is a table to show how some dies work:
| Die Type | Aplicação | Característica principal |
|---|---|---|
| V-Die | Most bending jobs | V-shaped groove, many sizes |
| U-Die | Smooth, round bends | U-shaped groove, gentle curves |
| Hemming | Folding edges flat | Makes strong, neat hems |
| Radius | Curved bends | Rounded groove for smooth bends |
| Especialidade | Unique shapes and jobs | Custom or special grooves for special projects |
You will use many types of press brake punches and dies as you learn more about bending. Each tool helps you shape metal in a different way. Nanjing Metal offers a wide range of punches and dies, including custom options for special projects. When you know how to choose the right tool, you can make strong, accurate, and good-looking parts every time.
Escolhendo o Ferramental para Dobradeira

Picking the right press brake tooling is very important. It helps you make good, accurate bends in metal. You must choose tools that fit your project. This part will show you what to think about, how to match your tools, and mistakes to watch out for.
Fatores
When you pick tools for bending sheet metal, you need to look at some main things. Each one can change how safe and good your work is.
Material
The kind of metal you bend changes what tools you need. Hard metals like stainless steel need stronger punches and dies. Softer metals, like aluminum, can use regular tools. Copper and brass are soft, so they need smooth tools to stop marks.
Here is a quick chart to help you pick the right tool material:
| Material | Aplicação |
|---|---|
| Aço temperado | Best for bending stainless steel |
| Aluminum-Bronze | Good for ferrous and titanium tubing |
| Hard-Chrome Plated Steel | Works well for aluminum and copper tubing |
Tip: Always use the right tool material for your metal. This makes your tools last longer and gives you better bends.
If you bend mild steel or stainless, use a punch tip radius about half as thick as your metal. For soft aluminum, match the punch tip radius to the inside bend radius. The smallest punch radius should be at least 63% of your metal’s thickness to stop damage.
Grossura
How thick your metal is changes your die opening and punch radius. Thin sheets (3 mm or less) need small V-die openings and less force. Medium thickness (3–10 mm) needs balanced tools and V-dies about 8–10 times the thickness. Thick sheets (over 10 mm) need big V-die openings and more force.
- Thin aluminum sheets: Use V-die openings 6–8 times the thickness.
- Medium thickness: Use V-die openings 8–10 times the thickness.
- Thick sheets: Use V-die openings 10–12 times the thickness.
Bend Type
The bend you want—sharp, radius, Z-bend, or hem—changes your tool choice. For sharp bends, use acute angle punches and matching dies. For radius bends, pick a punch and die with the right radius. Offset and hemming bends need special tools.
Radius
The bend radius is very important. If your punch has too small a radius, the metal can crack or get too thin. The punch radius should not be bigger than the natural bend radius of your metal. For most jobs, keep the punch radius between 63% and 100% of your metal’s thickness.
Note: Always check the smallest bend radius for your metal to stop problems.
Here is a checklist to help you remember the main things:
- Type of material
- Espessura do material
- Length of material
- Bending angle
- Tonnage load
- Tooling compatibility
- Cost considerations
Matching Tooling
You must match your press brake tools to your project. First, find out what metal you have and measure its thickness. Pick the bend type and radius you want. Make sure your press brake is strong enough for the job.
Here is a simple flowchart to help you:
- Find the material (steel, aluminum, copper, etc.).
- Measure the thickness.
- Pick the bend type (sharp, radius, offset, hem).
- Choose the bend radius you want.
- Check your press brake’s tonnage.
- Pick the punch and die that fit your needs.
- If you need a special shape, think about custom blades.
- For tricky projects, ask Nanjing Metal for help with custom tools.
| Recurso | Descrição |
|---|---|
| Ferramentas personalizadas | Made for tricky or special part shapes. |
| Modification of Designs | You can change designs to fit what you need. |
Nanjing Metal has many standard and custom press brake tools. Their team can help you make custom punches and dies for your job.
Tip: Matching your tools to your project gives you better results and less waste.
Erros a evitar
Many people make the same mistakes when picking press brake tools. Try not to make these errors so your parts and tools stay safe.
| Erro | Consequences |
|---|---|
| Wrong Die Size | Parts may not fit, metal can crack, tools or press brake may get damaged, risk of injury. |
| Sobrecarga | Permanent damage to press brake, tooling may crack, material may not bend, risk of injury. |
| Ignoring Material Properties | More force needed for hard metals, parts may not meet specs, risk of cracking. |
| Skipping Calculations | Bends may not fit, potential damage, material waste. |
If you pick the wrong tools, you can get thin spots, broken parts, and bends that do not match. Always pick tools based on your metal, thickness, bend type, and machine. There are many tool types, and each one is for a different job.
Callout: Always check your numbers and setup before you bend. This helps you stop mistakes and keeps your press brake tools working well.
If you follow these steps and tips, you can pick good press brake tools for your project. You will get strong, accurate bends and your bending machine will last longer.
Matrizes para Dobradeira: Uso e Segurança
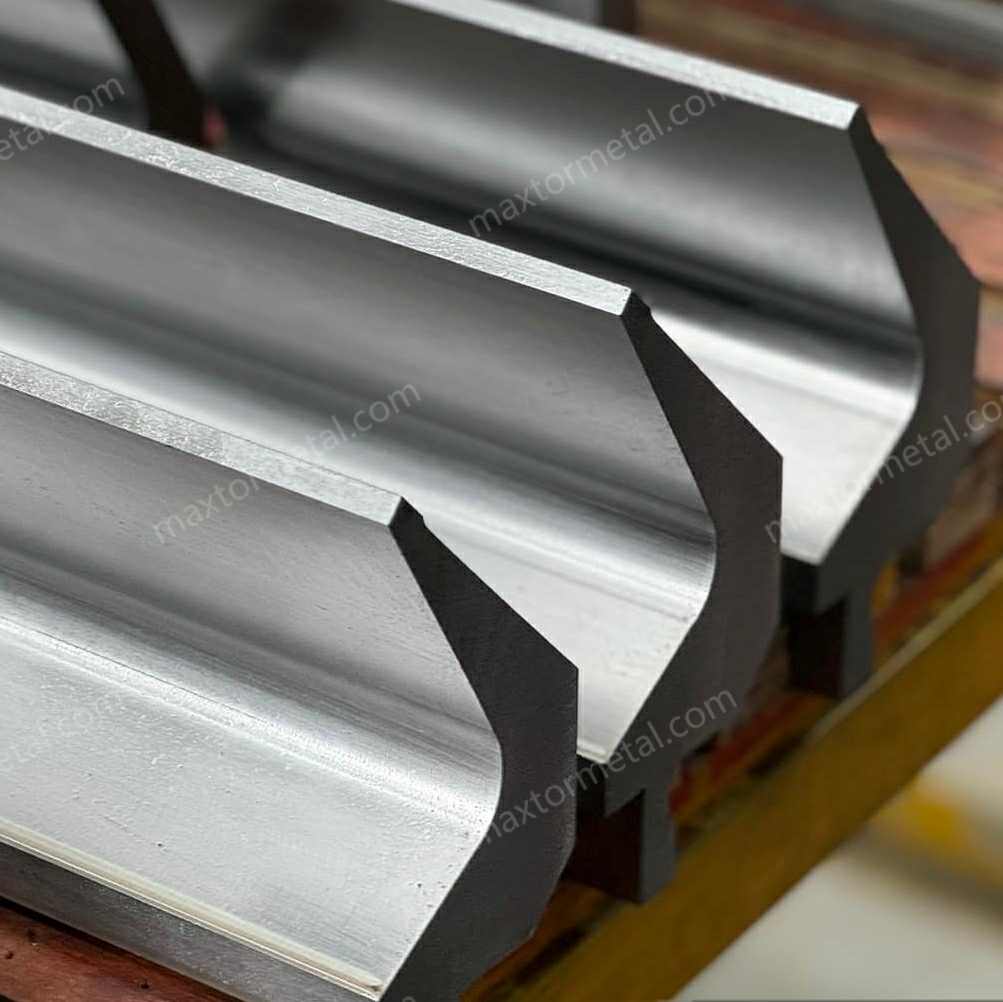
When you work with press brake dies, you need to know how to set them up, use them safely, and fix common problems. This section will help you understand each step so you can get the best results and stay safe.
Setup
Preparing the Press Brake
You must prepare your press brake before you install any press brake dies. Start by choosing a good spot for your machine. Make sure the floor is flat and strong. Gather all the tools you need. Check that your electrical system matches the machine’s needs. Use a crane or forklift to move the press brake into place. Secure the base to the ground so it does not move. Attach the columns and beam, then align the workbench with the base. Adjust the ram to the right height. These steps help you build a solid foundation for your press brake dies.
Installing the Die
You need to install the press brake dies carefully. Fix the upper punch on the ram. Place the bottom die on the workbench and secure it tightly. Connect the hydraulic system, including the pump, cylinder, valve, and tank. Make sure all electrical connections are safe and tight. Install the back gauge system and check its position. Level the machine using a spirit level. Calibrate all parts so the press brake dies line up correctly. Always follow the manufacturer’s instructions for each step.
Alignment and Adjustment
Proper alignment is key when you use press brake dies. Use a laser alignment tool or an alignment block to make sure the upper and lower dies match up. Adjust the ram and back gauge so everything lines up straight. For large or odd-shaped parts, use support arms or side stops to keep the metal steady. After you finish, check your work. Look for gaps or uneven spots. If you find any, adjust the dies until everything fits perfectly. Always double-check your settings before you start bending.
Tip: Following the ANSI B11.3-2022 standard helps you set up your press brake dies safely and accurately. This standard covers important safety rules, control systems, and emergency stops.
Dicas de segurança
Equipamento de Proteção Individual (EPI)
You must wear the right gear when you work with press brake dies. Here is what you need:
- Safety glasses to protect your eyes from flying metal.
- Heavy-duty gloves to keep your hands safe from cuts.
- Steel-toed boots to protect your feet if something falls.
- Ear protection if the machine is loud.
Machine Safety Checks
Before you use press brake dies, check your machine. Follow these steps:
- Look over the whole machine for rust, wear, or damage.
- Test the control system to make sure it works.
- Check the back gauge for proper movement.
- Inspect hydraulic hoses and fittings for leaks.
- Look at all mechanical parts for signs of wear.
- Check the condition of your press brake dies and punches.
- Test emergency stop buttons.
- Inspect the ram and bed for damage.
- Make sure all electrical parts work.
- Check the lubrication system and add oil if needed.
Safe Operating Procedures
You need to follow safe habits every time you use press brake dies. Use safety guards, light curtains, and two-hand controls to keep your hands away from danger. Always clamp your workpiece tightly. Stand clear of moving parts. Never bypass safety devices. Train yourself in safe lifting and use lifting tools for heavy metal. Inspect and maintain your machine often. Wear your PPE every time. Know how your press brake dies work and check all safety features before you start. Always follow the manufacturer’s setup and calibration rules.
Callout: Know where the emergency exits and first aid kits are in your shop. This knowledge can save lives.
Emergency Protocols
If something goes wrong while using press brake dies, you need a plan. Create an emergency plan for accidents like injuries or fires. Make sure everyone knows what to do. Assign roles, such as a team leader and first aid helpers. Train everyone in basic first aid, including CPR. Keep first aid kits and AEDs nearby. Make sure all workers know where to find them.
Solução de problemas
Common Setup Issues
You may face problems when setting up press brake dies. Some common issues include inconsistent bends, the machine not reaching full power, a misaligned back gauge, slow or jerky ram movement, control errors, or loud noises. These problems can affect your work and safety.
Die Misalignment
If your press brake dies do not line up, you will get bad bends. To fix this, use a laser alignment tool or alignment block to match the upper and lower dies. Use support arms or side stops for large parts. Have a qualified engineer check the machine’s accuracy often. This keeps your press brake dies working right.
Inconsistent Bends
When your bends do not match, check your press brake dies for wear or damage. Make sure the dies are clean and free of debris. Check the alignment again. Adjust the back gauge and ram if needed. Use the right die for your material and thickness. If you still have trouble, inspect the hydraulic and electrical systems.
Tooling Wear or Damage
Press brake dies can wear out or get damaged over time. Look for cracks, chips, or worn edges. Replace damaged dies right away. Clean your dies after each use. Keep a log of problems and repairs. This helps you spot patterns and fix issues faster.
Tip: Keep a troubleshooting log for your press brake dies. Write down every problem and how you fixed it. This habit helps you learn and improve your process.
You can use these steps and tips to set up, use, and maintain your press brake dies safely. Good habits and regular checks help you get the best results and keep your shop safe.
Manutenção
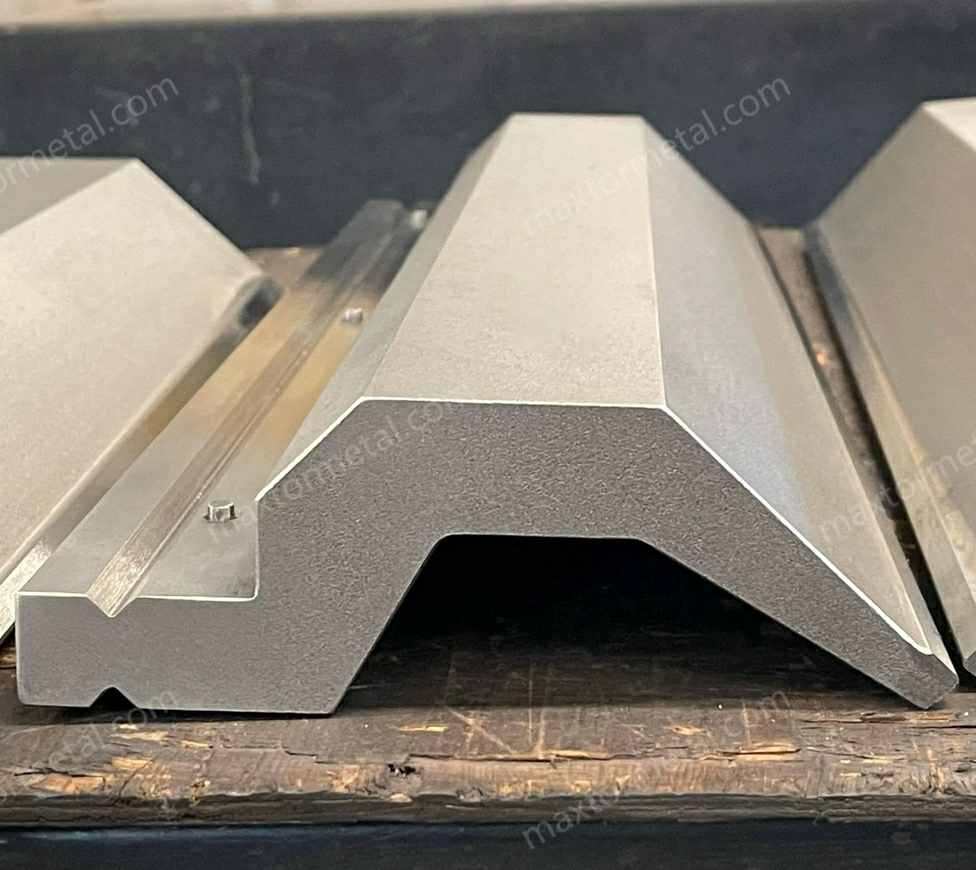
Taking care of your press brake tooling helps you get the best results and keeps your tools working longer. Good maintenance means you spend less money on repairs and replacements. You also get more accurate bends and safer work conditions.
Limpeza
You should clean your press brake tooling after every use. Metal dust, oil, and small pieces of material can build up on your punches and dies. If you leave these residues, they can cause rust or make your bends less accurate. Use a soft cloth to wipe down each tool. For stubborn dirt, use a mild cleaner that does not harm steel. Always dry your tools completely before storing them.
Tip: Cleaning your tooling right after use prevents contamination and rust. This simple habit keeps your tools in top shape.
Inspeção
Regular inspection helps you spot problems before they get worse. Look at your press brake tooling for signs of wear, cracks, or chips. Check for any misalignment between the punch and die. If you find damage, replace or repair the tool right away. Inspections also help you keep your bends accurate. When you catch issues early, you avoid bigger problems later.
Here are some things you should check during inspection:
- Look for worn edges or rounded corners on punches and dies.
- Check for cracks or chips in the tooling.
- Make sure the punch and die line up correctly.
- Inspect for rust or other signs of corrosion.
You should inspect your tools at the end of each shift or after a big job. Keeping a log of your inspections helps you track tool condition over time.
Longevidade
You want your press brake tooling to last as long as possible. Cleaning and inspection both help extend tool life. When you remove dirt and check for damage, you stop small problems from turning into big ones. Storing your tools in a dry, safe place also helps prevent rust and accidental damage.
Choosing high-quality tooling makes a big difference. Nanjing Metal uses 42CrMo alloy steel for their press brake tooling. This material stands up to high pressure and resists wear. You get tools that keep their shape and accuracy, even after many uses.
Here are some ways to make your tooling last longer:
- Clean and dry tools after every use.
- Store punches and dies in a dry, organized cabinet.
- Use the right tool for each job to avoid overloading.
- Follow the manufacturer’s guidelines for care and use.
Note: Regular cleaning and inspection help you spot wear, damage, or misalignment. These steps keep your press brake tooling accurate and reliable for years.
With good maintenance, you get the most from your press brake tooling. You save money, work safely, and produce better parts every time.
Dicas para Iniciantes

Simple Projects
When you start with press brake tooling, choose easy projects first. Simple shapes help you learn how the tools work. You can try making a straight bend in a small piece of sheet metal. Practice bending a right angle. Try to make a basic bracket or a small tray. These projects do not need many steps, but they teach you how to set up your press brake and use the punch and die.
Tip: Use scrap metal for your first bends. This way, you do not waste good material if you make a mistake.
You will see how different punches and dies change the shape of the metal. You can test how much force you need for each bend. If you make a mistake, look at what happened. Did the metal crack? Did the bend go too far? Each mistake helps you learn. Write down what you did and what you learned. This habit will help you improve faster.
Learning
You can learn a lot by watching others and asking questions. If you work in a shop, ask someone with experience to show you how to set up press brake tooling. Watch how they choose the right punch and die. Notice how they check the alignment and adjust the machine. You can also find many videos online that show each step.
Try to learn the names of each part of the press brake. Know what each type of punch and die does. Practice setting up the tooling by yourself. If you do not understand something, ask for help. Do not worry about making mistakes. Every expert started as a beginner.
Callout: Keep a notebook for your press brake projects. Write down the tools you used, the settings, and the results. This record will help you solve problems in the future.
Resources
You have many resources to help you with press brake tooling. Here are some good places to start:
- Instruction manuals: Always read the manual for your press brake. It shows you how to use the machine safely.
- Online videos: Many websites have step-by-step videos for beginners.
- Forums and groups: Join online groups where people talk about press brake tooling. You can ask questions and share your work.
- Tooling suppliers: Companies like Nanjing Metal offer guides and support for choosing the right press brake tooling. You can Contato their team if you need help with a special project.
- Local classes: Some schools or shops offer classes on metalworking and press brake use.
| Resource Type | O que você aprende |
|---|---|
| Manuals | Safety and setup steps |
| Videos | Step-by-step bending demonstrations |
| Forums | Tips and answers from other users |
| Suppliers | Tool selection and technical support |
| Classes | Hands-on practice and expert advice |
Note: Use more than one resource. The more you learn, the better your results with press brake tooling.
You can build your skills step by step. Start simple, learn from each project, and use all the resources you can find. This approach will help you become confident with press brake tooling.
Understanding press brake punches and dies helps you make accurate bends and strong metal parts. When you follow safety tips and use the right press brake tooling, your projects turn out better. Keep learning and practicing these skills. If you want expert advice or need help choosing the best press brake tooling, Entre em contato com nossos engenheiros de vendas.. Your next project can be your best one yet!
Perguntas frequentes
O que é ferramental para prensa dobradeira?
Press brake tooling includes the punches and dies you use in a press brake machine. These tools help you bend and shape sheet metal into different forms. You need the right tooling for accurate and safe metal fabrication.
How do I choose the right press brake tooling?
You should check your material type, thickness, and the bend you want. Pick punches and dies that match your project. Always follow the press brake machine’s guidelines for safe and accurate results.
Posso usar as mesmas ferramentas para todos os metais?
No, you cannot. Hard metals like stainless steel need stronger tooling. Softer metals like aluminum work with standard tools. Always match your press brake tooling to the metal for best results.
How often should I inspect my press brake tooling?
Inspect your tooling before each use. Look for cracks, chips, or worn edges. Regular checks help you spot problems early and keep your bends accurate.
What safety gear do I need when using press brake tooling?
You should wear safety glasses, gloves, and steel-toed boots. Ear protection helps if your shop is noisy. Always follow your shop’s safety rules.
Why do my bends look uneven?
Uneven bends can happen if your tooling is worn, dirty, or misaligned. Check your press brake tooling for damage. Clean and align your tools before you start bending.
Can I get custom press brake tooling for special projects?
Yes, you can order custom punches and dies for unique shapes or jobs. Custom press brake tooling helps you solve special bending challenges.
How do I make my press brake tooling last longer?
Clean your tools after each use. Store them in a dry place. Inspect them often. Use the right tool for each job. These habits help your press brake tooling stay in good shape.
Veja também
Como Decidir Entre Ferramentas de Prensa Dobradeira Novas, Usadas e Personalizadas
Soluções Práticas para Armazenamento Eficiente de Ferramentas de Prensa Dobradeira
Por Que os Conjuntos de Matrizes de Prensa Dobradeira São Importantes para Proteger Seus Materiais
Graus de Aço para Ferramentas de Prensa Dobradeira e Desempenho

 English
  Spanish
  Italian
  French
  Portuguese
  Russian
  German
  Arabic
  Hindi
Hindi  Vietnamese
  Indonesian
  Japanese
  Korean