

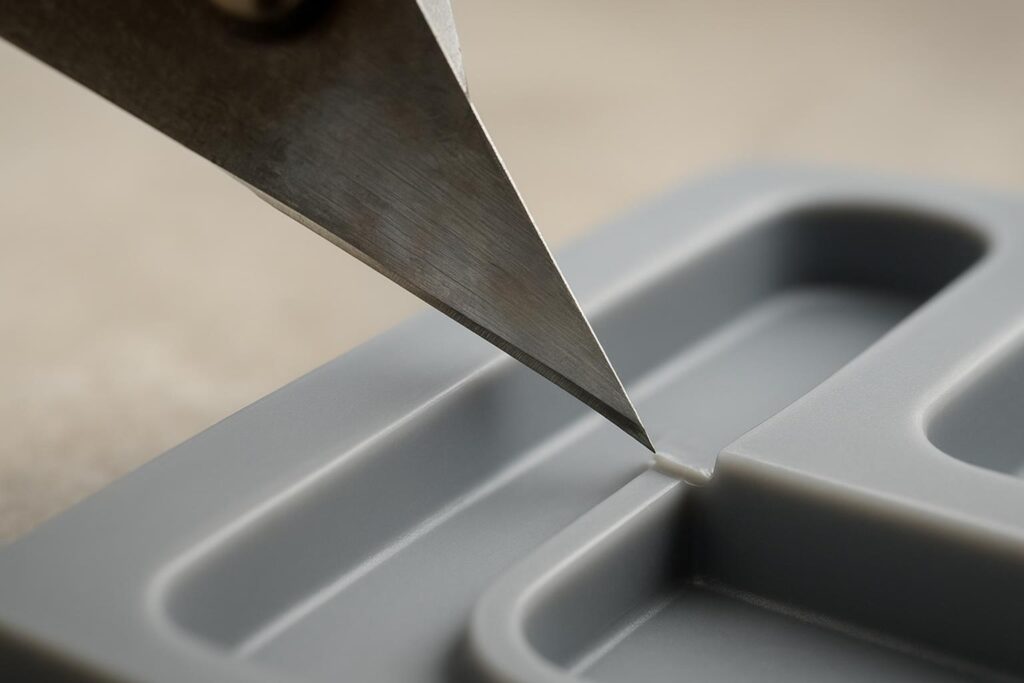
If you’re seeing black marks at the gate, inconsistent vestige height, or cosmetic haze after trimming, degating isn’t a “finishing detail” — it’s a yield, quality, and takt-time problem. Thermocutter (hot-knife) plastic degating tools can solve it, but only when temperature, dwell, and technique are tuned to the polymer and the gate geometry.
This guide focuses on plastic gate trimming without charring — meaning no blackening, no soot transfer, and no overheated halo around the gate land.
- Why precision degating matters for yield, finish, and takt time
- When hot-knife thermocutters beat cold trimming on plastics
- What you will learn: parameters, safety, ROI, and SOPs
Thermocutter fundamentals
What plastic degating tools do
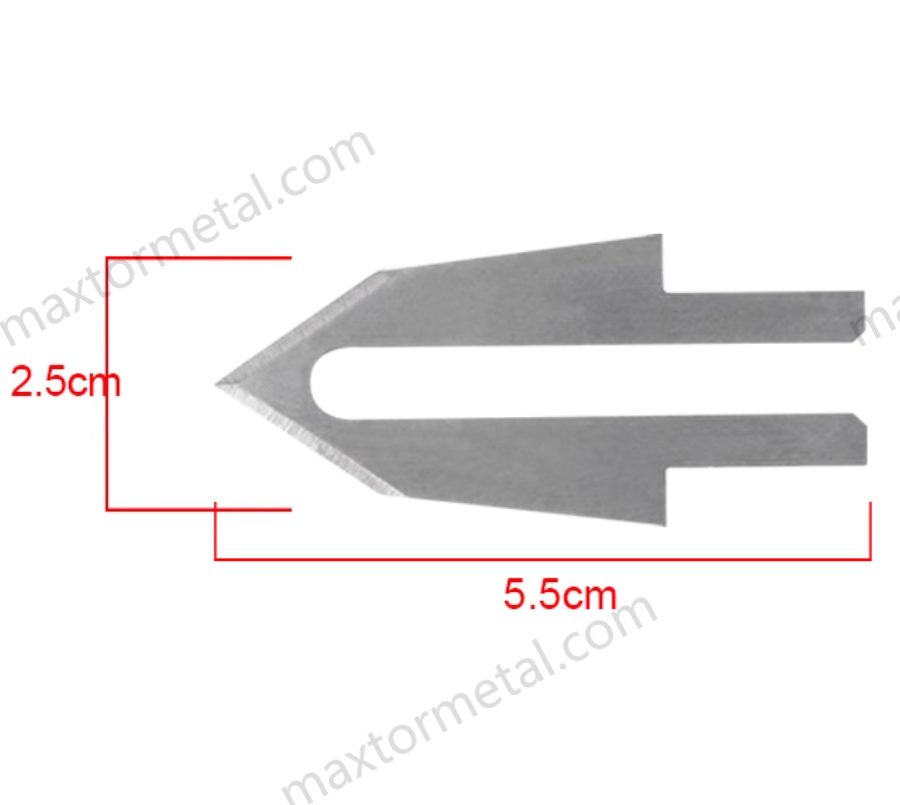
Plastic degating tools remove the gate/runner connection point after molding so the part meets cosmetic and dimensional requirements. In most shops, degating quality shows up as three measurable outcomes:
- 外観: no burn marks, whitening, or smear around the gate.
- 許容範囲: controlled vestige height and consistent edge profile.
- Flow of work: stable takt time with minimal rework and tool cleaning.
Cold trimming (flush cutters, shears, fixtured punch) “wins” when the plastic shears cleanly and the gate mass is small. It “loses” when the cut tears, pulls, or stresses the part surface.
Hot-knife working principles
A hot-knife thermocutter concentrates heat at the blade tip. Instead of mechanically snapping the gate, the blade softens the gate at the cut line so the operator (or fixture) can separate it with less force.
Two implications matter on the floor:
- Temperature is only half the control. Dwell time and feed speed decide how far heat travels beyond the gate.
- “No charring” is mostly about minimizing residence time at high temperature. You want just enough heat to separate the gate cleanly, then get off the part.
A practical tuning loop that works across materials:
- Start at the low end of the polymer window.
- Make one cut, then inspect.
- Adjust one variable at a time: temperature または feed/dwell.
Quality metrics to target
Before you change equipment or blade specs, define pass/fail in terms your team can measure.
Target metrics (use what fits your product):
- Vestige height: set a numeric limit (for example, “≤ 0.20 mm” or “flush within gauge”).
- Heat-affected zone (HAZ): no gloss change, sink, or halo outside the gate land.
- Discoloration: no brown/black specking or soot.
- Edge integrity: no stringing, burr, or torn fiber if the part is filled.
- Dimensional drift: gate-area features remain in tolerance after trimming.
重要なポイント: “No charring” is not a single setting — it’s a controlled window: minimum temperature + minimum dwell that still meets vestige and cosmetic limits.
Parameters by polymer

The safest way to set starting parameters is to treat published melt/processing temperatures as a starting point, then validate on your exact grade and gate mass. Reference tables like PlastikCity’s “Material melt & mould temperatures」 そして RYD Tooling’s “Plastic Melting Temperature Chart” are helpful for defining your first trial window.
If you’re building a parameter sheet for multiple resins, label it explicitly as a hot knife temperature by polymer starting guide — then lock changes behind a simple approval step (process + EHS).
PP and PE starting windows
のために hot knife degating on polyolefins (PP, PE), you’re usually balancing speed (to avoid heat soak) against clean separation.
Starting approach:
- Start low, move fast: a moderate blade temperature with a faster pass usually beats a hotter, slower pass.
- Watch for smear: if the cut edge looks wiped or glossy and the gate “rolls,” reduce dwell or drop temperature.
- Watch for pull-out: if the gate tears and leaves a crater, increase temperature slightly または slow the feed while keeping dwell controlled.
PP/PE often let you win on takt time: once your cut is clean, you can standardize the motion and reduce rework.
ABS, PVC, PET/PBT
These materials reward tighter control.
- ABS: If you see whitening or stress blush around the gate, your cut is too mechanical (too cool) or the part is being flexed during trimming. Stabilize the part, then bring temperature up in small steps.
- PVC: Treat overheating as an EHS risk, not just a cosmetic defect. Overheated PVC can release corrosive byproducts; keep temperature and exposure as low as possible and prioritize ventilation.
- PET/PBT: Higher melt ranges mean your starting temperatures are higher. The main failure mode is overheating the surrounding surface while waiting for the gate to soften. Reduce gate mass (if possible) and tune for short dwell.
⚠️警告: If a material smells sharp, acrid, or “burnt,” stop and review controls. Heated plastics fume risk varies by resin; use capture-at-source ventilation and avoid unnecessary overheating. Guidance like the UK HSE’s “Controlling fume during plastics processing」 is a good baseline.
Nylon and high-temp resins
Nylons (PA6/PA66) and higher-temperature resins need tighter process discipline because you’re operating at higher blade temperatures.
Practical notes:
- Heat spread increases with dwell: at higher temperatures, a small dwell increase can widen the heat-affected zone quickly.
- Filled grades behave differently: glass/mineral-filled materials may cut “cleaner” but can abrade the blade faster.
- Validate with a simple inspection routine: 10 parts at the start of shift, then periodic audits after blade cleaning or changeover.
Gate types and techniques
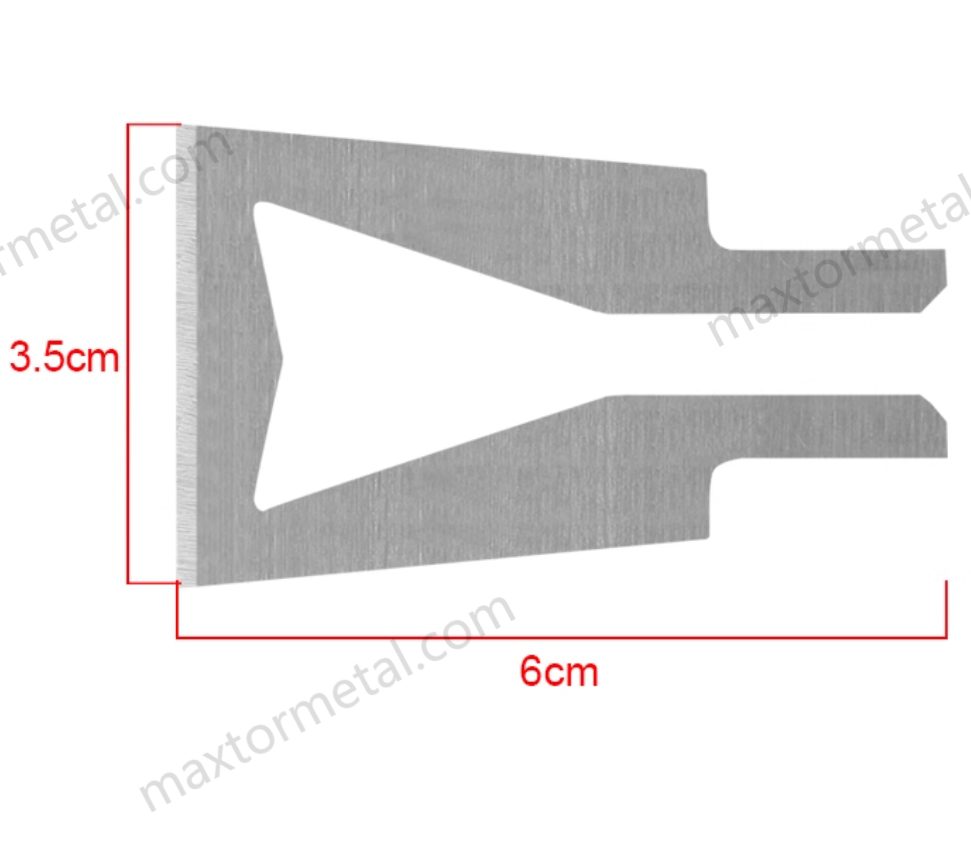
Gate geometry determines how heat moves and where the part is vulnerable.
Edge and tab gates
Edge/tab gates typically have accessible geometry, which makes them ideal for thermocutter degating — if you control contact.
Technique:
- Support the part to avoid flex during the cut.
- Approach with the blade square to the gate face when you need flushness.
- If you’re chasing cosmetics, let the gate soften, then shear — 表面に刃を擦り付けないでください。.
主な不具合モード:
- スミア/光沢斑:保持時間(ドウェル)の過長、または横方向の擦り付け。.
- ゲートクレーター:温度不足、または過度な機械的負荷。.
トンネルゲートおよびサブゲート
トンネルゲートやサブゲートはアクセスが困難であり、ゲートが十分に軟化していないと材料を引っ張ってしまう可能性が高くなります。.
Technique:
- 隣接する意匠面を加熱することなくゲートに到達するブレード形状を使用してください。.
- 保持時間は短く保ちます。綺麗に分離しない場合は、保持時間を延ばす前に温度を上げて調整してください。.
- 表面下のむしれ・亀裂がないか検査します(軽度の曲げやトルクを加えるまで一見問題ないように見えることがあります)。.
ファンゲートおよびフィルムゲート
ファンゲートやフィルムゲートは広範囲に広がっています。課題は、広範な表面を加熱することなく均一に切断除去することです。.
Technique:
- 以下を検討してください: 分割カット (1回の長い引き切りではなく、複数回の短い剪断)。.
- 薄いエッジがブレないよう、安定した治具を使用してください。.
- トリミング後、端面の直進性とシール性の要求事項(包装用部品などの場合)を確認します。.
Safety and ventilation

サーモカッターは、本来シンプルなトリミング工程に熱、ヒューム、電気負荷をもたらします。管理制御されたプロセスセルとして取り扱ってください。.
ヒュームおよび熱のリスク
加熱されたプラスチックは、特に過熱したり刃を長く接触させすぎたりすると、ヒュームや超微粒子を排出する可能性があります。最も安全な運用手順は次のとおりです:
- 以下の条件で運用する: 最低限の有効ブレード温度,
- 保持時間を最小限に抑える、,
- 発生源でヒュームを捕集する。.
プロセス固有のリスクに関する概要については、TWIの 「プラスチックの切断および溶接における健康と安全に関するFAQ」 が実用的な出発点となります。.
換気および保護具(PPE)
局所排気は、切断箇所に近いほど効果的です。.
LEV(局所排気装置)のベストプラクティス:
- フード/ノズルをヒューム発生源の可能な限り近くに配置します。切断部を部分的に囲える場合は囲ってください。.
- フードを離しすぎて過度な風量が必要にならないようにしてください。.
- セットアップ時に簡易的なスモークテストで気流の方向を確認し、メンテナンス後にも再確認してください。.
フード配置の一般的な原則について、CCOHSは以下の資料で要点をまとめています: 「『産業用換気:フード』」.
保護具(PPE)の基本要件:
- 工具温度に適した耐熱手袋。.
- 保護メガネ。.
- EHS(環境安全衛生)評価で必要とされた場合のみ呼吸用保護具を着用(工学的対策を優先)。.
電気安全およびロックアウト
サーモカッターはコントローラー付きのヒーターです。手工具ではなく電気設備として取り扱ってください。.
標準化すべき管理項目:
- 作業開始時に、コード、絶縁状態、およびストレインリリーフを点検してください。.
- 作業停止時には、安定した制御機能を備えた温度コントローラーと、安全なアイドル/復帰モードを使用してください。.
- ヒーターエレメントの交換、筐体の開放、または電気トラブルの解消を行う前に、必ずロックアウト/タグアウトを実施してください。.
ROI and implementation
TCOおよびデータプラン
シンプルで検証可能なモデルを示すことができれば、サーモカッターによるゲート除去プロジェクトの承認が得られやすくなります。.
実用的なパイロットプラン:
- ベースライン(現状把握) for 1–2 shifts
- ゲート不良に起因する不良率
- 100個あたりの手直し時間(分)
- タクトタイムへの影響(平均+範囲)
- EHSに関する注記(臭気に関する苦情、目視可能な煙・モヤ)
- トライアル(サーモカッターの状態) 管理された設定条件にて
- ベースラインと同じ評価指標
- 追加項目:刃の清掃頻度、刃の交換間隔、熱影響部(HAZ)による不良数
簡易TCO(総所有コスト)フレームワーク(自社の数値をご入力ください):
- 現在の年間コスト =(不良品数 × 部品単価)+(手直し時間 × 人件費単価)+(ダウンタイム時間 × ライン停止コスト/時間)
- 年間サーモカッターコスト =(工具の減価償却費)+(刃/チップ費用)+(エネルギーコスト)+(局所排気装置(LEV)維持費)+(教育訓練時間コスト)
- 年間削減効果(利益) = 現在の年間コスト − 年間サーモカッターコスト
MAXTOR METALの役割(保証ではなくツール選択肢として):
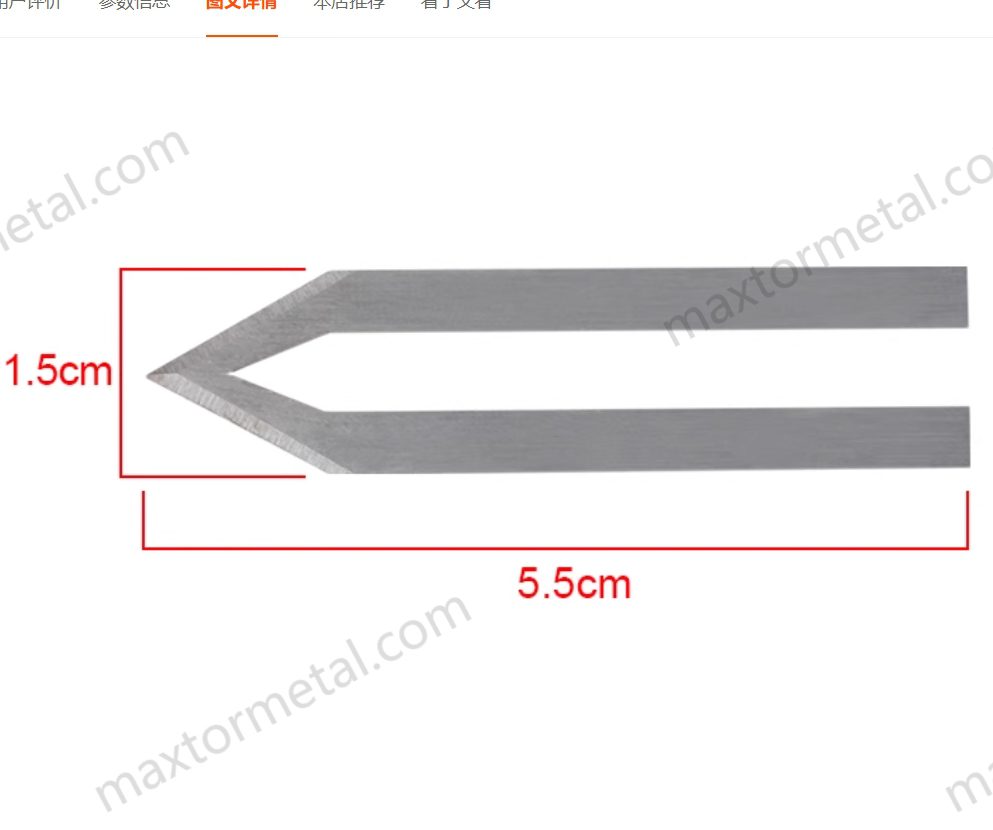
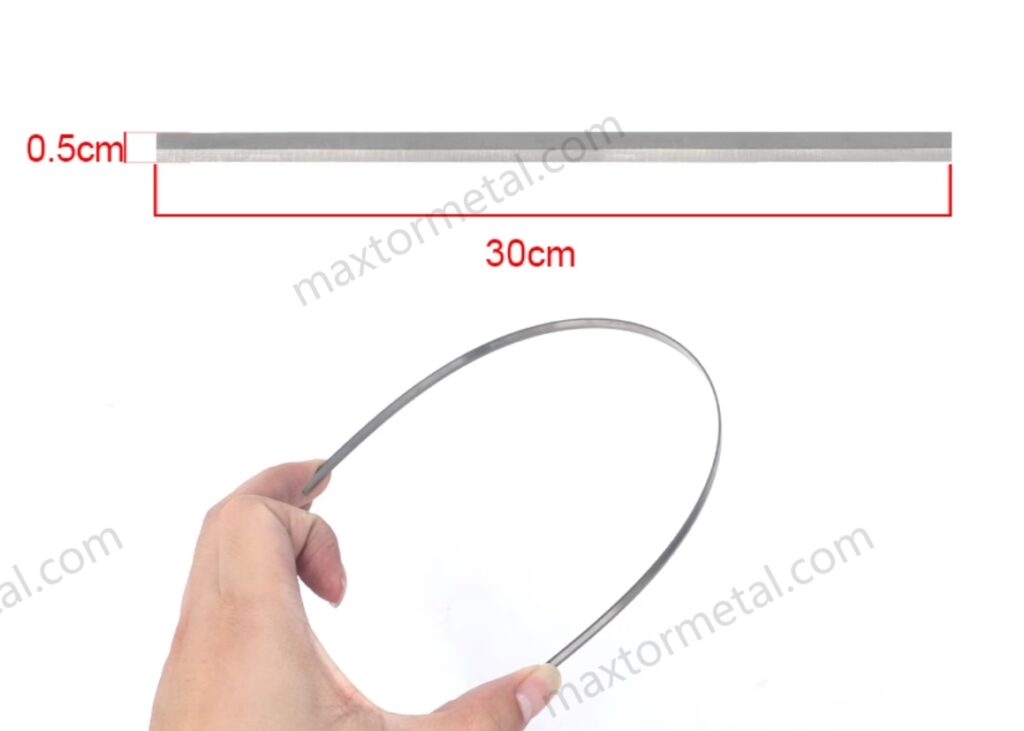
- 規格外の形状や再現性の高い交換用刃先形状が必要な場合、ドキュメント化された構成に対応する刃物メーカーを選定することで装着リスクを低減できます。MAXTOR METALでは、以下のような製品範囲を公開しています: MAXTOR METAL electric hot knife blades また、用途別の詳細を同社の サーモカッター刃の概要.
- 複数のゲート形式を標準化する工場では、「データに基づく検証」をパイロット試運転から得る必要があります。「刃型形状 → 設定条件 → 不良発生 → 刃の寿命」を追跡調査してください。独自の用途形状が必要な場合、MAXTOR METALでは図面や写真に基づくカスタムオーダーの手順も提示しています: MAXTOR METAL custom blades (再現性の高い交換スペックが必要な場合に有用です)。.
プロのヒント注意:刃の仕様選択は管理変数として扱ってください。同一のテストブロック内で刃型、温度、切断手法を同時に変更してしまうと、何が焦げを改善したのか特定できなくなります。.
工具選定チェックリスト
工具を購入する前、あるいは複数ラインへ標準化・展開する前に、このチェックリストをご活用ください:
- コントローラーは連続作業中も大きな温度変動なしに設定温度を維持できますか?
- 作業ステーションの一時停止時に焦げを防止する、安全な待機/セットバックモードを備えていますか?
- 切断中に作業者がワークをたわませないよう、治具で固定できますか?
- 使用する各ゲート形式に対応した刃型形状が少なくとも1種類以上確保されていますか?
- 刃型形状を特定(写真、図面、品番など)し、確実に再発注するためのマニュアル化された手法はありますか?
- 簡易ゲージ測定等により、ゲート残りの高さを測定・監査できますか?
- 切断ポイントへの発生源捕集型・局所排気装置(LEV)の設置は物理的に可能ですか?
SOP(標準作業手順書)と教育訓練
SOPは、作業者個人の技能への依存を減らし、シフト全体での安定した生産品質へと変革するものです。.
SOPには以下の要素を含めてください:
- 樹脂ファミリーごとの承認済み設定温度範囲(および変更権限者)。.
- A4 1枚程度の「調整ループ(チューニングガイド)」(焦げ、溶融付着、引きちぎれ、糸引き発生時の対策)。.
- 刃の清掃頻度と清掃方法(刃に使用可能な清掃具、損傷の原因となる行為)。.
- シフト開始時の点検項目:電源コードの状態、コントローラー設定値、局所排気機能の動作確認。.
- 品質チェック:ゲート残りのサンプリング測定計画および外観検査項目。.
- EHS注意事項:換気要件、高温部の取り扱い、ロックアウト手順。.
結論
焦げを防止し寸法公差を維持するための重要ポイント
- 樹脂の推奨温度範囲の下限から開始し、過度な加熱ではなく短時間の保持時間(ドウェルタイム)で調整します。.
- 合否判定を定量的な基準で定義します:ゲート残りの高さ、熱影響部(HAZ)、変色、寸法安定性。.
- ゲート形式に適した手法を選択し、ワークを治具固定して、たわみによる白化を防ぎます。.
- 発生煙(フューム)は工程上のリスクとして扱い、切断場所で直接捕集し、局所排気装置(LEV)の性能を検証してください。.
次のステップ:パイロット試運転、データ記録、EHS検証
特定の部品ファミリーで短期パイロット試運転を実施して設定条件や不良状況を記録し、他ラインへ横展開する前にEHSによる換気および教育訓練の検証を行ってください。工具や刃型形状の検討を開始される場合は、MAXTOR METALの カスタム工業用刃物のオプション をパイロットデータと合わせて確認し、購買部門が形状寸法や要求ドキュメント仕様を明確に規定できるようにしてください。.
Safety disclaimer
This article provides general process guidance for hot-knife (thermocutter) degating. Actual safe operating limits depend on the specific resin grade, additives, gate mass/geometry, equipment controls, and site ventilation. Always follow your local regulations and your facility’s EHS requirements, and consult the material SDS/TDS before heating plastics. If unusual odor, visible haze, or suspected overheating occurs, stop the operation and verify temperature control and capture-at-source ventilation before resuming.
Validation protocol for “starting windows”
Use published melt/processing temperature charts as a starting point only—then validate on your exact grade and part.
A simple validation routine that improves repeatability:
- Sample size: run 10 consecutive parts per condition (per polymer family + gate type).
- Change control: adjust one variable at a time (temperature または dwell/feed).
- Record the essentials: polymer/grade, gate type, blade profile, setpoint, actual tip temperature (if measured), dwell time, feed speed, cleaning interval, and blade change interval.
- Pass/fail checks: vestige height (with a gauge or microscope), discoloration/soot transfer, visible HAZ (gloss/halo), stringing/smear, and any dimensional drift near the gate.
- Audit cadence: re-check 10 parts at shift start and after blade cleaning/changeover.
Tommy Tang is a Senior Sales Engineer at Nanjing METAL Industrial with 12 years of experience supporting industrial cutting and trimming applications. Certifications: CSE, CME, Six Sigma Green Belt, PMP.

 English
 Spanish
 Italian
 French
 Portuguese
 Russian
 German
 Arabic
 Hindi
 Vietnamese
 Indonesian
 Japanese
 Korean