

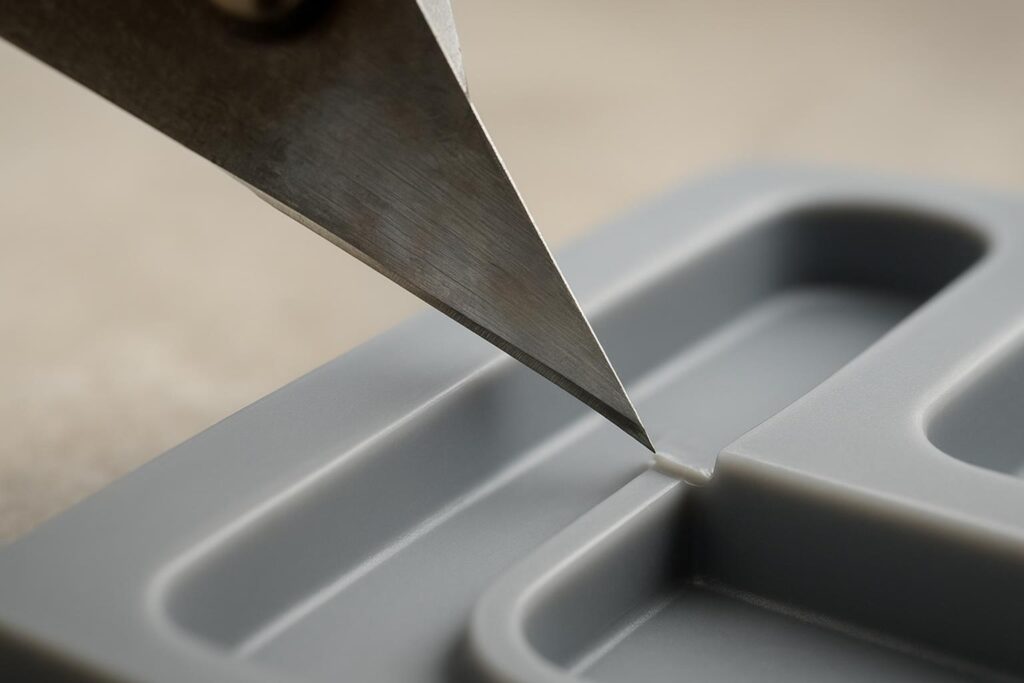
If you’re seeing black marks at the gate, inconsistent vestige height, or cosmetic haze after trimming, degating isn’t a “finishing detail” — it’s a yield, quality, and takt-time problem. Thermocutter (hot-knife) plastic degating tools can solve it, but only when temperature, dwell, and technique are tuned to the polymer and the gate geometry.
Esta guía se centra en plastic gate trimming without charring — meaning no blackening, no soot transfer, and no overheated halo around the gate land.
- Why precision degating matters for yield, finish, and takt time
- When hot-knife thermocutters beat cold trimming on plastics
- What you will learn: parameters, safety, ROI, and SOPs
Thermocutter fundamentals
What plastic degating tools do
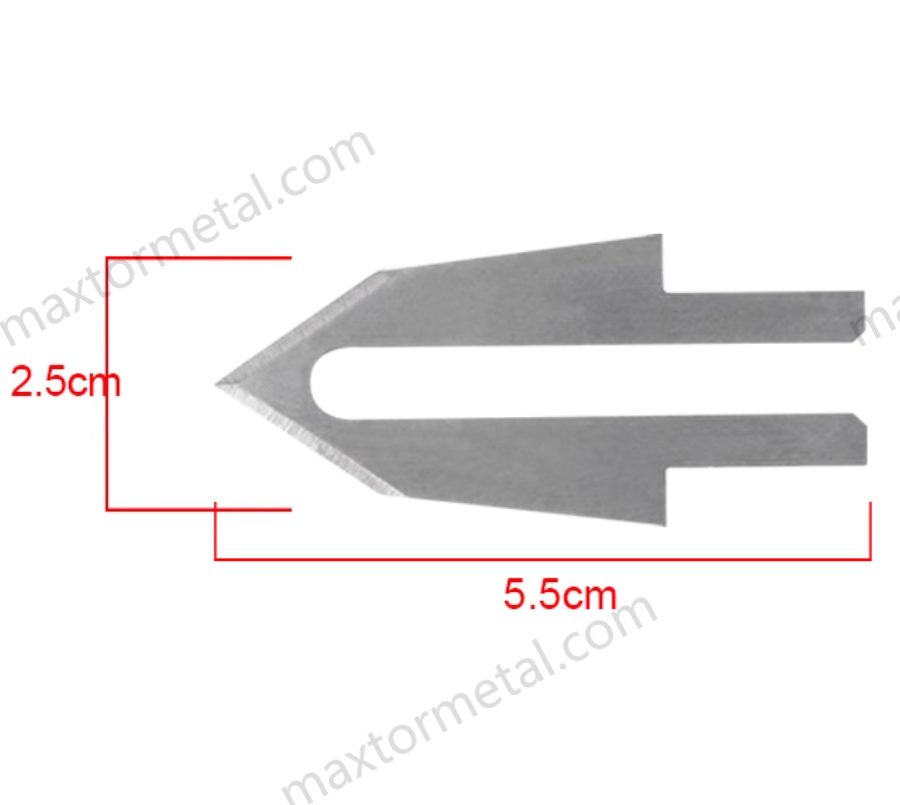
Plastic degating tools remove the gate/runner connection point after molding so the part meets cosmetic and dimensional requirements. In most shops, degating quality shows up as three measurable outcomes:
- Apariencia: no burn marks, whitening, or smear around the gate.
- Tolerancia: controlled vestige height and consistent edge profile.
- Flow of work: stable takt time with minimal rework and tool cleaning.
Cold trimming (flush cutters, shears, fixtured punch) “wins” when the plastic shears cleanly and the gate mass is small. It “loses” when the cut tears, pulls, or stresses the part surface.
Hot-knife working principles
A hot-knife thermocutter concentrates heat at the blade tip. Instead of mechanically snapping the gate, the blade softens the gate at the cut line so the operator (or fixture) can separate it with less force.
Two implications matter on the floor:
- Temperature is only half the control. Dwell time and feed speed decide how far heat travels beyond the gate.
- “No charring” is mostly about minimizing residence time at high temperature. You want just enough heat to separate the gate cleanly, then get off the part.
A practical tuning loop that works across materials:
- Start at the low end of the polymer window.
- Make one cut, then inspect.
- Ajustar una variable a la vez: temperature o feed/dwell.
Quality metrics to target
Before you change equipment or blade specs, define pass/fail in terms your team can measure.
Target metrics (use what fits your product):
- Vestige height: set a numeric limit (for example, “≤ 0.20 mm” or “flush within gauge”).
- Heat-affected zone (HAZ): no gloss change, sink, or halo outside the gate land.
- Descoloramiento: no brown/black specking or soot.
- Edge integrity: no stringing, burr, or torn fiber if the part is filled.
- Dimensional drift: gate-area features remain in tolerance after trimming.
Conclusión clave: “No charring” is not a single setting — it’s a controlled window: minimum temperature + minimum dwell that still meets vestige and cosmetic limits.
Parameters by polymer

The safest way to set starting parameters is to treat published melt/processing temperatures as a starting point, then validate on your exact grade and gate mass. Reference tables like “Temperaturas de fusión y moldeo de materiales» de PlastikCity" y “Tabla de temperaturas de fusión de plásticos” de RYD Tooling” resultan útiles para definir la primera ventana de prueba.
Si está elaborando una hoja de parámetros para múltiples resinas, etiquétela explícitamente como una guía inicial de temperatura de cuchilla caliente por polímero —y después bloquee los cambios tras un proceso sencillo de aprobación (procesos y EHS).
Ventanas iniciales para PP y PE
Para desmazarotado con cuchilla caliente En las poliolefinas (PP, PE), generalmente se busca un equilibrio entre la velocidad (para evitar la acumulación de calor) y una separación limpia.
Enfoque inicial:
- Empiece con valores bajos y avance rápido: una temperatura moderada de la cuchilla con una pasada más rápida suele superar a una pasada más caliente y lenta.
- Esté atento a los arrastres por fusión: si el borde de corte parece arrastrado o brillante y la entrada de colada se “enrolla”, reduzca la permanencia o baje la temperatura.
- Esté atento al arrancamiento: si la entrada de colada se desgarra y deja un cráter, aumente ligeramente la temperatura o y reduzca el avance manteniendo controlado el tiempo de permanencia.
El PP y el PE suelen permitir ganar en tiempo de ciclo: una vez que el corte sea limpio, puede estandarizar el movimiento y reducir el reprocesamiento.
ABS, PVC, PET/PBT
Estos materiales requieren un control más estricto.
- ABS: Si observa blanqueamiento o marcas de tensión alrededor de la entrada de colada, el corte es demasiado mecánico (demasiado frío) o la pieza se está flectando durante el rebarbado. Estabilice la pieza y, a continuación, suba la temperatura en pequeños incrementos.
- PVC: Trate el sobrecalentamiento como un riesgo de EHS, no solo como un defecto estético. El PVC sobrecalentado puede liberar subproductos corrosivos; mantenga la temperatura y la exposición lo más bajas posible y priorice la ventilación.
- PET/PBT: Unos rangos de fusión más altos implican temperaturas iniciales más elevadas. El principal modo de fallo es el sobrecalentamiento de la superficie circundante mientras se espera a que la entrada de colada se ablande. Reduzca la masa de la entrada de colada (si es posible) y ajuste para lograr un tiempo de permanencia corto.
⚠️ Advertencia: Si un material desprende un olor penetrante, acre o a “quemado”, deténgase y revise los controles. El riesgo de humos en plásticos calentados varía según la resina; utilice ventilación con captura en la fuente y evite el sobrecalentamiento innecesario. Guías como la del HSE del Reino Unido, “Control de humos durante el procesamiento de plásticos»," resultan una excelente base de referencia.
Nailon y resinas para altas temperaturas
Los nailons (PA6/PA66) y las resinas de mayor temperatura requieren una disciplina de proceso más rigurosa, ya que se opera con temperaturas de cuchilla más elevadas.
Notas prácticas:
- La propagación del calor aumenta con el tiempo de permanencia: a temperaturas más elevadas, un pequeño aumento del tiempo de permanencia puede ampliar rápidamente la zona afectada por el calor.
- Los grados con carga se comportan de forma distinta: los materiales con carga de vidrio o mineral pueden ofrecer un corte más “limpio”, pero pueden desgastar la cuchilla más rápido.
- Valide mediante una rutina de inspección sencilla: 10 piezas al inicio del turno y, posteriormente, auditorías periódicas tras la limpieza de la cuchilla o el cambio de formato.
Gate types and techniques
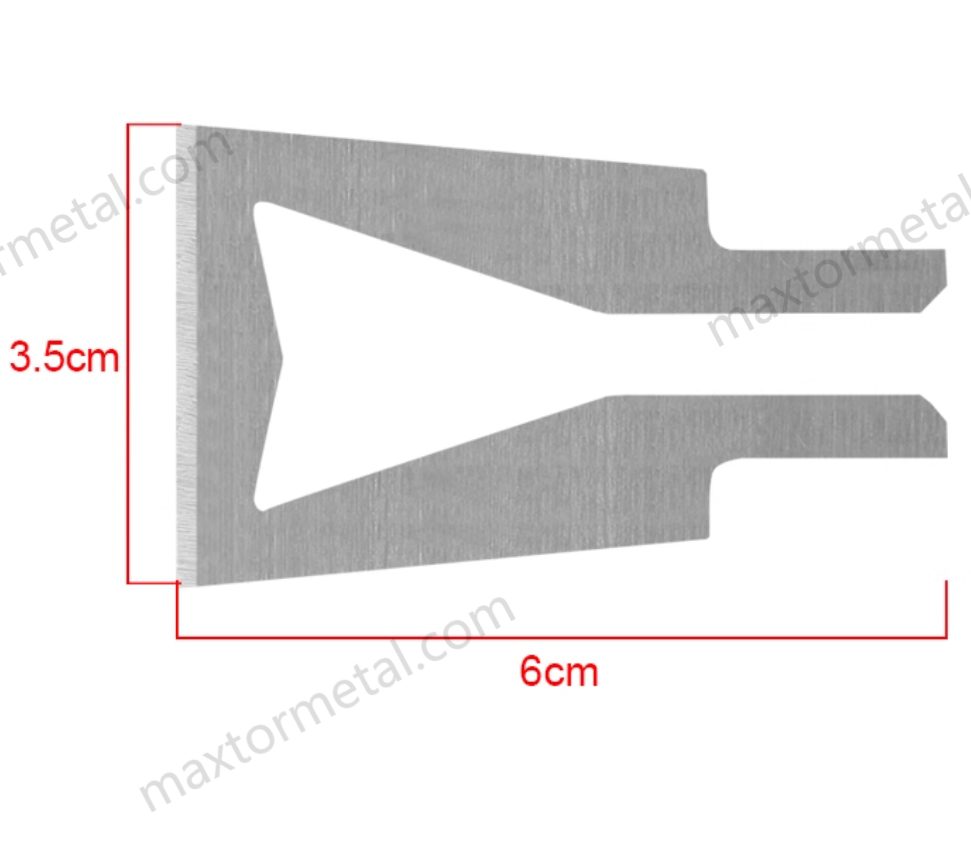
La geometría de la entrada de colada determina cómo se desplaza el calor y dónde es vulnerable la pieza.
Entradas de colada laterales y en lengüeta
Las entradas de colada laterales/en lengüeta suelen tener una geometría accesible, lo que las hace ideales para el desmazarotado con cuchillas para termocortadoras, siempre que se controle el contacto.
Técnica:
- Apoye la pieza para evitar la flexión durante el corte.
- Aproxime la cuchilla perpendicular a la cara de la entrada de colada cuando necesite un acabado al ras.
- Si busca un acabado estético impecable, deje que la entrada de colada se ablande y, a continuación, cizalle —no “arrastre” la cuchilla sobre la superficie.
Common failure modes:
- Smear/gloss patch: too much dwell or lateral wiping.
- Gate crater: too cold or too much mechanical force.
Tunnel and sub gates
Tunnel/sub gates are harder to access and more likely to pull material if the gate isn’t softened enough.
Técnica:
- Use a blade profile that reaches the gate without heating adjacent cosmetic faces.
- Keep dwell short; if it’s not separating cleanly, adjust temperature upward before increasing dwell time.
- Inspect for subsurface tearing (it can look fine until you do a light bend or torque).
Fan and film gates
Fan/film gates spread across a wider area. The challenge is consistent removal without heating a large surface.
Técnica:
- Consider segmented cuts (multiple short shears) instead of one long drag.
- Use stable fixturing so the thin edge doesn’t flutter.
- After trimming, verify edge straightness and any sealing requirement (for packaging-style parts).
Seguridad y ventilación

Thermocutters introduce heat, fumes, and electrical load into what might otherwise be a simple trimming station. Treat it like a process cell with controls.
Fume and heat risks
Heated plastic can emit fumes and ultrafine particles, especially if you overheat the material or keep the blade in contact too long. The safest pattern is:
- run at the lowest effective blade temperature,
- minimize dwell,
- capture fumes at the source.
For a broad overview of process-specific risks, TWI’s FAQ on health and safety implications of cutting and welding plastics is a practical starting point.
Ventilation and PPE
Ventilation works best when it’s close to the cut point.
LEV best practices:
- Place the hood/nozzle as close as practical to the fume source; if you can partially enclose the cut, do it.
- Avoid putting the hood so far away that it needs excessive airflow.
- Verify airflow direction with a simple smoke test during setup, then re-check after maintenance.
For general hood placement principles, CCOHS summarizes key points in "Industrial Ventilation: Hoods".
PPE baseline:
- Heat-resistant gloves suitable for the tool temperature.
- Eye protection.
- Respiratory protection only as required by your EHS assessment (engineering controls first).
Electrical and lockout
Thermocutters are heaters with controllers — treat them like electrical equipment, not hand tools.
Controles a estandarizar:
- Inspect cords, insulation, and strain relief at the start of shift.
- Use temperature controllers with stable regulation and a safe idle/setback mode when the station is paused.
- Lockout/tagout before changing heating elements, opening enclosures, or troubleshooting electrical faults.
ROI and implementation
TCO and data plan
A thermocutter degating project becomes easy to approve when you can show a simple, auditable model.
A practical pilot plan:
- Baseline (current state) for 1–2 shifts
- scrap rate attributed to gate defects
- rework minutes per 100 parts
- takt time impact (avg + range)
- any EHS notes (odor complaints, visible haze)
- Trial (thermocutter state) with controlled settings
- same metrics as baseline
- add: blade cleaning frequency, blade change interval, and any heat-affected-zone rejects
A simple TCO framework (fill in your numbers):
- Annual cost today = (scrap parts × part cost) + (rework hours × loaded labor rate) + (downtime hours × line cost/hour)
- Annual thermocutter cost = (tool amortization) + (blades/tips) + (energy) + (LEV upkeep) + (training time)
- Annual benefit = annual cost today − annual thermocutter cost
Where MAXTOR METAL fits (as tooling options, not a claim):
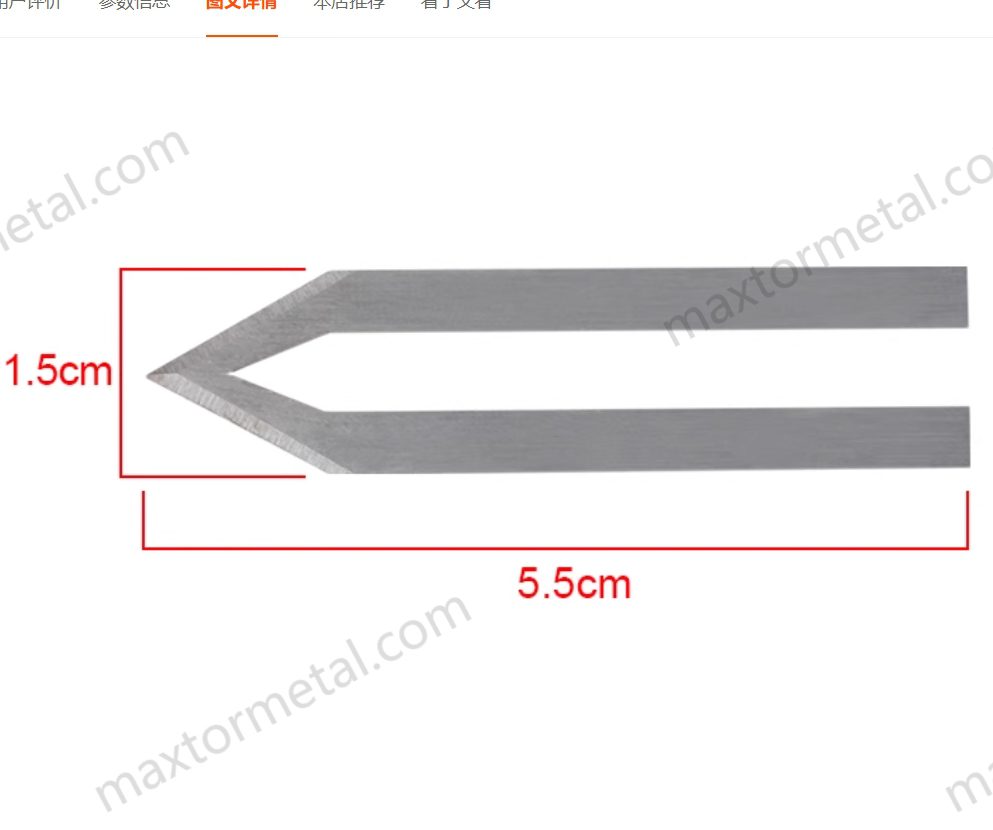
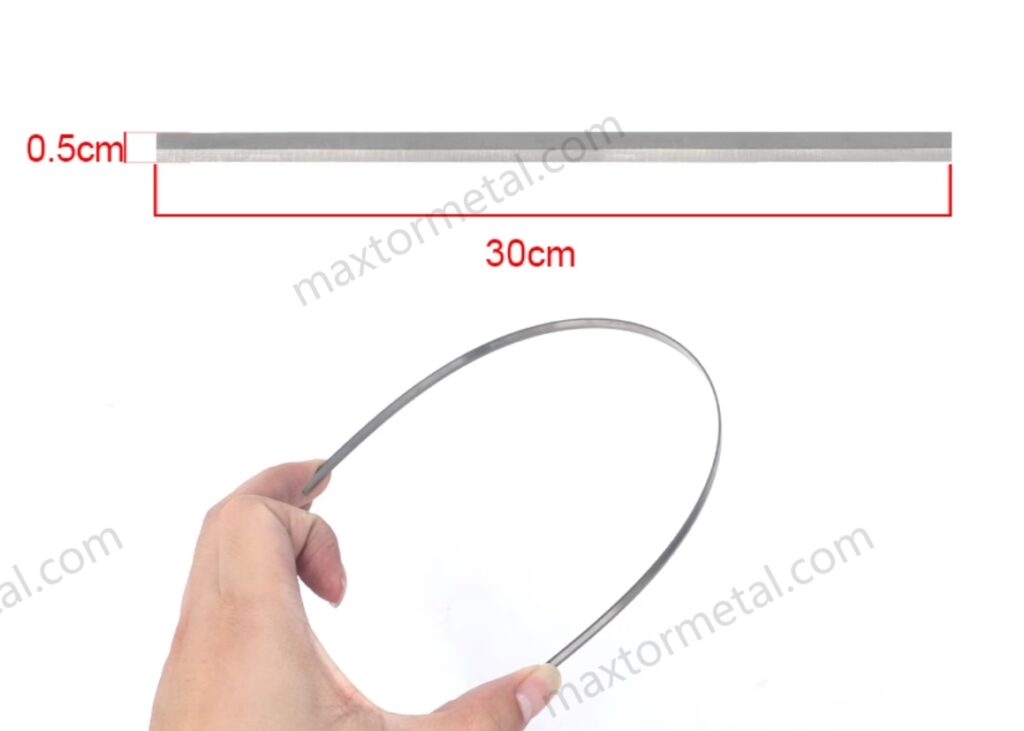
- If you need non-standard profiles or repeatable replacement geometry, a blade supplier that supports documented configurations can reduce fitment risk. MAXTOR METAL publishes ranges such as MAXTOR METAL electric hot knife blades and describes application context in its thermocutter blades overview.
- For plants standardizing multiple gate types, the “data-backed” part should come from your pilot: track blade profile → settings → defects → blade life. If your process requires custom geometry, MAXTOR METAL also outlines a drawing/photo-based custom route via MAXTOR METAL custom blades (useful when you need repeatable replacement specs).
Consejo profesional: Treat blade options like a controlled variable. Don’t change profile, temperature, and technique in the same trial block — you won’t know what fixed the charring.
Tool selection checklist
Use this checklist before you buy or standardize a tool across lines:
- Can the controller hold temperature without large swings during continuous work?
- Do you have a safe idle/setback mode to reduce charring when the station pauses?
- Can you fixture the part so the operator isn’t flexing it during the cut?
- Do you have at least one blade profile matched to each gate type you run?
- Is there a documented method to identify the blade profile (photo, drawing, part number) and re-order it reliably?
- Can you measure and audit vestige height with a simple gauge method?
- Is capture-at-source LEV physically feasible at the cut point?
SOPs and training
An SOP is what turns a “good operator station” into stable output across shifts.
Include these SOP elements:
- Approved temperature windows by polymer family (and who can change them).
- A one-page “tuning loop” (what to do for: char, smear, pull-out, stringing).
- Cleaning interval and method (what’s allowed on blades; what causes damage).
- Shift-start verification: cord condition, controller setpoint, LEV function check.
- Quality checks: vestige height sample plan and cosmetic inspection points.
- EHS notes: ventilation requirement, heat handling, and lockout steps.
Conclusión
Key takeaways to avoid charring and maintain tolerance
- Start at the low end of a polymer’s window and tune with short dwell, not brute heat.
- Define pass/fail in measurable terms: vestige height, HAZ, discoloration, and dimension stability.
- Match technique to gate type, and fixture parts to avoid flex-induced whitening.
- Treat fumes as a process hazard: capture at the cut point and verify LEV performance.
Next steps: pilot trials, data logging, and EHS verification
Run a short pilot with a fixed part family, log settings and defects, and have EHS verify ventilation and training controls before scaling to additional lines. If you want a starting point for tooling and blade profiles, review MAXTOR METAL’s custom industrial blade options alongside your pilot data so procurement can specify geometry and documentation requirements clearly.
Safety disclaimer
This article provides general process guidance for hot-knife (thermocutter) degating. Actual safe operating limits depend on the specific resin grade, additives, gate mass/geometry, equipment controls, and site ventilation. Always follow your local regulations and your facility’s EHS requirements, and consult the material SDS/TDS before heating plastics. If unusual odor, visible haze, or suspected overheating occurs, stop the operation and verify temperature control and capture-at-source ventilation before resuming.
Validation protocol for “starting windows”
Use published melt/processing temperature charts as a starting point only—then validate on your exact grade and part.
A simple validation routine that improves repeatability:
- Sample size: run 10 consecutive parts per condition (per polymer family + gate type).
- Change control: adjust una variable a la vez (temperature o dwell/feed).
- Record the essentials: polymer/grade, gate type, blade profile, setpoint, actual tip temperature (if measured), dwell time, feed speed, cleaning interval, and blade change interval.
- Pass/fail checks: vestige height (with a gauge or microscope), discoloration/soot transfer, visible HAZ (gloss/halo), stringing/smear, and any dimensional drift near the gate.
- Audit cadence: re-check 10 parts at shift start and after blade cleaning/changeover.
Tommy Tang is a Senior Sales Engineer at Nanjing METAL Industrial with 12 years of experience supporting industrial cutting and trimming applications. Certifications: CSE, CME, Six Sigma Green Belt, PMP.

 English
 Spanish
 Italian
 French
 Portuguese
 Russian
 German
 Arabic
 Hindi
 Vietnamese
 Indonesian
 Japanese
 Korean