
This checklist is for strand pelletisers (pull‑strand / strand-cut systems) — not underwater pelletising. If you’re looking for a strand pelletiser changeover sequence your team can run the same way every time, start here.
Scope & responsibility (read first): This checklist is written for strand pelletisers and focuses on the rotary cutter / knife changeover. It does not replace your OEM manual, site risk assessment, or local legal requirements.
- UK context: references align with HSE guidance and PUWER expectations.
- International use: apply the same control principles (safe stop, isolation/LOTO, stored‑energy control, guarding, competence) and ensure compliance with local regulations and the machine manufacturer’s instructions. For EU sites, this should be consistent with the machine’s CE-marking documentation and instructions for safe maintenance.
Document control: Last updated 2026-01-29 · Next review 2027-01-29 · Document owner МАКСТОР МЕТАЛЛ · Document ID RC-PEL-LOTO · Version v3.0
Revision triggers: review immediately after any near-miss, guarding/interlock change, OEM procedure update, or cutter/knife design change.
It focuses on the rotary cutter / knife changeover and the settings that typically cause injuries, pellet defects, or costly rework.
In the UK, a rotary cutter changeover isn’t “just maintenance”. It’s a high-risk intervention on work equipment, and the dutyholder is expected to control the risks under PUWER (Provision and Use of Work Equipment Regulations). HSE’s PUWER overview is a good starting point for what “safe work equipment” means in practice: suitable equipment, effective guarding, maintenance, and competent people.
How to use this checklist on the shop floor: print it, run it in sequence, and treat the sign-off points as hard gates. Use this rotary cutter changeover safety checklist for pelletisers exactly as written. If any step is a “No”, stop and fix it before moving on.
Safe stop and isolation (rotary cutter changeover safety checklist)
Apply Safe Stop (HSE)
Before you touch guards, tools, or blades, apply a formal safe stop sequence. HSE’s guidance on Safe Stop before maintenance is clear on intent: prevent unintended movement or restart before intervention.
Checklist:
- Machine stopped using normal controls (no emergency stop as a “routine” isolator).
- All movement has fully ceased (allow run‑down time for rotating parts).
- Controls returned to neutral/off.
- Key removed / access to start controls controlled (where applicable).
Isolate and lock off (lockout tagout / LOTO)
Safe stop is the start — not the end. You then need isolation and lock-off (lockout tagout / LOTO) so the machine cannot be energised while hands are in the danger zone.
Checklist:
- All energy sources identified (electrical, pneumatic/hydraulic, mechanical, and any stored energy).
- Electrical isolator switched off and locked.
- Pneumatic/hydraulic supplies isolated and pressure safely released.
- Any stored mechanical energy made safe (blocked, restrained, or allowed to dissipate).
- Lock(s) applied with tag(s) showing name, date, and reason for lock-off.
⚠️ Warning: “Power off” is not the same as “isolated”. Treat every changeover as if a restart could happen unless lock-off makes it physically impossible.
Verify zero energy
The verification step is what prevents “we thought it was dead” incidents.
Checklist:
- Try-start test performed (attempt to start using normal controls) to confirm the isolations hold.
- Any residual movement risk eliminated (no coast-down rotation; no trapped pressure).
- Work area checked for secondary hazards (hot surfaces, sharp edges, pinch points).
For the UK context, this aligns with HSE expectations for safe maintenance and isolation arrangements described in its maintenance of work equipment guidance.
Guarding, PPE, and access
Remove and test guards
Blade changeovers create a predictable problem: you need access, but access exposes the hazard. Your control measures need to be deliberate.
Checklist:
- Guards removed only after safe stop + lock-off + verification.
- Guard fixings retained (no missing fasteners on reassembly).
- Interlocks checked for integrity (no bypassing or “temporary” defeat).
- Guarding returned before any test run.
HSE’s general approach to guarding dangerous cutting hazards is consistent across sectors; its safeguarding guidance for cutting machinery is a useful reference point when assessing whether your guarding and access method is genuinely safe.
Task‑specific PPE
PPE won’t compensate for poor isolation or access control — but the right PPE reduces the severity of inevitable sharp‑edge contact.
Checklist (site-specific to risk assessment):
- Cut-resistant gloves suitable for blade handling.
- Eye protection (chips, swarf, cleaning fluids).
- Close-fitting sleeves / no loose clothing near rotating parts.
- Safety footwear (dropped blades and tools are common).
Records and training (PUWER)
A safe changeover is a system, not an individual habit. PUWER expects people to be competent and trained for the work they do.
Checklist:
- Only trained/authorised staff perform cutter changeover and setting.
- Training covers the task, risks, and precautions (isolation, guarding, blade handling, verification).
- Competence is refreshed when equipment or procedures change.
- Records exist (sign-off sheets, training matrix, refresher dates).
If you need a plain-English statement of the expectation, HSE’s page on training and competence under PUWER is the clearest summary.
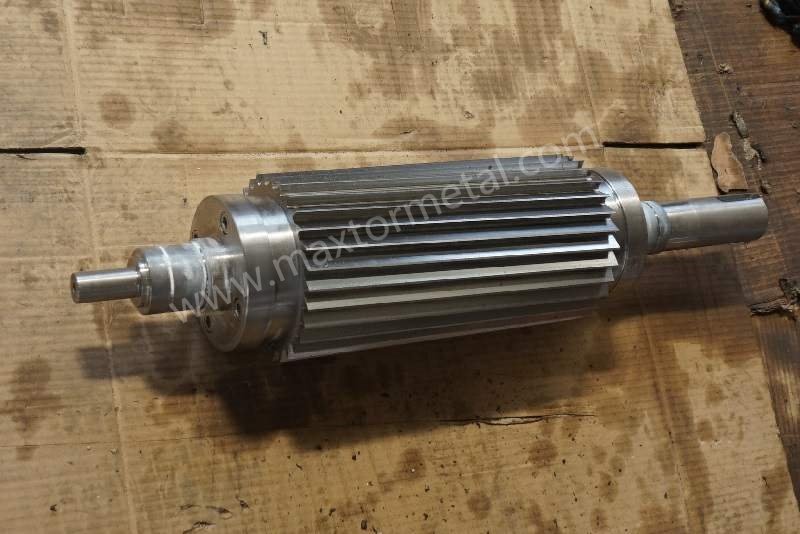
Blade handling and settings

Handle and store blades
The blade itself is a hazard when stationary. Control it like you would any sharp tool — with handling aids, protected edges, and a predictable storage method.
Checklist:
- Blade edges protected during removal and transport (covers, sleeves, or dedicated holders).
- Blades stored in labelled slots/boxes so edges cannot contact hands unexpectedly.
- Lifting/handling method defined for heavier cutter assemblies.
- Old blades disposed of safely (no loose blades in scrap bins).
Gap and torque
Most pelletiser changeover problems show up as one of three outcomes: poor cut quality, rapid wear, или unexpected contact between rotor and bed knife.
Checklist:
- Gap/clearance set to your OEM spec using a feeler gauge (or equivalent method).
- Fasteners tightened using a calibrated torque wrench to the specified torque.
- Tightening sequence followed (especially where distortion affects knife alignment).
Where your team needs a structured method for setting and checking knife clearance, MAXTOR METAL’s guide on bed knife–rotor gap adjustment for perfect clean cuts can be used as a training aid alongside your machine manual.
Brand note (documentation and traceability): If you’re replacing knives, choose blades that come with verifiable material, heat‑treat, and hardness documentation — it makes troubleshooting, regrind decisions, and audit trails easier. MAXTOR METAL supplies custom pelletiser knives and provides supporting documentation on request; see the MAXTOR METAL plastic pelletiser blade page for typical materials and hardness ranges.
Verification before restart
Before you energise the machine, force a short, repeatable verification routine. This is where you prevent “one loose fastener” or “one bad gap” from becoming a damaged cutter, an injury, or an hour of downtime.
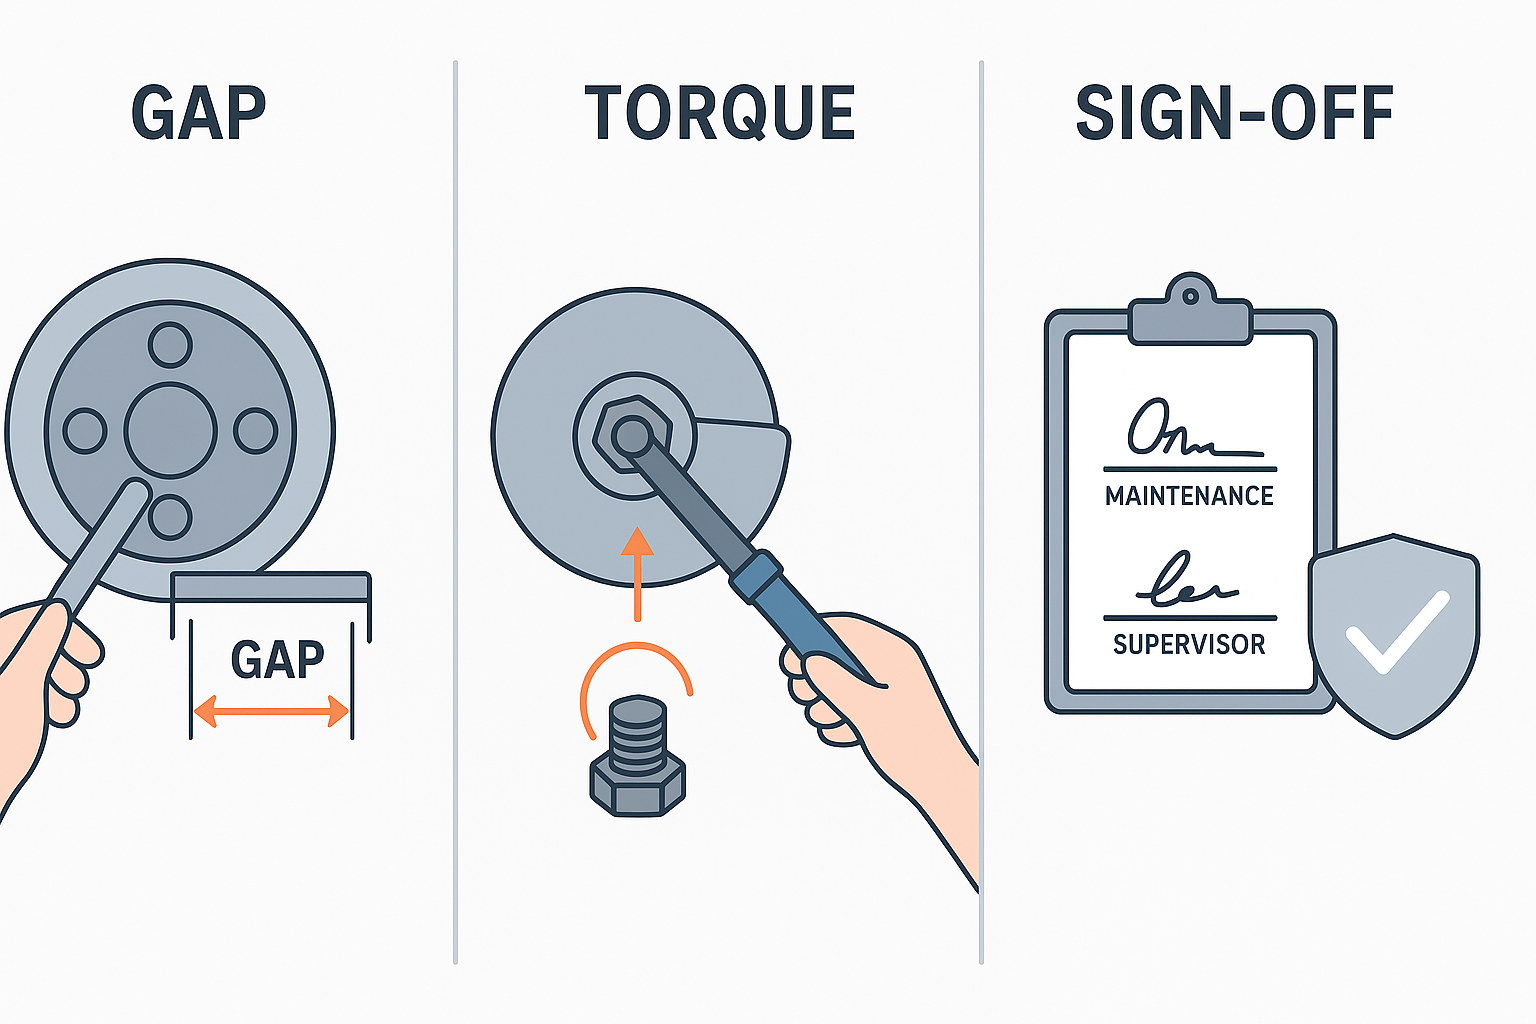
Checklist:
- Gap/clearance rechecked after final tightening.
- All tools removed from the cutter zone.
- All guards refitted and confirmed secure.
- Work area cleared; communication made to affected operators.
- Two-person sign-off completed (maintenance + supervisor/H&S, per site rule).
- Controlled test run performed per OEM method.
Field notes: common changeover failure modes (from industry incident patterns)
Use this as a quick “what usually goes wrong” reminder before you start.
- Unexpected restart / re-energisation: frequently linked to incomplete isolation or skipped verification. Control: follow a written LOTO procedure, lock every energy-isolating device, and perform a try-start test after lock-off.
- Stored energy and coast-down movement: rotating components can still move after power-off. Control: allow full run-down time, restrain/block where applicable, and confirm zero movement before hands enter the danger zone.
- Hand injuries during blade handling: cuts often occur during removal/transport/storage. Control: use edge protection/holders, maintain a defined handling method, and dispose of old blades in a controlled way.
Note: these points summarize commonly reported maintenance incident patterns and are intended to reinforce (not replace) your OEM procedure and site risk assessment.
References and further guidance
- HSE: PUWER overview — https://www.hse.gov.uk/work-equipment-machinery/puwer-overview.htm
- HSE: Safe Stop before maintenance — https://www.hse.gov.uk/agriculture/topics/maintenance-1.htm
- HSE: Maintenance of work equipment — https://www.hse.gov.uk/work-equipment-machinery/maintenance.htm
- HSE: Safeguarding guidance for cutting machinery — https://www.hse.gov.uk/printing/machine/safeguarding-cutting-machines.htm
Заключение
A rotary cutter changeover is safe when it’s repeatable: safe stop, lock-off, zero-energy verification, controlled access, disciplined blade handling, and a clear sign-off gate.
Key compliance cues to keep in view:
- PUWER expectations around safe equipment, maintenance arrangements, guarding, and competence (start with the HSE PUWER overview).
- Safe maintenance discipline and isolation planning per the HSE maintenance guidance.
Now make it truly site-specific (fill these in and keep them controlled):
- Target gap/clearance: ____ mm (Source: OEM manual model ____ , page/section ____ or site risk assessment ____)
- Target fastener torque: ____ N·m (Source: OEM manual / fastener spec / work instruction ____)
- Competence & sign-off rule: who is authorised to do the changeover (role/grade), what training is required, and what record must be completed (e.g., two-person sign-off sheet ID ____ , stored at ____). Finally, commit to periodic audits and refreshers: treat this checklist as a controlled document, review it after near-misses or equipment changes, and refresh training to keep competence current.
Автор
- Author: Tommy Tang, Senior Sales Engineer, Nanjing METAL Industrial (12 years in industrial blades) — Certifications: CSE, CME, Six Sigma Green Belt, PMP
If you spot an error or have a safer OEM-specific step, contact us so we can review and update this checklist.