


You can keep Lâminas Perfuradoras de Papel working well with daily care. Clean, lubricate, sand, and protect each blade every day. This helps stop damage and keeps cuts neat. A recent survey showed plants with regular care had less downtime. They also saved more money. You can make your paper perforating blades last longer.
Principais conclusões
- Clean paper perforating blades after each use. This removes dust, glue, and ink. Cleaning stops rust and keeps cuts neat.
- Lubricate blades and moving parts once a week. Use light machine oil or vegetable oil. This lowers friction and helps blades last longer.
- Sand blades only when needed. Use the right angle and gentle pressure. This keeps edges sharp and avoids damage.
- Handle blades with care. Hold the sides and wear gloves. Do not touch hard surfaces. This protects blade tips and keeps you safe.
- Store blades in a dry, clean place. Use protective covers and keep blades apart. This stops them from getting dull or chipped.
- Check blades every day for damage, sharpness, and cleanliness. This helps you find problems early and keeps cuts good.
- Follow a regular maintenance schedule. Clean, lubricate, inspect, sharpen, and store blades right. This saves money and cuts down on lost time.
- Use good blades. Take care of blades every day. This gives better cuts, longer blade life, and safer work.
Importance of Maintenance
Paper Perforating Blade Performance
You want your paper perforating blades to work well every day. Taking care of them daily keeps them sharp and clean. Cleaning and adding oil helps the blades cut better. This lets your machine make neat and even holes. If you forget to care for the blades, dust and dirt can build up. This makes the blade dull and not work as well. You might see rough or messy cuts. Doing regular care stops these problems. When you keep up with care, your blades work better and cut more accurately. This also helps your machine run smoothly and keeps your work moving. Clean and sharp blades help you work faster and make fewer mistakes.
Tip: Check your blades before and after you use them. This easy step helps you find problems early and keeps your machine working well.
Segurança
Taking care of your blades keeps you and your team safe. Blades that are looked after are less likely to break or slip. This means there is less chance of accidents. If blades get dull or dirty, they can catch on paper or jam the machine. This can hurt someone or break the machine. Daily care helps you see if a blade is worn out or broken before it causes trouble. You can fix or change it right away. Clean blades are less likely to rust or get weak. This keeps them safe to use. By caring for blades every day, you make your workspace safer for everyone.
Cost and Longevity
You save money and time by taking care of your paper perforating blades. Daily care helps blades last longer. This means you do not have to buy new blades often. Places that care for blades every day need fewer new blades each month. They also spend less on fixing machines and do not lose time from breakdowns. When blades are in good shape, they work better and use less power. Sharp blades cut faster and smoother, so the machine does not have to work as hard. You also stop sudden problems and big repair bills. A little care each day saves a lot over time. You get more use from each blade and keep your work going strong.
- Cleaning and checking blades every day stops problems.
- Sharpening and storing blades right helps them last longer.
- Preventive care means fewer repairs and less lost time.
- Sharp blades help you work better and save energy.
Note: Picking good blades, and caring for them every day helps you get the most for your money.
Limpe as lâminas após cada utilização.
Cleaning Process
Direction and Technique
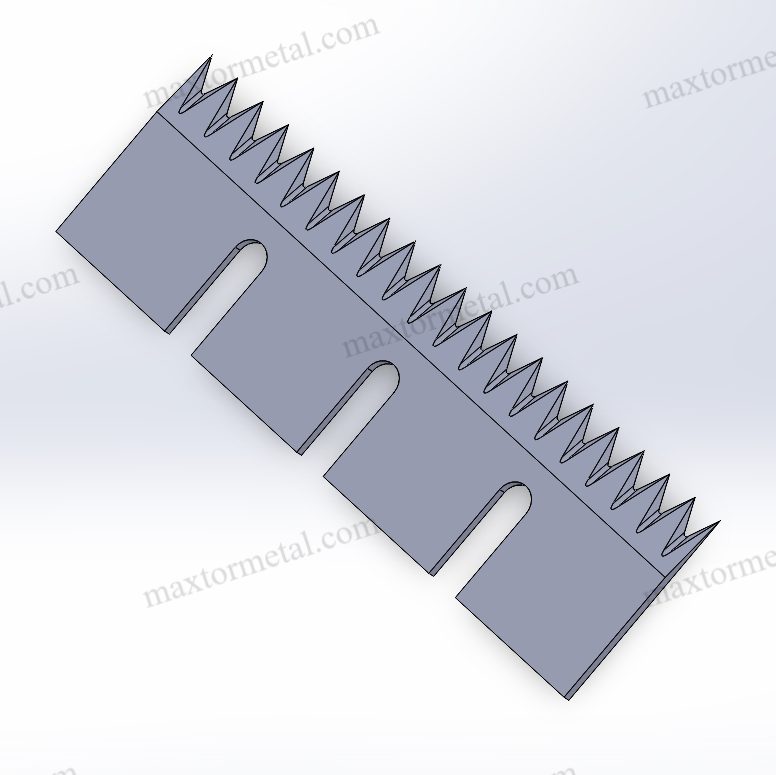
Você deve sempre clean blades after each use. This habit keeps your equipment in top shape. Start by wearing gloves to protect your hands. Use a stiff-bristle brush or a soft cloth for the cleaning process. Move the brush or cloth in the same direction as the blade’s edge. Never scrub against the edge. This step helps you avoid dulling or damaging the blade. Focus on the perforations and blade tips. These areas collect the most dust, paper fibers, glue, and ink. Gently remove all debris. Do not use too much force. Too much pressure can cause nicks or scratches. Careful cleaning keeps the blade sharp and ready for the next job.
Rinsing and Drying
After brushing, rinse the blade with clean water. This step removes any leftover cleaning agents and loose dirt. Use a lint-free cloth or paper towel to dry the blade right away. Make sure you dry all the moisture from the perforations and crevices. If you leave the blade wet, it may rust. Let the blade air dry for a few minutes before you put it back in the machine or store it. Quick and complete drying helps prevent rust and corrosion. This step is very important for keeping your blade in good condition.
Agentes de limpeza
Pick mild cleaning agents for your daily cleaning routine. Simple Green, diluted laundry detergent, or gentle dish soap work well. These cleaners remove sticky residues without harming the blade. For tough spots, use a small amount of isopropyl alcohol. Always rinse the blade well after using any cleaner. Stay away from harsh chemicals or abrasive pads. These can scratch or damage the blade surface. Always check the manufacturer’s guide for safe cleaning products.
Cleaning Checklist
Here is a simple checklist to help you remember each step:
- Remove the blade from the machine if possible.
- Inspect the blade for visible debris or damage.
- Use a stiff-bristle brush to remove dust, fibers, glue, and ink.
- Apply a mild cleaning agent and gently scrub the blade, focusing on perforations and tips.
- Rinse the blade with clean water.
- Dry the blade immediately with a lint-free cloth or paper towel.
- Check for any leftover residue or moisture.
- Let the blade air dry before reassembly or storage.
Tip: Always clean blades after each use to keep them sharp and safe.
| Tarefa | Frequência | Notas |
|---|---|---|
| Limpeza de superfície | Diário | Remove glue, ink, and dirt after each use |
| Inspeção visual | Diário | Check edges and tips for damage |
| Verificação de montagem | Diário | Make sure the blade is secure in the machine |
By following these steps, you keep your blade clean and ready for work. You also help your equipment last longer and work better.
Erros a evitar
You want your paper perforating blades to last and work well. You must avoid common mistakes during cleaning. These mistakes can damage your blade and make your work harder.
1. Cleaning Against the Edge
Never clean against the blade edge. Always move your brush or cloth in the same direction as the edge. Scrubbing against the edge makes the blade dull or chipped. You lose sharpness and accuracy.
2. Leaving Blades Wet or Damp
You must dry your blade right after cleaning. If you leave moisture on the blade, you risk rust. Rust weakens the blade and makes it unsafe. Always use a lint-free cloth or paper towel. Let the blade air dry before you put it back in the machine or storage. This step helps you prevent rust and corrosion.
3. Using Abrasive Materials
Do not use steel wool or rough pads. These scratch the blade surface. Scratches make the blade wear out faster. Choose a stiff-bristle brush or soft cloth for cleaning.
4. Using Harsh Chemicals
Stay away from strong acids, bleach, or ammonia-based cleaners. These chemicals damage the blade and can cause pitting or corrosion. Pick mild cleaning agents like Simple Green, gentle dish soap, or diluted laundry detergent.
5. Skipping Daily Cleaning
You must clean blades after each use. If you skip cleaning, dust, glue, and ink build up. This buildup makes the blade dull and can cause jams. Dirty blades do not cut well and may break.
6. Not Cleaning the Blade Holder
Many people forget to clean the blade holder. Dirt in the holder stops the blade from sitting flat. If the blade wobbles during rotation, it wears out faster and may break. Always check and clean the holder and all parts that touch the blade.
Tip: Take your time during cleaning. Rushing leads to mistakes and missed spots. Careful cleaning keeps your blade sharp and safe.
7. Using Excessive Force
Do not press too hard when cleaning. Too much pressure causes nicks or scratches. Gentle cleaning protects the blade edge and tips.
| Erro | O que acontece | Como evitar |
|---|---|---|
| Cleaning against edge | Dulls or chips blade | Clean with the edge |
| Leaving blade wet | Rust and corrosion | Dry immediately |
| Materiais abrasivos | Scratches blade | Use soft brush or cloth |
| Harsh chemicals | Damages blade surface | Use mild cleaning agents |
| Skipping cleaning | Buildup, dullness, jams | Clean blades after each use |
| Dirty blade holder | Blade wobbles, wears out | Clean holder and blade |
| Excessive force | Nicks and scratches | Clean gently |
You can keep your blade in top shape by avoiding these mistakes. Careful cleaning helps you get the best results every time.
Lubricate Blades and Moving Parts

Lubrication Frequency
Daily Lubrication Needs
You need to lubricate blades and moving parts to keep your machine running smoothly. Most machines do not need daily lubrication. Weekly lubrication is usually enough for paper perforating blades and moving parts. This schedule helps reduce wear and keeps everything working well. If you use your machine more often, you may need to check the lubrication more frequently. Always follow the manufacturer’s instructions for the best results.
Signs That Lubrication Is Needed
You should watch for signs that your blade or machine needs lubrication. If you hear squeaking or grinding noises, it means the parts are dry. If you feel more resistance when you move the blade, it is time to add oil. Sometimes, you may see dust or debris sticking to the blade. This can also mean you need to lubricate. Regular checks help you catch these signs early.
Over-Lubrication and Under-Lubrication Risks
Too much lubrication can cause problems. If you use too much oil, it can build up and attract dust. This makes the blade dirty and can slow down your machine. Too little lubrication is also bad. Dry parts wear out faster and may break. You need to find the right balance. Use just enough oil to keep the blade moving smoothly, but not so much that it leaves a mess.
Lubrication Methods
Application Techniques
You have several ways to apply lubrication to your blade. Here are some of the best methods:
- Apply oil to a sheet of paper in an “X” pattern. Let the oil soak in. Place another sheet on top. Run both sheets through the machine. This spreads oil evenly on the blades.
- Run the blades in reverse. Use a narrow spout bottle to put oil directly on the blade. Then run the blades forward to spread the oil.
- Use pre-oiled lubricant sheets. Run these sheets through the machine in reverse. This cleans and lubricates the blade at the same time.
Running the blades in reverse before and after lubrication helps spread the oil and remove debris.
Areas to Lubricate
Focus on the moving parts and the blade edge. Lubricate the joints, pivots, and any part that moves against another. Do not forget the blade holder. A small amount of oil on these areas keeps everything working well.
Safety Precautions During Lubrication
Always turn off and unplug the machine before you start. Wear gloves to protect your hands from oil and sharp edges. Wipe away any extra oil to prevent slips or messes. Make sure the area is clean before you start the machine again.
Best Lubricants
Recommended Lubricant Types
Choose light machine oil or vegetable-based oils for your blade. Vegetable-based oils work well and do not leave sticky residue. For some machines, food-grade lubricants are best, especially if you use the blades for food packaging.
Compatibility with Maxtor Metal Blades
Maxtor Metal Perforating Blade Knives work well with light machine oil and vegetable-based lubricants. These oils protect the blade and keep it sharp. Always check the product guide for any special instructions.
Avoiding Harmful Substances
Do not use petroleum-based oils if you can avoid them. These can cause residue buildup and may be a fire hazard. Stay away from corrosive or abrasive lubricants. These can damage the blade and shorten its life.
Tip: Use only the amount of oil you need. Wipe away any extra to keep your blade clean and safe.
Lubrication Checklist
Pre-Lubrication Inspection
Before you start to lubricate blades and moving parts, you need to check your equipment. Look at each blade closely. Search for dust, paper fibers, or sticky spots. If you see any dirt, clean the blade first. Check for signs of wear, like chips or dull edges. Make sure the blade sits tight in its holder. Loose blades can cause problems during lubrication. Inspect the moving parts around the blade. Look for rust, old oil, or anything that might block smooth movement. If you find damage, fix it before you continue.
Tip: Always turn off and unplug your machine before you inspect or touch any blade.
Step-by-Step Lubrication Process
You can follow these steps to make sure your lubrication works well:
- Gather your supplies. You need a clean cloth, the right lubricant, and gloves.
- Remove the blade from the machine if possible. This gives you better access.
- Clean the blade with a soft cloth to remove any dust or old oil.
- Apply a small amount of lubricant to the blade edge and the moving joints. Use a precision oiler or a cloth for even coverage.
- Move the blade back and forth by hand. This helps spread the lubrication across all surfaces.
- Wipe away any extra oil with a clean cloth. Too much oil can attract dust.
- Put the blade back in the machine. Make sure it fits tightly and lines up with the other parts.
Here is a quick table to help you remember each step:
| Etapa | Ação | Por que isso importa |
|---|---|---|
| 1 | Gather supplies | Stay organized |
| 2 | Remove blade | Easier access |
| 3 | Lâmina limpa | Remove dirt and old oil |
| 4 | Apply lubricant | Reduce friction |
| 5 | Move blade by hand | Spread lubrication |
| 6 | Wipe away extra oil | Prevent dust buildup |
| 7 | Reinstall blade | Ensure safe operation |
Post-Lubrication Checks
After you lubricate blades and moving parts, you need to check your work. Look at the blade to see if it has a thin, even layer of lubrication. Make sure there is no extra oil dripping or pooling. Turn the blade by hand to feel if it moves smoothly. Listen for any strange sounds. If you hear squeaking or grinding, add a little more lubricant. Check that the blade sits firmly in its holder. Wipe away any oil that got on other machine parts. Plug in the machine and run it for a short time. Watch the blade as it moves. If everything looks and sounds good, your lubrication is complete.
Note: Regular checks after lubrication help you catch problems early and keep your machine running well.
Sanding and Industrial Blade Maintenance
Sanding Techniques
Proper Sanding Direction and Angle
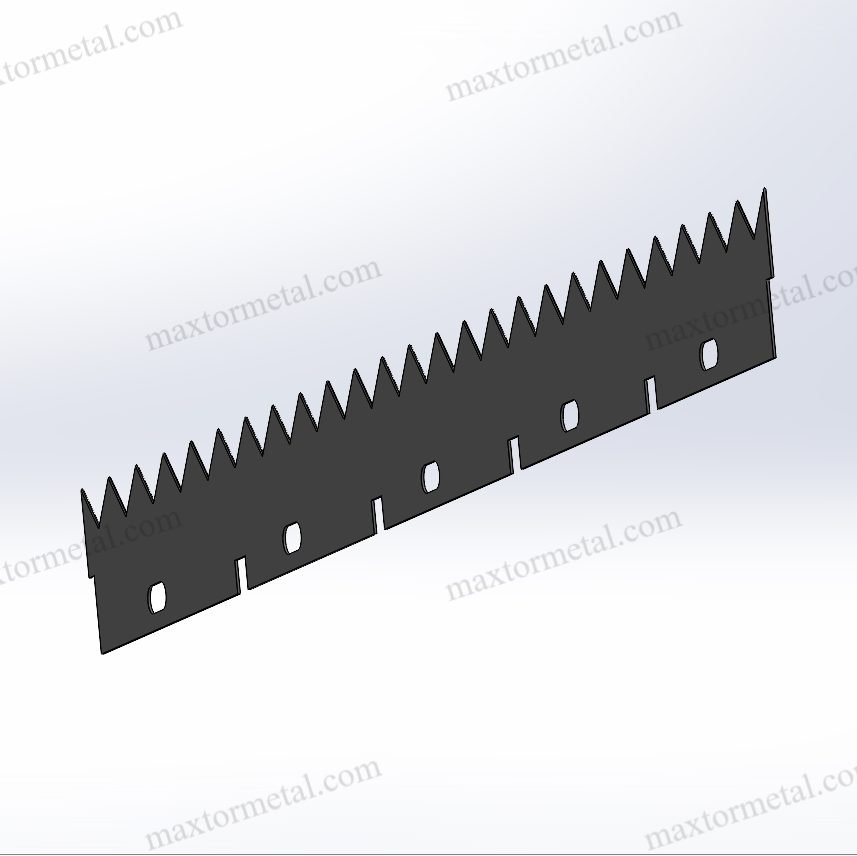
You should sand your blade in the right way to keep it working well. Always move the sandpaper or sharpening tool along the edge, not across it. This keeps the blade’s shape and angle the same. Hold the blade still and match the edge’s angle. Most blades work best at a 20 to 25-degree angle. Keeping this angle helps you get a sharp and even edge each time.
Pressure Control and Consistency
Use gentle and steady pressure when sanding. Pressing too hard can take off too much metal and ruin the blade. Light, even strokes help you control sharpening. Move the tool smoothly and do not rush. Using the same pressure gives you a smooth edge and helps you avoid mistakes.
Avoiding Overheating During Sanding
Sanding can make the blade hot from friction. Too much heat can hurt the edge and make it less sharp. To stop overheating, take breaks and touch the blade to check if it is hot. If it feels hot, let it cool down before you keep going. You can also dip the blade in cool water while sharpening to keep it safe.
Erros comuns a evitar
Many people make mistakes when they take care of industrial blades. Some sand against the edge, which makes the blade dull. Others use too much pressure or the wrong angle. Overheating is another common problem. Try to avoid these mistakes to keep your blade sharp and ready to use.
Tip: Check your work as you go. Small changes help you keep the blade in good shape.
Sanding Tools
Sandpaper Types and Grit Selection
Pick the right sandpaper for sharpening. Start with coarse grit, like 220, if the blade is very dull. Use finer grits, like 400 to 600, for normal sharpening and finishing. Fine grit helps you get a smooth and sharp edge.
Whetstones and Sharpening Stones
Whetstones and sharpening stones give you more control when you sharpen blades. Use a coarse stone to reshape the edge and a fine stone to finish it. Keep the stone wet for smoother sharpening and better results.
Mechanical Sharpeners and Grinders
Mechanical sharpeners and grinders help you save time when sharpening or fixing dull blades. Use these tools for big blades or when the edge is very dull. Always set the machine to the right angle for a sharp edge. Do not press too hard and check the blade often.
Cleaning Tools for Sanding Residue
After sharpening, clean the blade with a soft brush or cloth. Take off all the metal dust and grit. This step keeps the blade ready to use and stops buildup that can hurt the blade’s sharpness.
Sanding Frequency
Daily Maintenance vs. Periodic Sharpening
You do not need to sharpen your blade every day. Daily care means wiping the surface and checking for chips. Only sharpen or regrind when you see problems with how the blade works. Test the blade’s sharpness each week to know when to sharpen.
Signs That Blades Need Sanding
Look for signs that your blade needs sharpening. If you feel dragging, pulling, or see burrs when cutting, it is time to sharpen. A dull blade will not cut cleanly and can damage your material.
Factors Affecting Sanding Intervals
How often you sharpen depends on how much you use the blade and what you cut. If you use the blade a lot or cut tough stuff, you need to sharpen more often. Always check the blade’s sharpness and shape before each shift.
Here is a helpful table for your industrial blade maintenance schedule:
| Tarefa | Frequência | Notas |
|---|---|---|
| Limpeza de superfície | Diário | At the end of every shift |
| Inspeção visual | Diário | Focus on edges and chips |
| Verificação de montagem | Diário | Ensure the blade does not wiggle |
| Teste de nitidez | Semanalmente | Test on actual material; look for dragging or burrs |
| Revisão de alinhamento | Semanalmente | Use a straight edge or gauge |
| Limpeza da superfície de montagem | Semanalmente | Clean and check for damage |
| Medição de espessura | Mensal | Use caliper or micrometer to measure blade thickness |
| Inspeção de rachaduras | Mensal | Use flashlight or dye penetrant |
| Balanceamento | Mensal | Monitor machine vibration |
| Afiação completa | Conforme necessário | Based on performance indicators, not fixed time |
Note: Sanding and sharpening should be done when needed, not on a set schedule. Regular checks help you keep your blade sharp and working well.
Sanding Checklist
Pre-Sanding Inspection
Before you start sharpening, you need to check your blade carefully. Look for chips, cracks, or bends along the edge. Hold the blade up to the light to spot any uneven spots. Use your finger (with a glove) to feel for burrs or rough areas. Check if the blade sits flat and straight. If you see rust or sticky residue, clean it off first. This step helps you avoid mistakes during industrial blade maintenance and keeps your sharpening process safe and effective.
Step-by-Step Sanding Process
You want to achieve precision when sharpening your blade. Follow these steps for the best results:
- Place the blade on a stable surface.
- Choose the right tool for sharpening, such as sandpaper, a whetstone, or a mechanical sharpener.
- Hold the blade at the correct angle, usually between 20 and 25 degrees.
- Move the sharpening tool along the edge, following the original shape.
- Use smooth, even strokes. Do not rush.
- Flip the blade and repeat on the other side if needed.
- Check your progress often to keep precision high.
- Wipe away any metal dust after each pass.
Tip: Consistent pressure and angle help you get a sharp edge and avoid uneven wear.
Post-Sanding Blade Assessment
After sharpening, you need to check your blade again. Look for a smooth, even edge with no nicks or burrs. Run your finger (carefully) along the edge to feel for sharpness and smoothness. Test the blade on a piece of scrap material. If it cuts cleanly and easily, your sharpening worked. If not, repeat the process for better precision. This step is key in industrial blade maintenance and helps you know when regular sharpening and regrinding are needed.
| Assessment Step | O que procurar | Por que isso importa |
|---|---|---|
| Inspeção visual | Smooth, even edge | Ensures precision |
| Touch Test | No burrs or rough spots | Confirms sharpness |
| Cutting Test | Clean, easy cut | Checks effectiveness |
Safety Precautions During Sanding
Safety is important during industrial blade maintenance. Always wear gloves and safety glasses. Make sure your work area is clean and well-lit. Keep your hands away from the edge while sharpening. Use a clamp or holder to keep the blade steady. Take breaks to avoid fatigue and overheating. Never rush the process. If you use a mechanical sharpener, follow the instructions for safe use. Store your sharpening tools safely after use.
Note: Safe habits protect you and help you achieve the best precision during sharpening and regrinding.
Paper Perforating Blade Tip Protection Rules
Manuseio
Técnicas de manuseio seguro
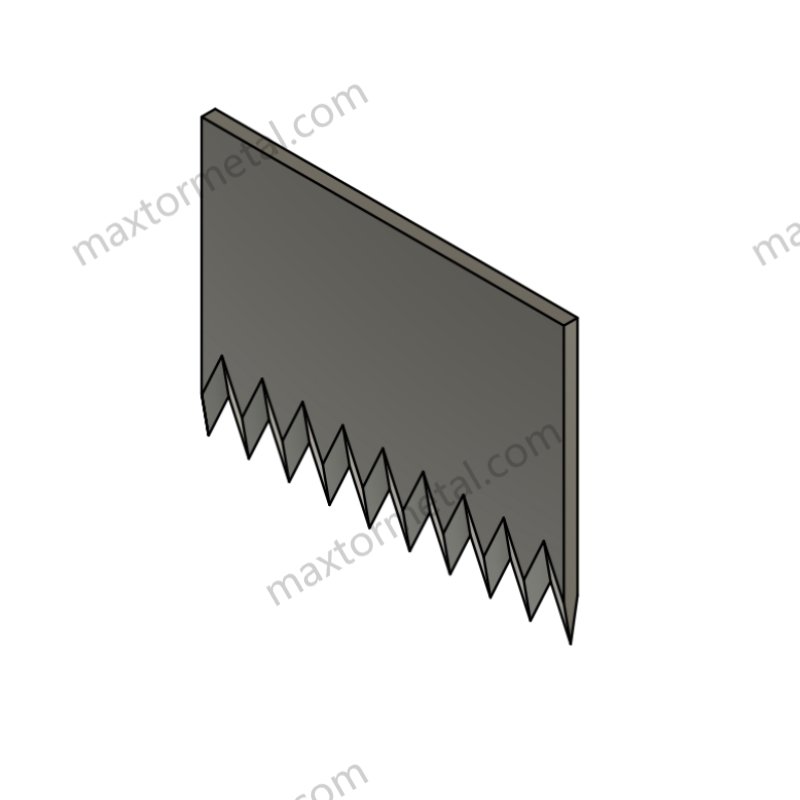
You should always handle each blade with care. Hold the blade by the sides, not by the edge or tip. Wear gloves to protect your hands from cuts. Move slowly and keep your focus on the blade. Place the blade on a soft surface when you set it down. This helps you avoid accidents and keeps the blade sharp.
Avoiding Contact with Hard Surfaces
Never let the blade touch hard surfaces like metal tables or concrete floors. Hard contact can chip or dull the blade tip. Use a rubber mat or a soft cloth as a resting place. When you move the blade, keep it away from other tools and sharp objects. This simple habit helps you prevent damage.
Using Protective Covers During Transport
When you need to move the blade, always use a protective cover. Blade covers or sheaths keep the tip safe from bumps and drops. You can buy covers or make your own from thick cardboard or plastic. Secure the cover before you carry the blade. This step protects both you and the blade during transport.
Armazenar
Ambiente de armazenamento adequado
Store your blade in a clean, dry place. Moisture can cause rust and weaken the blade. Choose a storage area with low humidity and good airflow. Keep the blade away from chemicals and direct sunlight. A safe environment helps your blade last longer.
Blade Orientation and Separation
Place each blade flat or upright, depending on the storage rack. Make sure blades do not touch each other. Use dividers or slots to keep them apart. This stops the blade tips from rubbing together and getting dull or chipped.
Use of Protective Sheaths or Guards
Always use a sheath or guard when storing the blade. These covers shield the tip from dust and bumps. You can use plastic guards, fabric sleeves, or even bubble wrap. Make sure the cover fits snugly and does not slip off.
Inspeção
Daily Tip Condition Check
Check your blade tips every day. Look for sharpness and signs of dullness. Examine the edge for chips, cracks, or other damage. Use a magnifying glass if needed. Press the blade gently and see if it springs back. If the blade stays flat or recovers slowly, it may need attention.
Identifying Signs of Damage or Wear
Watch for flattening, discoloration, splitting, or fraying at the blade tip. Discoloration can mean chemical or UV damage. Splitting or fraying lowers cutting performance. If you see any of these signs, sharpen or replace the blade right away.
Cleaning Before and After Use
Clean the blade before and after each use. Remove dust, glue, and ink from the tip. Use a soft cloth and mild cleaner. Dry the blade well before storing it. Clean blades work better and last longer.
Tip: Regular inspection and cleaning help you catch problems early and keep your blade in top shape.
Protection Checklist
Handling Checklist
You can keep your blade working well by using a simple checklist. Follow these steps every time you use a blade:
- Always wear gloves to keep your hands safe.
- Hold the blade by the sides, not the edge or tip.
- Move the blade slowly and pay attention.
- Do not let the blade touch hard things or metal.
- Use a cover or sheath when you carry the blade.
- Do not use the blade for jobs it is not made for.
- Teach everyone how to handle and clean the blade safely.
Tip: Careful handling helps you stay safe and keeps the blade sharp longer.
Storage Checklist
Storing your blade the right way keeps it safe and ready. Use this checklist to protect your blade when you put it away:
- Store the blade in a clean, dry place with low humidity. Try to keep humidity under 50%.
- Put silica gel packs or desiccants in the storage area to soak up moisture.
- Place the blade in a sealed bag or vacuum container for extra safety.
- Always use a sheath, guard, or cover to protect the blade tip.
- Make sure blades do not touch each other. Use dividers or slots to keep them apart.
- Keep the blade away from chemicals, sunlight, and heat.
- Put a thin layer of oil or coating on the blade to stop rust.
| Storage Step | Por que isso importa |
|---|---|
| Dry environment | Stops rust and corrosion |
| Protective cover | Keeps blade tip safe |
| Separation | Stops blades from rubbing together |
| Oil coating | Adds extra rust protection |
Lista de verificação de inspeção
Checking your blade often helps you find problems early. Use this checklist to look at your blade every day:
- Look closely at the blade tip and edge for chips, cracks, or dull spots.
- Check for rust, discoloration, or buildup on the blade.
- Clean the blade before and after each use to remove dust, glue, and ink.
- Test the blade’s sharpness on scrap material.
- Write down your inspection and any care in a logbook.
- Sharpen the blade if it does not cut well.
- Replace the blade if it is badly damaged or sharpening does not help.
Note: Keeping a log of blade checks and care helps you know when to replace blades.
Troubleshooting and Maintenance Schedule
Paper Perforating Blades Common Issues
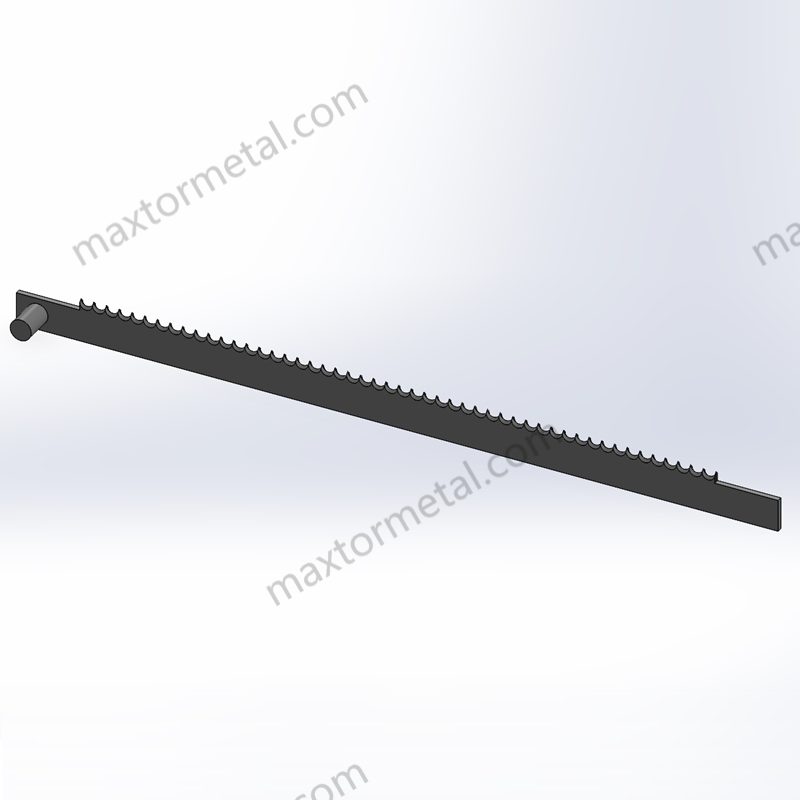
Paper perforating blades can have problems that make them work badly. These problems can slow down your work and make cuts messy. Here are some things you might see:
- Se o holes look different each time, you may have wrong settings or paper. Check the paper weight and change the settings to fit.
- Paper can tear or rip if it is thin or weak. Pick the right blade and slow down the machine to stop this.
- Dust or bits of paper can clog the blade. Clean the blade after every use to keep it clear.
- Blades get dull and do not cut well after lots of use. Sharpen or change old blades to keep them working.
- Blades can get notches or bent. This makes cuts uneven. Be gentle with blades and replace them if you see damage.
- Dull blades or wrong machine settings can make cuts uneven. Sharpen the blade and fix the settings to help.
- Glue or sticky stuff can stick to the blade. Clean the blade often and use anti-stick spray if needed.
- If you put the blade in wrong, it can wobble and wear out fast. Always follow the instructions to install blades.
- Blades can get too hot and lose strength. Go slower and use oil to keep blades cool.
Tip: Watch the machine while it works. If you see a problem early, you can fix it fast and keep blades working longer.
Quando substituir
Change blades when you notice these things:
- The blade does not cut smoothly or leaves rough edges.
- You see chips, cracks, or bends on the blade.
- Sharpening does not make the blade work better.
- The blade has rust or looks corroded.
- The blade does not fit the job you need.
Changing blades at the right time helps you work better and keeps your machine running. You will not lose time or money from broken blades.
Note: Check your blades often. Do not wait until they break before you change them.
Maintenance Schedule
A good plan helps blades last longer and work well. Follow these steps to care for your blades:
| Tarefa | Com que frequência | Why You Do It |
|---|---|---|
| Limpeza | Após cada uso | Removes dirt and stops clogs |
| Lubrificação | Semanalmente | Lowers friction and heat |
| Inspeção | Diário | Finds damage or sticky spots |
| Afiação | Conforme necessário | Mantém as lâminas cortando bem |
| Calibração | Mensal | Makes sure holes are even |
| Armazenar | Após o uso | Protects blades and helps them last |
Maxtor Metal checks blades carefully and uses strong materials. They test blades to make sure they cut well and do not rust. Workers learn how to keep blades in good shape. These steps help you get better cuts and use blades longer. You will not need to buy new blades as often.
Callout: Sticking to a regular care plan helps you stop problems and keeps blades working their best.
You can make your blades cut better and stay safe by taking care of them every day.
- Clean the blades after you use them. This stops rust and keeps them sharp.
- Add oil and sand the blades when needed. This helps them work their best.
- Keep the blade tips safe and check them each day for any damage.Experts say that taking care of blades often helps them last longer, work better, and break down less.
Pick Maxtor Metal Perforating Blade Knives if you want blades you can trust. Start caring for your blades every day and you will see better cuts each time.
Perguntas frequentes
How often should you clean paper perforating blades?
You should clean paper perforating blades after every use. This habit keeps the blades sharp and free from dust, glue, and ink. Clean blades help you get smooth, even cuts every time.
What is the best way to store paper perforating blades?
Store paper perforating blades in a dry, clean place. Use blade covers or sheaths to protect the tips. Keep each blade separated to avoid chips or dull edges.
Which lubricants work best for paper perforating blades?
Light machine oil or vegetable-based oils work best. These oils keep the blades moving smoothly and help prevent rust. Avoid heavy or sticky oils that can attract dust.
How do you know when to sharpen or sand your blade?
Check the blade’s edge before each use. If you see burrs, chips, or feel dragging during cutting, it is time to sharpen or sand the blade. Sharp blades make clean, easy cuts.
Can you use any cleaning agent on paper perforating blades?
No, you should use only mild cleaning agents like Simple Green or gentle dish soap. Harsh chemicals can damage the blade surface. Always rinse and dry the blade after cleaning.
What are the signs that a blade needs replacing?
Look for cracks, deep chips, rust, or if sharpening no longer helps. If the blade does not cut cleanly, you should replace it. Damaged blades can cause poor cuts and safety risks.
Why is daily maintenance important for paper perforating blades?
Daily maintenance helps you keep blades sharp, safe, and long-lasting. Clean, lubricated, and protected blades work better and save you money by reducing the need for replacements.
Tip: Set a daily routine for cleaning, checking, and storing your paper perforating blades. This habit keeps your equipment in top shape.
| Tarefa | Com que frequência | Por que isso importa |
|---|---|---|
| Lâminas Limpas | Após cada uso | Prevents buildup and rust |
| Lubrifique as lâminas | Semanalmente | Reduces friction and wear |
| Inspect Tips | Diário | Spots damage early |
| Sharpen/Sand Blades | Conforme necessário | Mantém a qualidade de corte |
Veja também
Como Obter o Melhor Desempenho da Sua Faca Perfurada
Como Escolher a Faca Perfuradora Certa para o Seu Material
O que são lâminas perfurantes e como são usadas
Lâminas industriais perfuradas: a chave para cortes de precisão em embalagens e muito mais

 English
  Spanish
  Italian
  French
  Portuguese
  Russian
  German
  Arabic
  Hindi
Hindi  Vietnamese
  Indonesian
  Japanese
  Korean
2 respostas
Your blog is a treasure trove of valuable insights and thought-provoking commentary. Your dedication to your craft is evident in every word you write. Keep up the fantastic work!
Thank you so much for your incredibly kind words—they mean a lot to me! I’ll definitely keep going—stay tuned for more.