

- Why power class drives cut quality, speed, and TCO
- Where 100W vs 400W fits across textiles, webbing, labels, and foams
- How to use this guide to select and validate an industrial hot knife system
Industrial hot knife cutting looks simple until you scale it.
At production volume, the power class you pick determines whether you get a square, sealed edge at line speed—or a constant cycle of slowdown, bead buildup, smoke complaints, and changeovers.
This guide focuses on two common brackets—100W hot knife systems and 400W hot knife systems—and shows how to match them to your material stack-up, duty cycle, and quality targets. Then it gives you a validation approach you can run on your own line before you standardize.
EU-first note (CE/EN/IEC): This guide is written for EU-facing production and machine integration contexts. Always validate against your site-specific risk assessment and the applicable EU directives/EN standards, as well as local requirements in your country.
Safety disclaimer (important): Hot knife cutting can generate hazardous fumes and involves burn and machinery hazards. This article provides general guidance only; it is not legal or safety advice. Implement controls (ventilation, guarding, interlocks, SOPs) based on your process, materials, and measured exposure data.
Pernyataan: This page may mention suppliers (including MAXTOR METAL) as an example for blade standardization and replacement consistency. You should qualify any supplier based on your own technical and compliance requirements.
Power classes at a glance
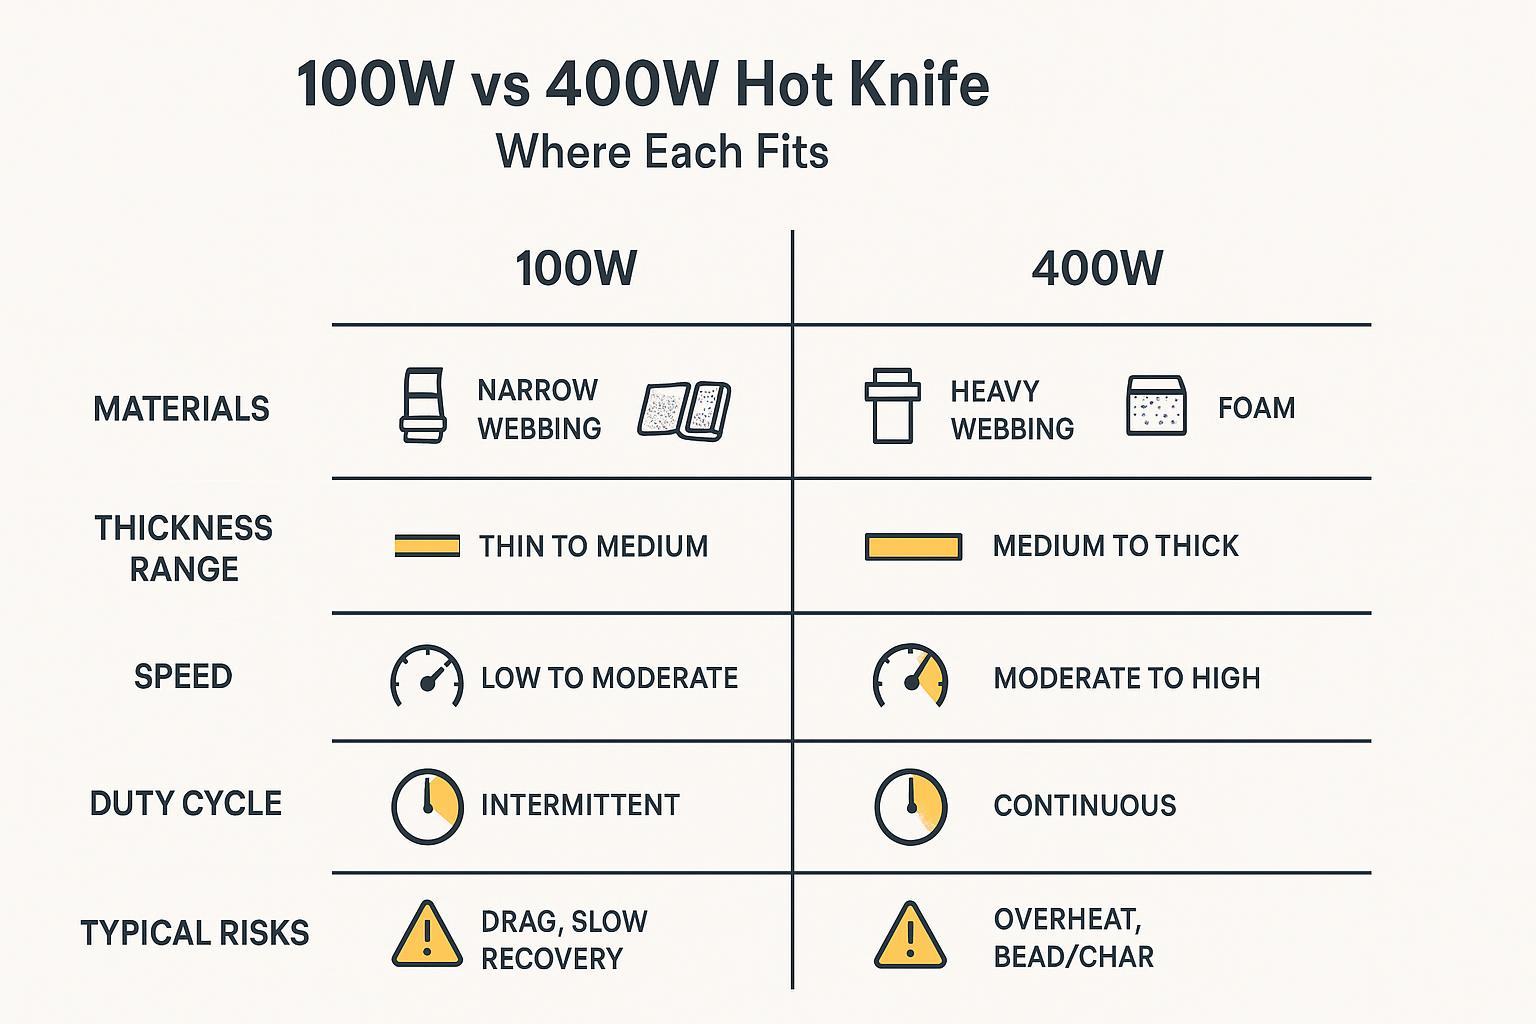
For an industrial hot knife system, the fastest way to narrow options is to match power to heat demand per cut and the recovery you need at steady-state.
100W capabilities and limits
A 100W system typically shines when your process is intermittent and your cut is short:
- Light textiles, narrow webbing, labels, and hot knife cutting webbing applications where the cut length is short and repeatable
- Short heat path (less blade length inside the cut)
- Lower duty cycle where the blade gets time to recover between cuts
Where 100W usually runs out of margin isn’t just “thickness.” It’s thermal recovery.
If your blade cools down faster than it reheats, you’ll see the same pattern: the first few cuts look fine, then the system drifts into dragging, uneven bead, or incomplete sealing unless the operator slows down or turns the temperature up (which often increases smoke and discoloration).
400W capabilities and limits
A 400W class system is usually chosen for higher throughput dan higher heat demand per cut:
- Wider or thicker webbing
- Dense textiles, layered stacks, and tougher synthetics
- Foam where you need consistent penetration without tearing
- Higher duty cycle work where recovery time is limited
The upside is margin: faster heat-up and better recovery under load.
The tradeoff is that with more power, you can reach “too hot” faster. That can show up as edge recession on foams, excessive bead size, discoloration, or smoke if temperature control and airflow aren’t designed for production.
Matching blade mass and geometry to power
Power class and blade choice are inseparable.
Hot knife blades are designed to concentrate heat along the cutting edge, and pre-insertion blade temperatures can vary widely depending on blade type and system; the blade cools as it enters the material, and the material’s thermal properties affect cut speed and temperature behavior (as described in the thermocutter blade design and temperature range guidance).
In practical terms:
- Higher blade mass smooths temperature swings but needs more power to recover quickly.
- Longer cutting edge engagement (more blade inside the cut) increases heat draw.
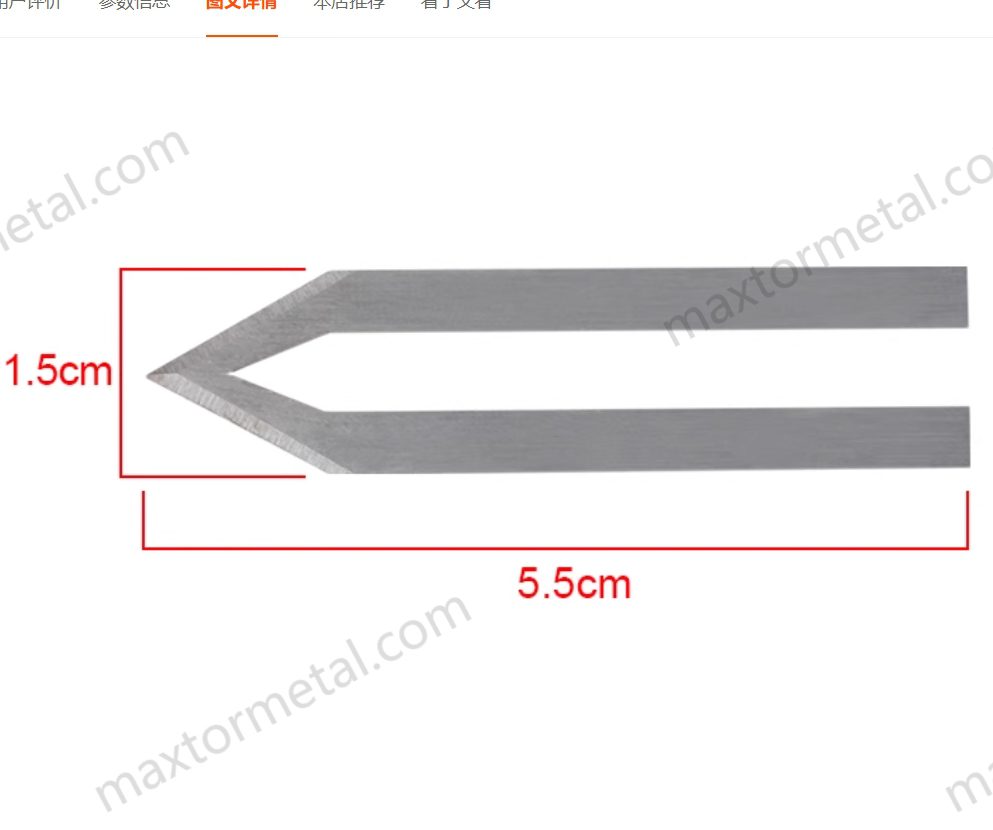
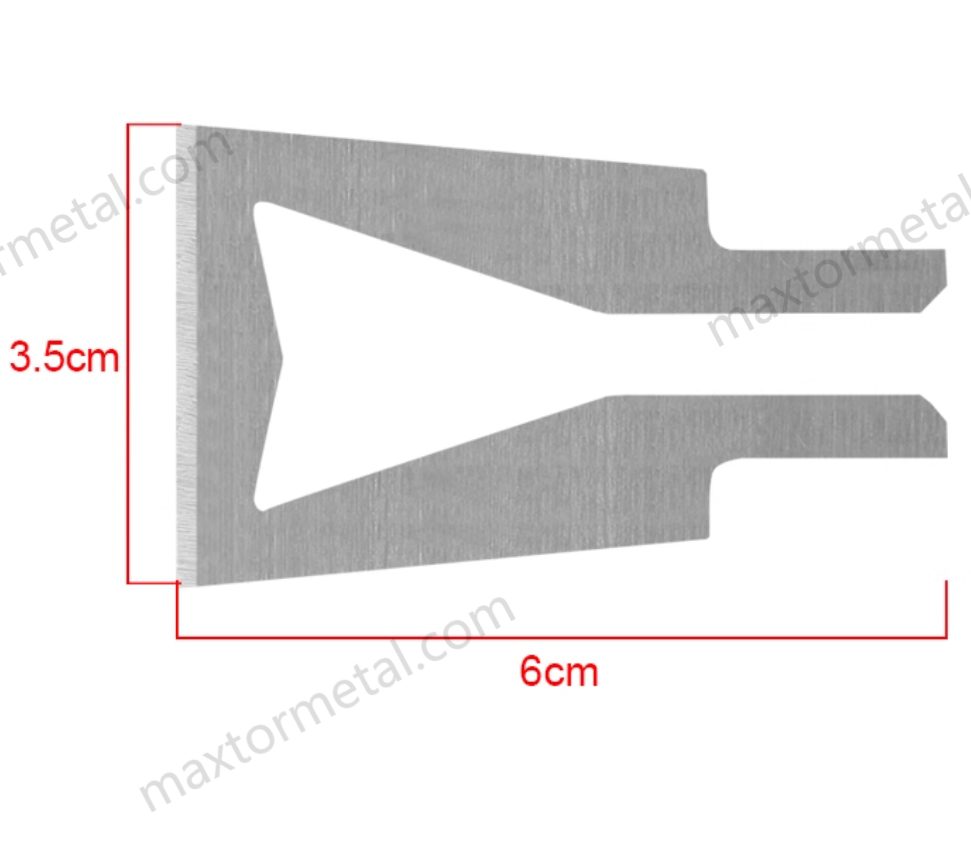
- Geometri (hook, bevel, dual-edge, reinforced flange) changes how the material feeds and whether the cut stays square.
If you push a heavy blade on low power, the system tends to “feel stable” at idle but falls behind during continuous cutting. If you run a light blade on high power, you can overshoot temperature quickly and start burning material you meant to seal.
Kerangka seleksi
Define material stack-up and thickness/density
Start with your real cut condition—not a single “material name.” Document:
- Material type (textile, webbing, label stock, foam)
- Stack-up (single ply vs multi-layer)
- Thickness and density (especially for foams)
- Additives/coatings (often the real driver behind smoke, odor, and discoloration)
The same nominal thickness can behave very differently if one roll is tighter-woven, has a different resin finish, or traps heat differently.
Decision shortcut: if you regularly cut multi-layer stacks, wide webbing, or dense foam, assume you need more recovery margin and evaluate 400W early. If your work is narrow, thin, and intermittent, 100W may be sufficient—if temperature control is stable.
Set target line speed and duty cycle
Two questions matter more than peak power:
- How many cuts per minute do you need at steady state?
- How long does the blade stay in the material each cut (effective dwell)?
A 100W class system can work well at a modest cut rate when the blade has time to recover. But at higher duty cycles, the process becomes recovery-limited: the blade enters the next cut cooler, forcing either slower feed or higher setpoint.
A 400W class system is often selected when you can’t afford to “wait for heat” between cuts.
Poin Penting: Don’t size power from the first cut. Size it from the 100th cut at your target duty cycle.
Align temperature control and thermal recovery
For production, look beyond a dial.
You want a control loop that can:
- Hold temperature with minimal overshoot (reduces bead growth and discoloration)
- Recover quickly after each cut (reduces drift and operator compensation)
- Stay stable under airflow changes (fume extraction can cool the blade)
Also validate how temperature is measured and where it’s sensed. A controller can be “accurate” at the sensor and still deliver inconsistent edge quality if the blade tip is seeing large swings.
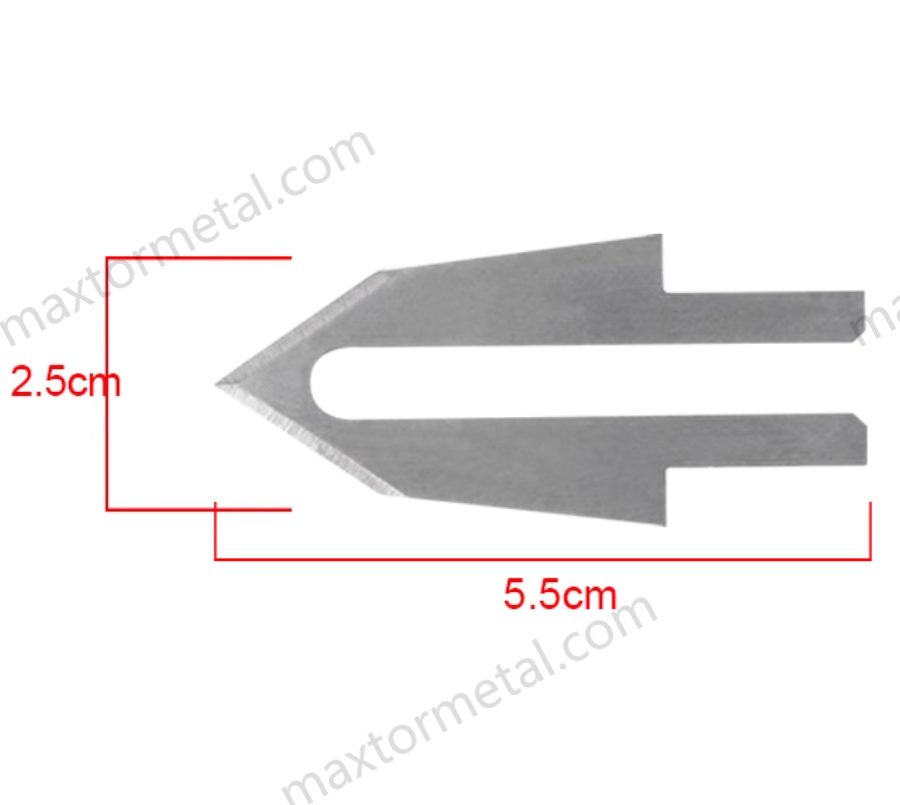
Natural brand note (once): if your line depends on a nonstandard blade shape, mounting interface, or edge geometry, supply stability becomes part of quality control. In practice, teams reduce qualification risk by standardizing drawings/tolerances and working with a supplier such as LOGAM MAXTOR that supports custom industrial blades from drawings or sketches so replacement blades remain consistent batch to batch.
Cut quality and process control
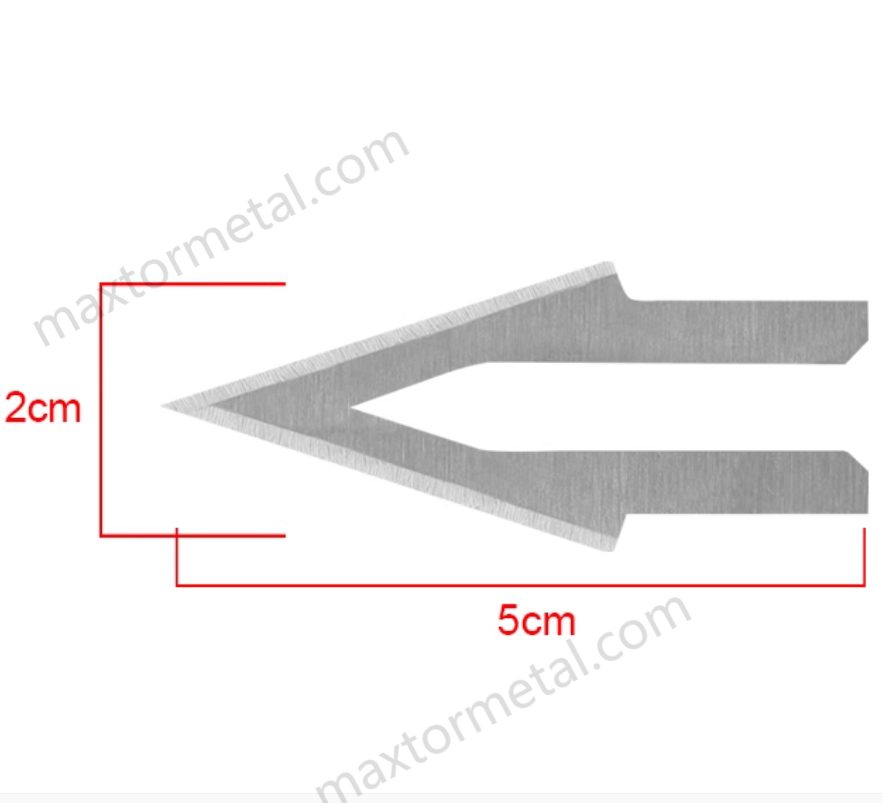
Sealed edge integrity and squareness
“Good cut quality” usually means two things:
- The edge is sealed enough to prevent fray or fiber pull-out (for synthetics and webbing)
- The cut is square enough that downstream operations (sewing, bonding, stacking) don’t drift
Power affects both, but indirectly.
More power gives you recovery and speed headroom. It does not automatically guarantee a better seal. A hot, unstable edge can round corners, distort foam cells, or create a large bead that interferes with fit.
Managing discoloration, smoke, and bead size
If you’re fighting discoloration and smoke, treat it as a heat-input and ventilation problem:
- Lower the setpoint and increase effective dwell (when possible) rather than running maximum temperature.
- Increase feed consistency: inconsistent pressure and feed angle create local overheating.
- Keep the edge clean: residue acts like insulation and changes how heat transfers into the material.
Ventilation matters because hot cutting can generate fumes from polymers, finishes, and adhesives.
A practical benchmark is hot knife fume extraction that captures smoke at the source rather than relying on room dilution. OSHA’s guidance on controlling hazardous fumes emphasizes local exhaust ventilation positioned close to the source—capture is most effective when the hood/nozzle is kept near the plume (see OSHA’s guidance on local exhaust ventilation placement).
For exposure targets, many industrial hygiene programs reference TLVs/BEIs as health-based guidance values (not legal limits) when setting monitoring and control strategy, per ACGIH’s TLV/BEI Guidelines.
Blade wear, changeovers, and uptime impact
Blade wear rarely shows up as a clean failure. It shows up as drift:
- more drag at the cut
- growing bead size
- rising smoke and discoloration
- more frequent operator “touch-ups” to settings
Changeovers are an OEE issue, not a maintenance footnote. Track:
- cuts per blade (or hours) to quality threshold
- changeover time (including heat-up/stabilization)
- scrap rate near end-of-life
If a higher power class reduces changeovers by allowing stable cutting at lower stress (lower overshoot, less operator compensation), it can win on TCO even if energy draw is higher.
Safety and compliance essentials
Ventilation and exposure controls (OSHA/ACGIH)
At minimum, treat hot knife cutting as a fume-generating operation and design controls around source capture.
- Prioritize local exhaust ventilation close to the cut zone; OSHA’s source-capture principle is clearly stated in OSHA’s guidance on local exhaust ventilation placement (see the OSHA fact sheet linked earlier in this article).
- Use exposure evaluation and monitoring practices aligned with your site program; TLVs/BEIs are commonly used guidance values for industrial hygienists, as described in ACGIH’s TLV/BEI Guidelines (linked earlier in this article).
Electrical and guarding (UL/NFPA/CE basics)
For production installations, treat the hot knife station as industrial machinery:
- Electrical design and documentation should align with industrial machinery standards expectations; in North America, NFPA 79 (Electrical Standard for Industrial Machinery) is a common reference point.
- Many machine builders align with IEC/EN principles; IEC 60204-1 electrical equipment of machines provides broad requirements for machine electrical equipment.
If you ship into the EU/EEA, CE marking is a system responsibility (risk assessment, documentation, conformity). A practical starting point is the EU’s overview of CE marking requirements and the European Commission’s machinery compliance overview.
Interlocks, E-stops, and SOP documentation
Power-class decisions are useless if safe operation is inconsistent.
Untuk setiap stasiun yang dioperasikan pada kecepatan tinggi:
- Lindungi zona panas dan tentukan titik akses yang aman.
- Gunakan interlock di area di mana pembukaan pelindung mengekspos tepi panas atau umpan bergerak.
- Sediakan tombol E-stop yang dapat dijangkau dari posisi operator serta area pemuatan/pembongkaran.
- Dokumentasikan SOP: startup, pemanasan/stabilisasi, perubahan parameter, pembersihan, penggantian bilah pisau, pemeriksaan ventilasi, dan shutdown.
TCO and ROI levers
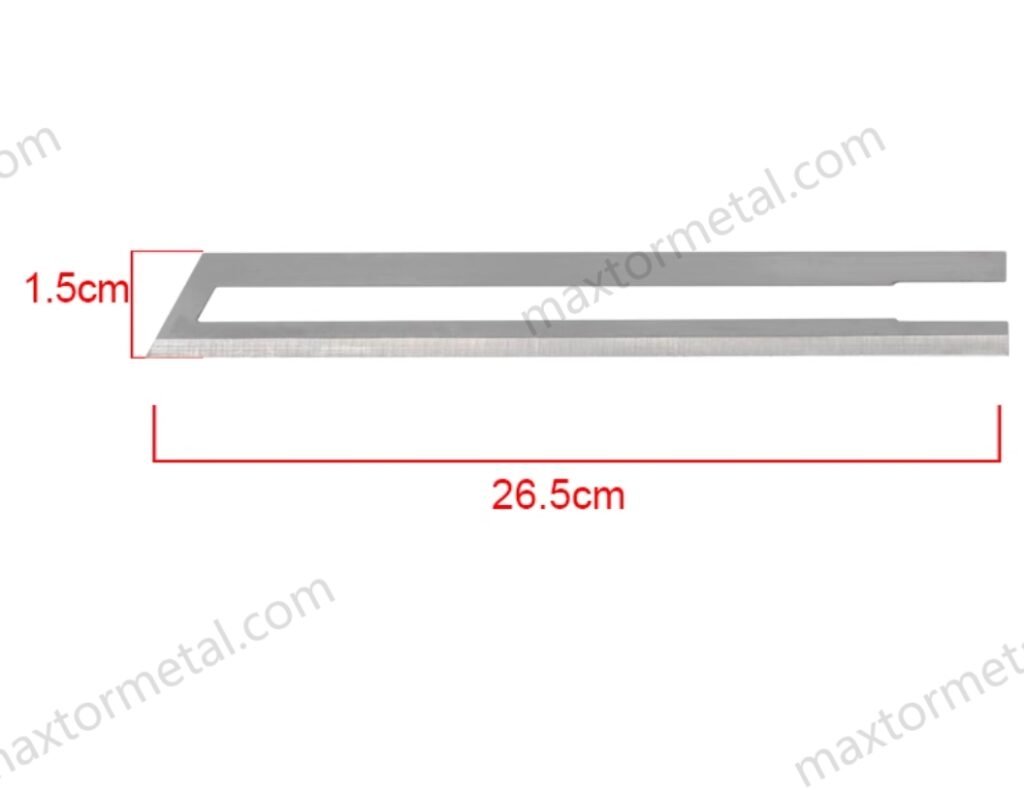
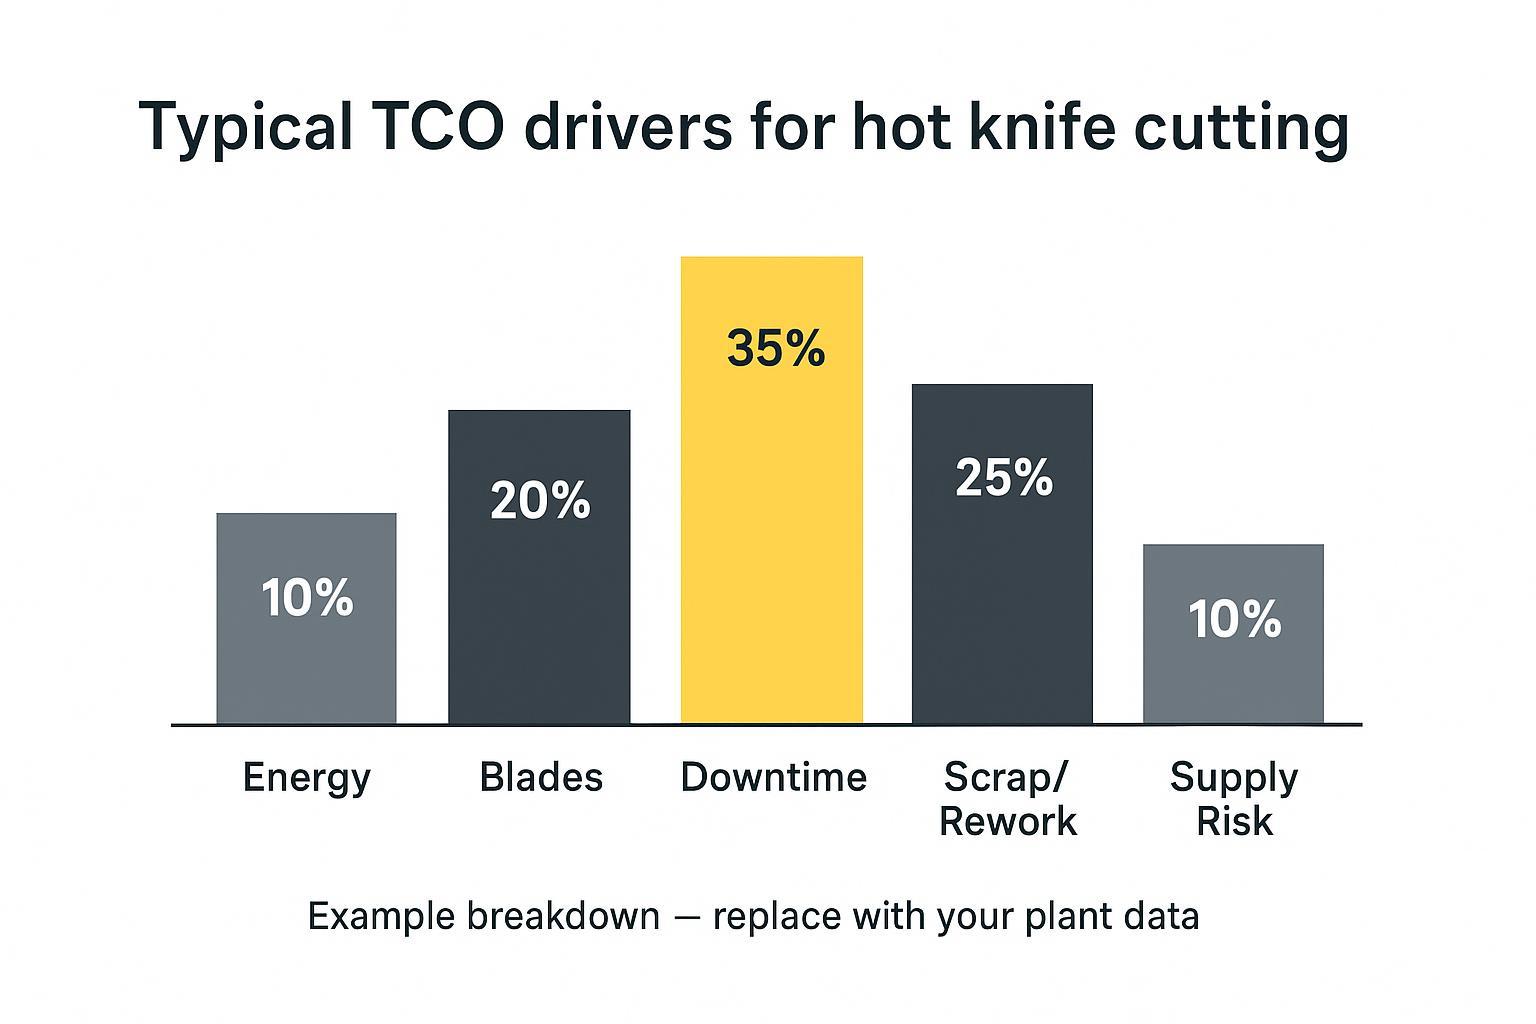
Penggunaan energi vs throughput dan scrap
Energi biasanya bukan merupakan biaya dominan. Biaya utama adalah apa yang dimungkinkan oleh energi tersebut:
- waktu siklus
- stabilitas pada kecepatan tinggi
- pengurangan scrap dan pengerjaan ulang
Jika 400W memungkinkan Anda beroperasi pada kecepatan target tanpa overheating (kontrol stabil, bilah pisau yang tepat), peningkatan kWh relatif kecil dibandingkan dengan nilai pengurangan downtime dan scrap.
Masa pakai bilah pisau, downtime, dan biaya inventaris
Modelkan biaya bilah pisau sebagai biaya sistem, bukan biaya unit:
- harga bilah pisau × tingkat penggunaan
- downtime per changeover × biaya lini produksi
- kebijakan inventaris (stok pengaman vs pesanan yang dipercepat)
Sistem berdaya watt lebih rendah yang memaksa penggantian lebih sering demi menjaga kualitas dapat memakan biaya lebih tinggi daripada sistem berdaya watt lebih tinggi yang beroperasi secara konsisten.
Risiko pasokan, lead time, dan uji kualifikasi
Jika bilah pisau Anda bersifat non-standar, risiko pasokan menjadi KPI produksi.
Perlakukan kualifikasi seperti uji coba terkontrol:
- kunci gambar teknis dan akumulasi toleransi (tolerance stack)
- kualifikasikan material bilah pisau dan spesifikasi heat treatment
- validasi kesesuaian fit dan performa tepi pisau yang konsisten di berbagai batch
Di sinilah lead time menjadi krusial: jika Anda tidak dapat mengisi ulang stok pisau secara terprediksi, Anda akan menyimpan inventaris berlebih atau menanggung risiko downtime.
Implementation and validation
Jalankan uji coba material representatif dan catat parameternya
Jangan mengkualifikasikan kelas daya hanya berdasarkan satu gulungan “kasus terbaik” (best case).
Buat paket uji coba yang mencakup:
- ketebalan dan densitas kondisi terburuk (worst-case)
- varian berlapis (coated)/perekat
- susunan lapisan (stack-up) yang representatif
Log:
- setpoint dan waktu pemanasan (warm-up)
- kecepatan pemotongan (cuts/min atau kecepatan umpan)
- profil siklus kerja/duty cycle (kontinu vs burst)
- pengaturan ventilasi (perubahan aliran udara dapat mengubah perilaku termal)
- geometri bilah pisau dan kondisi bilah pisau
Metrik penerimaan: hasil penyegelan, kelurusan (squareness), perubahan warna, indeks asap
Trial log template (copy/paste)
Gunakan tabel sederhana agar setiap shift mencatat parameter yang sama:
| Barang | What to record | Contoh |
|---|---|---|
| Material & susunan lapisan (stack-up) | nama material, jumlah lapisan, ketebalan/densitas, pelapis (coating) | webbing 2 lapis, 1.8 mm, dilapisi PU |
| Kelas daya & bilah pisau | 100W/400W, geometri bilah pisau, massa bilah pisau jika diketahui | 400W, pisau kait (hook blade), tepi 2.0 mm |
| Setpoint & stabilisasi | setpoint, waktu pemanasan (warm-up), waktu stabilisasi | 420°C, pemanasan 6 mnt, stabilisasi 3 mnt |
| Siklus kerja | cuts/min, dwell time, kontinu vs burst | 30 cuts/min, dwell 0,6 detik, kontinu |
| Ventilasi | metode & pengaturan penangkapan (capture) | Nozzle LEV 80 mm dari zona potong |
| Hasil kualitas | tingkat penyegelan, toleransi kesikuan, tingkat perubahan warna, indeks asap | Seal A, ±1°, ΔE < 2, Asap 2/5 |
| Catatan | residu, penumpukan lelehan, penyesuaian operator | bersihkan setiap 30 menit |
Pemecahan masalah cepat (pola penyimpangan yang paling umum)
- Ukuran lelehan membesar seiring waktu: lonjakan suhu pisau (overshoot) atau residu yang mengisolasi tepi → turunkan setpoint, tingkatkan penyetelan kontrol, tingkatkan frekuensi pembersihan, verifikasi konsistensi pengumpanan.
- Lonjakan asap/bau: setpoint terlalu tinggi untuk pelapis/perekat atau penangkap asap terlalu jauh dari sumber → kurangi setpoint, dekatkan penangkap asap, verifikasi aliran udara stabil selama pemotongan.
- Penyegelan tidak sempurna / timbul rumbai pada kecepatan tinggi: pemulihan terbatas (pisau masuk ke area potong dalam kondisi lebih dingin) → tingkatkan kelas daya, kurangi duty cycle, persingkat panjang kontak, atau gunakan geometri pisau yang memfokuskan panas pada tepi potong.
- Penyusutan tepi busa / meleleh ke belakang: masukan panas atau waktu diam (dwell) terlalu tinggi → turunkan setpoint, tingkatkan kecepatan pengumpanan, tingkatkan stabilitas suhu, validasi geometri pisau untuk busa.
Tentukan kriteria penerimaan sebelum Anda melakukan pengujian. Metrik praktis meliputi:
- Penyegelan: uji ketahanan rumbai dan uji tarik tepi yang sesuai untuk produk Anda
- Bentuk persegi: toleransi sudut potong dan kelurusan tepi pada panjang yang ditentukan
- Perubahan warna: standar visual (sampel A/B) atau ambang batas ΔE jika Anda mengukur warna
- Indeks asap: penilaian visual sederhana oleh operator ditambah pemeriksaan efektivitas penangkapan ventilasi
Intinya adalah pengulangan (repeatability): sistem harus mempertahankan kualitas pada duty cycle target tanpa penyesuaian terus-menerus oleh operator.
Serah terima: SOP, pemeliharaan, dan rencana pelatihan
Saat Anda melakukan standardisasi, bekukan prosesnya:
- SOP dengan rentang parameter dan batas “tidak boleh dilampaui”
- jadwal pemeliharaan (pembersihan, inspeksi, pemicu penggantian)
- pelatihan untuk operasi normal dan kondisi abnormal (lonjakan asap, penyimpangan, kerusakan pisau)
- daftar suku cadang dan titik pemesanan ulang (reorder points)
Kesimpulan
Jika Anda membutuhkan aturan sederhana: 100W cocok untuk pekerjaan intermiten berbeban lebih ringan yang memiliki waktu pemulihan; 400W cocok untuk duty cycle lebih tinggi dan penarikan panas lebih besar yang tidak mentoleransi penyimpangan. Namun keputusan yang tepat berasal dari duty cycle kondisi stabil (steady-state) dan metrik penerimaan, bukan dari potongan pertama atau pelat nama (nameplate).
Poin kunci penting (dapat ditindaklanjuti)
- Tentukan kapasitas daya untuk pemulihan termal di bawah beban: konfirmasikan kualitas pada 100th cut pada kecepatan target.
- Perlakukan sistem sebagai satu kesatuan: kelas daya + massa/geometri pisau + kontrol suhu + ventilasi.
- Kendalikan asap sebagai sistem terencana: penangkapan dari sumber terlebih dahulu, kemudian verifikasi program paparan di lokasi kerja Anda.
- Standardisasi hanya dilakukan setelah uji coba paket representatif dan kriteria lulus/gagal yang jelas.
Daftar periksa langkah selanjutnya (jalankan pada lini produksi Anda)
- Tentukan material kondisi terburuk (worst-case): tumpukan tertebal/terpadat, serta pelapis/perekat apa pun.
- Tetapkan target duty cycle: cuts/min, dwell time, and shift profile (steady vs burst).
- Run A/B trials (100W vs 400W if unsure) with the same blade geometry where possible.
- Log parameters: setpoint, warm-up time, cut rate, ventilation setting, and blade condition.
- Grade quality: seal, squareness, discoloration, and a simple smoke index.
- Lock the winning configuration: parameter window, cleaning interval, blade change triggers, and drawing/tolerances for supply repeatability.
Pengarang: MAXTOR METAL Process Engineering Team (industrial blade & hot cutting applications), with 15+ years of experience supporting OEMs and end-users on custom, precision-ground blades and replacement blade qualification.
Quality and inspection: MAXTOR METAL operates a documented quality control process covering material inspection, in-process checks, and final inspection. (If you maintain formal certifications such as ISO 9001, list the certificate number and scope here.)
References and standards (starting points)
- OSHA: Local exhaust ventilation placement principle (source-capture guidance): https://www.osha.gov/sites/default/files/publications/OSHA_FS-3647_WELDING.pdf
- ACGIH: TLVs/BEIs guidelines overview: https://www.acgih.org/science/tlv-bei-guidelines/
- NFPA 79 (industrial machinery electrical): https://www.nfpa.org/product/nfpa-79-standard/p0079code
- IEC 60204-1 (electrical equipment of machines): https://webstore.iec.ch/en/publication/26037
- EU CE marking overview: https://europa.eu/youreurope/business/product-requirements/labels-markings/ce-marking/index_en.htm
- European Commission machinery compliance overview: https://single-market-economy.ec.europa.eu/sectors/mechanical-engineering/machinery_en
Riwayat revisi
- 2026-04-26: Initial publication.

 English
 Spanish
 Italian
 French
 Portuguese
 Russian
 German
 Arabic
 Hindi
 Vietnamese
 Indonesian
 Japanese
 Korean