

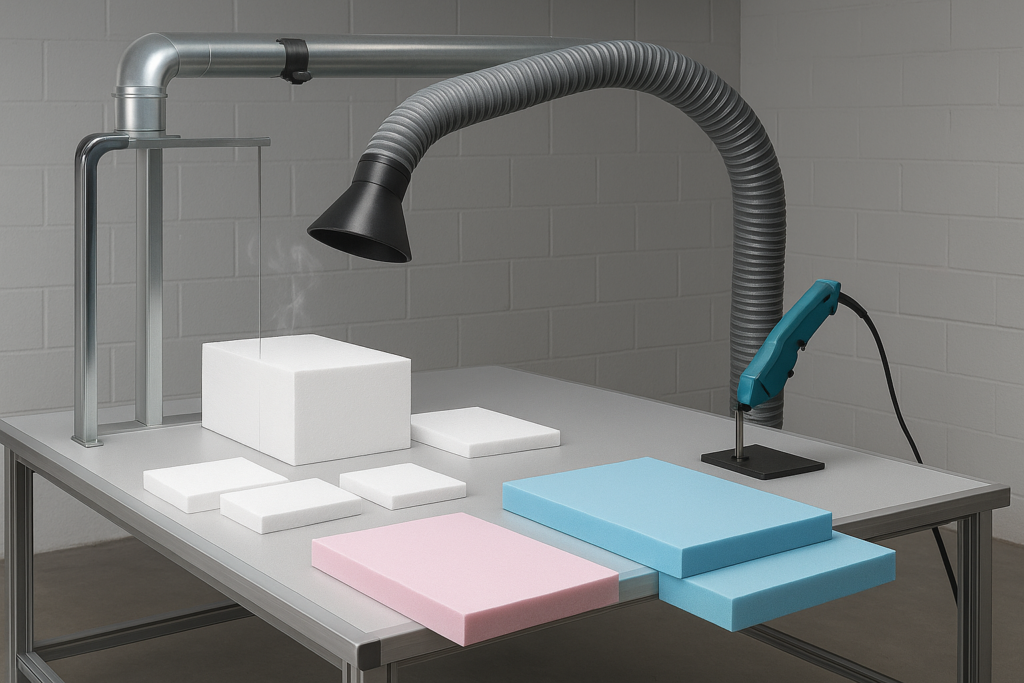
Scope & safety note: This guide focuses on handheld hot knives/thermocutter blades used on EPS and XPS. Treat it as practical process guidance—not a substitute for your facility’s EHS program. Always follow your material SDS, local regulations, and equipment manufacturer instructions, and validate ventilation and PPE with your safety team.
Clean, low-smoke cutting isn’t just a “nice-to-have” for EPS and XPS. It directly affects yield (less scrap and rework), OEE (fewer stoppages to clean buildup or swap consumables), and compliance risk (fewer nuisance odors and visible emissions reaching the shop).
Thermocutter blades (hot knives) and hot wires solve a different problem than cold cutting. Instead of tearing cells or throwing dust, they melt through the foam at a controlled rate—so the edge can stay smooth, square, and repeatable when parameters are set correctly.
This guide is organized to get you from “rough cuts and smoke” to a stable, documented process. It walks through parameter windows, selection of blades/wires and fixtures, ventilation and electrical safety, and a QC loop that keeps the cut quality stable across shifts.
- Why clean, low-smoke EPS/XPS cutting improves yield, OEE, and compliance
- What thermocutter blades and hot wires do differently from cold cutting
- How this guide is organized for quick setup, safety, and QC
Process parameters
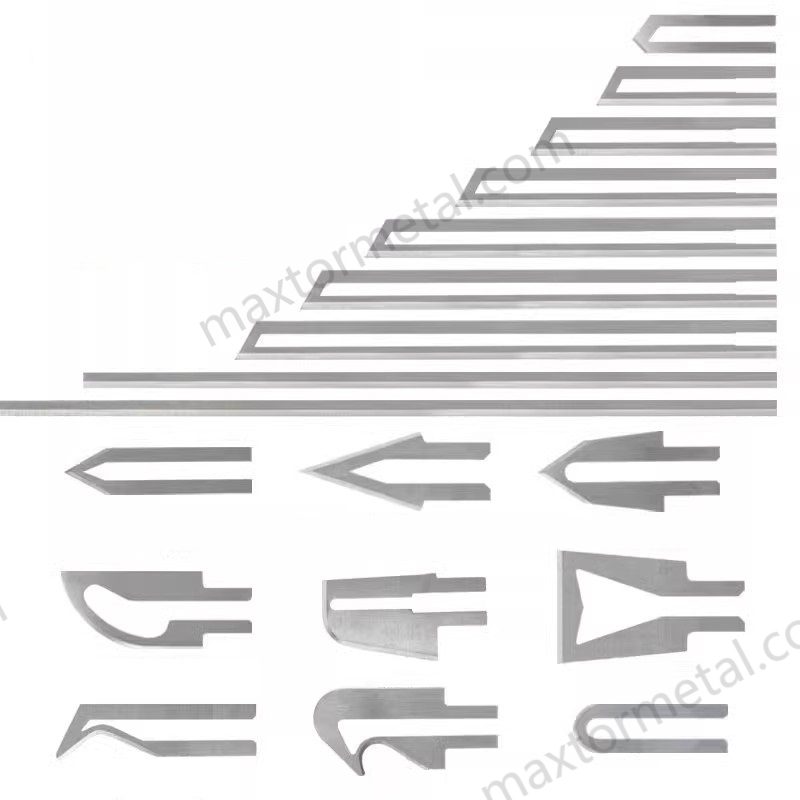
This is where low smoke foam cutting is won or lost: the same blade or wire can run clean on EPS and struggle on XPS if heat and feed aren’t matched.
Temperature windows for EPS vs XPS
A clean edge with low smoke usually comes from the same principle: run the lowest heat that still produces a continuous melt at your chosen feed.
- EPS generally cuts cleanly at lower heat because it’s more porous and lower density.
- XPS is typically denser and may need slightly more heat—or a slower feed—to avoid dragging and edge chatter.
If the wire/blade is too hot, you’ll see a wider kerf, glossy “over-melt” edges, and a noticeable increase in smoke/odor. If it’s too cool, the tool drags, the cut becomes wavy, and dimensional control suffers.
Suggerimento professionale: Tune heat by looking at the edge, not the dial. Your target is a smooth edge with minimal residue and no visible charring—then lock that setpoint and treat feed rate as the fine adjustment.
Starting settings quick table for handheld hot knives
Because handheld hot knives vary widely (cartridge wattage, blade size, controller type), the most transferable way to start is with controller output (%) plus a measured electrical value (A/V) e un repeatable feed speed. Use these as starting points and then tune with the test routine below.
How to record your electrical value (simple): note the rated supply voltage on the tool (e.g., 110 V or 230 V) and measure the stable current draw (A) during a steady straight cut using a clamp meter.
| Schiuma | Spessore | Heat start point (controller output) | Electrical reference | Feed start point | What “too hot” looks like | What “too cool” looks like |
|---|---|---|---|---|---|---|
| EPS | Thin to medium | 30–45% | Record supply V + stable A while cutting | 15–30 mm/s | Glossy over-melt edge, widening kerf, more odor/smoke | Dragging, wavy edge, tearing |
| EPS | Thick | 40–60% | Record supply V + stable A while cutting | 8–20 mm/s | Over-melt lip, edge rounding | Stalling, high force needed |
| XPS | Thin to medium | 40–65% | Record supply V + stable A while cutting | 10–25 mm/s | Kerf gets wide quickly, strong odor | Chatter, surface roughness |
| XPS | Thick | 55–80% | Record supply V + stable A while cutting | 5–15 mm/s | Heavy fumes, edge collapse | Blade sticks, line wander |
Appunti:
- Treat blade size as a hidden variable: wider/thicker blades usually need more power for the same feed.
- If you must slow down to maintain squareness, reduce heat first, then adjust feed—this tends to reduce smoke.
- For production, lock settings by recording: foam type + thickness + blade profile + controller % + supply V + cutting A + measured feed speed.
Feed, tension, and kerf control
Three variables interact in a tight loop:
- Heat (temperature/power) drives melt rate.
- Feed determines how long the foam is exposed to heat at the cut line.
- Tension (for hot wire) controls straightness and kerf stability over long spans.
Practical consequences you can measure:
- Kerf width grows when heat is high and feed is slow. It also grows when wire tension is low and the wire bows.
- Smoke increases when heat is higher than required for the feed rate.
- Edge waviness increases when feed is inconsistent or the wire/blade deflects.
Don’t chase one variable in isolation. If you speed up feed without adding heat, the cut will roughen. If you add heat without speeding up feed, smoke and kerf will increase.
Setup tests and incremental tuning
Use a repeatable tuning routine on scrap before you run production parts:
- Baseline setup: set wire/blade heat to a conservative (low) starting point; set a steady feed you can repeat.
- First test cut (short, straight): cut 100–200 mm and inspect.
- Adjust one variable only:
- Rough edge / dragging → add a small heat increment.
- Glossy over-melt / widening kerf / more smoke → reduce heat or increase feed slightly.
- Run a longer cut: confirm the wire stays straight (tension) and the kerf doesn’t drift across the span.
- Lock the settings: record the final values as the first revision of your parameter sheet.
For general technique (steady feed, avoid forcing the cut), see Epsole’s guide to cutting foam with hot wire.
Blade and wire selection
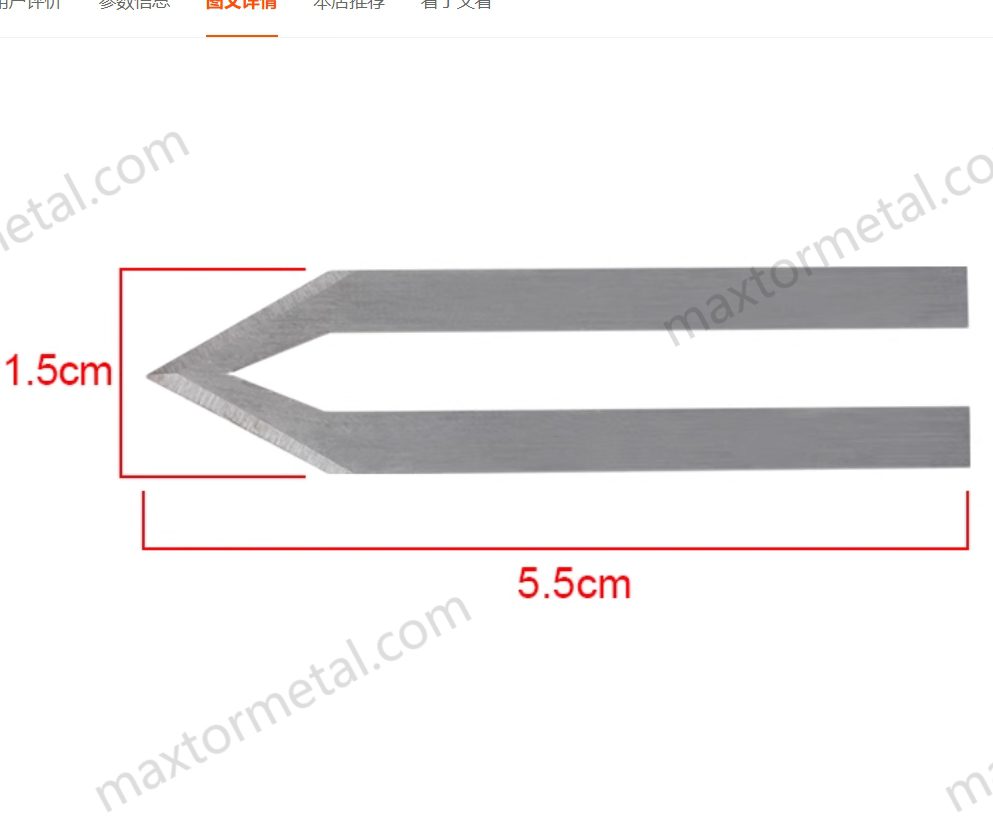
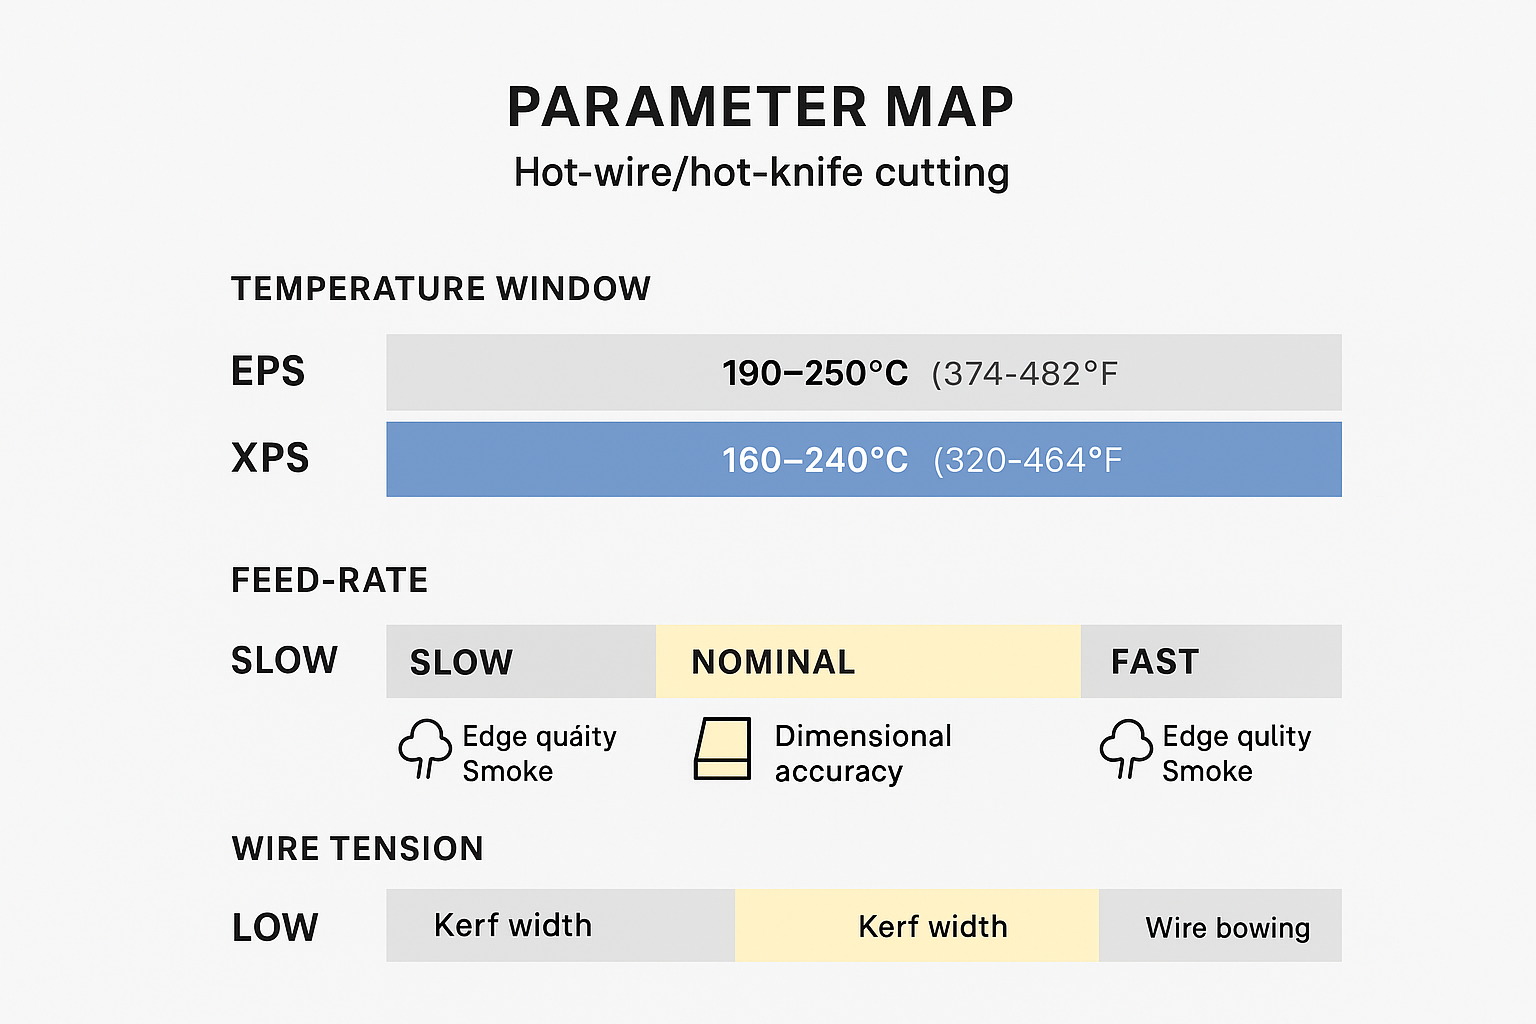
When you’re choosing foam cutter blades for EPS XPS work, selection is really about three things: geometry for the cut path, heat stability at your operating window, and a mounting/fixture setup that doesn’t introduce deflection.
Choosing foam cutter blades and coatings
Hot-knife performance comes from geometry, surface finish, and heat-resistant material stability at operating temperature.
You’ll also see some factories call these thermocutter blades—the key difference is that you’re controlling melt behavior, not “shearing” the foam.
When you specify a blade for EPS/XPS, focus on what you can verify:
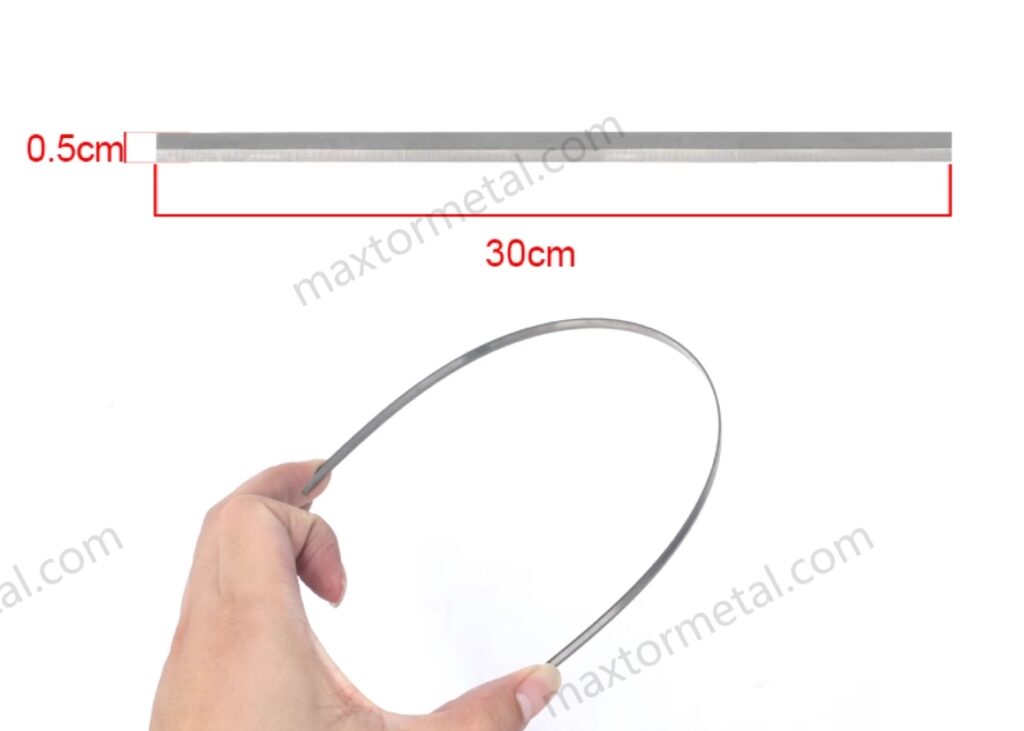
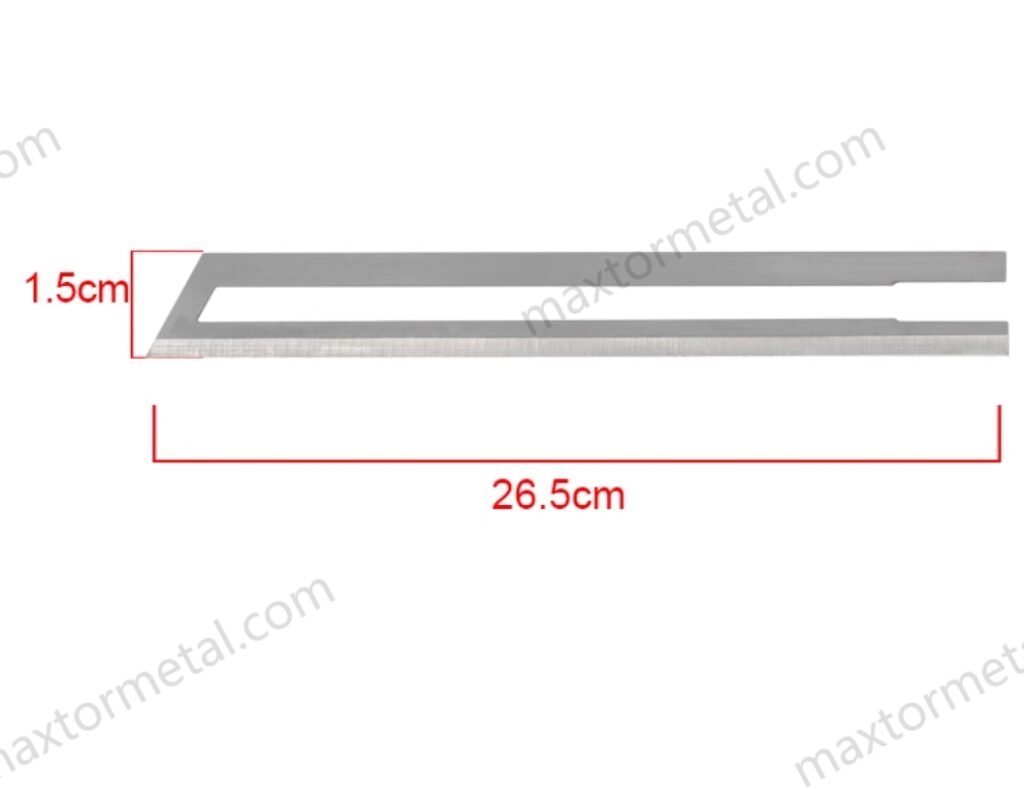
- Profile and edge geometry: straight, beveled, pointed, hooked, or specialty shapes to match the cut path and access.
- Thickness and stiffness: enough stiffness to resist deflection without overloading the heater.
- Surface condition: smoother surfaces reduce drag and can reduce residue transfer.
If your equipment uses non-standard mounts or profiles, it’s often faster to work from a drawing, sketch, or a physical sample than to force-fit a catalog blade. MAXTOR METAL supports OEM/ODM fitment for thermocutter tooling; their MAXTOR METAL electric hot knife blades page is a good starting point for blade profile options, and their lame industriali personalizzate workflow is the right route when you need an exact match to your heater block, slot, or clamp.
Wire gauge, length, and power matching
Hot wire cutting is sensitive to electrical matching because the wire is both the cutter and the heating element.
Selection rules that hold up on the shop floor:
- Wire diameter (gauge) sets a big part of the power requirement. Thicker wire can be more durable but needs more power to reach the same cutting performance.
- Wire length changes resistance and heat distribution. Longer spans need proper tensioning to prevent bowing.
- Power supply headroom matters. Running at the edge of the supply’s capacity makes your process unstable when ambient temperature, foam density, or airflow changes.
For long spans and tight tolerances, treat tensioning as a controlled component (spring tensioner or defined tension method), not “hand-tight.” If the wire bows, you’ll see drift from the intended line and inconsistent kerf.
Guides, fixtures, and path planning
Cut quality often fails because the tool is “right” but the part isn’t controlled.
A practical fixture mindset:
- Use a straightedge or fence for long straight cuts.
- Support both sides of the kerf when cutting thin sections to prevent drop and drag.
- Plan entry/exit points so the tool doesn’t dwell at corners (dwell = smoke + over-melt).
- For templates, keep contact pressure consistent and avoid “steering” the wire with sideways force.
When you’re chasing stable dimensions, a good fixture will usually outperform another round of temperature tweaking.
For non-standard blade/wire materials and OEM/ODM fitment, make the request “data-backed” by defining the documents you will accept as evidence in your RFQ and incoming inspection.
For non-standard blade or wire materials, the clean way to keep this data-backed is to specify what documents you need with the quote:
- Material grade and heat treatment condition (where applicable)
- Hardness test report and inspection points
- Dimensional drawing with tolerances (critical-to-fit surfaces called out)
- Surface finish requirement on contact faces where drag matters
MAXTOR METAL’s materials and durability story is strongest when it’s tied to process documentation and heat treatment control; their blade heat treatment process overview is a useful reference when you’re aligning on what inspection and traceability should look like.
Safety and ventilation
Hot-wire cutting EPS XPS is often chosen specifically to reduce dust versus sawing or sanding. That doesn’t mean it’s “no-risk”: fumes and heat still need controls.
Emissions, limits, and PPE basics
Hot cutting EPS/XPS can generate irritating fumes, especially when heat is higher than needed or ventilation is weak. Your first control should be engineering controls (capture at source), with PPE as backup.
A credible baseline SOP is the Harvard GSD FabLab guidance for EPS/XPS hot-wire cutting. Their Hot Wire Foam Cutting EPS and XPS SOP calls out:
- safety glasses
- optional heat-resistant gloves
- respirator (organic vapor + particulate pre-filter) when engineering controls are insufficient or discomfort occurs
Treat local policy, material SDS, and your facility EHS requirements as the authority for limits and monitoring.
For broader ventilation guidance beyond this SOP, OSHA’s Ventilation overview and the OSHA Technical Manual Local exhaust ventilation guidance are solid starting points. For industrial ventilation design methods, ACGIH’s Industrial Ventilation resources are widely referenced by EHS and industrial hygiene teams.
Local exhaust and airflow verification
Local exhaust ventilation (LEV) works when it captures fumes at the cut line, not after they spread.
Use two checks you can run without special instruments:
- Position check: place the capture hood/snorkel close to the source (the Harvard SOP specifies within about 6 inches of the wire) and pull away from the operator.
- Capture check: use a small, safe visual tracer (for example, a light strip of tissue held near—not on—the capture zone) to confirm airflow direction into the hood.
If you want a more repeatable check (recommended for multi-shift consistency), add one of these low-cost verification methods:
- Handheld anemometer check: record air velocity at the hood opening and at a consistent point near the cutting line (same distance each time). You’re looking for stable capture behavior, not a single “magic number.”
- Smoke pencil / fog source check: introduce a small, safe tracer near the cut line and confirm it moves into the hood without crossing the operator breathing zone.
Record fields (copy/paste into your parameter sheet): hood type, hood distance to cut line, hood orientation, fan setting, make-up air (doors open/closed), observed capture result (pass/fail), and any operator comfort notes.
If smoke is visible in the room air before it’s captured, treat that as a process failure: reduce heat, increase capture effectiveness, or both.
Electrical, heat, and fire safeguards
Hot cutters are simple machines with unforgiving failure modes.
Minimum safeguards that prevent avoidable incidents:
- Lock out power before adjustments (wire changes, blade swaps, heater servicing).
- Inspect wiring and connectors routinely; heat cycling loosens hardware.
- Keep flammables away from the cutting zone and do not allow the tool to dwell in one spot.
- Use the minimum effective heat—this reduces smoke and reduces ignition risk.
⚠️ Attenzione: If you see charring, black smoke, or sustained glowing at the cutting element, stop and reset the process. That’s not “normal smoke”—it’s an out-of-control heat setting.
Repeatability and QC
Parameter sheets and first-article checks
If you want stable output, treat parameters as a controlled recipe.
A simple parameter sheet should include:
- foam type (EPS/XPS), density if known, thickness
- tool type (wire or blade), wire diameter/length or blade profile
- heat setting (setpoint or controller output)
- feed method and target feed speed
- LEV setup (hood type and placement reference)
For first-article checks, measure what your customers actually reject:
- cut squareness
- width/length to print
- edge surface condition (no tears, no over-melt lip)
- kerf consistency over the full cut length
A simple first-article + in-process check template (adapt tolerances to your drawing/customer spec):
| Check item | Metodo | Frequenza | Record | Corrective action |
|---|---|---|---|---|
| Width/length | Tape/caliper vs drawing | First article + every 1–2 hours | Part ID, values, pass/fail | Adjust fixture stops; re-check feed stability |
| Squareness | Square + feeler gauge (or angle gauge) | First article + after tool change | Pass/fail + note | Improve support/guide; reduce dwell at corners |
| Edge quality | Visual standard (photos) | Every batch / shift start | Grade 1–5 + notes | Reduce heat first; clean blade; verify ventilation capture |
| Kerf consistency | Measure kerf at start/mid/end | First article | mm values | Increase feed or reduce heat; check blade contamination |
| Smoke/odor | Operator observation + LEV capture check | Shift start + after LEV move | Pass/fail + notes | Reposition hood; verify airflow direction; reduce heat |
Tip: create a one-page photo standard for “acceptable edge” vs “over-melt” vs “tearing” so inspectors and operators grade the same way.
Preventive maintenance and calibration
Process drift usually comes from predictable causes:
- wire stretch or tensioner wear
- residue buildup on blades, guides, or fences
- heater cartridges aging (for hot knives)
- loose clamps changing contact pressure
Keep PM practical:
- define a cleaning interval based on run hours
- define a wire/blade change trigger (edge quality drop, increased smoke at same settings, dimensional drift)
- verify fixtures and fences for straightness on a scheduled cadence
Troubleshooting common defects
Focus on symptoms you can see—and fix with one controlled change.
- Wavy cut / dimensional drift: increase wire tension or improve part support; verify feed steadiness.
- Rough edge / tearing: add small heat increment or reduce feed slightly; check for tool contamination.
- Glossy over-melt edge / wide kerf: reduce heat or increase feed; avoid dwell at corners.
- Smoke spike: treat as overheating or capture failure—reduce heat first, then verify LEV capture.
If you’re documenting defects for corrective action, EPSPlant’s practical discussion of mask and ventilation for cutting polystyrene foam is a useful reminder: operator comfort complaints usually correlate with overheating and weak capture, not “mystery foam problems.”
Conclusione
If you want clean edges with low smoke on EPS/XPS, the fastest path is to turn your “feel-based” setup into a repeatable recipe.
Next steps you can run this week:
- Run the scrap tuning routine and lock the lowest effective heat for your target feed.
- Create a one-page parameter sheet (foam + thickness + blade profile + controller % + cutting A/V + feed speed).
- Standardize LEV placement and verification (same hood distance/orientation; pass/fail capture check).
- Add a first-article + in-process check so quality doesn’t drift across shifts.
- Define a simple trigger for maintenance: “edge drops / smoke increases at same settings / kerf drifts” → clean or replace the blade.
If you’re dealing with non-standard mounts, unusual blade profiles, or a foam that keeps shortening blade life, treat the blade as an engineered component. To quote or match a hot-knife blade reliably, it helps to provide:
- Photos of the tool holder/clamp and the installed blade
- A sketch or drawing with critical dimensions and tolerances (especially mounting interfaces)
- Foam type (EPS/XPS), thickness range, and expected cut path
- Your current defect (smoke, tearing, kerf drift) and your target outcome (edge quality, speed, blade life)
Autore
Tommy Tang — Senior Sales Engineer, Nanjing METAL Industrial. 12 years of experience in industrial blades. Certifications: CSE, CME, Six Sigma Green Belt, PMP.
Contact for process or safety questions: MAXTOR METAL contact page.
Riferimenti bibliografici
- Harvard GSD FabLab, Hot Wire Foam Cutting EPS and XPS SOP
- OSHA, Ventilation overview
- OSHA, OSHA Technical Manual: Local exhaust ventilation
- ACGIH, Industrial Ventilation resources

 English
  Spanish
  Italian
  French
  Portuguese
  Russian
  German
  Arabic
  Hindi
Hindi  Vietnamese
  Indonesian
  Japanese
  Korean
Una risposta