
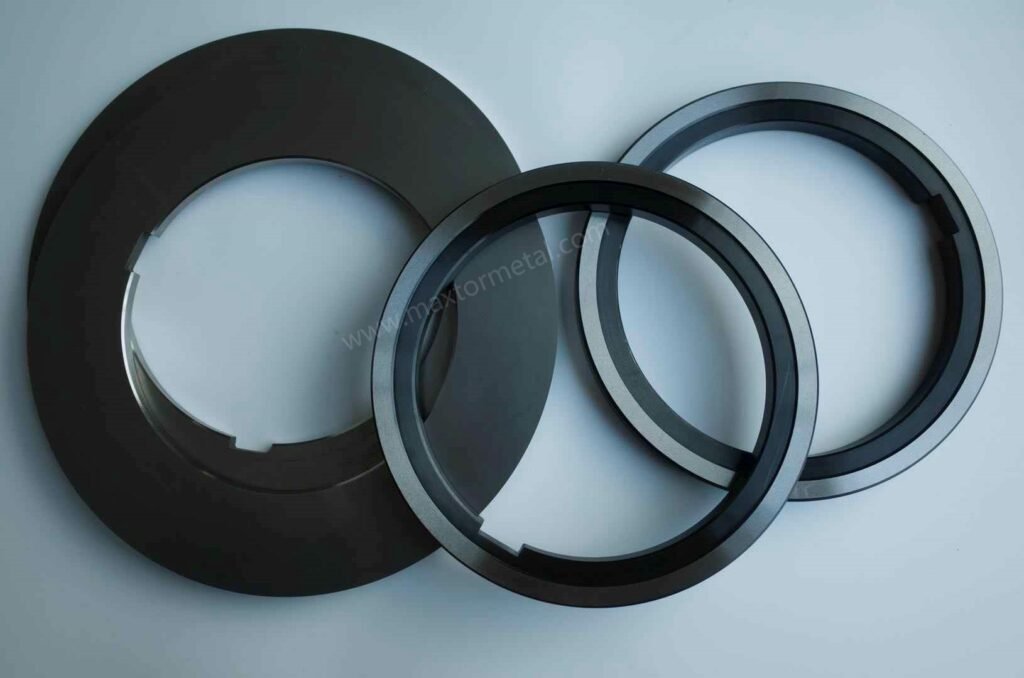
A slitting line can have excellent knife steel and still struggle with burrs, width drift, and premature chipping if the bore–arbor interface is poorly specified or inconsistently verified. This checklist is meant to be used as an engineering audit: you take an OEM slitter knife blueprint, compare it against the spindle/arbor reality, and log pass/fail gates before the tooling ever touches coil.
If your line uses roller shearing blades in addition to circular slitters, keep the product geometry and inspection expectations aligned across tooling families. A practical reference is the Maxtor Metal roller shearing blades product page, which helps teams keep terminology and inspection paperwork consistent without turning the audit into a vendor discussion.
맥스터 Metal teams often see the same pattern during audit reviews: edge-quality issues get blamed on “knife quality,” while the real root cause lives upstream in fit selection, runout control, and seating surface condition.
- Purpose: define an engineering audit for OEM slitter knife blueprint on spindle fit
- Scope: ISO fits, runout/parallelism, surface finish, and fit-check workflow
- Outcomes: stable edge quality, lower burrs, longer life, predictable uptime
ISO fits and tolerances
Hole-basis fits for arbor–bore (H7/g6, H7/h6, H7/f6)
Most slitter stacks are easiest to control using a hole-basis system: the knife/spacer bore is specified as “H7,” and the arbor seating diameter is specified as a shaft tolerance zone (g6, h6, f6) to tune clearance.
- H7/g6: a controlled sliding/locational clearance fit when you need repeatable assembly with minimal “float,” but still expect disassembly during changeovers.
- H7/h6: the “neutral” shaft position (h) tends to push the clearance toward the smaller end; used when you want very consistent location but still a practical assembly.
- H7/f6: a bit more clearance than g6/h6; used when thermal expansion, contamination risk, or frequent stack changes make tight fits unreliable.
If your drawing package is ISO-based, the baseline references are the ISO Store pages for ISO 286-1 그리고 ISO 286-2 (fits and limit deviations).
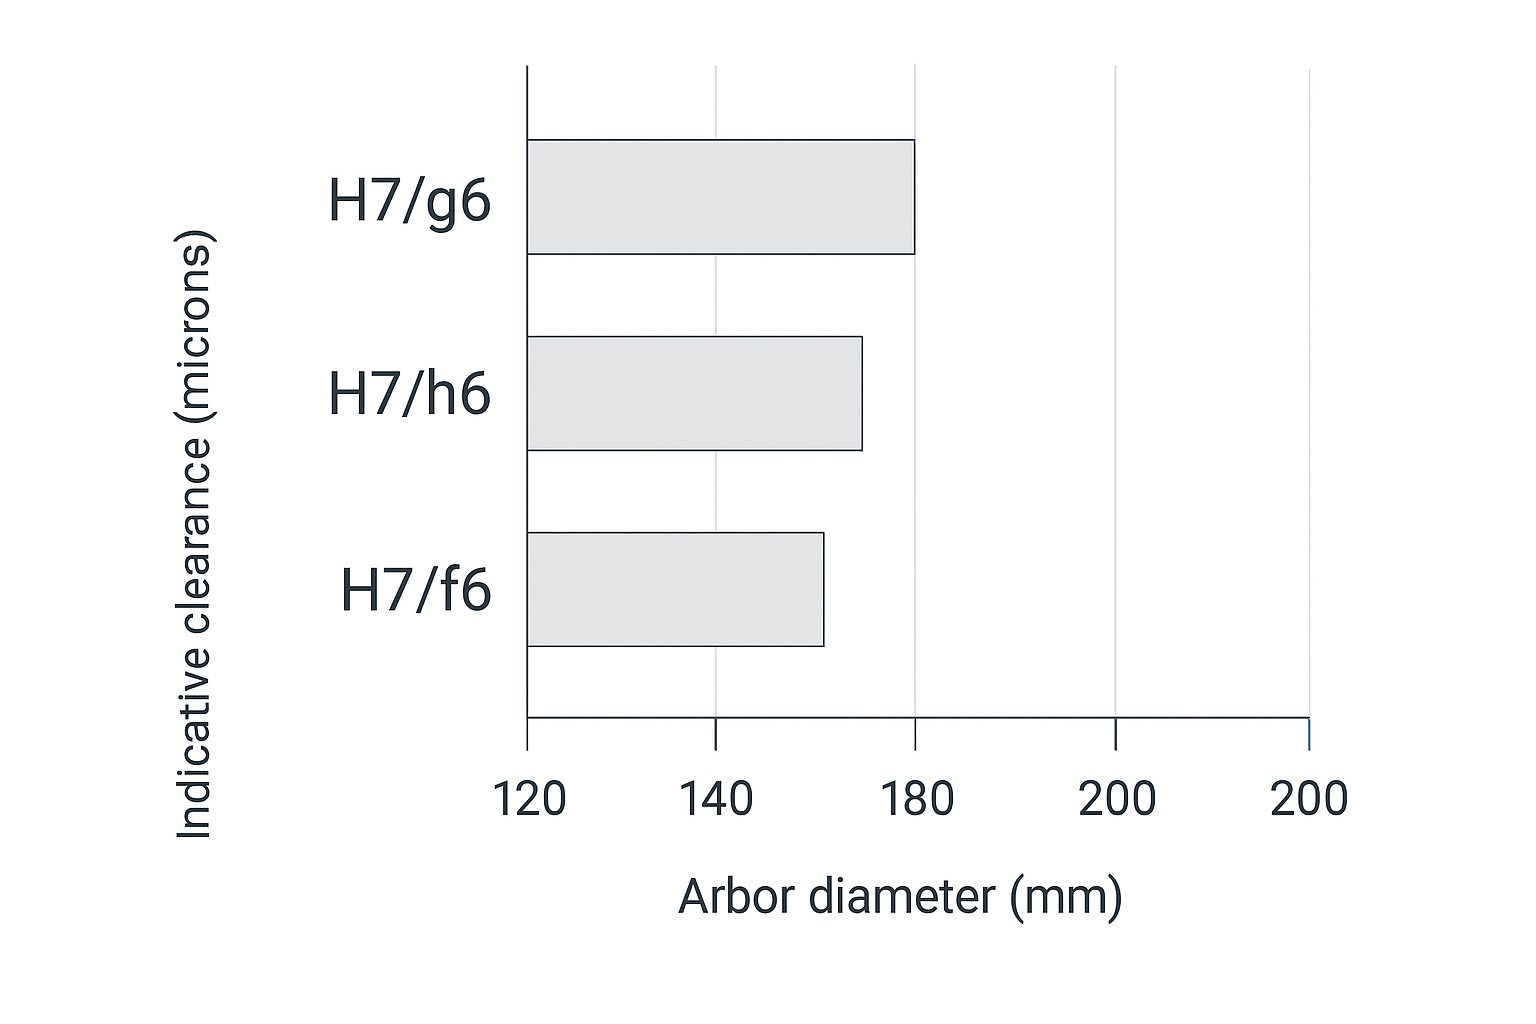
Indicative clearance bands for 120–200 mm nominal sizes
For common slitter bores in the 120–200 mm range, the clearance you actually get from H7/g6 vs H7/h6 vs H7/f6 can be small in absolute terms, but large in process impact. Two practical notes:
Worked example: ISO 286 limits for a 150 mm bore (how to pull the numbers)
아래는 method demonstration for extracting limits from ISO 286 tables. Always use your organization’s official copy of ISO 286 (or internal standards library) as the controlling source.
How to cite ISO tables in an audit record (so anyone can reproduce the numbers)
When you pull limits from ISO 286 tables, record where the values came from, not just the final min/max.
Include these fields in your audit record (or in the Notes column of the CSV):
- ISO document used (example: ISO 286-2)
- Diameter step used for the nominal size (the range bucket that contains the nominal diameter)
- IT grade used (IT6 / IT7, etc.)
- Fundamental deviation letter used (H for hole; g/h/f for shaft)
- Table/Figure reference from your organization’s controlled copy (table number or figure ID as labeled in your standards library)
- Rounding rule (if your internal practice specifies rounding for reporting)
This makes the clearance band fully traceable even when different plants use different standards portals or editions. The blueprint remains controlling; the audit record simply documents which ISO table entry was used to interpret the fit callout.
Example input
- Nominal bore diameter: 150 mm
- Bore tolerance: H7 (hole-basis)
- Candidate shaft zones: g6, h6, f6
Step-by-step
- In ISO 286-2, locate the diameter step that contains 150 mm.
- Read the IT7 tolerance value for that diameter step.
- For the hole position 시간, the lower deviation EI = 0. Therefore:
- Hole lower limit = 150.000 mm
- Hole upper limit = 150.000 mm + IT7
- For the shaft tolerance (g6 / h6 / f6):
- Read the fundamental deviation for the letter (g / h / f) at the same diameter step.
- Read IT6 for that diameter step.
- Shaft limits = (150.000 mm + deviation) to (150.000 mm + deviation + IT6)
- Clearance band = (hole limit) − (shaft limit). Record min clearance 그리고 max clearance.
What to record on the audit sheet
One numeric example (illustrative only): 150 mm H7/g6
Below is a single worked line using illustrative values (example only). Always verify against your plant’s controlled ISO 286 tables and drawing notes.
Assume (illustrative):
- Hole: 150 H7 → EI = 0.000 mm, ES = +0.040 mm
- Shaft: 150 g6 → ei = -0.025 mm, es = -0.015 mm
Then:
- Hole limits: 150.000 to 150.040 mm
- Shaft limits: 149.975 to 149.985 mm
- Clearance band: min = 150.000 − 149.985 = 0.015 mm, max = 150.040 − 149.975 = 0.065 mm
The goal of including one numeric line is not to override ISO 286; it is to make the audit sheet actionable and to show how to compute min/max clearance from the limits you pull from your controlled tables.
- Nominal diameter + fit callout (e.g., 150 mm H7/g6)
- Hole limits (min/max)
- Shaft limits (min/max)
- Calculated clearance band (min/max)
This example is intentionally presented as a “how to pull the numbers” workflow, because the correct values depend on the ISO 286 diameter step tables used by your plant and the drawing’s stated nominal diameter.
- Clearance is not the same as runout. A “correct” clearance fit still allows runout if the bore is not coaxial to the OD or if the seating faces are not flat/clean.
- You need a controlled band, not a single number. Real stacks live across temperature, cleanliness, spacer wear, and assembly habits.
Use the infographic below as a quick visualization, then pull the actual limits from the ISO tables for your nominal diameter.
Surface roughness targets for locating faces (Ra, Rz)
Blueprints often specify the bore but under-specify the surfaces that actually carry the axial stack location: knife hub faces, spacer faces, and arbor shoulders. In practice, face finish drives whether the stack “settles” the same way every build.
A good audit practice is to set surface texture requirements using the drawing conventions in ISO 1302 and the modern profile-parameter definitions in the ISO 21920 series.
As a starting point for many steel-processing slitter stacks (always follow the drawing when specified):
- Locating faces (knife hub faces, spacers, arbor shoulders): fine ground finish; a commonly used reference is Ra ≤ 0.8 μm (often paired with Rz ≤ 3.2 μm).
- Non-locating surfaces: a looser reference is Ra ≤ 1.6 μm, provided it does not create burrs, raised damage, or trapped debris that affects seating.
메모: Treat these as typical starting ranges, not universal requirements. The OEM drawing and your internal standards/control plan remain controlling.
핵심 요점: If the blueprint controls bore size but ignores seating faces, you can “pass inspection” and still fail on edge quality.
Spindle fit interface acceptance targets
Radial/axial play and TIR limits (knife edge, hub face)
This is where audits often go wrong: teams try to use a single universal number. In reality, your acceptance targets should be set by:
- the OEM drawing callouts (first priority)
- the product tolerance chain (strip width tolerance, burr limit, customer spec)
- line speed and dynamic stability
That said, an audit still needs gates. Use two simple acceptance categories and record them every build:
- Assembled knife edge TIR (radial): measured at the cutting OD with a dial indicator while rotating the arbor.
- Assembled hub face runout (axial/face): measured on the hub face (or a controlled reference face) to capture wobble.
If the blueprint uses ISO GPS symbols, interpret runout/parallelism under ISO 1101. If your internal drawings are ASME-based, align those callouts to your organization’s chosen GD&T standard set.
ISO GPS / surface texture references: cite your internal controlled copy
If you use ISO GPS symbols or surface texture callouts in audits, record the standard + symbol definition reference the shop is using.
- 을 위한 runout/parallelism/flatness interpretation (ISO 1101), record the standard edition in your controlled library and the relevant symbol definition reference (clause/figure ID as labeled internally).
- 을 위한 surface texture (ISO 1302 / ISO 21920 series), record the parameter set used (Ra/Rz or profile parameters) and the reference figure/table ID used by your controlled copy.
This avoids “same symbol, different interpretation” problems when multiple sites or suppliers are involved.
Practical notes for technicians:
- Use the same indicator contact point and preload each time.
- Log max/min readings and calculate TIR; don’t rely on “looks OK.”
- If you can’t repeat a reading, your setup is unstable—fix the setup before judging the part.
A practical way to set TIR / face runout acceptance targets
Material sensitivity: how coil grade affects runout tolerance
Not all materials “forgive” the same amount of assembled error. When the drawing does not specify assembled runout limits, use material sensitivity as a practical tie-breaker for choosing your acceptance tier.
If your audit process also ties fit choice and edge-quality expectations to incoming coil material requirements, ASTM’s overview of metals standards (including steel and stainless steel) can help you keep material spec language consistent across purchasing, QA, and production documentation.
- 304 stainless steel: higher work hardening and tougher shear behavior typically makes edge quality more sensitive to wobble and radial eccentricity. Treat it as a reason to target Tier A whenever the line is capable.
- Cold-rolled carbon steel (CR): often sits in the middle—many lines can run it successfully at Tier A or Tier B depending on width tolerance and burr limits.
- Galvanized steel (GI): the zinc layer can make surface defects and edge roll more visible; if cosmetic edge expectations are tight, bias toward tighter face runout control (Tier A/B) even when radial TIR looks acceptable.
Practical rule: when switching from CR to 304 or high-cosmetic GI, tighten the first-pass audit gate (Tier A where possible), then confirm with a short trial slit before committing to full production.
Use the OEM drawing callouts as the first priority. When the drawing does not specify assembled limits, set tiered targets based on process sensitivity (material, line speed, knife diameter) and then validate with trial slits.
Recommended assumptions for the example targets below (adjust to your reality):
- Machine: high-precision coil slitting line (FIMI-compatible spindle system)
- Knife diameter: Ø180–350 mm
- Material: cold-rolled steel, galvanized steel, or stainless steel
- Material thickness: 0.4–2.0 mm (typical mid-gauge)
- Line speed: 100–300 m/min
- Inspection method: dial indicator (or CMM) with knives mounted on a qualified master arbor
- Measurement state: clean mating surfaces, specified clamping torque applied, room temperature before production
Example acceptance tiers (for audit planning and internal alignment):
| Tier | Typical application conditions | Knife edge TIR (radial) | Hub face runout (axial) |
|---|---|---|---|
| A — High precision | Precision metal slitting (CR/SS), tighter edge-quality requirements | 0.005–0.010 mm | 0.003–0.008 mm |
| B — General industrial | General metal coil slitting / medium-speed service center lines | 0.010–0.020 mm | 0.008–0.015 mm |
| C — Robust / heavy gauge | Heavy-gauge or lower-precision applications | 0.020–0.050 mm | 0.015–0.030 mm |
Audit note: These are typical internal targets under the assumptions listed above. If your OEM drawing specifies limits, the drawing wins. If you cannot repeat readings, stabilize the setup before judging the tooling.
Parallelism/flatness for spacers and overarms
Spacer and overarm geometry is the silent multiplier. A stack can have acceptable knife runout at rest, then drift under load if:
- spacer faces are not parallel
- overarm or clamp faces introduce a tilt
- the stack is clamped unevenly due to burrs or contamination
Blueprint acceptance targets should include:
- spacer face parallelism/flatness (with a defined datum scheme)
- overarm and clamp face parallelism relative to the spindle axis
Audit tip: treat spacers as precision components, not consumables.
Cleanliness, magnetism, and thermal control thresholds
A fit system only works if the interface behaves like the drawing assumed it would.
Minimum audit thresholds to define (and enforce):
- Cleanliness: no trapped fines, no raised nicks, no oil film on locating faces.
- Magnetism: if parts retain swarf, you’ll get false seating and shifting; define how magnetism is checked and what you do when it’s high.
- Thermal control: define when you measure (cold vs stabilized) and how long parts must equilibrate before acceptance readings are valid.
Receiving inspection of knives and spacers

Instruments and calibration traceability
Receiving inspection is only defensible if your measurements are traceable.
Checklist:
For teams that want a neutral, third-party anchor on traceability and dimensional measurement practice, NIST’s overview of dimensional metrology is a helpful reference point for how measurement results are tied back to SI and calibration discipline.
- Instruments match tolerance level (micrometers/bore gauges/indicators as appropriate)
- Calibration is current and traceable to your internal system (or an accredited lab)
- Measurement method is documented (where to touch, how many points, acceptance formula)
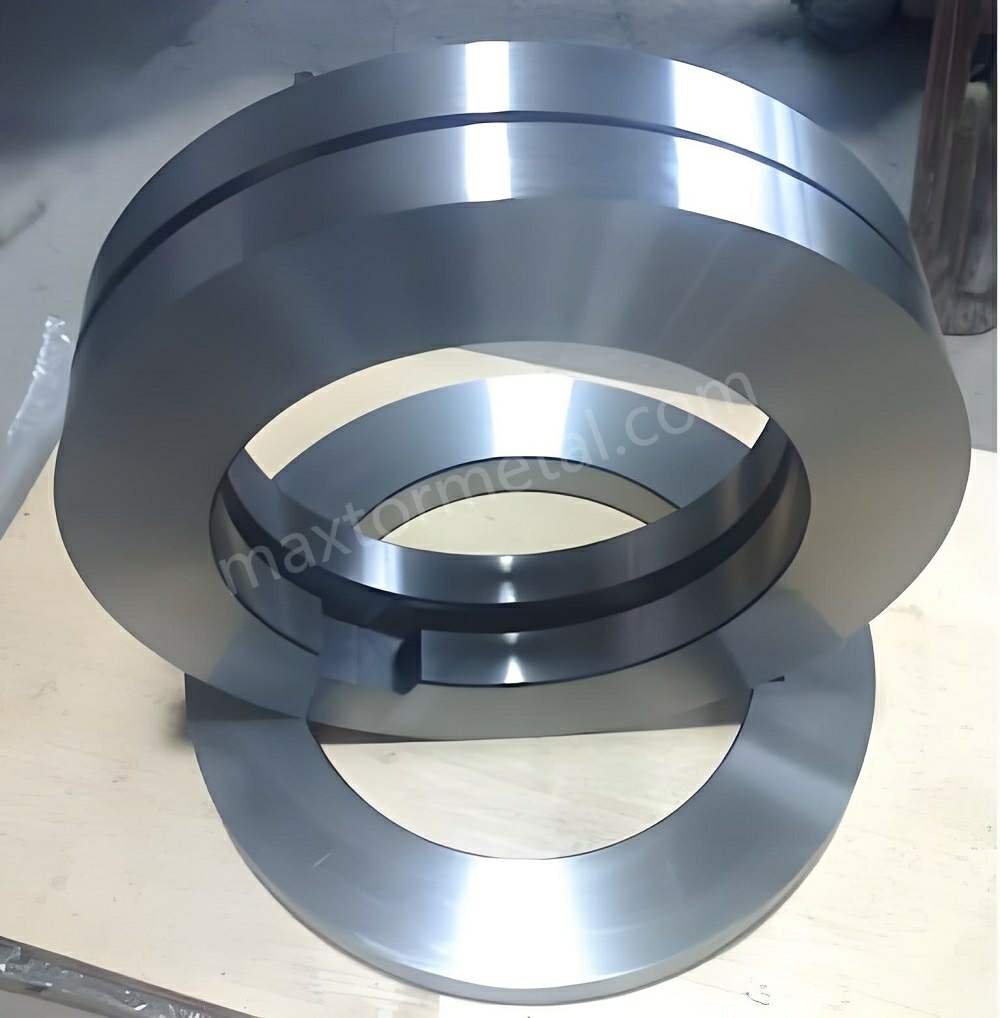
Bore/thickness/OD checks and blue-check acceptance
Incoming checks should separate size from geometry:
- Bore size: verify against the ISO fit class called out on the blueprint.
- 두께: verify single-part thickness 그리고 understand how thickness stacks with spacers.
- OD: verify OD where it matters (cutting diameter, overlap behavior).
Blue-check (contact pattern) acceptance:
- establish what “good coverage” means on the seating zones
- reject parts with patchy contact indicating taper, localized high spots, or face damage
Spacer width, parallelism, and face finish verification
Spacer issues show up as width drift long before they show up as a “bad knife.” Receiving inspection should include:
- width measurement with an agreed method (multiple points, temperature noted)
- parallelism/flatness verification for faces that locate the stack
- surface finish verification where the drawing calls it out
Arbor condition mapping
OD survey vs. specified fit band (g6/h6/f6)
Audits often stop at knife inspection. Don’t. The arbor is the datum that everything else references.
Map the arbor seating diameter:
- measure OD in multiple axial zones (seating zone vs non-seating)
- measure at multiple angular positions to detect ovality
- compare results to the specified shaft tolerance zone (g6/h6/f6)
The point isn’t to “get a number.” The point is to prove the arbor is still within the fit system your blueprint expects.
Journal and seating-zone TIR and finish
Two separate checks matter:
- Journal/seating-zone TIR relative to the spindle axis
- 표면 상태: damage, fretting marks, transfer material, corrosion pits
If the seating zone has raised damage, you can’t compensate it with a tighter bore tolerance.
Remedial criteria for taper/ovality and surface damage
Define repair thresholds in your audit sheet:
- taper beyond your internal limit (based on the allowed fit band)
- ovality that causes inconsistent blue-check patterns
- surface damage that creates localized high points or galling risk
Common remedies:
- controlled polish/regrind of seating zones (with documented material removal)
- replacement of worn sleeves (if applicable)
- escalation to spindle/bearing inspection when TIR is unstable
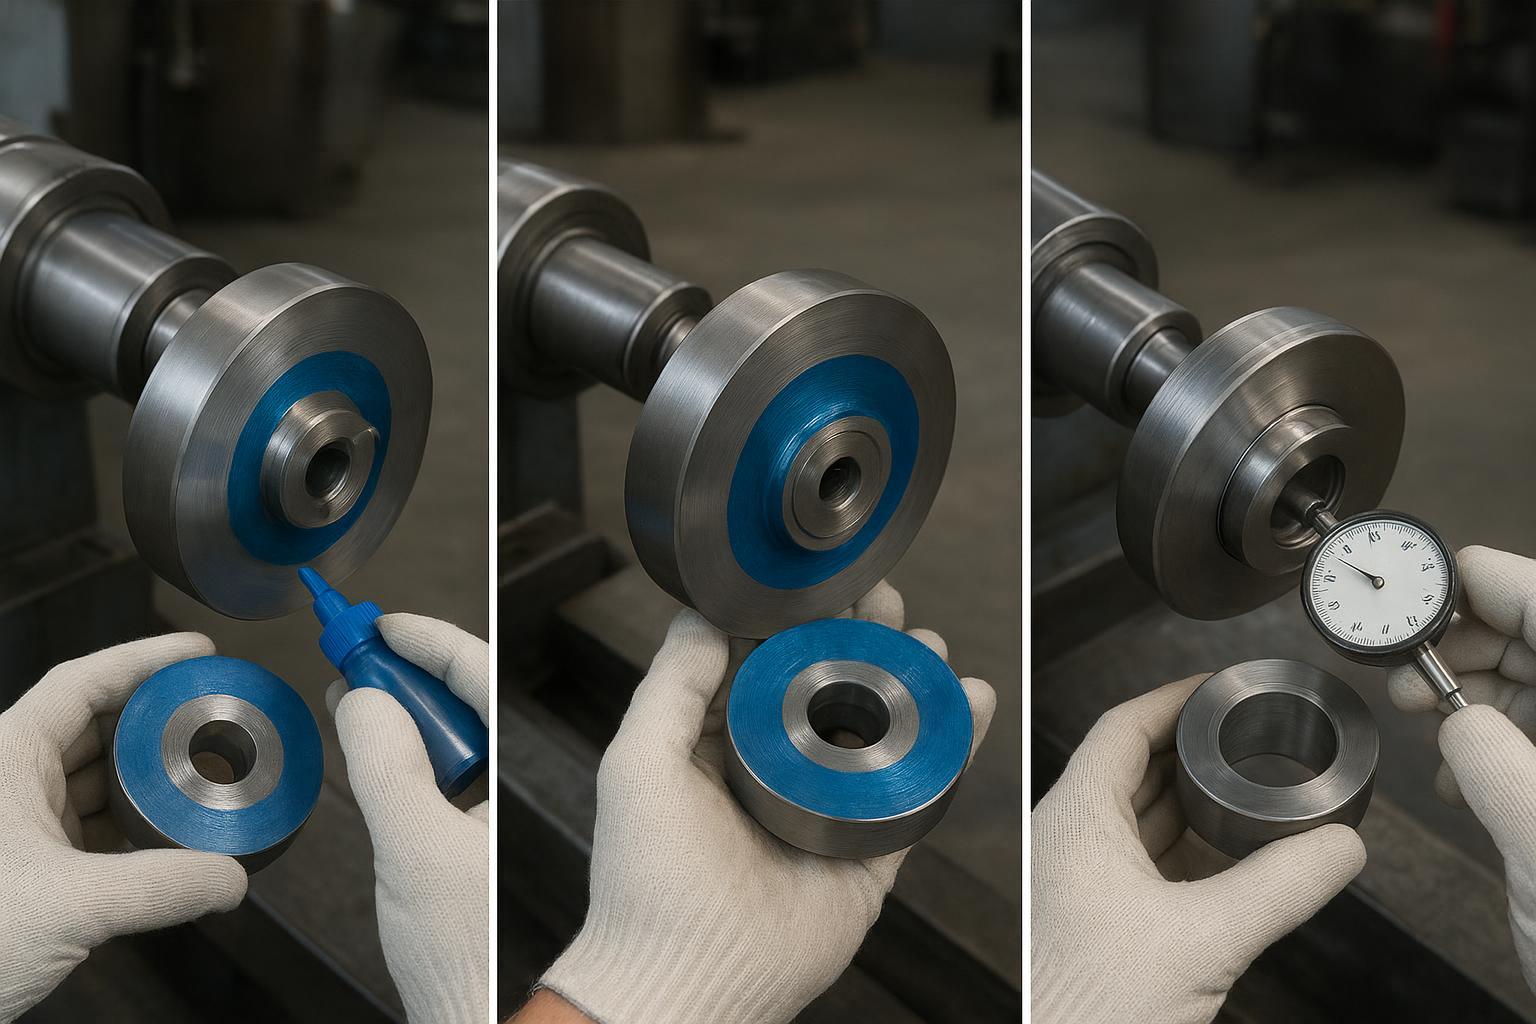
Fit-check and blue-check procedure
Stack build order and cleanliness discipline
Fit-check is a process, not a moment.
Checklist discipline:
- Clean all locating faces before each assembly step
- Build stack in the documented order (spacers/knives/overarm components)
- Use consistent torque and clamp sequence
- Avoid “tapping to fit” unless your procedure explicitly allows it and records it
Dial-indicator sweep and acceptance logging
Minimum logging fields to make the audit useful:
- arbor ID, knife set ID, spacer set ID
- temperature condition
- knife edge TIR (radial)
- hub face runout (axial)
- notes on blue-check coverage
Make the pass/fail gate explicit. If you can’t explain why a stack was accepted, it isn’t audit-ready.
Trial slit confirmation and acceptance criteria
Even a perfect static fit can fail under load. A short trial slit should confirm:
- burr level is within baseline
- width holds within tolerance after stabilization
- no abnormal noise/vibration that suggests seating shift
Troubleshooting and corrective actions
Burr, tearing, rollover: gap/runout alignment nexus
When burrs spike or tearing appears:
- treat it as a 체계 issue: knife condition + overlap/side clearance + assembled runout
- verify whether the edge TIR or face runout changed compared to the last “good” build
- check for contamination trapped between spacers/knife faces that shifts the stack under load
Corrective action hierarchy:
- Clean and rebuild with controlled torque
- Replace the suspect spacer(s) with known-good references
- Re-map arbor seating zone and blue-check for contact loss
Width drift and thermal growth: spacer and bearing cues
If width drifts over a run:
- confirm spacer widths at temperature (not just at ambient)
- check whether bearing temperature rise correlates with drift (thermal growth + preload change)
- verify overarm/clamp faces are not introducing a tilt as the system warms
Correctives:
- tighten thermal control rules in the audit (stabilization time, measurement timing)
- isolate spacer wear from bearing/spindle issues by repeating runout measurements after heat soak
Fretting/galling at bore–arbor: finish and fit remediation
Fretting and galling are usually telling you one of three things:
- clearance is wrong for the actual thermal/contamination environment
- surfaces are too rough (or damaged) for repeatable sliding assembly
- clamp load and micro-movement are causing contact fatigue
Correctives:
- re-evaluate fit choice (e.g., moving from a near-line-to-line fit toward a controlled clearance when changeovers are frequent)
- repair seating surfaces and restore specified finish
- adjust cleaning/magnetism control so abrasive fines don’t become lapping compound
In slitter audit programs supported by Maxtor Metal, shops often improve audit repeatability by combining incoming measurement records with regrind history (what was removed, where contact changed, how runout shifted). That kind of data-backed loop is most useful when it stays factual—measurement methods, timestamps, and acceptance gates—rather than subjective “looks good” notes.
결론
The 5 acceptance numbers to retain every build
Record these on every changeover so your audit stays traceable:
- Bore–arbor fit class used (example: H7/g6) and the nominal diameter
- Knife edge TIR (radial) at the cutting OD (max–min)
- Hub face runout (axial/face) on the reference face (max–min)
- Blue-check coverage result (pass/fail + notes)
- Trial-slit confirmation (burr baseline + width stability after warm-up)
3 common failure modes and the fastest checks
- Burr/tearing spikes → re-check edge TIR + face runout against the last “good” build, then inspect spacer/knife faces for trapped fines.
- Width drift over a run → verify spacer widths at temperature and look for overarm/clamp-induced tilt as bearings warm.
- Fretting/galling at the bore–arbor interface → review fit choice vs thermal/contamination reality, then restore seating-zone finish and cleanliness discipline.
Next steps
Standardize your documentation so every changeover produces the same minimum evidence pack: fit class used, runout readings, blue-check coverage, and trial-slit confirmation. That’s the fastest way to keep edge quality stable across teams and shifts.
If you also maintain roller shearing tooling in the same plant, it helps to keep product documentation aligned so inspection and regrind records don’t fragment across tool types. A low-friction internal reference point is the Maxtor Metal roller shearing blades.
작가: Jerry Chu, Technical Support Specialist (After-sales Service), Maxtor Metal
Jerry has 10 years of cross-industry field experience supporting cutting and slitting applications (paper, plastics recycling, metal coil slitting, wood processing), with a practical focus on reducing burrs, controlling dust, and stabilizing on-line cutting quality.
자격증: PMP, CMRP
Last updated: 2026-06-16
Technical review and document control
To improve audit repeatability across teams and shifts, treat this checklist as a controlled technical document.
- Intended use: engineering/QA checklist for slitter knife bore–arbor fit and assembled runout verification.
- Standards baseline: ISO 286 (fits), ISO 1101 (GPS/GD&T), ISO 1302 and ISO 21920 (surface texture). If your drawings use ASME GD&T, align symbols and datum logic to your internal standard set.
- Review approach: update the checklist when your OEM drawings change, when spindle/arbor regrinds occur, or when you find repeated nonconformities in runout/blue-check patterns.
- Evidence pack: keep runout logs, temperature condition, clamping torque, and blue-check notes together with the knife/spacer/arbor IDs.
Downloadable audit template (recommended fields)
If you maintain a controlled form, include at minimum:
- Line/asset ID, arbor ID, knife set ID, spacer set ID
- Nominal bore size + fit callout used
- Measurement temperature condition and stabilization time
- Knife edge TIR (radial), hub face runout (axial)
- Blue-check coverage pass/fail + notes
- Trial-slit confirmation (burr baseline, width stability)
- Corrective action taken and re-check results
Tip: Assign a document number and revision date to your template so the shop always uses the latest version.
Copy-paste Excel header (CSV)
Paste the single header row below into Excel (or any CMMS/QMS form builder) and use it as your standard “evidence pack” structure.
Document No.,Revision,Last Updated,Plant/Site,Line/Asset ID,Machine/OEM,Spindle System,Shift,Date,Inspector,Ambient Temp (°C),Stabilization Time (min),Arbor ID,Arbor Nominal OD (mm),Arbor Fit Zone (e.g., g6/h6/f6),Arbor OD Zone A (mm),Arbor OD Zone B (mm),Arbor OD Zone C (mm),Arbor Ovality Max (mm),Arbor Taper (mm),Arbor Seating Zone TIR (mm),Arbor Surface Condition (Pass/Fail),Knife Set ID,Spacer Set ID,Nominal Bore (mm),Blueprint Fit Callout (e.g., H7/g6),ISO 286 Reference (Doc + Edition),ISO 286 Diameter Step,ISO 286 IT Grade (e.g., IT6/IT7),ISO 286 Fundamental Deviation Letters (e.g., H/g),ISO 286 Table/Figure ID (Internal),ISO 286 Rounding Rule, Hole Limit Min (mm),Hole Limit Max (mm),Shaft Limit Min (mm),Shaft Limit Max (mm),Clearance Min (mm),Clearance Max (mm),ISO 1101 Reference (Internal Clause/Figure ID),ISO 1302 Reference (Internal Figure/Table ID),ISO 21920 Reference (Internal Figure/Table ID),Surface Texture Parameter Set (e.g., Ra/Rz),Assembly Torque/Clamp Spec,Contact Cleanliness (Pass/Fail),Magnetism Check (Pass/Fail),Blue-check Coverage (Pass/Fail),Blue-check Notes,Knife Diameter (mm),Material,Material Thickness (mm),Line Speed Setpoint (m/min),Acceptance Tier (A/B/C),Knife Edge TIR (Radial) (mm),Hub Face Runout (Axial) (mm),Measurement Method (Indicator/CMM),Indicator Resolution (mm),Setup Repeatability Check (Pass/Fail),Trial Slit Done (Y/N),Burr Result (Pass/Fail),Width Stability Result (Pass/Fail),Noise/Vibration Observed (Y/N),Corrective Action Taken,Re-check Knife Edge TIR (mm),Re-check Hub Face Runout (mm),Final Disposition (Accept/Reject),Notes
Minimum rules to keep the data usable:
- Keep all runout and size values in mm.
- Always record the measurement state (clean mating surfaces, specified clamping torque applied, room temperature before production).
- For any ISO-based value you report (fits, GD&T interpretation, surface texture), record the reference identifier from your controlled standards library (document edition + internal table/figure/clause ID).
- If ISO 286 numeric limits are not calculated at the line, leave limit/clearance cells blank and record “per ISO 286 table” in 노트 (the blueprint remains controlling).
자주 묻는 질문(FAQ):
What is the best ISO fit for a slitter knife bore to arbor?
It depends on how tightly you need location versus how often you change stacks. Many slitter systems use hole-basis fits such as H7 with a shaft zone like g6, h6, or f6, then validate performance with assembled runout measurements rather than clearance alone.
How do you check slitter knife runout on the arbor?
Mount a dial indicator on a stable base, touch the indicator to the knife OD at the same point each time, rotate the arbor 360°, and record max minus min as TIR. Repeat on the hub face for face runout to detect wobble separately from radial eccentricity.
Why can burrs increase even when the knives are sharp?
Because burr is often driven by alignment: overlap/side clearance combined with assembled runout and stack seating. A clean edge can still produce burr if the stack shifts under load or if spacer faces are not parallel.
What should a blue-check contact pattern look like on a slitter knife hub?
You want broad, consistent contact in the intended seating zone—without isolated high spots or patchy coverage that suggests taper, debris, or face damage. The acceptance rule should be defined on the audit sheet so technicians aren’t guessing.
How do spacers cause width drift in slitting?
Spacer width variation and face parallelism errors stack up, and thermal growth can change effective width during a run. If you only measure spacers cold (or only at one point), you can miss the real cause of drift.
What surface finish should be specified for spacer faces and arbor shoulders?
The safest approach is to specify surface texture on the drawing for all locating faces (spacer faces, knife hub faces, arbor shoulders) using recognized drawing conventions. Then verify the finish is consistently achieved after regrinds and repairs.
How do you make a slitter knife audit “traceable” for quality systems?
Use calibrated instruments, document the method, log readings (not opinions), and record part IDs, temperature condition, and acceptance gates. That gives you repeatable evidence when edge quality changes across shifts or lines.