By Tommy Tang, Senior Sales Engineer (Nanjing METAL). 12 years supporting pelletizing and size-reduction blade applications. Certifications: CSE, CME, Six Sigma Green Belt, PMP.
Scope and validation note: The numeric ranges in this guide are typical starting points used in plant practice. Always follow your OEM manual and site safety rules first, then confirm final setpoints with the A/B verification steps described below.
Introdução
Extending the working life of pelletizer knives is one of the fastest ways to stabilize pellet quality and keep uptime high. Longer-lived edges mean fewer emergency changeovers, more consistent pellet geometry, and less die-face rework. In short, effective pelletizer blade life extension turns small, routine checks into big gains in availability.
In this guide, you’ll set up daily and weekly checks, define wear signals and go/no-go limits, dial in alignments and gaps, control moisture and temperature around the cut, and track a few KPIs that tell you when to act—before quality drifts. We’ll keep the focus on water-ring/die-face lines, with targeted notes for strand and underwater systems. You’ll leave with quantified thresholds and local verification methods that reduce downtime and total cost with clear triggers.
Key takeaways
- Standardize daily/weekly inspections and log edge condition, gap readings, torque marks, and fines %. Small habits extend life.
- Use practical starting points, then validate locally (OEM manual wins): knife-to-die-face gap 0.10–0.30 mm; edge runout (TIR) < 0.05 mm; recheck hot.
- Master moisture/thermal control: for underwater, stabilize process-water temperature and flow; for strand, dry fully at the cutter.
- Decide sharpen vs replace with simple rules: chips/cracks or minimum thickness → replace; dull edge with intact geometry → controlled regrind.
- Track OEE, fines %, and blade cost per ton; trigger maintenance when fines rise >50% versus your baseline in a shift.
Inspect, Detect, Act
Daily and weekly checks
Daily (start-up and mid-shift): follow your site’s lockout/tagout (LOTO) and PPE rules before approaching rotating parts or hot surfaces; clean the die face and knife edges; remove polymer residue and fines; inspect edges for chips, cracks, and burrs; check torque marks on knife screws and hub fasteners; record pellet appearance (tails, smearing, chatter) and fines %. Weekly: verify fastener torque to OEM spec, listen for bearing noise, measure knife runout with a dial indicator (target < 0.05 mm TIR), confirm gap readings at 12/3/6/9 o’clock, and review trend logs.
For safe die-face cleaning and lapping reminders on underwater systems, MAAG’s maintenance notes emphasize cleanliness and proper coupling before operation; see the guidance summarized in MAAG’s cleaning recommendations for underwater systems (2022).
Wear signals and go/no-go limits
Start with symptoms you can see and measure:
- Visible edge damage (chips, cracks) typically coincides with rising tails and an uptick in fines after drying. If you can feel a nick with a fingernail or see a micro-chip under 10×, plan a change. Confirm with a 30–60 minute A/B run and compare fines % and motor load.
- Pellet-length or -diameter drift and new vibration/noise often trace back to runout, hub seating, or uneven gap. If TIR exceeds ~0.05 mm, reseat or replace the hub/bearing and re-check.
- Moisture-linked smearing at the cut raises fines in dryers. Address air-knife placement (strand) or process-water stability (underwater) before blaming the knife.
As a pragmatic plant trigger, take action if fines increase >50% versus your current baseline for a shift. This aligns with field practice highlighted across troubleshooting coverage such as Plastics Technology’s overview of pellet quality dynamics in 2023; see the context in Plastics Technology’s “The Path to Pellet Perfection” (2023).
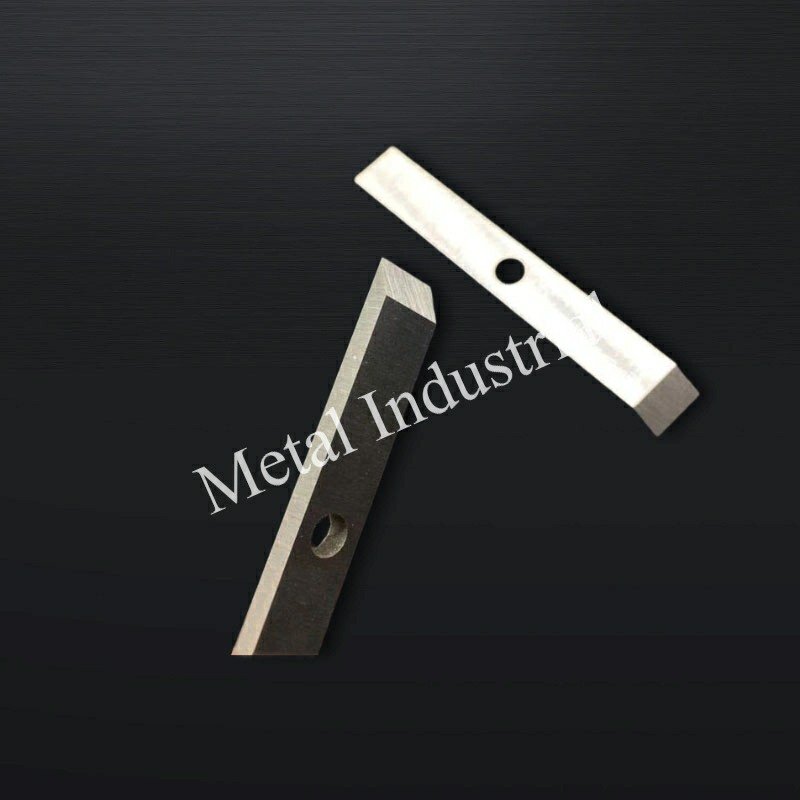
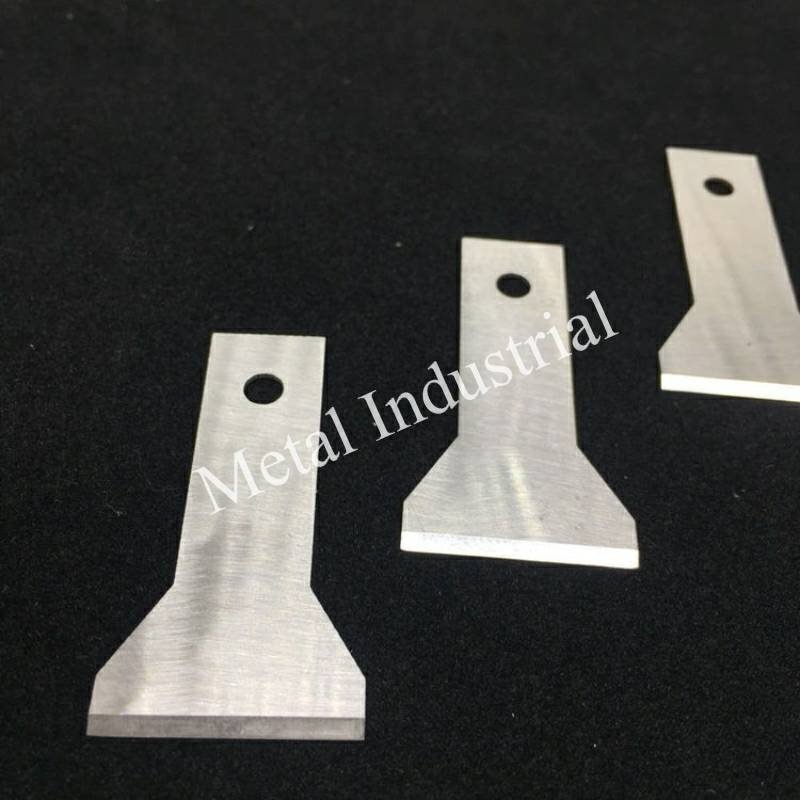
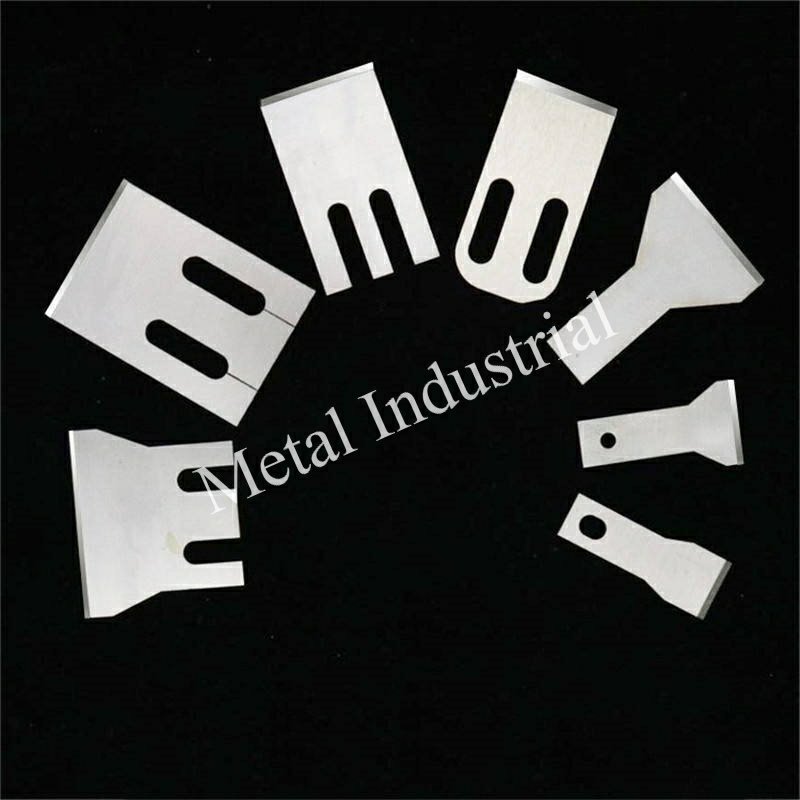
Sharpening vs. replacement
- Replace when: you see cracks, deep chips that would alter geometry, or thickness is at/under your minimum; also replace if a recently re-sharpened blade delivers unusually short life—an indicator of base material fatigue.
- Regrind when: the edge is dull but geometry is intact. Before removing knives, follow LOTO, allow hot parts to cool where required, and handle edges with cut-resistant gloves. Keep bevel angles and edge radius tight; use coolant during grinding to preserve temper and control airborne dust/particles per your shop rules. Practical guidance for D2/HSS in PE/PP service: expect 3–8 controlled regrind cycles depending on abrasiveness. Validate each grind with a short trial batch and compare fines %, pellet geometry standard deviation, and motor load to your baseline.
For process-focused sharpening and safety steps, see the maintenance principles in MAXTOR METAL’s guide to maintaining and sharpening blades (procedural heuristics, applicable to establishing a controlled regrind routine).
Alignments and Gaps
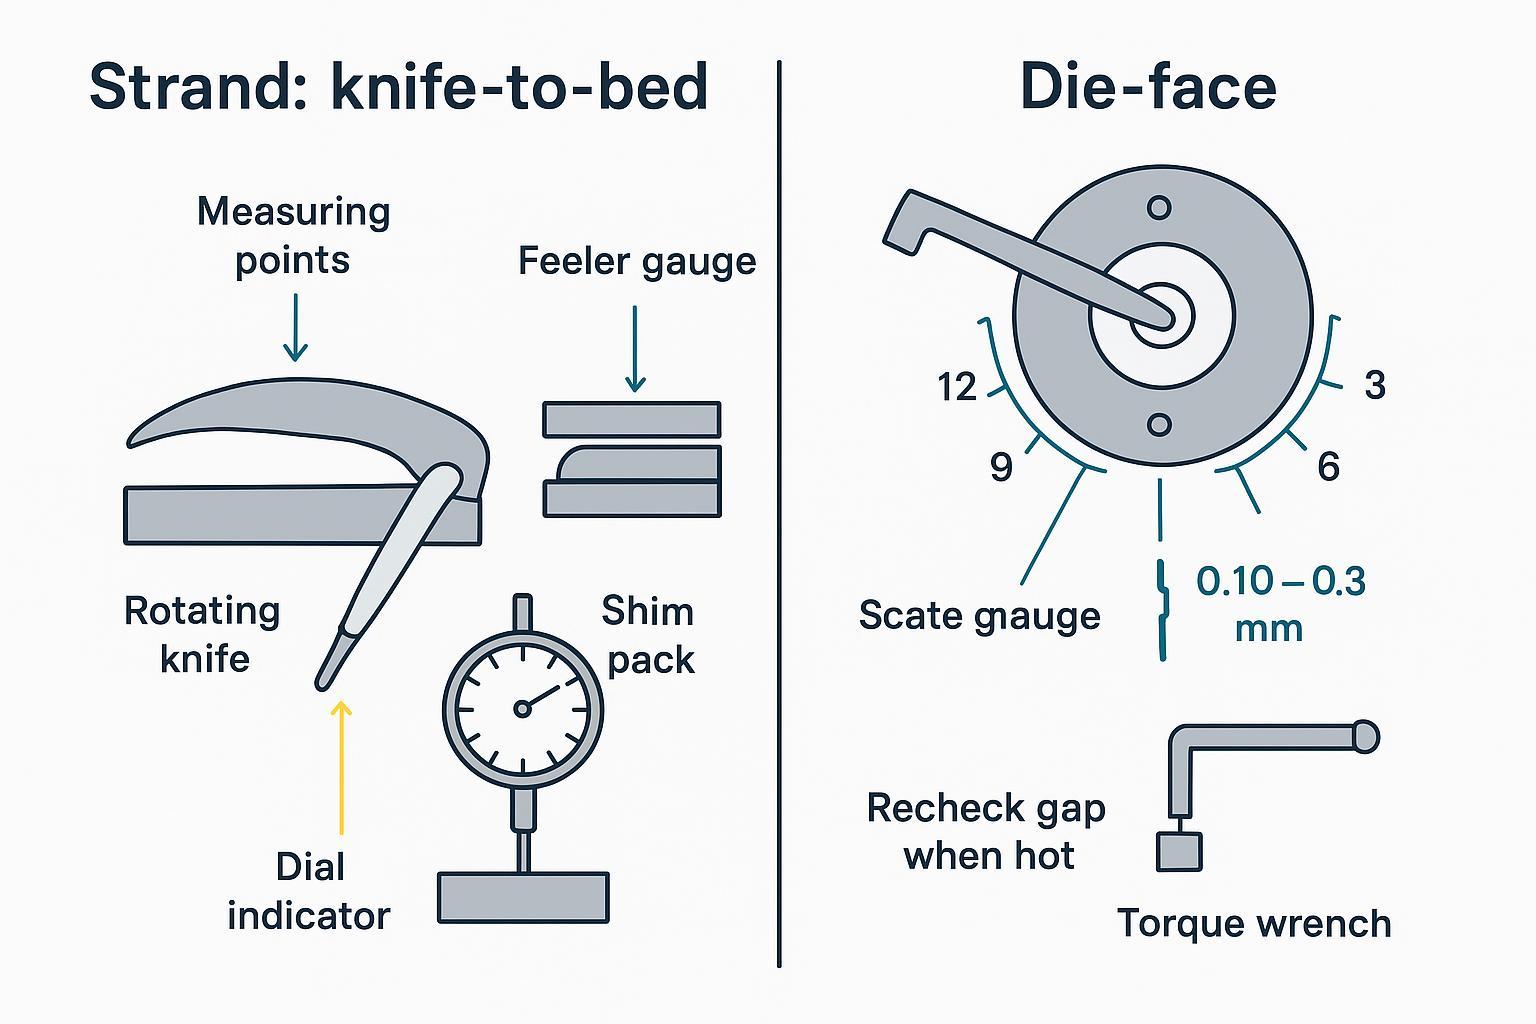
Strand knife-to-bed basics
For dry-cut strand systems, aim for a clean scissor action between the rotating knife and the bed knife without rubbing or heat. Prepare the bed knife, remove burrs, and align the rotating knife so there’s uniform contact along the length at light pressure. Use a dial indicator to check runout across the shaft and knife body; if TIR approaches 0.05 mm, investigate hubs and bearings. After a brief hot run, re-check for contact marks, noise, or strand smearing.
Underwater die-face proximity
On water-ring/die-face systems, a uniform, small gap across the die face is critical. Before checking or setting the gap, follow LOTO and verify the rotor cannot start; treat the die face and water chamber as hot until proven otherwise. As a typical starting band, set 0.10–0.30 mm using feeler gauges at 12/3/6/9 o’clock, then rotate by hand to confirm no high spots. Record readings and target gap uniformity within ~0.02–0.05 mm as an internal control (tighten or loosen per OEM guidance and pellet results). Recheck hot after 30–60 minutes because thermal growth can shift the setup—use heat-rated gloves and keep clear of pinch points during the hot check. Keep the die face clean and flat; if needed, perform a light lap before mounting knives to restore flatness. See maintenance reminders in MAAG’s cleaning recommendations (2022) for die preparation hygiene.
Preserve alignment during changeovers
Use reference shims/fixture keys so your “cold” alignment returns reliably after rebuilds. During changeovers, follow LOTO, block/secure any lifted components, and keep hands clear of pinch points around hubs and knife carriers. Torque fasteners to OEM specs and apply torque-mark paint to detect loosening. Keep one or more pre-set knife/hub assemblies to shorten changeover time and reduce handling risk. Log final gap, TIR, torque values, and the first-hot check so you can spot drift patterns.
Moisture and Thermal Control
Strand drying and air knives
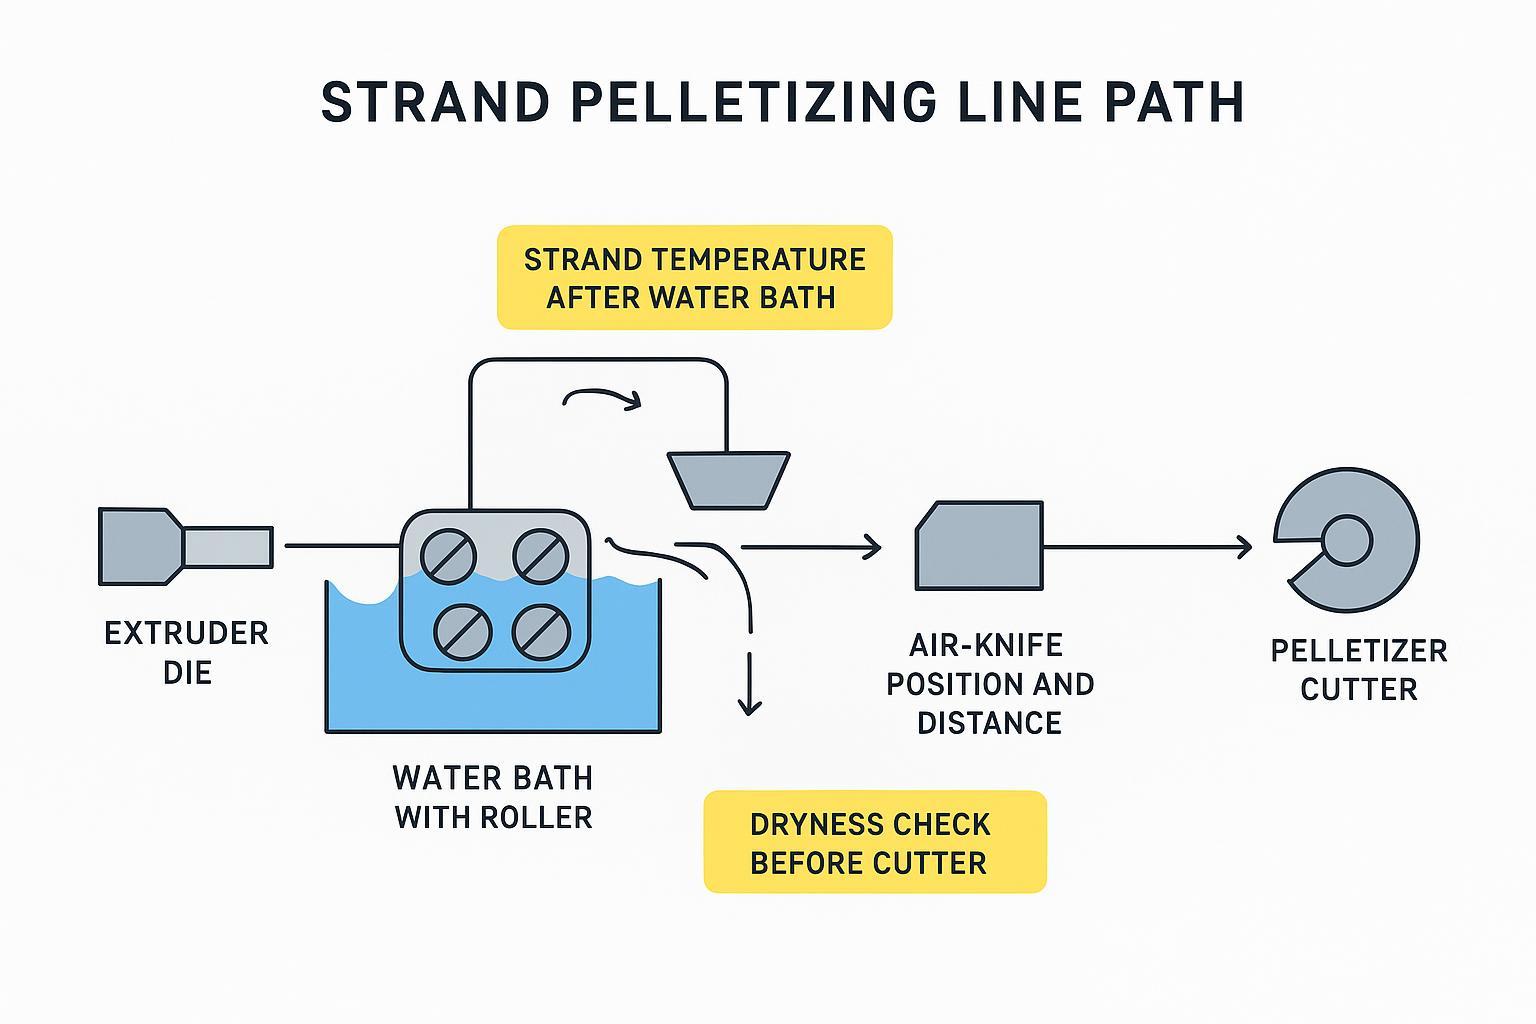
For strand lines, strands must exit the bath cool enough to avoid smearing at the cutter and must be dry at entry. If your footprint is tight, add rollers to double-back in the bath and increase effective cooling length. Place the air knife or vacuum air knife immediately before the cutter; adjust distance and angle so strands arrive dry to the touch and free of flutter. Practical tactics for cooling length and streamer prevention are summarized in Plastics Technology’s coverage; see insights in “Six Tips to Prevent Those Annoying Streamers” (2022) and the broader troubleshooting overview in “The Path to Pellet Perfection” (2023).
Verification routine: measure strand surface temperature after the bath (IR thermometer or contact probe) and log air-knife position/pressure. Validate dryness by weighing a 60-second composite sample pre- and post-air-knife if needed; adjust until smearing disappears at the cut.
Underwater water temp and flow
Underwater pelletizers depend on stable process-water temperature, pressure, flow, and filtration. As typical starting points for PE/PP (verify locally and follow your OEM manual): maintain ~45–65 °C process water with ±5 °C stability, supply pressure around 3–6 bar at the chamber inlet, and filtration at or below ~50 µm to protect the die and knives. Treat these numbers as commissioning baselines—final setpoints are equipment- and resin-specific. Instrument with RTDs at chamber inlet/outlet, mag-flow at supply, and pressure transducers pre- and post-die; tie to a PID-controlled heat exchanger and VFD on the pump.
MAAG’s public overviews describe the need for conditioned, filtered recirculation loops even if exact setpoints are model-specific; see the background in MAAG’s compounding and masterbatch overview (n.d.). Validate the loop daily: confirm temperature holds within band, flow is steady, filters are clean, and sensors pass a quick accuracy check (ice point/boiling checks for RTDs, zeroing for the flowmeter). Depressurize and isolate the circuit before opening filters/strainers, and treat process water as hot/chemically treated per your site rules.
Die-plate condition and balance
Knife life plummets on a damaged or out-of-flat die face. Inspect for grooves and burrs; lap lightly when needed to restore flatness and finish before mounting knives. If you observe new vibration or a sudden rise in noise, check hub balance and runout as proxies before chasing process settings. Always re-verify the gap hot after any corrective action.
Materials, Coatings, Quick-Change
Match material to abrasiveness
- Moderate abrasiveness (typical recycled PE/PP with 10–40% CaCO3 or talc): D2 (SKD11) or HSS (e.g., M2) often provides a strong balance of toughness and wear resistance with multiple controlled regrinds.
- High abrasiveness (>40% fillers, glass/mineral filled): consider carbide or coated tool steels to resist abrasive wear; expect to tune bevels and regrind intervals based on fines trends and edge microscopy.
Low-friction and hard coatings
TiN/TiCN/CrN and DLC-like carbon films can lower friction and slow adhesive wear; PTFE-like topcoats can reduce sticking in certain formulations. Trade-offs include brittleness, coating adhesion, and regrind compatibility. Start with a single, well-documented trial: specify the base steel, coating, bevel geometry, and allowable edge radius post-regrind; collect an A/B data set over an 8-hour window.
As a practical, vendor-neutral example, MAXTOR METAL manufactures OEM-compatible plastic pelletizer knives and offers coated options (e.g., D2/HSS with TiN/Cr-based finishes) plus controlled sharpening that preserves geometry; see an overview of capabilities at MAXTOR METAL pelletizer blades. Validate any coating choice locally with fines %, pellet geometry variation, and changeover hours saved.
Quick-change hubs and torque
Follow the OEM torque spec on knife screws and hub fasteners; apply anti-seize only where approved. Use torque-mark paint so you can spot movement at a glance. Keeping one or more pre-set knife/hub assemblies reduces changeover time and helps preserve alignment. For safe, stepwise replacement practices on die-face blades, see this safe replacement guide.
Implementation, KPIs, and Pelletizer Blade Life Extension
Checklists and intervals
Adopt one-page SOPs that operators can copy into the logbook. Daily: clean and inspect edges and die face; check torque marks; record pellet appearance and fines %. Mid-shift: spot-check gap at one clock position and measure TIR if new vibration is heard. Weekly: torque verification, full 12/3/6/9 o’clock gap readings, bearing noise/heat check, water-loop verification (temperature/flow/pressure/filtration) on underwater systems.
Thresholds tied to quality signals
Establish a local baseline: fines % by weight (sieve), pellet length/diameter standard deviation (optical gauge), and motor load (amps). Use these starting triggers:
Quick interpretation note (to avoid over-generalizing): these triggers are meant to flag a change from your own steady-state, not to compare across plants. If your line runs different dies, polymers, or filler loadings, keep separate baselines by product family.
- Fines >50% above baseline for a shift → inspect edge, confirm gap uniformity, and verify drying/water control.
- TIR ≥0.05 mm → reseat hub/knife, inspect bearings, adjust or replace as needed.
Measurement note: take TIR readings on a clean, seated hub/knife (no debris under faces), and confirm indicator setup repeatability (same contact point, same preload). If the reading changes when you re-mount the indicator, fix the measurement method before you service the machine.
- Knife-to-die-face gap out of 0.10–0.30 mm band or uneven by >0.05 mm → reset and recheck hot after 30–60 minutes.
Validate each corrective move with a 30–60 minute A/B run and compare metrics to the baseline.
Optional (copy/paste) log template for each run:
| Item | Cold check | Hot check (30–60 min) | Pass/Fail rule | Notas |
|---|---|---|---|---|
| Knife-to-die-face gap (mm) at 12/3/6/9 | Within your OEM/site band and uniformity target | |||
| Knife runout (TIR, mm) | ≤ your site limit (typical start: 0.05) | |||
| Fines (%) | ≤ baseline × 1.5 (shift trigger) | |||
| Pellet defects (tails/smear/chatter) | No new defects | |||
| Motor load (amps) | No abnormal rise vs baseline | |||
| Water loop (UW): temp/pressure/flow/filter ΔP | Stable within your control band |
Track OEE, fines, blade cost/ton
Track the basics and tie them to action:
- OEE: Availability × Performance × Quality; document unplanned stops related to knives and die maintenance.
- Fines %: 30-minute composite sample each shift; log trends and correlate with edge inspections.
- Blade cost per ton: (Blade purchase + sharpening + downtime cost) / tons produced between replacements.
Worked example (illustrative):
- Purchase + regrind + downtime per cycle = $420 total; tons produced between swaps = 60 t → blade cost/ton = $7.00/t. If a controlled regrind adds 20 t before the next swap without raising fines, the new cost/ton becomes $420 / 80 t = $5.25/t. The savings justify a formal regrind schedule—subject to validation against your quality limits.
Mini Case Template (Fill-in)
Use this box as a lightweight, repeatable way to document whether a change (new knife set, regrind, gap reset, coating trial, water-loop tuning) actually improved pellet quality and uptime. Keep it anonymous and objective.
1) Baseline (before change)
- Line/system: water-ring/die-face / strand / underwater
- Resin + recipe: (polymer, MFI range, % regrind, filler %, moisture window)
- Knife condition: new / regrind #__ / visible chips? Y/N / thickness vs min: __
- Key setpoints (cold → hot): gap at 12/3/6/9 __ / TIR __ / UW water temp-press-flow-filter ΔP (if applicable) __
- KPI snapshot (choose a fixed window, e.g., 1 shift or 1 week): OEE __ / fines % __ / unplanned stops tied to knives __ / blade swaps per week __
2) Change made (what exactly changed)
- What you changed: (gap reset / hub reseat / regrind / new material / coating / water loop adjustment)
- Why: (symptom observed: tails, fines, chatter, motor load rise, noise)
- Controls: what stayed the same (resin lot, die plate, operator, dryer settings, sampling method)
3) Verification method (how you proved it)
- A/B run window: __ minutes/hours (keep it consistent)
- Sampling: sieve method for fines, pellet geometry check method, motor load logging interval
- Pass criteria (example): fines ≤ baseline × 1.5, no new tails/smear, stable amps, no added downtime
4) Result (after change)
- KPI snapshot (same window as baseline): OEE __ / fines % __ / unplanned stops tied to knives __ / swaps per week __
- Decision: keep change / revert / run a longer trial / escalate to OEM
- Notes: (photos of pellet defects, edge microscope notes, unusual events)
Reminder: If you can’t hold resin/die/operator constant, call it a “directional result” and repeat the test.
Think of it this way: the plants that achieve reliable pelletizer blade life extension don’t gamble—they measure. Clean, inspect, and log daily; hold gap uniformity and TIR within tight bands; dry strands before the cut or stabilize the underwater loop; choose materials and coatings matched to abrasiveness; and run a disciplined sharpen-vs-replace playbook. These moves curb unplanned stops and, with consistent KPIs, can yield longer practical intervals between changeovers when validated locally.
Your next steps: standardize the setup SOPs above, lock in log fields for gap/TIR/fines, and start a simple A/B protocol to prove improvements.