
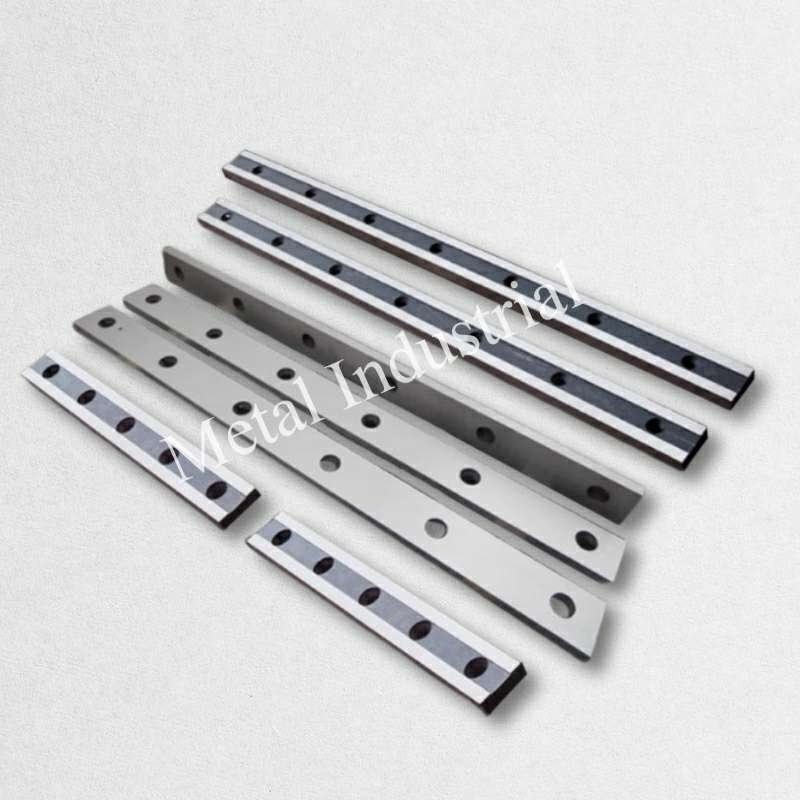
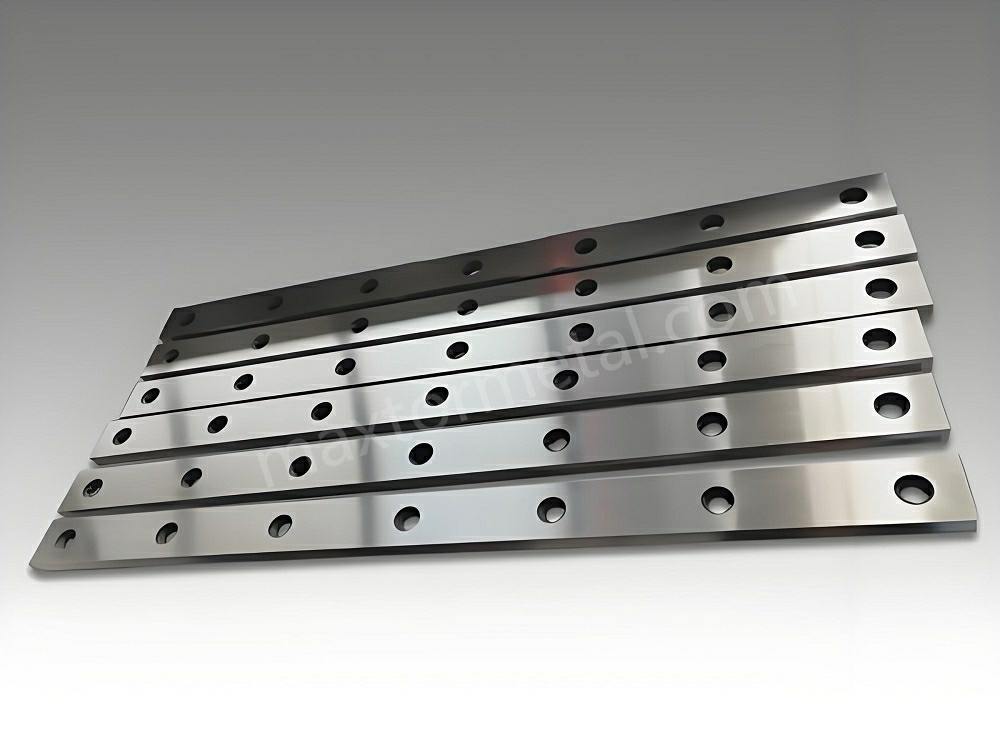
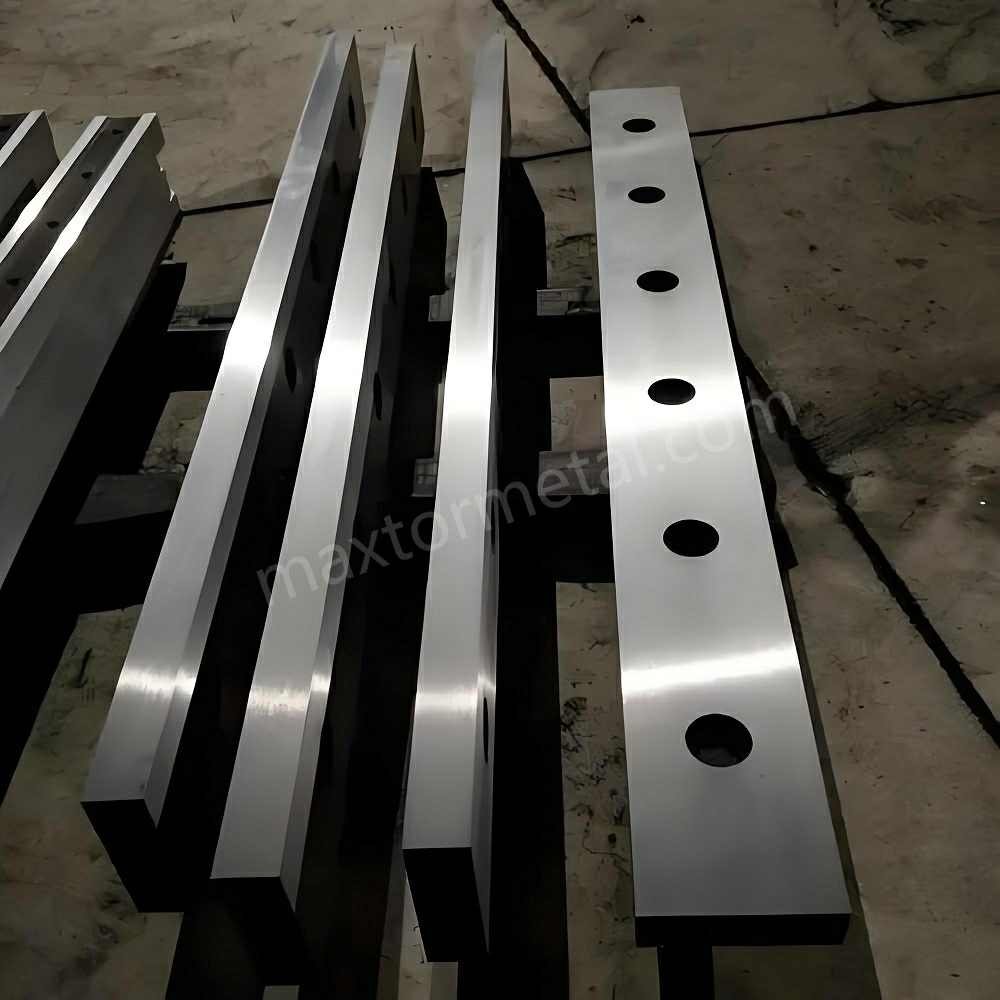
You get great results when you Заточка сдвиговых ножей. Keep the blade shape correct and use the right angle. Keep the blade’s original shape. Take off only a little bit of material. Metal Industrial Shear Blades have special edge design and strong materials. Careful sharpening helps them cut better and last longer. Use the right way to sharpen to avoid mistakes. This helps you save money over time.
Ключевые выводы
- Sharpening shear blades the right way helps them work better and last longer. This means you get cleaner cuts and spend less time fixing things.
- Keeping the blade’s original shape is very important. It makes cutting easier, helps cuts stay smooth, and stops you from wasting material.
- Sharpening often saves money. You do not need to buy new blades as much. Your machines also stop less often.
- Pick the right grinding tool for your blade’s size and shape. Use bench grinders for small blades. Belt grinders work best for big, curved blades.
- Always pick the right grinding wheel and grit for your blade’s material. This stops the blade from getting too hot and keeps it sharp.
- Safety matters a lot. Wear safety gear. Make sure your workspace is clean and bright. This helps you avoid getting hurt.
- Check blades often for damage. Adjust the clearance before sharpening. This helps keep the blade’s shape right.
- After sharpening, look for burrs and test if the blade is sharp. This makes sure the blade is ready to use.
Why Sharpen Shear Blades Properly
Performance and Longevity
Sharpening shear blades the right way helps them work well. It also makes them продлится дольше. Metal Industrial Shear Blades use strong materials and special edges. These blades are tough and can do many jobs. Sharp blades give you clean cuts. You will not have to stop work as much. Dull blades can make rough cuts or slow down your work.
Look at the table below. It shows how sharpening helps Metal Industrial Shear Blades do better:
| Improvement Type | Описание |
|---|---|
| Повышенная износостойкость | Special coatings help blades last 2-3 times longer in tough jobs. |
| Повышенная износостойкость | Good manufacturing lets blades handle hard work and stay sharp. |
| Efficient Maintenance | Blades are easy to sharpen and coat, so you save time and money. |
Sharpening does more than just make blades sharp. It keeps them strong for hard jobs.
Geometry Preservation
Keeping the blade’s shape is very important. You must protect the rake angle, parallelism, and flatness. If the shape is wrong, you can get burrs or chips. You might also see uneven cuts. These problems make your job harder and can hurt the blade.
- Keeping the right shape means you:
- Use less effort to cut.
- Get smoother and quicker cuts.
- Lose less blade material.
Studies show that losing the right shape makes blades wear out fast. The edge can get dull from rubbing against small bits. This makes the blade less sharp and less useful.
TCO and Cost Savings
Sharpening blades the right way saves money. You do not need to buy new blades often. You also spend less time fixing problems or stopping work. Many people who use these blades save a lot by sharpening them often.
- Regular sharpening helps you:
- Avoid buying new blades too soon.
- Spend less on blade care.
- Keep machines running longer without stops.
Cleaning and checking blades often helps them last longer. The chart below shows how different sharpening ways help blades last longer:

When you sharpen and care for shear blades, you get more use from each blade. You also keep your work safe and running well.
Tools and Preparation for Sharpening
Before you start sharpening shear blades, gather the right tools. Make sure your workspace is safe and ready. Metal Industrial Shear Blades use strong materials, so pick your tools carefully. You can look at изготовленное на заказ лезвие choices. If you want to know more about blade materials, check Nanjing Metal Industrial.
Choosing Grinding Equipment
Bench vs. Belt Grinders
There are different grinders you can use. Each one is good for certain jobs.
- Bench Grinders
- Преимущества: This grinder gives you a steady place to work. It helps you grind with care. Many shops have one.
- Недостатки: Bench grinders are not good for big or curved blades. They can make blades hot fast.
- Лучшее для: Use a bench grinder for small or medium shear blades. It works best for straight edges and when you need control.
- Belt Grinders
- Преимущества: Belt grinders are easy to use for many shapes. They work well for big or curved blades. They take off metal quickly.
- Недостатки: You need to keep the angle steady. The belts can wear out quickly.
- Лучшее для: Use a belt grinder for big blades or blades with tricky shapes. It is also good for quick grinding.
Кончик: Use a bench grinder in a shop for small, straight blades. Use a belt grinder in a factory for big, curved blades.
Surface grinders are also helpful for sharpening. They work well on flat blade parts that touch each other. Set the grinding angle between 2 and 7 degrees for the best results.
Wheel Selection by Material
Pick the right grinding wheel for the blade material. This stops the blade from getting too hot and keeps the edge smooth.
| Материал лезвия | Recommended Wheel Type | Grit Size | Hardness Grade |
|---|---|---|---|
| Сталь D2 | Ceramic or CBN | 60–120 | K–N |
| H13 Steel | Aluminum Oxide or CBN | 80–120 | J–M |
| Карбид вольфрама | Diamond | 100–180 | R–S |
- For D2 steel, use ceramic or CBN wheels. Pick a grit size from 60 to 120.
- For H13 steel, use aluminum oxide or CBN wheels. Choose a grit size from 80 to 120.
- For tungsten carbide, use diamond wheels. Pick a grit size from 100 to 180.
Always use the right wheel and grit for the blade. This keeps the blade sharp and stops heat damage.
Safety and Workspace Setup
Personal Protective Equipment (PPE)
You need to stay safe when sharpening shear blades. Grinding makes sparks and dust.
- Wear safety goggles to protect your eyes.
- Use cut-resistant gloves for your hands.
- Put on hearing protection for your ears.
- Wear a dust mask or respirator to keep out dust.
- Make sure your workspace is bright.
- Keep your area clean and tidy.
PPE keeps you safe from sparks, flying bits, and touching the blade by mistake.
Cooling systems are important too. They stop blades from getting too hot and losing their edge.
- Air cooling is good for light jobs. Fans blow away heat.
- Liquid cooling is better for thick blades. Coolant soaks up heat.
- Cryogenic cooling uses liquid nitrogen for fast cooling. This lowers stress on the blade and helps it last longer.
A steady workspace cuts down on shaking. This helps you make careful cuts and keeps blades working longer.
Blade Inspection and Clearance Adjustment
Check the blade before you sharpen it. Inspections help you find problems early and save time.
| Метод контроля | Описание |
|---|---|
| Визуальный осмотр | Look for rounded edges, chips, cracks, or uneven wear. |
| Performance Tracking | Track how much you cut. Notice if you need to sharpen more often. |
| Документация | Write down how the blade works. This helps you plan when to replace it. |
- Check blades often to find wear, damage, or if they are not straight.
- Early checks stop big problems from happening.
- Look for cracks, tiny breaks, and make sure the blade is straight.
Always set the blade clearance before sharpening. This helps you only take off what you need and keeps the blade shape right.
When you get your tools, workspace, and safety gear ready, you are set to go. You can sharpen shear blades well and keep your machines working great.
How to Sharpen Shear Blades Like a Pro
Cleaning and Setup
Remove Debris and Old Lubricant
You need to start with a clean blade before you sharpen shear blades. Dirt, old oil, and rust can hide damage and make sharpening harder. Use these cleaning methods:
- Wash the blade with warm water and dish soap for light cleaning.
- Wipe the blade with rubbing alcohol (70% isopropyl) to remove grease and disinfect.
- For tough grime, use a diluted hydrogen peroxide solution (mix equal parts 3% hydrogen peroxide and water).
- If you see stubborn dirt, try a TSP (TriSodium Phosphate) cleaner. Wear gloves and goggles for safety.
A clean blade helps you see the edge clearly and makes the sharpening process smoother.
Secure the Blade for Sharpening
You must keep the blade steady while you work. Movement can cause uneven edges or accidents. Place the blade in a sturdy vise or a special sharpening fixture. Make sure the blade does not wiggle. A stable setup lets you control the angle and pressure better.
Tip: Use a soft cloth or rubber pads in the vise to protect the blade surface from scratches.
Inspect for Damage or Warping
Look closely at the blade. Check for chips, cracks, or bends. Run your finger gently along the edge to feel for rough spots. If you find deep damage or warping, you may need to repair or replace the blade. Do not sharpen a blade with serious flaws, as it can break or cut poorly.
Marking and Measuring Angles
Identify Manufacturer’s Recommended Angle
Every blade has a best angle for sharpening. This angle keeps the blade strong and sharp. Manufacturers use different methods to set these angles. Here is a table that shows common ways to measure them:
| Measurement Method | Angle Reference | Resulting Angle |
|---|---|---|
| German Method | 0° from inside edge | 35° from inside, 55° from outside |
| Japanese Method | 90° from inside edge | 35° from inside, 55° from outside |
| US Method | 90° – angle gage result | 35° from inside, 55° from outside |
Check your blade’s manual or the company’s website for the exact angle. Using the right angle helps you sharpen shear blades like a pro.
Use Angle Gauges or Protractors for Accuracy
You want to keep the sharpening angle exact. Use these tools to help:
- An angle-setting jig holds the blade at the right angle.
- A tilt box lets you measure and adjust the angle easily.
- A protractor helps you line up the blade and set the guide.
These tools make sure you do not change the blade’s shape by mistake.
Mark the Bevel with a Permanent Marker
Take a permanent marker and color the edge of the blade. This mark shows you where you are grinding. As you sharpen, the marker will disappear from the spots you touch. This trick helps you keep the angle even and avoid grinding too much metal.
Note: Marking the bevel is a simple way to track your progress and keep the edge straight.
Grinding Technique
Maintaining Bevel and Flatness
When you grind, you want to keep the blade’s original shape. Use these tips:
- Use a bevel jig to hold the angle steady.
- Try the push stick method to guide the blade and keep your hands safe.
- Check the grinding surface often. If you use a platen, resurface it to keep it flat.
- Mark grind heights and centerlines with layout fluid or a marker for better accuracy.
You can also:
- Use a solid belt grinder for better control.
- Choose a Variable Frequency Drive (VFD) for fine grinding.
- Replace worn-out belts to avoid uneven grinding.
Fresh abrasives give you a smoother finish and help you sharpen shear blades without making them uneven.
Preventing Overheating
Grinding can make blades hot. Too much heat can soften the metal and ruin the edge. You can stop this by:
- Dipping the blade in water often during grinding.
- Using water-cooled sharpening tools.
- Grinding by hand to keep heat low.
- Picking grinding wheels with larger grains for better heat control.
- Using CBN or diamond wheels to cut down on friction.
- Dressing the grinding wheel often to keep it sharp.
You can also slow down the feed rate and take shallow cuts. This keeps the blade cool, even if it takes a bit longer.
Always watch for blue spots on the blade. Blue means the blade got too hot and may have lost its hardness.
By following these steps, you keep the blade strong and sharp for a long time.
Honing and Polishing
Use Fine Grit Stones or Honing Wheels
After you finish grinding, you need to refine the edge. This step makes the blade sharper and smoother. You can use different types of honing stones or wheels for this job:
- Blackstone silicone wheels work well for very hard steels. They help shape the bevel and remove rough spots.
- Japanese waterstones, such as 1000 or 6000 grit, are great for final edge refinement. They remove tiny scratches and burrs, leaving a sharp edge.
- King Japanese waterstones are also a good choice for sharpening many types of blades.
Start with a coarser stone if the edge feels rough. Move to a finer stone or wheel to finish. Always keep the stone wet if you use waterstones. This helps the stone cut better and keeps the blade cool.
Tip: Use light pressure when honing. Let the stone or wheel do the work. This helps you avoid removing too much metal and keeps the blade’s shape.
Polish the Edge for a Mirror Finish
Polishing the edge is the last step before you use the blade. When you polish the edge to a mirror finish, you make the blade glide through materials with less effort. The smooth edge cuts cleaner and more precisely. This is important for delicate jobs where you need accuracy.
Polishing also removes small imperfections. These tiny flaws can cause chipping or rust if you leave them. By polishing, you help the blade last longer and stay sharp. Use a fine honing wheel or a polishing compound for this step. Work slowly and check the edge often. You want to see a shiny, mirror-like surface along the bevel.
Final Inspection
Check for Burrs and Consistent Edge
After you hone and polish, you need to check the blade for burrs and a consistent edge. Burrs are small pieces of metal that stick out from the edge after sharpening. They can make the blade cut poorly or even damage the material you are cutting.
Here are some ways to check for burrs and edge consistency:
- Feel along the edge with your fingertip. You might notice a rough spot or a tiny hook.
- Look at the edge under a bright light or with a magnifier. Burrs can look like shiny lines or small bumps.
- Alternate honing sides with light pressure to help remove any remaining burrs.
A good edge should feel smooth and even from end to end. If you find a burr, go back to the honing stone and gently remove it.
Test Blade Sharpness and Alignment
You should always test the blade before you put it back to work. There are several simple ways to check sharpness and alignment:
- Visual inspection: Look for nicks, chips, or bends along the edge.
- Paper test: Try slicing a piece of paper. A sharp blade will cut cleanly without tearing.
- Tomato test: Slice a tomato. If the blade glides through easily, it is sharp.
- Arm hair test: Carefully try to shave a small patch of arm hair. If the blade cuts hair without pulling, it is ready.
- Vegetable or fruit test: Use a firm vegetable or fruit to see how the blade performs in real use.
If the blade passes these tests, you have finished the sharpening process. If not, repeat the honing and polishing steps until you get the results you want.
Note: Always handle the blade with care during testing. A sharp edge can cut you easily.
By following these steps, you make sure you sharpen shear blades to a professional standard. You get a blade that cuts cleanly, lasts longer, and works safely every time.
Avoiding Common Grinding Mistakes
Wrong Angle and Geometry Loss
You need to keep the correct angle when you sharpen shear blades. If you grind at the wrong angle, you change the blade’s geometry. This mistake can cause many problems:
- The blade may tear the material instead of cutting it cleanly.
- You can overheat the edge, which weakens the blade.
- The blade will wear out faster and may even damage your machine.
The cutting edge angle is very important. It decides how well the blade cuts. If you use the wrong angle, you lose cutting power and accuracy. Always check the manufacturer’s guide for the right angle. Use angle gauges or jigs to help you keep the correct shape.
Tip: Match the blade’s pitch and profile to the material and machine speed. Fine teeth work best for fast jobs. Coarse teeth are better for slow, heavy cuts.
If you use a blade with the wrong geometry, you risk tip breakage, especially with brittle materials. Always align the blade’s shape with its limits.
Over-Grinding
Over-grinding happens when you remove too much material from the blade. This mistake can shorten the blade’s life and damage its surface. You need to avoid grinding too much at once.
Here is what can happen if you over-grind:
| Основные выводы | Описание |
|---|---|
| Fatigue Life Impact | The blade becomes weaker and does not last as long. |
| Surface Integrity Damage | The blade’s surface gets damaged, which can lead to cracks or chips. |
| Grinding Conditions | Wet grinding helps the blade last longer than dry grinding. |
You should always use light pressure and check your progress often. Take breaks to cool the blade and inspect the edge. If you see deep scratches or uneven spots, you may have removed too much material.
Note: Over-grinding can also change the blade’s balance. This can cause vibration and poor cutting results.
Heat Damage and Softening
Grinding creates heat. If the blade gets too hot, it can lose its hardness. The edge becomes soft and dulls quickly. You need to keep the blade cool while you work.
The danger zone for heat damage starts at 400°F (about 204°C). Most industrial shear blades are tempered at this temperature. If you go over this limit, you can ruin the blade’s heat treatment.
- The cutting edge is thin and heats up fast.
- Buffing and grinding can easily push the temperature too high.
- Once the blade softens, it will not hold an edge.
You can prevent heat damage by dipping the blade in water, using coolant, or grinding in short bursts. Watch for blue or purple colors on the edge. These colors mean the blade got too hot.
Always keep coolant levels high and check the blade’s temperature often. This simple step protects your blade and keeps it sharp.
Here is a table of common grinding mistakes found in industrial blade maintenance:
| Ошибка | Объяснение |
|---|---|
| Inadequate coolant levels | Causes overheating and premature wear, leading to poor cut quality. |
| Operating at excessive speeds | Leads to increased friction and premature wear. |
| Failure to dress wheels | Results in poor blade tracking and reduced precision. |
| Continued use of dull blades | Leads to poor cut quality and increased material waste. |
You can avoid these mistakes by following best practices and checking your work often. This will help you sharpen shear blades like a pro and keep your tools working longer.
Burrs, Chipping, and Bowed Blades
When you sharpen shear blades, you need to watch out for burrs, chipping, and bowed blades. Burrs are tiny pieces of metal that stick out from the edge after sharpening. If you leave a burr, your blade will not cut smoothly. It can also cause resistance and make your cuts rough. Chipping happens when small pieces break off the edge. Bowed blades bend out of shape and do not cut straight.
You can prevent these problems by following best practices during sharpening. Always check for a burr after sharpening one side. Flip the blade and sharpen the other side. Use gentle swiping motions with less pressure. This helps you avoid making a new burr. Run your finger along the edge to check for smoothness. If you feel a hook or rough spot, you still have a burr.
Proper burr removal is important. If you do not remove the burr, the blade will not work well. You can use different techniques to get rid of burrs and keep your shear blades in top shape.
| Техника | Описание |
|---|---|
| Elevate Angle | Raise the sharpening angle slightly until the burr is almost gone, then finish at the original angle. |
| Fold Burr | Lightly drag the edge across hard plastic or wood at 90° to lift the burr for easier removal. |
| Strop on Paper | Use plain paper wrapped around a hard surface to polish and remove leftover burrs. |
| Quick Method | Drag the edge through plastic or wood during final strokes to help remove burrs. |
| Alternate Passes | Sharpen both sides equally to avoid undoing your work. |
| Backdrag Test | Lightly drag the edge on plastic or wood to check for burrs. If nothing catches, the edge is clean. |
| Micro-burr Consideration | Sometimes leaving tiny burrs is better than overworking the edge or making the angle too wide. |
Кончик: Always alternate sides when sharpening. This keeps the edge even and helps prevent chipping.
If you notice chipping, you may be using too much pressure or the wrong angle. Use lighter strokes and check your progress often. Bowed blades often result from uneven grinding or too much force. Secure the blade well and use steady, even pressure. If a blade bows, it will not cut straight and may need professional repair.
- After sharpening one side, feel for the burr and then switch to the other side.
- Use lighter pressure to avoid making a new burr.
- Check for a smooth edge by running your finger along the blade after a few swipes.
By following these steps, you keep your shear blades sharp, straight, and ready for any job.
Coarse Stones and Ryde Line Damage
The type of sharpening stone you use can affect the quality of your shear blades. Coarse stones remove material quickly, but they can also cause damage if you are not careful. The ryde line is the fine line along the edge of the blade. If you use a stone that is too coarse, you risk damaging this line.
If the stone used to rebalance the shears is too coarse, the ryde line can be damaged or the shears won’t polish up to a high shine and will catch and pull.
A damaged ryde line means your shear blades will not cut smoothly. The edge may catch on materials or pull instead of slicing cleanly. You will also have trouble getting a polished, shiny finish on the blade. Always start with a coarser stone only if the blade is very dull or damaged. Move to finer stones as you get closer to the final edge.
- Use coarse stones only for heavy reshaping or repair.
- Switch to medium and fine stones for sharpening and finishing.
- Check the ryde line often. If you see scratches or roughness, use a finer stone.
- Finish with a polishing step to get a smooth, shiny edge.
Choosing the right stone and using the correct technique will help you avoid ryde line damage. Your shear blades will stay sharp, smooth, and ready for precise cutting.
Material-Specific Sharpening Tips
Сталь D2
Recommended Grinding Wheels and Grits
D2 steel is a popular choice for industrial shear blades because it is tough and holds an edge well. You need to use the right grinding wheels and grits to sharpen D2 steel. Choose ceramic or CBN (Cubic Boron Nitride) wheels. These wheels work best for hard steels like D2. Pick a grit size between 60 and 120. Use a hardness grade from K to N. This combination helps you remove just enough material without damaging the blade.
If you need a custom blade for a special job or material, you can explore варианты лезвий на заказ to match your needs.
Cooling and Overheating Prevention
D2 steel can lose its hardness if it gets too hot during sharpening. You must keep the blade cool to protect the edge. Use light pressure when grinding. Do not push too hard. Cool the steel often by dipping it in water or using a coolant system. This stops the edge from overheating and keeps the blade strong.
Here is a table that shows the best cooling techniques for D2 steel:
| Техника | Описание |
|---|---|
| Use Light Pressure | Apply moderate pressure to avoid overheating the steel. |
| Cool the Steel Frequently | Periodically cool the steel to prevent overheating and damage. |
Always watch for color changes on the edge. Blue or purple means the blade got too hot.
Angle and Geometry Considerations
You need to keep the original angle and shape of the shear blade. Check the manufacturer’s guide or the Nanjing Metal Industrial website for the correct angle. Use an angle gauge or protractor to set the bevel. Mark the edge with a permanent marker to track your progress. Take off as little material as possible. This helps the blade last longer and keeps the cutting edge strong.
H13 Steel
Suitable Abrasives and Wheel Types
H13 steel is another common material for shear blades. It is strong and resists heat. You need special abrasives to sharpen H13 steel. Superabrasives like diamond and CBN wheels are ideal. These wheels are very hard and cut H13 steel well. You can find them in many grit sizes, from 46 to 2,000. The wheels come with different bonds, such as resinoid and vitrified. These bonds help the wheel cut smoothly and stay cool.
- Superabrasives like diamond and CBN are ideal for sharpening H13 steel blades due to their extreme hardness.
- These materials are specifically designed for grinding hard work materials, making them suitable for high-performance applications.
- Superabrasive wheels come in various grit sizes (typically 46 through 2,000 grit) and types of bonds, such as resinoid and vitrified, which enhance cutting efficiency and reduce overheating.
Heat Management and Surface Finish
H13 steel can crack if it gets too hot. You need to use light pressure and keep the blade cool. Dip the blade in water often or use a coolant system. This prevents micro-cracks and keeps the edge sharp. After grinding, check the surface finish. A smooth finish means the blade will cut better and last longer. Use finer grits for the last few passes to get a polished edge.
Tip: Always inspect the blade for heat checks or surface burns after sharpening.
Common Pitfalls in Sharpening H13
Many people make mistakes when sharpening H13 shear blades. They use too much pressure or grind too fast. This can cause cracks or burns on the edge. Always use gentle strokes and check your progress often. If you see any cracks or dark spots, stop and let the blade cool. Use the right wheel and grit for H13 steel to avoid these problems.
Карбид вольфрама
Diamond Wheels and Grit Selection
Tungsten carbide is very hard and needs special care when sharpening. Use diamond wheels for the best results. Pick a grit size between 100 and 180. Choose a hardness grade from R to S. Diamond wheels cut carbide smoothly and help you get a sharp edge without chipping.
Avoiding Chipping and Edge Fracture
Carbide edges can chip if you use too much pressure. Always grind slowly and gently. Do not force the blade against the wheel. Use a steady hand and let the diamond wheel do the work. Check the edge often for chips or cracks. If you see any, use lighter strokes and a finer grit.
Note: Avoid aggressive grinding. This keeps the edge strong and prevents fractures.
Polishing for Maximum Sharpness
After grinding, you need to polish the edge for the best cutting performance. Use fine diamond paste or a honing wheel. Work slowly and check the edge for a mirror finish. A polished edge cuts cleaner and lasts longer. This step is important for high-precision jobs.
If you need a special blade for a unique material, you can look at индивидуальные решения для лезвий to get the right tool for your work.
By following these material-specific tips, you keep your shear blades sharp, strong, and ready for any job.
Japanese vs. German Shears
Typical Blade Angles and Steel Types
Japanese and German shear blades are not the same. Japanese shears have a convex edge. This edge is very sharp and cuts smoothly. The angle is finer, between 40° and 50°. These blades use high-quality steel. This helps them stay sharp for a long time.
German shear blades have a beveled edge. This edge is not as sharp but is easier to care for. The angle is steeper, between 50° and 60°. German shears use strong steel. They can handle tough jobs and lots of sharpening.
Here is a table that shows the main differences:
| Особенность | Japanese Shears | German Shears |
|---|---|---|
| Тип лезвия | Convex edge blades | Bevel-edge blades |
| Резкость | Extremely sharp for precise cuts | Less sharp, easier to maintain |
| Частота технического обслуживания | Requires sharpening less frequently | Easier to maintain but less sharp |
| Качество материала | High-quality materials for longevity | Durable and practical construction |
Sharpening Techniques for Each Style
You need to sharpen Japanese and German shears in different ways. For Japanese shears, use a flat hone or fine whetstone. Hold the blade at the same angle as before. Move it gently across the stone. Keep the convex shape. Do not make the edge flat. Use light pressure and check your work often. This keeps the blade sharp and smooth.
For German shear blades, use a grinding wheel or medium-grit stone. Hold the blade at the steeper angle. Move it in a steady way. You do not need to keep a convex edge. The beveled edge is easier to sharpen. You can use a little more pressure. Always check to make sure the edge is even.
Tip: Always follow the manufacturer’s rules for sharpening angles. This helps you keep the right shape and get the best cuts from your blades.
Распространенные ошибки и как их избежать
People often make mistakes when sharpening these blades. One mistake is using the wrong angle. If you change the angle, the blade can get dull. Another mistake is pressing too hard. This can chip the edge or make it uneven.
Here are some ways to avoid mistakes:
- Use the right sharpening tool for each blade.
- Keep the original angle. Use an angle guide if you need it.
- Use light, even strokes. Do not rush.
- Check your work often. Look for burrs or rough spots.
- Clean the blade before and after sharpening.
Note: If you are not sure about the angle or how to sharpen, ask a pro or check the manufacturer’s instructions. This helps you keep your blades sharp and avoid damage.
When you know the differences between Japanese and German shear blades, you can pick the right way to sharpen. This helps you get sharp blades that last a long time.
Troubleshooting and Blade Replacement
Heat Checking and Surface Burns
You may notice small cracks or dark spots on your blade after grinding. These marks are called heat checks and surface burns. They happen when the blade gets too hot during sharpening. Heat checks look like tiny lines that run across the edge. Surface burns show up as blue, purple, or black spots. These signs mean the blade lost some hardness.
To prevent heat damage, always cool the blade often. Dip it in water or use a coolant. Use light pressure when you grind. If you see any color changes, stop and let the blade cool down. You can use a magnifying glass to check for small cracks. If you find many heat checks, the blade may not cut well anymore.
Tip: Always check for heat damage before you put the blade back to work. This helps you avoid poor cuts and keeps your machine safe.
Diagnosing Bowed Blades
A bowed blade does not stay flat. It bends in the middle or at the ends. You can spot a bowed blade by laying it on a flat table. If you see a gap under the blade, it is bowed. You may also notice uneven cuts or hear strange sounds during use.
Here are steps to check for a bowed blade:
- Place the blade on a flat surface.
- Press down gently at each end.
- Look for any space between the blade and the table.
- Use a straightedge or ruler to check for gaps.
A bowed blade can cause jams or crooked cuts. If you find a bow, do not try to fix it by force. You may need to replace the blade or ask a professional for help.
When to Rotate or Replace Blades
You should know when to rotate or replace your shear blades. Regular checks help you get the best results and keep your machines safe. Here are signs that you need to take action:
| Знак | Что это значит | Что делать |
|---|---|---|
| Dull edge | Blade does not cut cleanly | Sharpen or rotate blade |
| Deep chips or cracks | Blade is damaged | Заменить лезвие |
| Bowed or warped shape | Blade is not flat | Заменить лезвие |
| Frequent sharpening needed | Blade wears out quickly | Заменить лезвие |
| Uneven wear | One side is thinner than the other | Rotate or replace blade |
You can rotate blades if they have more than one cutting edge. This helps you use all sides before replacing them. If you see deep damage, replace the blade right away. Always follow the manufacturer’s guide for safe blade care.
Note: If you sharpen shear blades often but still see poor results, it may be time for a new blade.
By checking your blades often and knowing when to replace them, you keep your work safe and your machines running well.
Maintenance for Maximum TCO
Routine Cleaning and Lubrication
You should clean your shear blades after every use. Dirt and old oil can stick to the blade. Metal shavings can also build up. This can make the blade rust or get dull faster. Use a soft brush or cloth to wipe off the dirt. If you see sticky stuff, use a gentle cleaner. Dry the blade well after cleaning.
Lubrication helps the blade move easily and stops rust. Put a thin layer of machine oil or the right lubricant on the blade edge and moving parts. Do not use too much oil. Too much oil can make dust and dirt stick. Always look for chips or cracks when you clean. If you see damage, fix it before sharpening the blade again.
Tip: Clean and oil your blades after each use. This easy step stops rust and keeps your cuts neat.
Хранение и обращение
Storing your blades the right way keeps them safe. Put blades in a dry place. Use blade guards or cases to stop nicks or chips. Keep blades away from water to stop rust. If you store blades for a long time, check them sometimes for rust.
Handle blades carefully. Always wear gloves when you move or put in blades. Place blades on something soft so they do not bend. Never drop a blade or put heavy things on it. Careful handling helps blades last longer and keeps them safe to use.
Quick-Reference Maintenance Checklist
You can use this checklist to keep your blades in good shape:
| Действия по техническому обслуживанию | Рекомендуемый интервал/состояние |
|---|---|
| Регулярная уборка | После каждого использования, чтобы предотвратить ржавление и сохранить остроту лезвий. |
| Заточка лезвий | Когда резка становится сложной или трудной, используйте правильный угол. |
| Проверьте на износ | При каждой чистке осматривайте поверхность на наличие сколов, трещин или неровных краев. |
| Смажьте движущиеся части | После чистки и перед тем, как убрать лезвия на хранение. |
| Проверка выравнивания | Регулярно проверяйте, чтобы срезы были ровными и лезвия меньше изнашивались. |
| Замена лезвий | Если вы видите трещины, большие сколы или если лезвие стало слишком тонким. |
- Clean blades after every use to get rid of dirt.
- Check for chips, cracks, or other damage.
- Oil the blade edge and moving parts.
- Store blades in a dry, safe place.
- Check if blades are straight and replace them if needed.
Remember: Taking care of your blades helps them last longer and keeps your work safe and easy.
You can sharpen shear blades like a pro when you follow the right steps. Use the correct angle and check your work often. Avoid common mistakes to keep your blades sharp and strong. Clean and store your blades after each use. Regular care helps you save money and work safely. If you want expert advice or need help, Свяжитесь с нашими инженерами по продажам. сегодня.
Часто задаваемые вопросы
Как часто следует затачивать лезвия ножниц?
You should sharpen shear blades when you notice rough cuts or increased effort. Most users sharpen blades after every 500 to 1,000 cuts. Regular inspection helps you decide the best schedule.
What is the best angle for sharpening shear blades?
You need to follow the manufacturer’s recommended angle. Most shear blades work best at angles between 35° and 55°. Use an angle gauge for accuracy.
Can you sharpen shear blades at home?
You can sharpen shear blades at home with the right tools. Use a bench grinder or belt grinder. Always wear safety gear and follow proper techniques.
Why do shear blades lose sharpness quickly?
Shear blades lose sharpness from cutting hard materials, improper sharpening, or lack of cleaning. Regular maintenance and correct sharpening help blades stay sharp longer.
What is the safest way to handle shear blades during sharpening?
You should wear cut-resistant gloves and safety goggles. Secure the blade in a vise. Keep your hands away from the edge and work slowly.
How do you know when to replace shear blades?
Replace shear blades when you see deep chips, cracks, or warping. If sharpening does not restore performance, it is time for a new blade.
Which grinding wheel works best for D2 steel shear blades?
Ceramic or CBN wheels work best for D2 steel shear blades. Use grit sizes between 60 and 120. This combination gives you a sharp edge and prevents overheating.
Do you need to lubricate shear blades after sharpening?
You should apply a thin layer of machine oil after sharpening. Lubrication protects the edge from rust and keeps the blade moving smoothly.
Смотрите также
Достижение Резки Без Заусенцев с Прецизионными Гильотинными Ножами
Ножи Сдвиговых Ножниц из D2: Почему Сталь D2 — Король для Холодной Резки Металла
Ножи Гильотинные против Ножей Сдвиговых Ножниц: В Чем Разница и Что Лучше для Вашей Работы?
Как Устранить Распространенные Проблемы с Ножами Гидравлических Ножниц для Металлолома в 2025 году
Один ответ