


Phân tích mẻ lưỡi dao cắt xén giúp bạn tìm ra nguyên nhân khiến lưỡi dao bị hỏng. Nó cũng chỉ ra lý do tại sao hệ thống gặp sự cố trong quá trình cắt thủy lực của bạn. Khi lưỡi dao bị mỏi hoặc chịu ứng suất quá mức, chúng sẽ bị mẻ. Điều này làm bạn mất thời gian và giảm chất lượng đường cắt. Hư hỏng do bảo trì kém hoặc các vấn đề thủy lực có thể làm ngừng hoạt động và gây tốn kém chi phí. Bạn cần kiểm tra và khắc phục sự cố sớm để ngăn ngừa hỏng lưỡi dao. Lưỡi dao chất lượng tốt sẽ bền hơn, giữ cho đường cắt đẹp và tiết kiệm chi phí. Việc kiểm tra và bảo dưỡng máy thường xuyên giúp bảo vệ máy khỏi ứng suất và hiện tượng mỏi cơ học. Khắc phục các sự cố của máy cắt thủy lực giúp ngăn ngừa hư hỏng lưỡi dao, đồng thời giúp bạn luôn có được những đường cắt chất lượng mỗi lần vận hành.
- Hiện tượng mẻ dao làm bạn mất thời gian và tốn nhiều chi phí hơn.
- Lưỡi dao bị mỏi và chịu ứng suất cao sẽ không bền.
- Kiểm tra và sửa chữa máy sớm giúp bạn có được những đường cắt tốt hơn.
Những điểm chính
- Mẻ dao khiến máy phải dừng hoạt động và tốn nhiều chi phí hơn. Kiểm tra lưỡi dao thường xuyên có thể ngăn chặn những vấn đề này.
- Lưỡi dao bị mòn hoặc chịu ứng suất sẽ bị mẻ nhanh hơn. Hãy bảo dưỡng lưỡi dao để chúng sử dụng được lâu hơn.
- Hãy kiểm tra khe hở lưỡi dao nhiều lần. Khoảng cách phù hợp sẽ ngăn ngừa mẻ dao và mang lại đường cắt mịn.
- Chọn các vật liệu có độ bền cao như S7 hoặc A8 Mod cho lưỡi dao. Những vật liệu này giúp lưỡi dao không bị mẻ khi làm việc nặng.
- Kiểm tra các dị vật trước khi cắt. Bước này giúp bảo vệ lưỡi dao khỏi những hư hỏng bất ngờ.
- Áp dụng quy trình mài lại chuẩn xác. Sử dụng chất làm mát và thao tác nhẹ nhàng để tránh nhiệt độ cao làm hỏng lưỡi dao.
- Đảm bảo máy được căn chỉnh đúng cách và không bị quá tải. Thiết lập chuẩn xác giúp lưỡi dao không phải chịu ứng suất quá mức.
- Ghi chép lịch sử bảo trì vào nhật ký. Việc theo dõi các vết mẻ giúp phát hiện và khắc phục sự cố sớm.
Tìm hiểu hiện tượng mẻ lưỡi dao cắt tấm và ảnh hưởng của nó
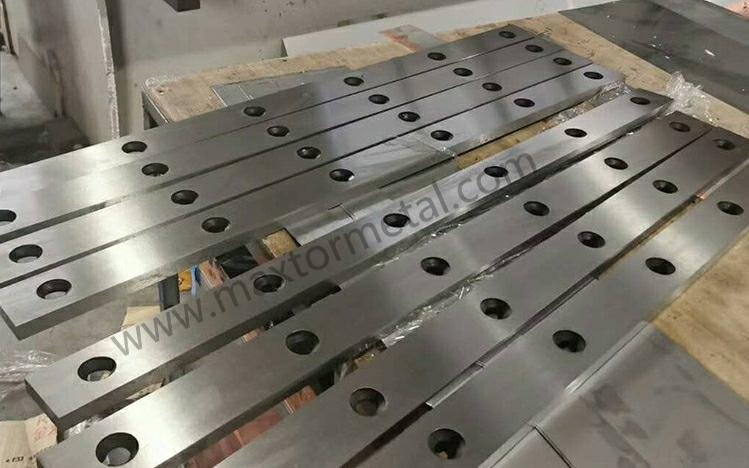
Phân biệt “Mẻ dao” với các dạng hỏng lưỡi dao khác (Gãy, Mòn, Biến dạng)
Bạn có thể gặp nhiều dạng hư hỏng lưỡi dao khác nhau trong quá trình làm việc. Mẻ dao là hiện tượng các mảnh nhỏ bị vỡ ra khỏi cạnh lưỡi dao. Hư hỏng này trông giống như các vết khía nhỏ hoặc các mảnh bị khuyết. Gãy xảy ra khi lưỡi dao bị nứt hoặc gãy thành các đoạn lớn. Mòn biểu hiện dưới dạng cạnh dao bị cùn hoặc các góc bị bo tròn. Biến dạng nghĩa là lưỡi dao bị cong hoặc xoắn vặn biến dạng. Mỗi vấn đề đều ảnh hưởng đến kết quả cắt của bạn theo một cách riêng.
Mẹo: Nếu bạn phát hiện các vết vỡ nhỏ, sắc nhọn dọc theo lưỡi dao, rất có thể bạn đang gặp phải tình trạng mẻ dao. Các vết nứt lớn là dấu hiệu của gãy dao. Cạnh dao bị cùn báo hiệu sự mài mòn. Lưỡi dao bị cong có nghĩa là đã bị biến dạng.
Chi phí đắt đỏ do mẻ dao: Thời gian dừng máy, Gia công lại và Chi phí mài lại
Mẻ dao có thể gây tốn kém hơn bạn nghĩ. Khi lưỡi dao bị mẻ, bạn phải dừng máy. Bạn lãng phí thời gian quý báu. Bạn có thể phải gia công lại phôi vì lưỡi dao bị mẻ tạo ra các đường cắt xù xì. Việc mài lại lưỡi dao cũng tốn thêm công sức và tiền bạc. Đôi khi, bạn phải mua lưỡi dao mới sớm hơn dự kiến.
Dưới đây là bảng đơn giản thể hiện mức độ ảnh hưởng:
| Vấn đề | Kết quả | Chi phí bạn phải gánh chịu |
|---|---|---|
| Thời gian chết | Dừng máy | Thất thoát sản lượng |
| Gia công lại | Chất lượng đường cắt kém | Thêm chi phí nhân công |
| Nghiền lại | Cần sửa chữa lưỡi dao | Chi phí dụng cụ |
Bạn có thể thấy hiện tượng mẻ dao ảnh hưởng thế nào đến lợi nhuận của mình. Phân tích nhanh giúp bạn tìm ra nguyên nhân và khắc phục trước khi chi phí tăng cao.
Chẩn đoán nhanh: Dạng mẻ là ngẫu nhiên hay đồng đều?
Bạn có thể rút ra nhiều điều bằng cách quan sát dạng mẻ dao. Nếu các vết mẻ xuất hiện thành một đường thẳng dọc theo lưỡi dao, có thể bạn đang gặp vấn đề về thiết lập hoặc sai khe hở. Các vết mẻ ngẫu nhiên thường do dị vật hoặc quá tải. Bạn nên kiểm tra lưỡi dao sau mỗi lần sử dụng. Phân tích đơn giản này giúp bạn quyết định cần khắc phục điều gì trước.
- Vết mẻ đồng đều: Kiểm tra khe hở lưỡi dao và độ cứng vật liệu.
- Vết mẻ ngẫu nhiên: Kiểm tra xem có mảnh vụn dị vật hoặc máy bị quá tải không.
Ghi chú: Luôn ghi lại các dạng mẻ dao vào nhật ký bảo trì. Thói quen này giúp bạn phát hiện xu hướng và ngăn ngừa hư hỏng trong tương lai.
Giờ đây bạn đã hiểu sự khác biệt giữa mẻ dao và các dạng hỏng khác, lý do tại sao nó gây tốn kém chi phí, và cách sử dụng các dạng mẻ dao để phân tích nhanh. Kiến thức này giúp bạn giữ cho lưỡi dao luôn ở trạng thái tốt nhất và hoạt động sản xuất diễn ra trôi chảy.
Top 5 nguyên nhân gây mẻ lưỡi dao cắt tấm và cách phòng ngừa
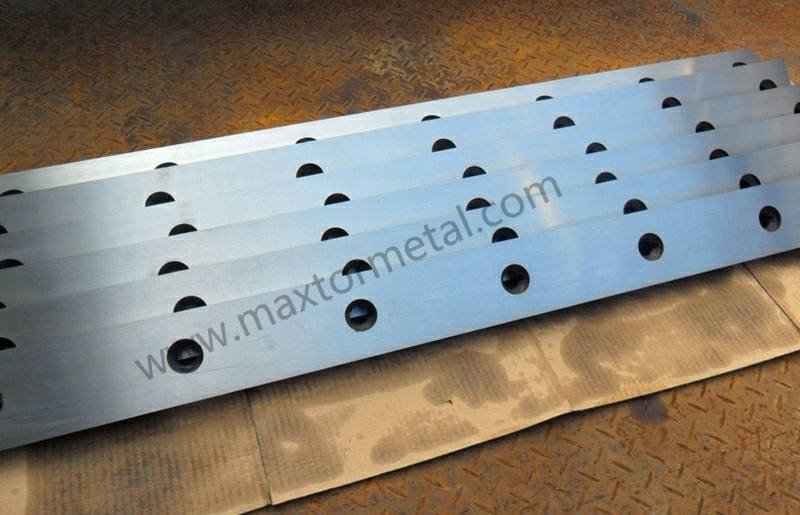
Nguyên nhân 1: Thiết lập khe hở lưỡi dao không chính xác
Chẩn đoán: Hiện tượng mẻ xảy ra khi khe hở quá nhỏ. Điều này khiến các lưỡi dao ma sát quá mức và chịu ứng suất cắt kép (double-shearing). Bạn có thể thấy hư hỏng bong tróc (spalling) dọc theo cạnh lưỡi dao nếu khe hở không chính xác. Khe hở hẹp tạo thêm ứng suất lên lưỡi dao. Điều này gây ra ma sát và cắt kép. Các vết mẻ và nứt nhỏ có thể hình thành. Hệ thống thủy lực cần các lưỡi dao được căn chỉnh thẳng hàng để có đường cắt tốt. Nếu bạn thấy đường cắt xù xì hoặc có vết nứt, rất có thể khe hở đã bị sai. Việc quan sát các dạng mẻ dao thường xuyên giúp bạn phát hiện vấn đề này sớm.
Mẹo: Các khe hở lưỡi dao sai có thể gây ra các vết nứt và đường cắt xù xì. Nếu khe hở quá rộng hoặc quá hẹp, đường cắt sẽ không đều. Hãy kiểm tra và điều chỉnh khe hở cũng như độ thẳng hàng của lưỡi dao thường xuyên để có đường cắt sạch và đẹp.
Phòng ngừa: Sử dụng bảng tra cứu khe hở của nhà sản xuất. Luôn kiểm tra khe hở bằng thước lá sau khi thay lưỡi dao. Bạn có thể ngăn ngừa hư hỏng do bong tróc bằng cách bảo trì định kỳ. Luôn tuân thủ bảng tra cứu khe hở của nhà sản xuất khi thiết lập máy cắt thủy lực. Sau khi thay lưỡi dao, hãy kiểm tra khe hở bằng thước lá. Việc này đảm bảo lưỡi dao được đặt ở khoảng cách chính xác, giúp giảm ứng suất và hiện tượng mỏi trên lưỡi dao. Thực hiện kiểm tra định kỳ giúp bạn tránh được các sự cố hệ thống thủy lực và duy trì chất lượng đường cắt tốt. Khi thường xuyên kiểm tra lỗi, bạn sẽ giảm thiểu nguy cơ bong tróc và các hư hỏng khác.
Phân tích nguyên nhân gốc rễ từ các nghiên cứu mới chỉ ra những nguyên nhân chính gây ra hư hỏng do bong tróc:
- Các vấn đề liên quan đến vật liệu của máy cắt thủy lực.
- Điều chỉnh khe hở lưỡi dao không chính xác trên lưỡi dao máy cắt thủy lực.
- The blade cutting into the skid plate.
- Cutting round steel can make the blade collapse.
- Too much impact force when feeding sheet material.
Reason 2: Overly Hard or Brittle Blade Material
Diagnosis: Chipping on clean, even material often has small, shiny breaks. If you see spalling damage with tiny, shiny breaks on clean material, the blade may be too hard or brittle. Hard blades can chip easily when cutting with high force. Brittle blades crack more, especially with tough or odd materials. This problem usually looks like even chips along the blade edge. Looking at the blade surface helps you find if hardness or toughness is the cause.
| Điểm chứng cứ | Sự miêu tả |
|---|---|
| Insufficient Hardness | Less carbide caused more wear and bending. |
| Độ bền va đập | Good impact toughness did not stop chipping. |
| Retained Austenite | Unstable austenite helped chipping start. |
MỘT hard blade can chip more, especially when cutting tough or odd materials. Brittle blades with low toughness crack more under strong force.
Prevention: Pick steels with higher Toughness like A8 Mod or S7 for jobs with lots of impact. Do not just pick the hardest steel like D2 at max HRC. You can stop spalling damage by choosing blade materials with more toughness. Steels like A8 Mod and S7 are better for shock and last longer in hydraulic cutting. These materials help blades avoid stress and tiredness during hard jobs. When picking blades, think about both hardness and toughness. For custom blades, visit the trang lưỡi dao tùy chỉnh to see what fits your job.
| Loại thép | độ dẻo dai | Hao mòn điện trở | Khả năng chống sốc | Loại ứng dụng |
|---|---|---|---|---|
| S7 | Xuất sắc | Vừa phải | Cao | Cold Work |
| A8 Mod | Cao | Xuất sắc | Vừa phải | Cold Work |
Reason 3: Foreign Objects and Material Contamination
Diagnosis: Random, deep dents with big chips can mean foreign objects got in. You might see spalling damage with big, random chips and deep dents when something strange gets into the hydraulic shear. Scrap work often brings blades into contact with unknown things. These objects put sudden stress on the blade and make it tired. This can break the blade. Looking at chip patterns helps you know if contamination is the cause.
Prevention: Use strict checks before shearing. Pick shock-resistant blade materials like S7 if there is a high risk of contamination. You can stop spalling damage by following strict inspection rules. Good Manufacturing Practices and Hazard Analysis Critical Control Points help you watch for dangers. Use metal detectors and X-ray machines to find metal and non-magnetic things. Check detection tools often to make sure they work. Use screens, sieves, and traps to take out foreign stuff before cutting. Check sifting tools before, during, and after shifts to keep up with maintenance.
If you work with scrap, use shock-resistant blade materials like S7 to lower the risk of spalling damage. Regular checks and fixes help you avoid hydraulic system problems and keep cuts good. Troubleshooting and finding the root cause keeps blades working well and stops surprise damage.
Ghi chú: Always check materials before putting them in the hydraulic shear. This step keeps your blade safe from spalling and helps it last longer.
Reason 4: Poor Regrinding Practices
Diagnosis: Heat-induced blue/yellow discoloration, often leading to chipping soon after sharpening.
You might see blue or yellow spots on your blade after sharpening. These colors mean the blade got too hot while grinding. Too much heat makes the blade edge weak and stressed. Bad regrinding can make the blade uneven and the angle wrong. These mistakes cause spalling and make the blade fail early. If you see chips soon after sharpening, heat damage is likely the reason. The blade gets tired, and stress points form on the edge. This leads to spalling and bad cuts.
Bad grinding can also leave burrs and rough spots. These weak spots can break during cutting. If you skip steps or rush, you raise the chance of blade damage. Hydraulic systems need blades with smooth, sharp edges for good cuts. If you do not take care of the blade, you risk spalling and blade failure.
Mẹo: Always look for blue or yellow marks after sharpening. These colors show the blade had heat stress and may chip when cutting.
Prevention: Use low-stress grinding techniques; ensure adequate coolant flow; verify the rake angle is properly preserved.
You can stop spalling by following good blade care steps. Use gentle grinding to keep the blade cool. Always use enough coolant when sharpening. This keeps heat low and stops the blade from getting tired. Set the right rake angle before grinding. The right angle helps the blade handle stress during hydraulic cutting.
Follow these steps to care for your blade:
- Take the blade out of the hydraulic shear.
- Clean the blade to get rid of dirt and old oil.
- Check the blade for spalling, cracks, or other damage.
- Set the right angle for grinding.
- Sharpen the blade using gentle grinding.
- Check if the blade is flat for even cutting.
- Remove burrs from the edges to get rid of weak spots.
- Put the blade back in the hydraulic system.
- Test the blade to see if it cuts well.
- Oil the blade to lower friction and stress.
Checking the blade often helps you find spalling early. Fixing your grinding process keeps blades sharp and strong. Good care lowers the risk of blade failure and makes cuts better. Steps like using coolant and checking angles protect your blade from stress.
Reason 5: Machine Misalignment or Overloading
Diagnosis: Chipping localized to one end of the blade or non-parallel wear patterns.
You might see spalling at one end of the blade or uneven wear. These signs mean the machine is not lined up right or is overloaded. If the hydraulic system does not keep blades straight, stress builds up in some spots. This causes tiredness and blade failure in those areas. Uneven wear means the blade is not cutting the same everywhere. Cutting material that is too thick can also cause spalling and damage. If you try to cut thick stuff, the blade can break and cuts will be bad.
The table below shows how misalignment and overloading hurt blades:
| Type of Damage | Sự miêu tả |
|---|---|
| Premature die wear | Uneven force on the die makes some parts chip early. |
| Structural damage to the machine | Running with uneven load puts stress on the machine and wears it out faster. |
| Mechanical Wear | Heavy loads wear down surfaces unevenly and cause bad wear patterns. |
You should watch for these signs when you check your blade. Fixing the hydraulic system helps you find what causes spalling.
Prevention: Check machine parallelism and rigidity; do not exceed the shear’s rated capacity or attempt to cut above the material thickness limit.
You can stop spalling by checking if the machine is lined up and strong. Use feeler gauges to check if the blades are parallel. The lower blade should be even with the upper blade beam, with only a small difference. Set the main gap between cutting edges and make sure there is a slight drag everywhere. Adjust the rake angle to the right value for your hydraulic shear. Tighten bolts in the right order to keep the blade from bending.
Regular checks and good care help you avoid blade failure. Do not cut material that is too thick for your machine. Always check how thick the material is before cutting. Steps like checking alignment and not overloading protect your blade from stress. Fixing misalignment and overload problems keeps your hydraulic shear working well and makes cuts better.
Ghi chú: Make a checklist for blade care and machine alignment. This habit helps you find spalling early and makes your blade last longer.
Khoa học vật liệu trong việc phòng ngừa mẻ lưỡi dao

The Hardness vs. Toughness Balance
It is important to know how hardness and toughness change blade performance. Hardness means a blade can fight against wear. Toughness means a blade can take hits before breaking. If a blade is too hard, it will not wear out fast but can break easily. Brittle blades chip when used in hydraulic cutting. If a blade is too tough, it might bend or wear out quickly. You need to find a good balance to stop spalling and blade failure.
Selecting Lower HRC for High-Impact Scrap Shearing
For scrap shearing with lots of impact, pick blades with hardness between 60 and 65 HRC. This range gives blades strength and helps them last longer. It stops blades from being too brittle and helps prevent spalling. When you use blades in hydraulic machines, think about what you are cutting. If you cut scrap metal, you need blades that can take shocks and avoid spalling. Blades with lower HRC can handle hits better and last more.
Tip: Always check the hardness before putting in a new blade. This step helps you stop spalling and blade failure.
Benefits of Cryogenic Treatment on D2 to Stabilize Microstructure
Cryogenic treatment makes D2 steel blades stronger. You cool the blade to very cold temperatures. This process makes the steel more stable and lowers retained austenite. A stable microstructure helps stop spalling and blade failure. Cryogenic treatment also makes blades tougher and more resistant to wear. Blades last longer and can handle hydraulic cutting stress. If you want better blade materials, learn more at Nam Kinh Metal công nghiệp.
Cryogenic treatment helps you:
- Lower spalling and blade damage.
- Make blades tougher for hydraulic cutting.
- Help blades last longer and cost less to fix.
The Role of Steel Purity
Steel purity is very important for blade quality and how well blades work. Pure steel has fewer tiny particles and problems. Inclusions are small bits that can cause spalling and blade failure. You should pick blades made from ESR-grade steels to avoid these issues. ESR means Electro-Slag Remelting. This process takes out bad stuff and makes steel cleaner. Clean steel blades fight spalling and last longer in hydraulic machines.
Minimizing Inclusions and Defects through ESR-Grade Steels
Blades made from dirty steel often have problems like burrs, twisted material, and poor quality. Burrs are raised edges that make assembly hard and cause problems when working. Twisted material means the blade bends or warps, which leads to spalling and blade failure. Blade quality depends on the steel and blade shape. You need ESR-grade steels to stop these problems.
- Burrs can lead to spalling and blade failure.
- Twisted material causes uneven cuts and more spalling.
- Blade quality gets better with pure steel and the right shape.
You can use regular checks and analysis to find problems early. Troubleshooting helps you find what causes spalling. When you pick ESR-grade steel blades, you get better cutting and fewer failures. You also spend less on repairs and get better cuts.
Note: Always look for inclusions and defects when you check your blade. This habit helps you stop spalling and blade damage.
You can make blades last longer and work better by learning about material science. Pick the right hardness and toughness. Use cryogenic treatment for stronger blades. Choose ESR-grade steels for cleaner blades. Use regular checks and analysis to keep hydraulic blades working well. Troubleshooting and maintenance help you avoid spalling and blade failure.
Danh sách kiểm tra chẩn đoán: Phân tích dạng mẻ
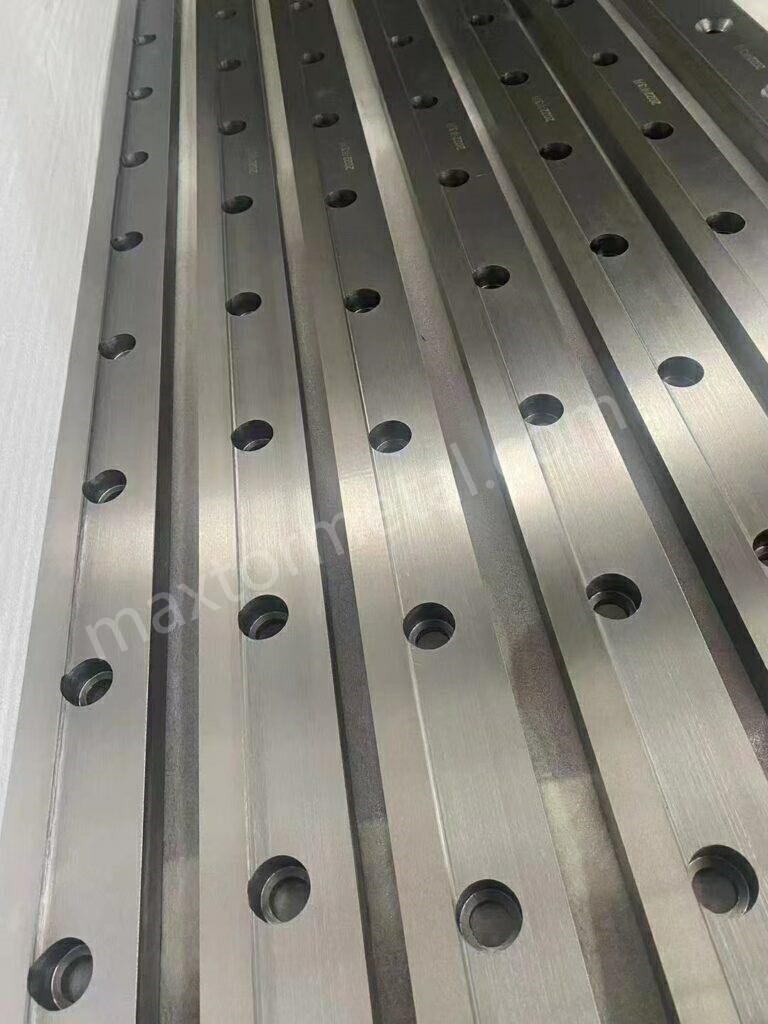
When you see spalling on your hydraulic shear blade, look at the chip pattern. The pattern can tell you what caused the spalling damage. Use this checklist to help you find problems and make your blade better.
Pattern A: Uniform, Small Chips Along the Entire Edge
If you see small chips all along the blade edge, the blade might be too hard. The gap between blades could also be too tight. Spalling damage will look even and repeat along the blade. This happens when the hydraulic shear puts too much stress on the edge. The blade cannot take the hit, so tiny pieces break off.
If you notice this, check the blade gap first. Use a feeler gauge to measure the space. Make sure the hydraulic system matches the manufacturer’s rules. If the blade is very hard, use one with more toughness. This can help stop spalling and make the blade last longer.
Look at how you cut things. If you cut very hard stuff, use a blade that is not as hard. This helps stop spalling and keeps the edge strong. Checking and fixing problems often helps you find these issues early.
Pattern B: Large, Random Chips
Big, random chips on your blade usually mean something got in the way or the machine worked too hard. This kind of spalling does not follow a set pattern. You might see deep dents or missing chunks on the blade. These signs show something hit the edge during hydraulic shearing.
Always check your material before cutting. Take out any scrap or debris that could cause spalling. If you work with mixed scrap, use shock-resistant blades. These blades handle hits better and lower the chance of spalling.
Check if your hydraulic shear is overloaded. Do not cut things that are too thick or hard for your machine. Overloading puts extra stress on the blade and causes spalling. Fixing your process helps you find what caused the damage and keeps your blade safe.
Pattern C: Chipping Concentrated at the Blade Ends
If you see spalling at the ends of the blade, the blade may not be lined up right or is not held tight enough. This damage often shows as chips or cracks at one or both ends. The hydraulic system may not hold the blade straight, or the clamping force may not be even.
You can stop this kind of spalling by doing these things:
- Change old vise jaws to serrated or soft-grip jaws. This helps hold the blade better and stops it from moving.
- Use a torque wrench to make the pressure even. This keeps the blade safe during hydraulic cutting.
- Line up the feed carriage with a laser tool. Make sure the feed path is straight with the blade.
- Check if the blade is tight and flat. Straight blades cut better and do not spall as much.
- Look at clamping fixtures to see if they are tight. Loose fixtures can let the workpiece move and cause spalling.
- Clean and flatten blade flanges. Tighten them to the manufacturer’s torque settings to stop warping.
Too much shaking during grinding can also cause chips at the blade ends. Check if the grinding wheel is straight and fix it before sharpening. These steps help you stop spalling and keep your blade working well.
Checking and fixing your hydraulic shear often helps you find these problems early. When you keep your blade lined up and held tight, you lower spalling and get better cuts.
Quick Reference Table: Chipping Patterns and Likely Causes
| Chip Pattern | Likely Cause | Troubleshooting Focus |
|---|---|---|
| Uniform, small chips (entire edge) | Material too hard or clearance too narrow | Check clearance, blade type |
| Large, random chips | Foreign objects or overload | Inspect material, check load |
| Chips at blade ends | Misalignment or uneven clamping | Align, clamp, reduce vibration |
Keep a log of spalling damage patterns. This helps you track blade quality and make your hydraulic cutting process better.
Các bước chủ động để đạt tỷ lệ mẻ bằng không
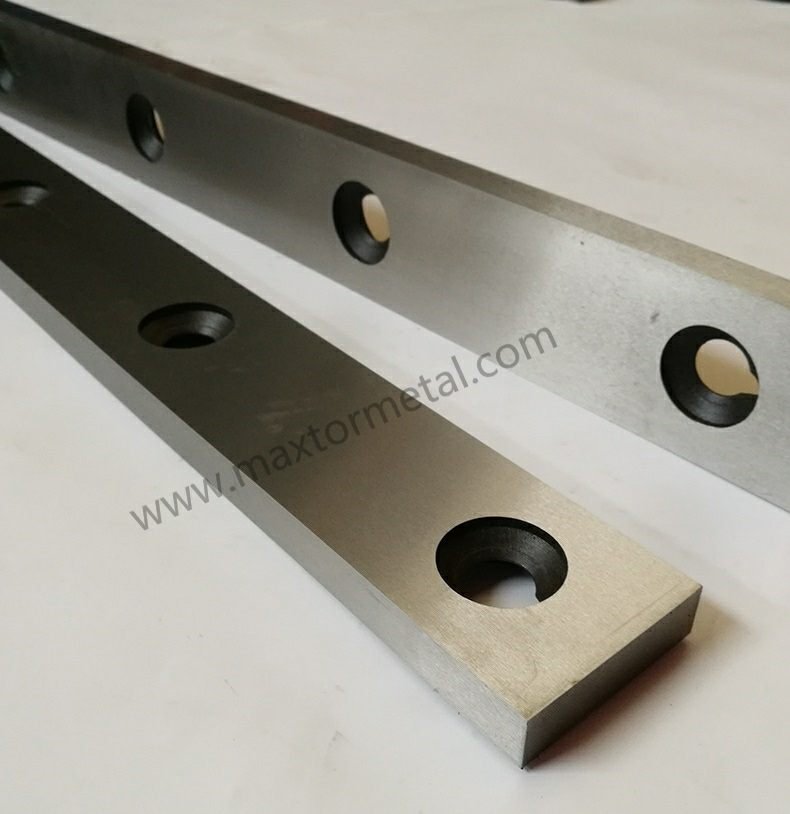
The Three Pillars of Prevention
You can stop spalling in your hydraulic shear by focusing on three main areas. These are setup, material, and maintenance. Each pillar plays a key role in keeping your blade strong and safe.
- Setup: You must check your hydraulic machine before every job. Make sure the blade sits straight and the clearance matches the manufacturer’s chart. A good setup lowers the risk of spalling and keeps your cuts clean.
- Vật liệu: Choose the right blade material for your work. If you cut tough or mixed metals, pick a blade with high toughness. This helps the blade resist spalling during hard hydraulic jobs. Always check the steel grade and hardness before you install a new blade.
- BẢO TRÌ: Regular maintenance keeps your hydraulic shear in top shape. Clean the blade after each use. Look for signs of spalling, cracks, or wear. Replace or regrind the blade if you see damage. Good maintenance stops small problems from turning into big failures.
Tip: You can use a simple checklist to track setup, material, and maintenance steps. This habit helps you spot spalling early and keeps your hydraulic system running smoothly.
Final Actionable Step: Implement a mandatory clearance and alignment check sheet for all blade changes.
You should always use a check sheet when you change a blade in your hydraulic shear. This step helps you avoid spalling and other damage. A check sheet makes sure you do not miss any important steps.
Here is a sample check sheet you can use:
| Bước chân | Done (✔/✘) | Ghi chú |
|---|---|---|
| Remove old blade | ||
| Clean mounting surface | ||
| Inspect for spalling | ||
| Check hydraulic system | ||
| Set blade clearance | ||
| Align blade with gauge | ||
| Tighten bolts evenly | ||
| Test cut and inspect edge |
You can print this table and keep it near your hydraulic shear. Fill it out every time you change a blade. This habit helps you catch spalling before it causes bigger problems.
Note: You should train your team to use the check sheet. Everyone must know how to spot spalling and keep the blade in good shape. Regular checks and good maintenance protect your hydraulic system and help your blade last longer.
By following these steps, you can reduce spalling and get better results from your hydraulic shear. You will save time, lower costs, and keep your blade working at its best.
You can stop shear blade chipping by knowing the main causes. Use smart strategies to keep blades safe. Doing regular maintenance keeps blades sharp and saves time. Maintenance means checking blades often, adding oil, and storing them right. Skilled workers should look for warning signs before blades get dull. They should fix problems early and regrind edges when needed. Fixing chips fast helps blades last longer. Picking the right blade material and using special coatings makes blades stronger. Good maintenance stops big repairs and keeps your hydraulic shearing machine working well. If you need help or want good blades, talk to our sales engineer đây.
| Strategy | Lợi ích |
|---|---|
| Lớp phủ bảo vệ | Blades last longer |
| Kiểm tra thường xuyên | Find problems early |
| Đào tạo vận hành | Fewer mistakes |
| Edge regrinding | Keeps cuts accurate |
Always take care of your blades and learn new ways to cut better. 😊
Câu hỏi thường gặp
What is Shear blade Chipping?
Shear blade chipping means small pieces break off the blade edge during cutting. You often see tiny notches or missing bits. This damage affects cut quality and can lead to more blade problems.
How can you spot shear blade chipping early?
You should look for small chips or rough spots along the blade edge. Check for uneven cuts or strange marks on your material. Regular inspections help you catch chipping before it gets worse.
Why does incorrect blade clearance cause chipping?
If the gap between blades is too tight, the blades rub and stress increases. This leads to chipping. You must always set the clearance using the manufacturer’s chart and check with a feeler gauge.
What materials help prevent shear blade chipping?
You should choose blade materials with high toughness, like S7 or A8 Mod steel. These materials resist impact and reduce chipping. Avoid blades that are too hard or brittle for your cutting job.
How does poor regrinding lead to chipping?
Bad grinding causes heat damage. You may see blue or yellow marks on the blade. This weakens the edge and makes it chip faster. Always use coolant and gentle grinding methods.
Can foreign objects in scrap cause shear blade chipping?
Yes. Foreign objects like bolts or debris can hit the blade and cause large, random chips. You should inspect materials before cutting and use shock-resistant blades for scrap work.
What is the best way to prevent shear blade chipping?
You need to check blade clearance, choose the right material, and maintain your machine. Use a checklist for blade changes. Regular care and inspections keep blades sharp and reduce chipping.
How do you repair a chipped shear blade?
You can regrind the blade edge to remove chips. Make sure you use proper grinding techniques and coolant. If the damage is severe, you may need to replace the blade.
Xem thêm
Lưỡi Dao Cắt Xén Nóng so với Lạnh: Hướng Dẫn Chi Tiết Về Lựa Chọn Vật Liệu và Giới Hạn Nhiệt Độ
Hướng dẫn mua hàng tối ưu cho lưỡi cắt công nghiệp: 7 bước kiểm tra chất lượng trước khi mua hàng
Mài Sắc Lưỡi Dao Cắt Xén Như Chuyên Gia: Tránh Các Sai Lầm Mài Phổ Biến và Kéo Dài TCO
Hướng Dẫn Chi Tiết Về Thiết Lập Khe Hở Lưỡi Dao Cắt Xén: Công Thức, Sai Lầm và Kết Quả Không Bavia

 English
  Spanish
  Italian
  French
  Portuguese
  Russian
  German
  Arabic
  Hindi
Hindi  Vietnamese
  Indonesian
  Japanese
  Korean