

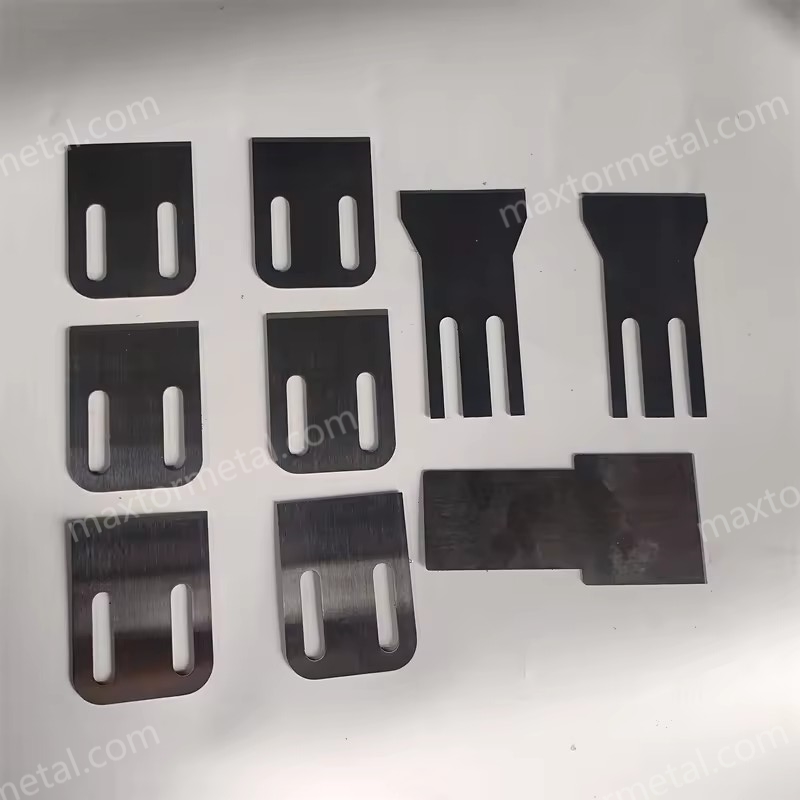
Selecting the right hot face pelletizing blades for air-cooled PE/PP isn’t just about material names on a quote. The right choice directly lowers tails and fines, stabilizes cut quality across shifts, and keeps uptime predictable so your total cost of ownership (TCO) tracks to plan. This guide shows you how to specify blade substrate, hardness, and coating; how to control geometry and tolerances for a clean cut; how to tune air-cooled operation; and how to manage lifecycle and sourcing for consistent, low-variance performance.
Use it three ways:
- Purchasing: build a tighter spec and acceptance checklist.
- Commissioning: align the cutter, validate the gap, and stabilize airflow.
- Maintenance: inspect, regrind, and document so your next order is right the first time.
أهم النقاط
How this guide was built (scope & verification): This article synthesizes OEM design concepts (alignment/controlled contact), common coated-component QA methods (e.g., XRF thickness checks, calotest thickness validation, and agreed adhesion screening/escalation tests), and shop-floor commissioning practices. Exact tolerances and setup values vary by cutterhead model and resin; treat any “example targets” as internal baselines and confirm final specs with your OEM manual and line trials.
- Prioritize clean, uniform contact at the die face; alignment and stable blade pressure reduce tails/fines fastest.
- Match substrate hardness and coating to resin and filler load; aim for edge toughness on recycled/filled streams.
- Control geometry: consistent edge angle, measured blade-to-die gap, and low runout are the backbone of a clean cut.
- Verify coatings with thickness and adhesion checks (XRF/calotest; scratch/tape as specified) to avoid early failure.
- In air-cooled setups, ensure directed, steady airflow across the die face and cutter path; synchronize cutter speed to haul-off.
- Treat blades as a managed asset: document regrind intervals, inspection results, and QC data to keep TCO predictable.
Selection fundamentals
Match resin and fillers
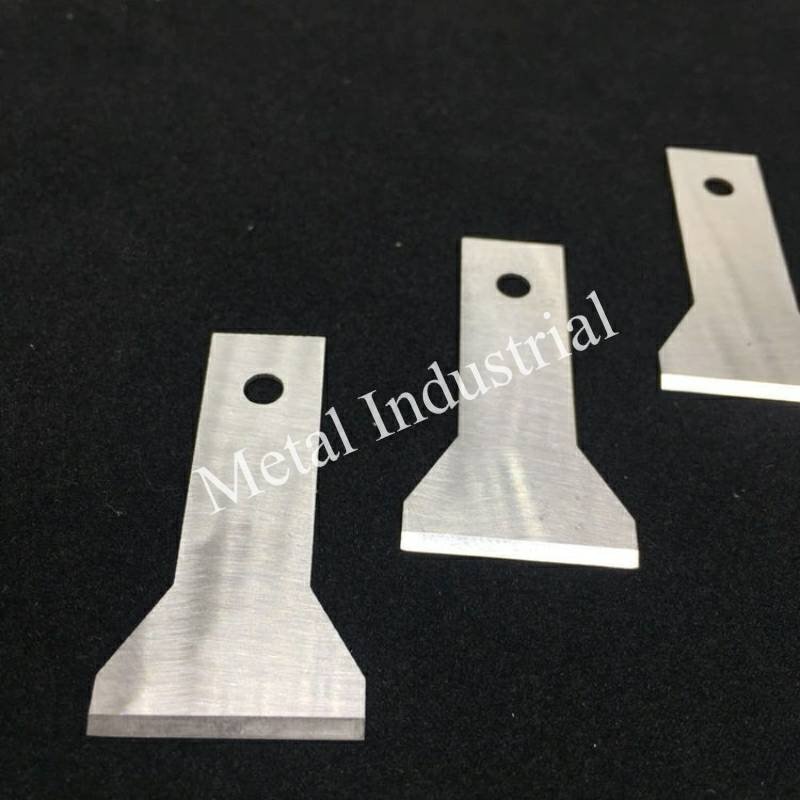
Resin behavior and contamination levels decide how hard and how tough your cutting edge should be. Virgin PE/PP often tolerates sharper edges and higher hardness. Recycled or mineral-filled formulations (CaCO3, talc, glass) drive abrasive wear and chip risk. For those, combine a tough substrate with a hard, low-friction PVD coating so the edge resists micro-chipping and smearing. Practical implication: don’t spec the same blade for washed film regrind and for virgin homopolymer PP; your fines and tails will tell on you.
Blade materials and hardness
Common substrate families include high-speed steels (e.g., M2) and cold-work tool steels (e.g., SKD11/D2). Many suppliers publish typical hardened ranges around the upper 50s to low 60s HRC for these grades, but the right target depends on heat treatment, resin contamination, and the die/cutter design. Higher hardness improves wear resistance, while sufficient core toughness reduces edge chipping during startup or when encountering contaminants. If you run abrasive fillers, pair a tough base with a suitable coating rather than simply pushing hardness higher.
For context on blade alignment and controlled contact principles used by OEM pelletizing systems (the alignment logic is transferable even when the cooling medium differs), see MAAG’s Gala design overview: MAAG Gala pelletizing systems — design principles.
OEM fit and compatibility
Even the best blade fails when the fit is off. Before ordering, verify:
- Hub bolt pattern and hole spacing
- Blade OD/ID, thickness, and clamp features
- Cutterhead model, serial, and any OEM-specific chamfers/reliefs
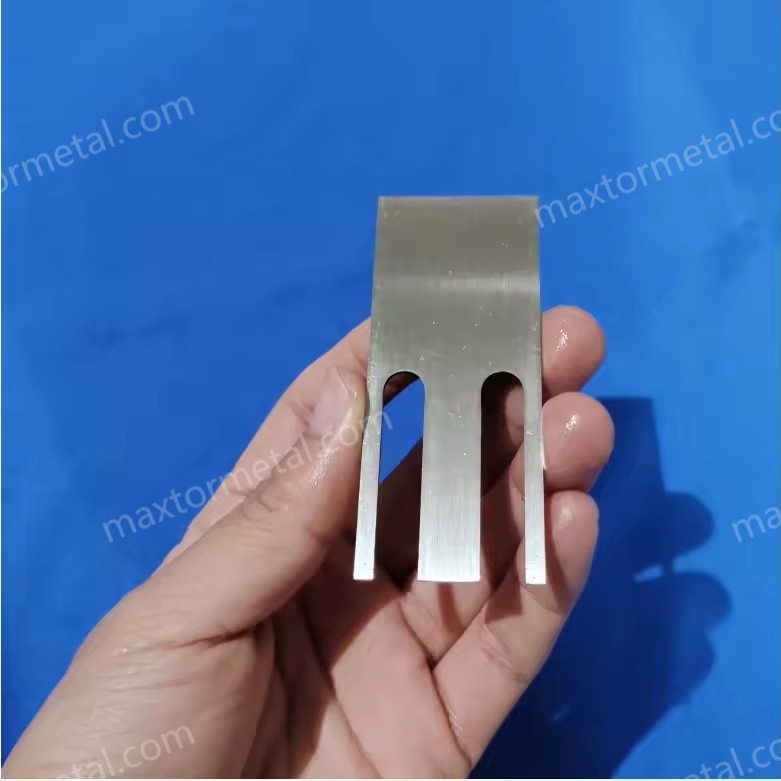
Provide drawings/samples or exact OEM references. Ask the supplier to confirm dimensional tolerances and surface finish on contact faces so the blade seats flat and repeats position across sets. This is the fastest way to avoid vibration, noise, and irregular pellets after changeover.
Geometry and tolerances
Edge angle and micro-hone
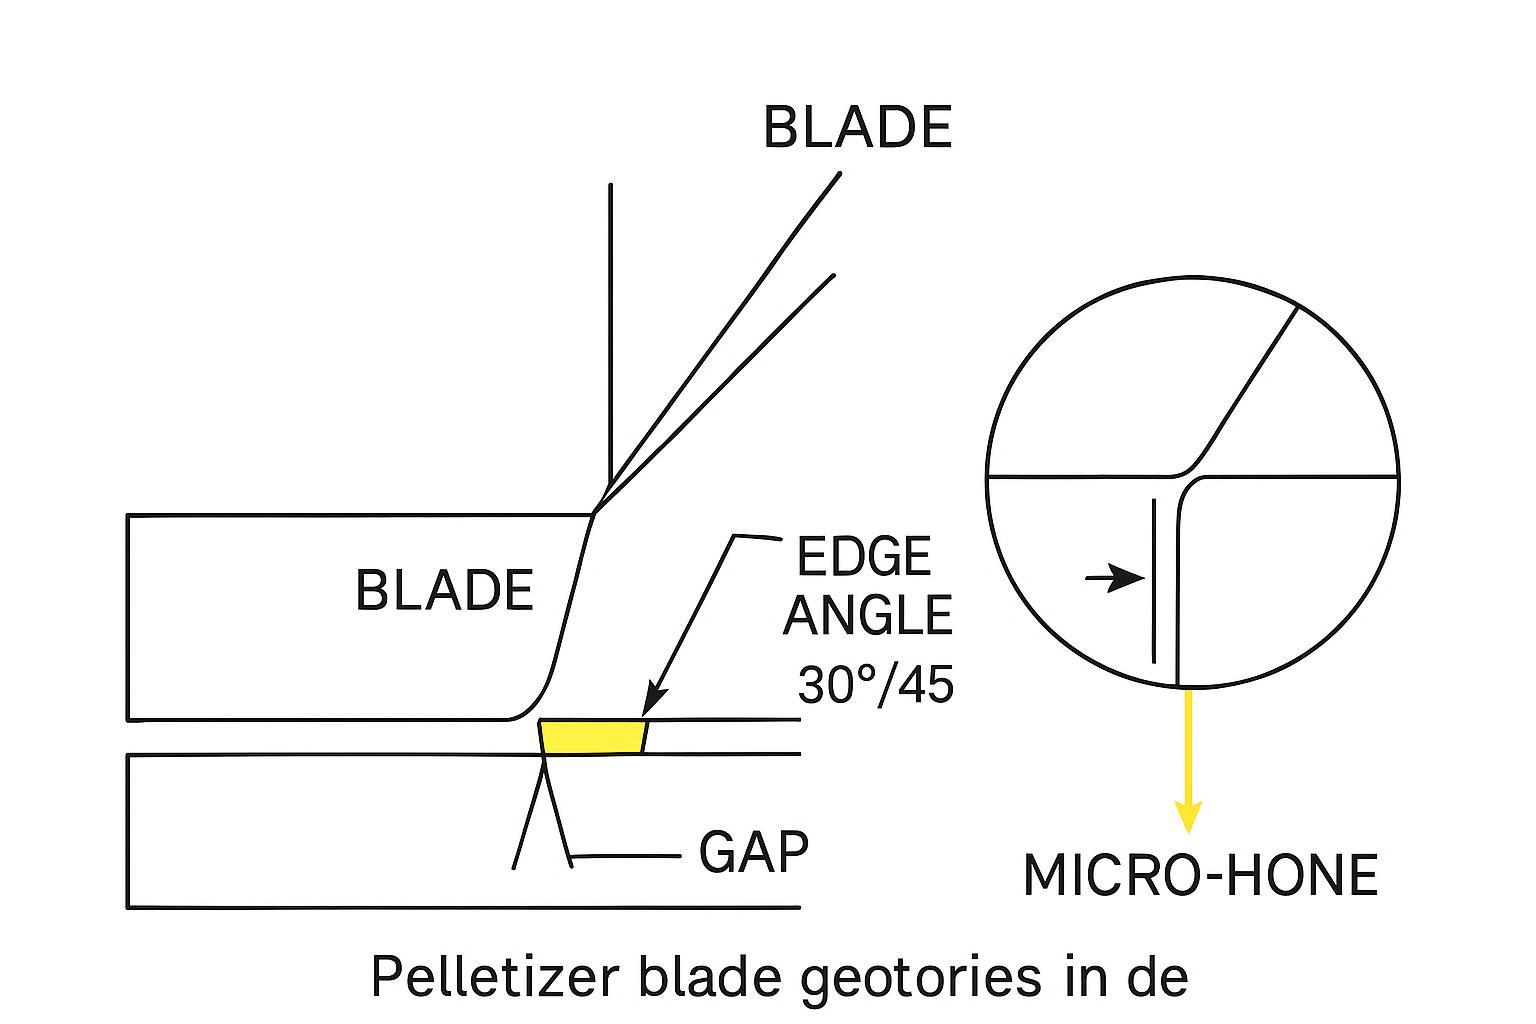
Edge angle sets the tradeoff between sharpness and durability. Market examples in pelletizer applications include 30° and 45° edges; your polymer’s stickiness and die geometry influence where you land. A small, controlled micro-hone (a tiny radius at the very edge) can stabilize the edge and reduce chipping without noticeably increasing fines. Treat the micro-hone as a defined feature, not an accident from hand deburring, and keep it consistent from blade to blade.
For examples of commercially referenced edge angles in pelletizer contexts, see Sollex’s application notes: Sollex pelletizer blade angles and product context.
Blade-to-die gap and alignment
There’s no universal number that works on every die and polymer, so use a commissioning workflow:
- Warm up to steady-state resin temperature and stabilize airflow.
- Establish uniform blade contact using your OEM’s procedure; verify at several clock positions.
- Incrementally adjust the blade-to-die clearance while sampling pellets (sieve for fines, visual for tails/stringers). Move in small, documented steps.
- Re-check after thermal stabilization and again after the first hour. If tails creep up, inspect for runoff, buildup, or chatter.
Why it works: stable, uniform contact and the smallest viable clearance reduce feathering and smear that cause tails. For the alignment logic and pressure control concept, see the OEM discussion referenced above: MAAG Gala cutter alignment concepts.
Flatness, parallelism, runout
Flat, parallel contact and low runout keep the edge tracking the die face evenly. Practical checks:
- Runout: dial indicator on the blade plane as the hub turns slowly; look for minimal variation and address hub wear or contamination if excessive.
- Flatness/parallelism: CMM or optical flat methods on the blade contact face and die face; remove contaminants and burrs.
- Contact pattern: bluing/ink checks during setup can confirm uniform seating.
These measurements prevent “wobble cuts,” intermittent tails, and localized fines. If your OEM publishes model-specific tolerances, follow those.
Example internal targets (verify with your OEM manual): Use these only as a starting point for incoming checks and trend tracking; the goal is repeatability on your specific cutterhead.
- Blade plane runout (assembled): set an internal target band (for example, “low hundredths of a millimeter”) and investigate any step-change versus your baseline after blade swaps.
- Contact face flatness / parallelism: define an internal acceptance band and measure the same way every time (same fixture, same points, same instrument).
- Gap uniformity: confirm the blade-to-die clearance is consistent at multiple clock positions after thermal soak; document the worst-point position.
Record results per blade set and hub so you can correlate geometry drift to fines/tails and avoid chasing process variables.
Coatings that work
Choose TiN, TiAlN, CrN, or DLC
Coatings extend edge life and reduce sticking—but only if thickness and adhesion are controlled. Here’s a quick comparison you can use during selection:
| طلاء | Core strengths | Typical use on PE/PP |
|---|---|---|
| تين | Hard, wear-resistant; good general purpose | Virgin grades; moderate abrasion where low friction isn’t critical |
| تيالين | Hot hardness and oxidation resistance | Higher temperature cuts or where heat tinting appears |
| كر ن | Balanced wear + lower friction; corrosion resistance | Recycled or slightly sticky grades; helps limit smear |
| DLC (a‑C:H variants) | Very low friction; hard thin films | Sticky PE/PP; reduces buildup and helps edge glide |
Verification methods such as XRF for non-destructive thickness checks and calotest for destructive thickness validation are widely used in coating QA, as outlined by Oerlikon Balzers (QA overview in 2024–2025): Measurement techniques for coating QA (Oerlikon Balzers). A general acceptance workflow for coated components, including simple adhesion screening, is summarized in Oerlikon’s QA guide: Coated components QA and acceptance overview (Oerlikon).
How a supplier like MAXTOR integrates coating QC (neutral example): On incoming inspection, production teams can spot-check PVD thickness via XRF, log substrate hardness from heat treatment (e.g., typical hardened tool steel bands), and use tape/scratch methods as specified to screen adhesion. Internal process documentation and batch QC snapshots are commonly shared on request. For a technical primer on coated pelletizer knives from the brand, see the educational resource: MAXTOR METAL — PVD-coated pelletizer knives guide.
Coating thickness and adhesion
Treat coating QA as a routine, not an exception. A practical approach is to define what you will measure, where you will measure it, and what paperwork must ship with every lot:
- Thickness: perform XRF spot checks at defined locations on every batch; schedule periodic calotest validation cuts and archive micrographs when required.
- Adhesion: agree on the screening method (tape) and escalation test (scratch/indentation) in the PO; document results with batch/serial traceability.
- Records: capture substrate grade, heat treatment spec, measured hardness range, coating type, thickness means/ranges, and adhesion test notes per lot.
Incoming inspection checklist (copy/paste into your PO or IQC form):
- Identification & traceability: blade set ID/serial, lot number, coating batch, date, inspector.
- OEM fit: cutterhead model/serial; drawing revision used for the order.
- أبعاد: OD/ID, thickness, bolt pattern/hole spacing, countersink/counterbore details, keyways/chamfers (report actual vs. tolerance).
- Contact-face condition: surface finish requirement (if specified), burr-free edges, no rocking on a reference surface.
- Assembled geometry: blade plane runout and contact pattern check on the hub (document method + measurement points).
- Substrate & heat treatment: steel grade, heat-treatment certificate (if available), measured hardness results + test location(s).
- طلاء: type, XRF thickness readings at defined locations (report mean/min/max), visual defects (pinholes/flaking).
- Adhesion: screening method (tape) result; escalation method (scratch/indentation) if required by spec.
- التعبئة والتغليف: edge protection, corrosion protection, handling notes.
These steps prevent early edge failure and give you the data you need to correlate coating variation with fines or shortened runtime.
Deployment on recycled streams
حالة دراسية مصغرة (القياس أولاً، دون تخمين): عند تجربة CrN مقابل DLC على نفس الركيزة لـ PE/PP المعاد تدويره، قم بإعداد سجل مقارنة A/B بسيط لتكون القرارات مبنية على بيانات خط الإنتاج الخاص بك.
- حافظ على ثبات: تركيبة الراتنج (الحشو %، مؤشر تدفق المذاب)، لوحة القالب، رأس القطع، إعداد تدفق الهواء، وحجم الحبيبات المستهدف.
- تتبع ثلاثة مؤشرات أداء رئيسية (KPIs): (1) نسبة الجزيئات الدقيقة % من نفس مجموعة الغرابيل وفترة أخذ العينات، (2) عدد الذيول/الخيوط لكل كتلة عينة ثابتة، (3) ساعات التشغيل حتى أول عملية مسح وحتى إعادة التجليخ المجدولة.
- سجل مراقبة الجودة (QC) إلى جانب النتائج: قراءات سمك XRF (المتوسط/الحد الأدنى/الحد الأقصى)، وطريقة فحص الالتصاق المستخدمة، ومعرّف مجموعة الشفرات.
بعد تشغيل مستقر لمرة أو مرتين لكل طلاء، ستلاحظ عادةً ما إذا كان العامل المحدد هو التآكل الاحتكاكي (مما يرجح كفة طبقات الطلاء الأكثر مقاومة للتآكل) أو اللطخ/الالتصاق (مما يرجح كفة طبقات الطلاء الأقل احتكاكاً).
يستفيد الـ PE/PP المعاد تدويره الذي يحتوي على جزيئات دقيقة أو مواد حشو أو ملوثات عرضية من طبقات الطلاء منخفضة الاحتكاك (مجموعات CrN أو DLC) لتقليل اللطخ والالتصاق. ابدأ بركيزة متينة + CrN عندما يكون التآكل الاحتكاكي هو الغالب؛ وإذا كنت لا تزال ترى تراكم اللطخ وتكون الذيول في الحالة المستقرة، فجرّب DLC على نفس الركيزة وقارن وقت التشغيل بين عمليات إعادة التجليخ ونسبة الجزيئات الدقيقة القائمة على الغربلة. وثّق كلاً من سمك الطلاء (XRF) وفحص الالتصاق لتكون المقارنات عادلة ودقيقة.
للحصول على سياق حول تحديد موضع أجهزة تدفق الهواء الذي يوضح كيفية تفاعل الطلاء مع درجة حرارة السطح وخطر اللطخ (مراجع محببات الخيوط؛ مع تكييف المفاهيم)، راجع كتيبات MAAG الفنية: MAAG PRIMO E — مفاهيم وضع سكين الهواء (محببات الخيوط).
Air-cooled operations
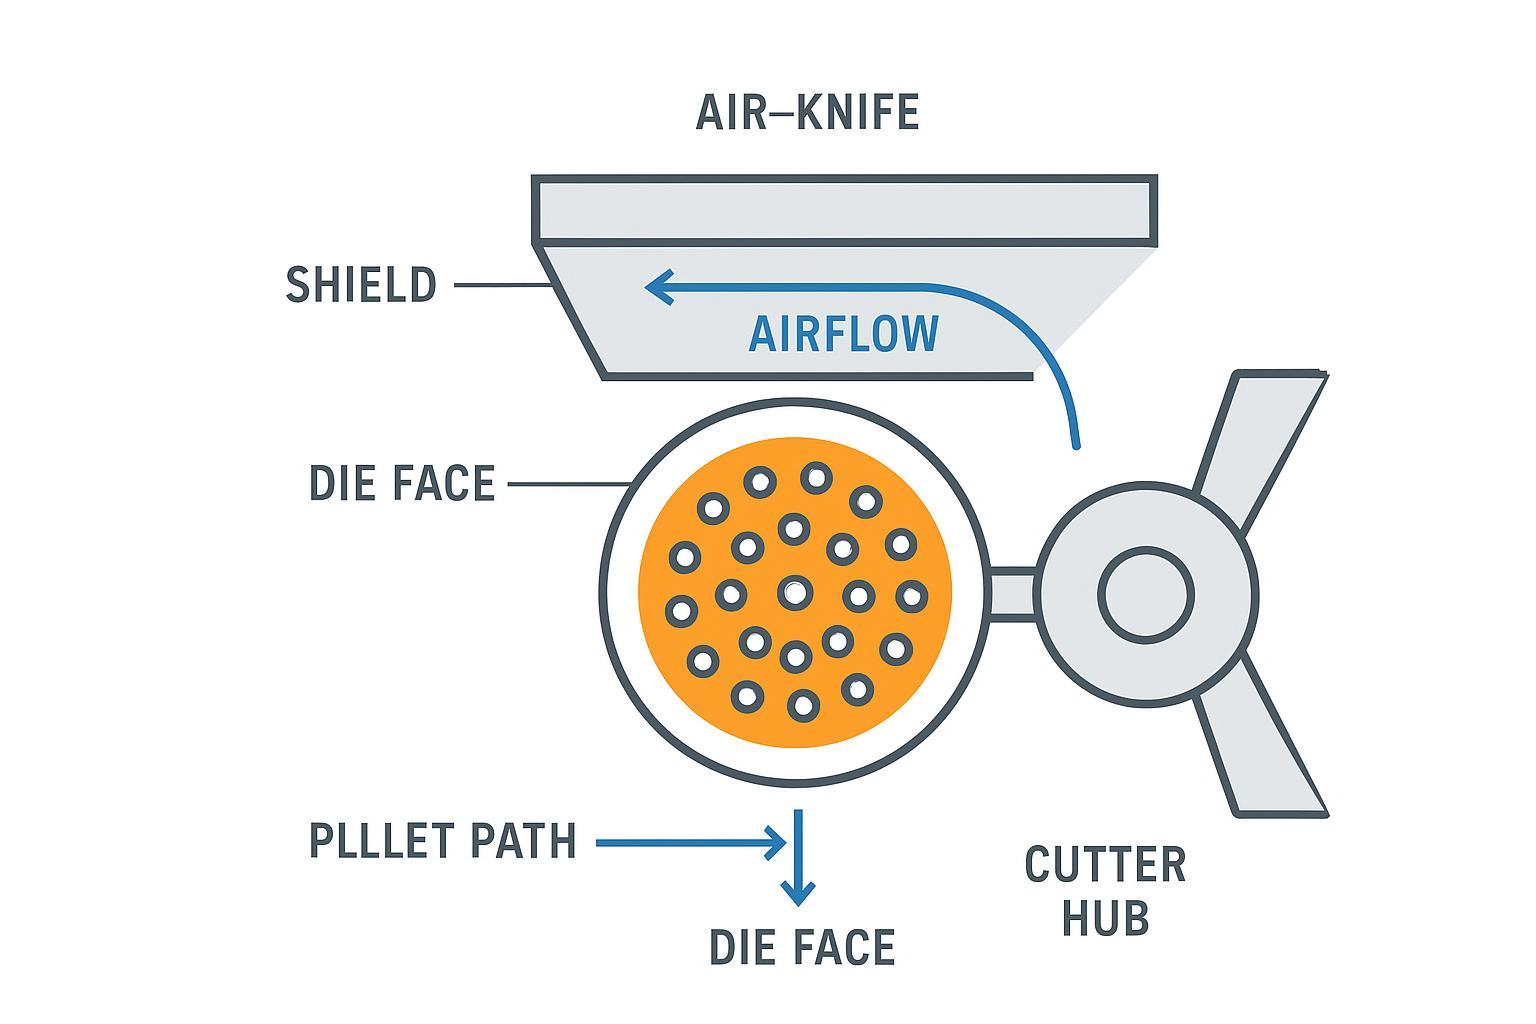
درجة حرارة الخيط وتدفق الهواء
يجب أن يعمل مساعد الهواء على استقرار سطح البوليمر قبل وصول الشفرة، ثم تبديد الحرارة الناتجة عن القطع. العلامات العملية على اقترابك من النتيجة المثالية: تنفصل الحبيبات بشكل نظيف مع حد أدنى من اللطخ؛ وتظل أسطح الشفرات نظيفة نسبياً بين عمليات الفحص؛ ولا يوجد رفرفة مرئية عند وجه القالب. إذا رأيت خيوطاً أو حبيبات ملطخة ذات ذيول تشبه المذنبات، فقم بزيادة تدفق الهواء الموجه عبر وجه القالب وتحقق من الحماية لمنع ارتداد الاضطراب الهوائي إلى منطقة القطع. تعد أدلة الشركات المصنعة للمعدات الأصلية (OEM) أفضل مصدر لمواقع سكاكين الهواء المحددة لكل طراز والنطاقات الموصى بها.
للحصول على رؤية شاملة للنظام حول مفاهيم وضع تدفق الهواء (معدات الخيوط، ولكن منطق تدفق الهواء قابل للتطبيق)، استشر كتيبات MAAG الفنية: MAAG PRIMO E — مفاهيم وضع تدفق الهواء (معدات الخيوط).
التزامن بين القاطع وجهاز السحب
تعتمد عمليات القطع النظيف على سرعة الخط المتزامنة وتكرار ضربات الشفرة. إذا كان القاطع غير متزامن قليلاً مع جهاز السحب، فستلاحظ ظهور ذيول دورية أو تباين في السمك. تحقق من مدخلات المشفر (encoder)، وافحص أي تأخر في حلقات التحكم بالسرعة، واضبط النظام بحيث تلتقي الشفرة بالخيط المستقر بزاوية وتوقيت ضربة متسقين.
فحوصات بدء التشغيل وتغيير المنتج
- تأكد من تلامس الشفرة الموحد والحد الأدنى من الانحراف (runout) بعد التشبع الحراري.
- افحص وجه القالب بحثاً عن أي ترسبات؛ ونظفه إذا كان هناك أي تراكم مرئي على الحافة.
- تحقق من تدفق الهواء الموجه عبر وجه القالب ومسار القاطع؛ واضبط محاذاة الغطاء/السكين إذا لوحظت أي رفرفة.
- خذ عينات من الحبيبات عند الدقيقتين 5 و15؛ واغربلها للبحث عن الجزيئات الدقيقة وافحصها للكشف عن الذيول/الخيوط؛ واضبط الخلوص بخطوات صغيرة.
- أعد فحص حالة الطلاء والحافة بعد الساعة الأولى؛ وامسح أي لطخ مبكر لمنع التراكم.
Lifecycle and TCO
استراتيجية وحدود إعادة التجليخ
قم بإعادة التجليخ قبل حدوث طفرة في الجزيئات الدقيقة. إن الانتظار حتى تصبح الحافة ثلمة بشكل واضح يزيد من خطر تكون الذيول، والضغط الزائد على الشفرة، وخدش وجه القالب. ضع محفزاً بناءً على مؤشرات الأداء الرئيسية الخاصة بك: عندما تتجاوز الجزيئات الدقيقة الناتجة عن الغربلة حد التحكم الخاص بك في الحالة المستقرة أو عندما يقصر وقت التشغيل بين عمليات المسح بشكل ملموس، قم بجدولة عملية إعادة تجليخ. حافظ على إزالة الحد الأدنى من المعدن وبشكل متسق عبر الدورات لتبقى الهندسة قابلة للتكرار. في حال ظهور تشققات (chipping)، أعد تقييم متانة الركيزة أو اتساق الصقل الدقيق (micro-hone) قبل إلقاء اللوم على سمك الطلاء وحده.
فترات الفحص ووثائق مراقبة الجودة (QC)
اعتمد وتيرة بسيطة:
- لكل وردية/يومياً: فحص بصري للثلم، والرايش (burrs)، واللطخ؛ مسح وجه الشفرة؛ التحقق من التلامس والصوت.
- أسبوعياً: فحص الانحراف (runout) وأدوات التثبيت؛ تسجيل بيانات غربلة الحبيبات وأي حالات ظهور للذيول.
- عند تغيير الدفعة أو شهرياً: فحص عشوائي لسمك XRF على الشفرات المطلية؛ فحص الالتصاق كما هو محدد؛ تسجيل صلابة الركيزة وأي شهادات معالجة حرارية.
اربط هذه السجلات بالأرقام التسلسلية للشفرات ودفعات الإنتاج. على مدار ربع سنة، سترى أي توليفات من الركيزة والطلاء ونافذة التشغيل تحقق أفضل نمط للجزيئات الدقيقة/الذيول على خليط الراتنج الخاص بك.
اقتصاديات التوريد وقطع الغيار
تعامل مع الشفرات كأصول دوارة. احتفظ بمجموعات احتياطية كافية لتغطية فترات إعادة التجليخ ونافذة مراقبة الجودة (QC) الواردة دون تعريض وقت التشغيل للخطر. حدد في العقود التفاوتات البعدية، ودرجة الركيزة وصلابتها، ونوع الطلاء، ووثائق ضمان الجودة (QA) المطلوبة لكل دفعة. السعر هو مجرد بند واحد؛ أما الجودة المتوقعة ومراقبة الجودة الموثقة فهما السبيل لتجنب الدفع مرتين بسبب توقف العمل.
الخاتمة
قبل الطلب، حدد مادة الأساس والصلادة المناسبة لمزيج الراتنج/المواد المالئة لديك، واختر الطلاء بناءً على مخاطر التآكل مقابل الالتصاق، وحدد اختبارات القبول للسُمك والالتصاق. أثناء التشغيل التجريبي، قم بتثبيت تدفق الهواء، وضبط تلامس الشفرة بشكل موحد، وضبط الفجوة بين الشفرة والقالب خطوة بخطوة مع مراقبة جودة الحبيبات لتقليل الذيول والشوائب الدقيقة في خطوط PE/PP المبردة بالهواء. قم بإدارة توقيت إعادة التجليخ ووثائق مراقبة الجودة (QC) لضمان بقاء التكلفة الإجمالية للملكية (TCO) متوقعة والحفاظ على وقت تشغيل مرتفع.
إذا كنت بحاجة إلى مرجع فني محايد أو لمناقشة ممارسات مراقبة الجودة (QC) لشفرات تحبيب البلاستيك المطلية، تفضل بزيارة الصفحة الرئيسية للعلامة التجارية: ماكستور ميتال.
نبذة عن الفريق الذي أعد هذا الدليل: تمتلك MAXTOR METAL خبرة تزيد عن 15 عامًا في تصنيع الشفرات الصناعية المخصصة والمجلوخة بدقة. بالنسبة لطلبات شفرات تحبيب البلاستيك، تتحكم الفرق عادةً في اتساق الإنتاج من خلال سجلات المواد والمعالجة الحرارية الموثقة، والفحوصات البعدية أثناء عملية التصنيع، وسجلات ضمان جودة الطلاء (على سبيل المثال، فحوصات XRF الموضعية للسُمك) حتى يتمكن المستخدمون من ربط نتائج فحص الوارد بدفعة إنتاج معينة.

 English
 Spanish
 Italian
 French
 Portuguese
 Russian
 German
 Arabic
 Hindi
 Vietnamese
 Indonesian
 Japanese
 Korean