


Single-shaft shredders don’t “slow down” randomly.
Conclusione chiave: If your team is stuck on the single-shaft shredder blades sharpen vs replace decision, don’t guess—measure clearance, verify torque, and trend amps/ton and PSD first.
Most of the time, it’s the cutting system losing its geometry: rotor cutter blocks/tips and bed knives (stator) stop shearing cleanly, clearances drift, or fasteners stop holding. The result is predictable—higher amps, more heat, unstable particle size, and surprise downtime.
This guide focuses on the parts you can actually control during maintenance:
- Bed knives (stator) E rotor cutter blocks/tips (materials and designs vary by OEM)
- IL measurements and records that let you decide whether to resharpen O replace without gambling with safety or total cost of ownership (TCO)
What you’ll use (and why these tools matter): feeler gauges (gap), torque wrench (clamp load), straightedge (flat/straight seating), bluing/marking compound (contact checks), and log sheets (trend control).
Map those tools to the checks you’ll repeat:
- Shredder knife clearance: feeler gauges + recorded measurement pattern
- Bed knife (stator) maintenance: straightedge checks, seat condition, and clamp interface inspection
- Rotor cutter block inspection: edge condition, pocket seating, and runout/endplay checks (per OEM)
- Shredder blade torque sequence: staged torquing pattern plus recheck timing
The decision focus is simple: keep uptime and output stable while avoiding two expensive mistakes—running dull steel too long O replacing steel that only needed a controlled resharpen/rotation.
Safety and Prep
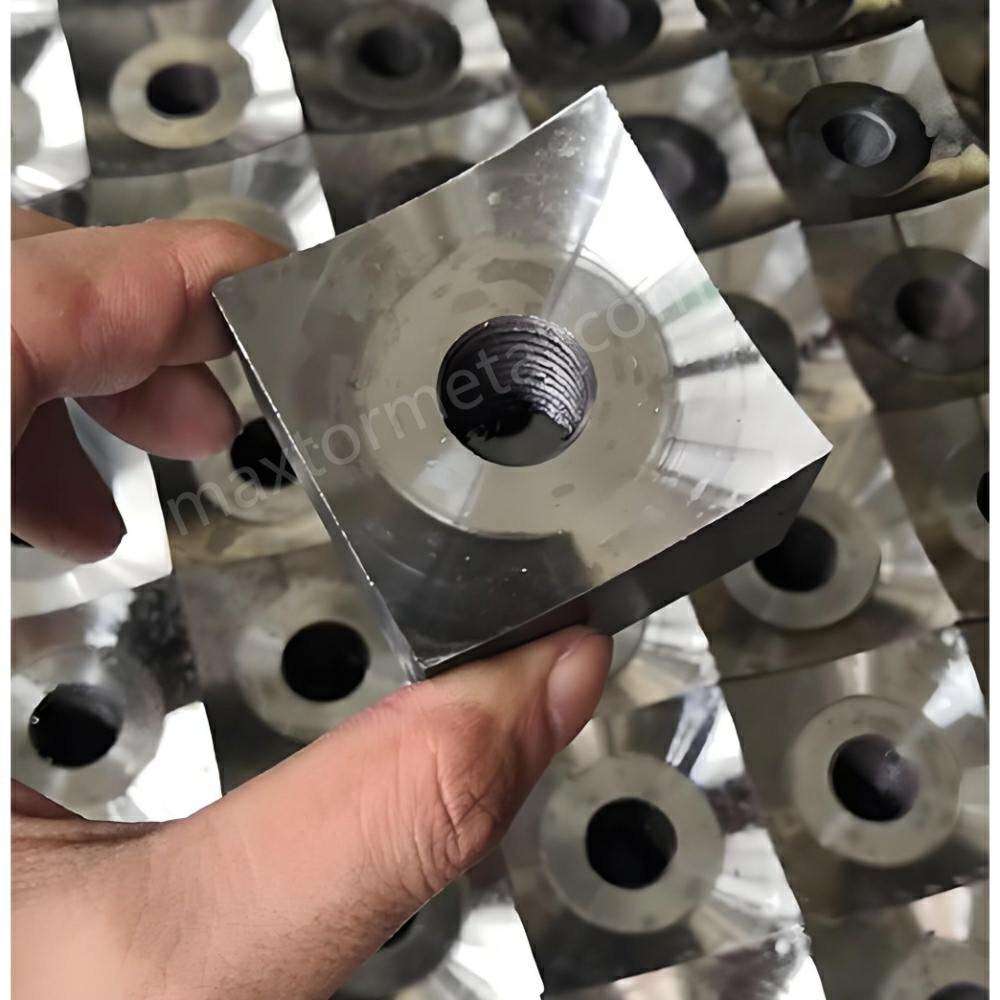
Safety disclaimer and editorial note
This guide is for general maintenance planning and training. Always follow your shredder OEM’s manual and your site’s EHS procedures. Work inside the cutting chamber should be performed only by qualified personnel using verified lockout/tagout. The authors assume no liability for misuse or deviations from OEM requirements.
Ultimo aggiornamento: 2026-04-12 (technical review for clarity; OEM specifications may differ by machine).
LOTO essentials (OSHA 1910.147)
Before any hands go inside the cutting chamber, treat this as hazardous-energy work.
OSHA — 1910.147 – The control of hazardous energy (lockout/tagout) requires an energy-control procedure that covers shutdown, isolation, application of lockout/tagout devices, control of stored energy, and verification.
At a practical level:
- Identify and isolate all energy sources (electrical, hydraulic, pneumatic, mechanical stored energy).
- Apply personal locks/tags to energy-isolating devices.
- Release or restrain stored energy (bleed pressure, block movement, support suspended parts).
- Verificare l'isolamento prima di iniziare i lavori (testare/provare, misurare ove applicabile). Le linee guida OSHA L'Appendice A sulla procedura tipica di lockout minimo è un buon punto di partenza per definire o verificare le procedure del proprio sito.
⚠️ Attenzione: Non avviare mai a impulsi l'azionamento per verificare il gioco o la sede. Qualsiasi controllo di rotazione deve essere manuale e solo dopo aver verificato l'isolamento energetico.
Strumenti, calibri e valori di riferimento
Preparare gli strumenti prima di allentare la bulloneria:
- Spessimetri che coprano l'intervallo specificato dal costruttore (OEM)
- Chiave dinamometrica (e il moltiplicatore se richiesto)
- Straightedge (controlli di planarità della sede/lama)
- Pasta per riscontro per la verifica dell'impronta di contatto (quando previsto dalla procedura OEM)
- Schede di registrazione (o un modulo digitale) per registrare gioco, esposizione, coppia di serraggio e anomalie
I dati di riferimento sono ciò che trasforma la manutenzione in un processo decisionale ripetibile:
- Ampere a vuoto e ampere tipici sotto carico per i materiali principali
- Produttività tipica e distribuzione granulometrica (PSD)
- Risultati del controllo standard del gioco “a freddo” e necessità di un “ricontrollo a caldo” dopo il rodaggio
Coppia di serraggio degli elementi di fissaggio e sequenza di ricontrollo
I sistemi di lame solitamente cedono nei punti di interfaccia prima che l'acciaio si “usuri”. Una lama non alloggiata o bloccata correttamente può sembrare un problema di affilatura, finché non si trasforma in un bullone rotto, un tagliente scheggiato o un contatto tra rotore e statore.
Seguire le specifiche e la sequenza di serraggio dell'OEM. La prassi generale prevede di:
- Pulire le sedi e le superfici di contatto degli elementi di fissaggio
- Serrare in fasi (ad esempio: parziale → intermedio → finale) seguendo lo schema OEM
- Ricontrollare una volta completato l'intero schema
- Se l'OEM richiede un rodaggio, pianificare un riserraggio post-rodaggio e (se specificato) un ricontrollo del gioco a caldo
Inspect and Measure
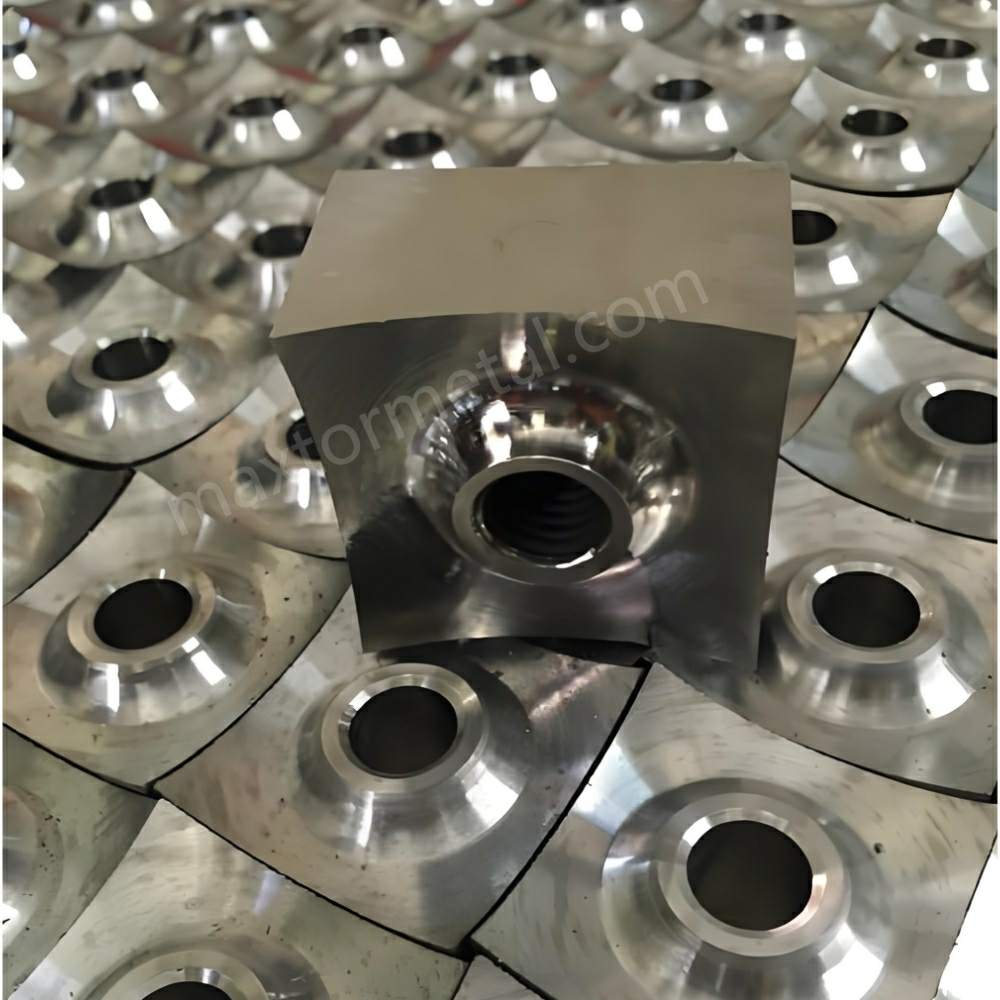
Controlli di accettazione prima di decidere tra affilatura e sostituzione
Per garantire decisioni uniformi tra i vari turni e tecnici, definite alcuni controlli di accettazione che il vostro team deve registrare:
- Mappatura del gioco: misurare e registrare il gioco in più punti lungo il controcoltello (sinistra/centro/destra) e in diverse posizioni del rotore.
- Integrità del bloccaggio: verificare che le sedi siano pulite e piatte; serrare gli elementi di fissaggio per fasi secondo la sequenza OEM, quindi eseguire un ricontrollo documentato.
- Conferma di assenza di contatto: ruotare a mano (solo dopo aver verificato la procedura LOTO) per confermare l'assenza di contatto tra rotore e controcoltello.
- Verifica post-intervento: dopo la riaffilatura/rotazione o la sostituzione, eseguire un controllo controllato e verificare che l'assorbimento (ampere/tonnellata) e il comportamento della PSD ritornino vicini ai valori di riferimento per la stessa tipologia di materiale.
Questi controlli non sostituiscono le specifiche OEM, ma rendono più facile dimostrare di averle seguite.
Indicatori di usura e prestazioni
Utilizzare due tipi di indicatori: quelli visivi e quelli forniti dalla macchina stessa.
Indicatori di prestazione che spesso si manifestano prima di un guasto catastrofico:
- Aumento del carico del motore (aumento di ampere/corrente a parità di alimentazione e materiale)
- Calore (temperature più elevate della camera/azionamento, maggiore sbavatura sulle materie plastiche)
- Throughput loss (tons/hour drops at the same operating window)
- Particle size instability (more fines/dust, more oversize, inconsistent cut)
- Noise/vibration changes (rubbing, repeating impacts, “new” vibration signatures)
Those symptoms are widely cited as early warnings in shredder maintenance best-practice writeups such as Waste Advantage Magazine’s maintenance best practices for waste shredders (2018) and daily-check guidance like Energycle’s single-shaft shredder maintenance checks (2026).
Visual indicators to check under safe access:
- Edge rounding/rollover, shiny wear lands, nicks
- Chips, cracks, or localized “missing” corners (especially after contamination events)
- Discoloration that suggests overheating/contact
- Uneven wear patterns across a knife length (often points to seating or parallelism issues)
If you’re seeing repeat chipping, treat it as a system issue (contamination, clearance, clamping) before you blame the steel. A structured checklist helps—see Single-Shaft Shredder Blade Chipping: a troubleshooting guide for the common root-cause categories to confirm.
Knife clearance and exposure ranges (verify per OEM)
Knife clearance is not a “set it once” number.
This is where most single-shaft shredder blades sharpen vs replace calls get biased: a dull edge and a drifting clearance can look the same from the outside, but they don’t correct the same way.
It’s a geometry relationship between rotor knives and the bed knife (stator), and it varies by OEM design, rotor diameter, knife style, and material.
What matters in practice:
- Uniform clearance across the full knife length (left/center/right), not just a single gauge point
- Consistency across rotor positions (rotate and re-check to avoid a hidden tight spot)
- Parallelism and seating quality (a burr or debris in a seat can ruin your measurement)
A good field method is to treat clearance as a controlled setup process, not a guess:
- Clean seats and pockets
- Snug-install cutters so they fully seat
- Adjust bed knife position per your machine method (shims/jack screws/wedges)
- Measure with feeler gauges at multiple points, record the values
- Torque in stages, then remeasure
- Hand-rotate and confirm there’s no contact
For a step-by-step approach that mirrors this discipline (while still emphasizing OEM-specific targets), see MAXTOR METAL’s shredder blade clearance setup guide.
Documentation and QA controls
How to set your own intervention thresholds (without guessing)
If you can’t publish or confirm OEM numeric targets in the field, you can still avoid “feel-based” decisions by defining site-specific triggers based on your own baselines:
- Step 1 — Establish baselines: record amps/ton (or kWh/ton), PSD, and “cold” clearance readings when knives are known-good.
- Step 2 — Define drift limits: set an internal trigger when amps/ton rises by a defined % for the same material mix, or when PSD variability crosses your downstream acceptance limits.
- Step 3 — Link triggers to checks: when a trigger trips, require a clearance map (multiple points/rotor positions) and a torque-to-spec verification before deciding sharpen vs replace.
- Step 4 — Validate after action: after a resharpen/rotation or replacement, confirm the metric returns near baseline during a controlled run-in.
Note: These triggers help you decide when to inspect and intervene. They do not replace OEM clearance, geometry, or torque specifications, which remain the final authority.
If your goal is predictable uptime, the logbook is part of the cutting system.
Minimum QA controls that pay off quickly:
If you want, we can provide a simple clearance map + torque confirmation + symptoms log sheet template (spreadsheet or printable checklist) aligned with the fields listed below.
- Record clearance readings (by position), knife exposure, E torque values (or confirmation of torque-to-spec)
- Nota material mix and any known contamination events (tramp metal, glass, stones)
- Track amps/ton trend (or another normalized energy proxy) and PSD drift
- Require a second-person sign-off after any cutter/bed-knife intervention
Brief brand note (non-promotional, evidence-based): MAXTOR METAL supports shredder knife programs with traceable documentation and compatibility support.
Brief brand note (transparency): the maintenance guidance above is intended to be educational; product/service mentions below are provided only as an optional sourcing/support path.
Depending on the application, their fixed-blade offerings include multiple material options and standard QC steps (material certificates, first article and in-process checks). They also offer OEM/ODM assistance to match drawings/samples and help validate fit-up and compatibility—see the material and QC notes on MAXTOR METAL single-shaft shredder fixed blade materials and QC notes.
Sharpen vs Replace (Single-Shaft Shredder Blades)
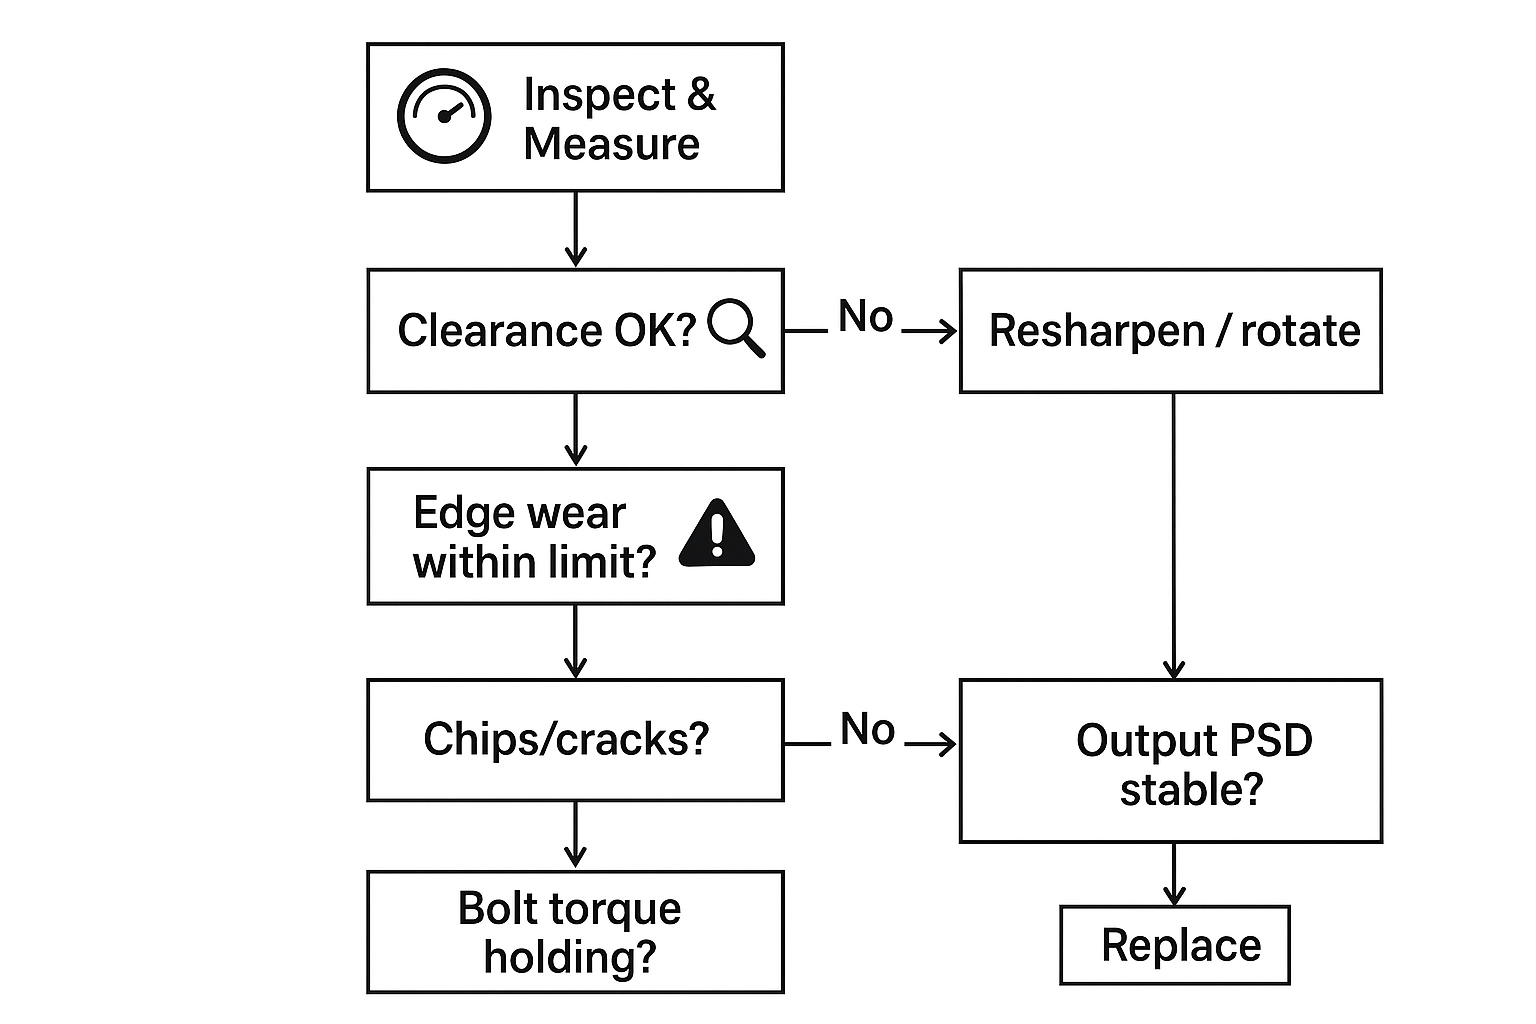
When to resharpen (limits and geometry)
Resharpening (or rotating indexable edges) is the right move when you can restore cutting geometry senza compromising clamp interfaces or creating a clearance control problem.
Resharpen tends to make sense when:
- Wear is progressive and uniform (dull/rounded edges) with no structural damage
- The knife body still meets your OEM geometry requirements (angles, land width, minimum thickness)
- You can reestablish clearance consistently after reassembly
- Bolts, washers, and seats remain in good condition and hold torque
Practical checks before you commit to a resharpen cycle:
- Straightedge check for obvious bowing or seat distortion
- Marking compound/bluing (when used in your procedure) to confirm contact patterns are sane
- A “cold” clearance measurement plan and a post run-in recheck plan
When to replace (damage, limits, persistent loss)
Replacement is the safer and cheaper decision when the steel (or the interfaces around it) can’t reliably return to spec.
Replace is usually the right call when:
- Avrete chips, cracks, fractures, or missing corners that act like stress risers
- The knife has reached OEM minimum dimensions after prior grinds/rotations
- Vedi persistent performance loss after a proper resharpen and correct clearance setup (amps stay high, PSD remains unstable)
- Fasteners don’t hold torque, or seats/pockets are damaged such that you can’t maintain parallelism
- You’re seeing recurring rotor-to-bed contact or rub marks after setup (indicates a higher-risk underlying issue)
Decision workflow and sign-off
A repeatable workflow reduces downtime because it prevents “try it and see” maintenance.
Use a simple decision workflow:
- LOTO + verify zero energy.
- Inspect edges and seats; document damage modes.
- Measure clearance at multiple points and rotor positions (verify per OEM).
- Confirm torque-to-spec and recheck after staged torquing.
- Decide:
- Geometry restorable + clamping stable → resharpen/rotate.
- Damage/limits/persistent loss or clamping instability → replace.
- Two-person sign-off: maintenance + operations (and EHS if your site requires).
Cadence and TCO Levers
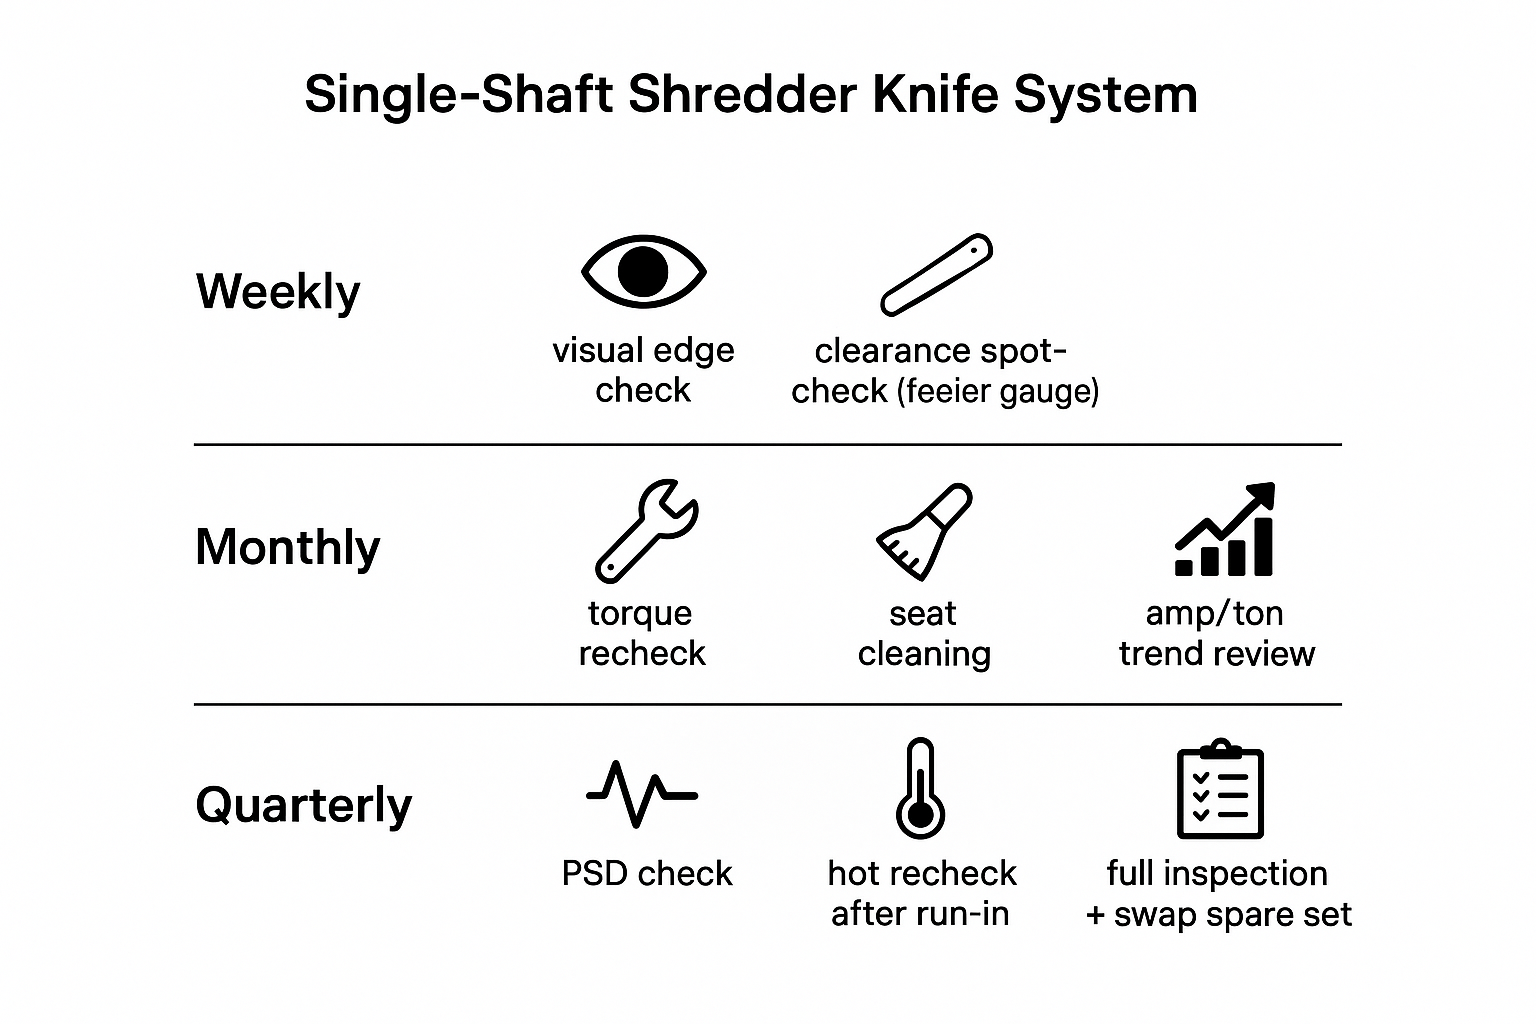
Maintenance intervals by duty and material
Interval planning should reflect reality: duty cycle, contamination, and abrasiveness drive wear more than calendar time.
Use the OEM manual as the baseline, then adjust based on what your logs show:
- Higher contamination/abrasives → shorter inspection and torque recheck intervals
- Film-heavy feeds that smear → pay closer attention to heat and clearance drift
- Hard inclusions/tramp metal risk → increase inspection frequency and strengthen incoming material controls
The key is consistency: do smaller checks more often rather than waiting for a full-blown teardown.
Spare-set and swap strategy
The fastest way to reduce downtime isn’t heroic maintenance—it’s a planned swap.
A practical spare strategy:
- Mantieni un spare set of rotor cutters and bed knives (and critical fasteners) ready to install
- Standardize shim packs and measurement tools so clearance setup is repeatable
- Treat sharpened sets like calibrated tools: label, record grind history, and store to prevent edge damage
This approach lets you pull worn steel, install a verified set, and sharpen offline without turning the shredder into a maintenance project for the whole shift.
Trend metrics: amps/ton, PSD, and service life
To protect TCO, track a small set of metrics that correlate strongly with knife condition:
- Amps/ton (or kWh/ton): a normalized energy signal that often rises as knives dull or clearance drifts
- PSD stability: fines/oversize trend, screen-loading behavior, downstream complaints
- Service life by set: time-in-service, material mix notes, number of rotations/grinds
When PSD becomes the pain point, it helps to standardize “what good looks like” (acceptable fines/oversize) and align that with knife-change triggers. For a deeper look at stabilizing size outcomes through maintenance and part quality, see replacement shredder blades for stable output size.
Riferimenti e ulteriori letture
- OSHA — 1910.147 – The control of hazardous energy (lockout/tagout)
- OSHA — 1910.147 App A – Typical minimal lockout procedures
- OSHA — Control of Hazardous Energy (Lockout/Tagout) overview
Methodology and corrections
- OEM-first principle: clearance ranges, torque values, and geometry limits must come from your shredder OEM documentation.
- How this guide is written: the procedures emphasize repeatable measurement (clearance mapping, torque rechecks) and operational trending (amps/ton, PSD) so maintenance decisions can be audited.
- Corrections and updates: if you spot an error or have an OEM-specific note that should be added, please contact us via MAXTOR METAL’s contact page so we can review and update the guide.
The sharpen-vs-replace decision gets easier when you stop relying on feel and start relying on thresholds you can verify:
- Symptoms you can trend (amps/ton, heat, PSD, vibration)
- Measurements you can repeat (clearance across positions, exposure, runout/endplay checks)
- Interfaces you can trust (clean seats, staged torque, hot rechecks when specified)
And one reminder that prevents most bad calls: clearance ranges, torque values, and knife geometry limits are OEM-specific. When you can’t verify the spec, you’re not maintaining—you’re guessing.
Next steps:
- Confirm governance: align EHS + maintenance on who is authorized to perform LOTO and cutting-chamber work, and make sure the OEM manual is accessible at the point of use.
- Set baselines and triggers: document baseline amps/ton (or kWh/ton), PSD acceptance limits, and a multi-point “cold” clearance map; define what drift triggers an inspection.
- Standardize verification: require torque-to-spec verification (staged pattern + recheck timing) and a recorded clearance map after any knife or bed-knife intervention.
- Plan for controlled swaps: keep a ready spare set (knives + critical fasteners), labeled with grind/rotation history, so changeovers are planned and sharpening happens offline.
- Close the loop: after resharpen/rotation or replacement, run a controlled check and confirm metrics return near baseline; keep a second-person sign-off so decisions stay consistent.
- Optional support: if you need compatibility confirmation or traceable material/heat-treatment documentation for replacement knives, MAXTOR METAL can support OEM matching from drawings/samples and provide the associated QC paperwork on request.

 English
  Spanish
  Italian
  French
  Portuguese
  Russian
  German
  Arabic
  Hindi
Hindi  Vietnamese
  Indonesian
  Japanese
  Korean