

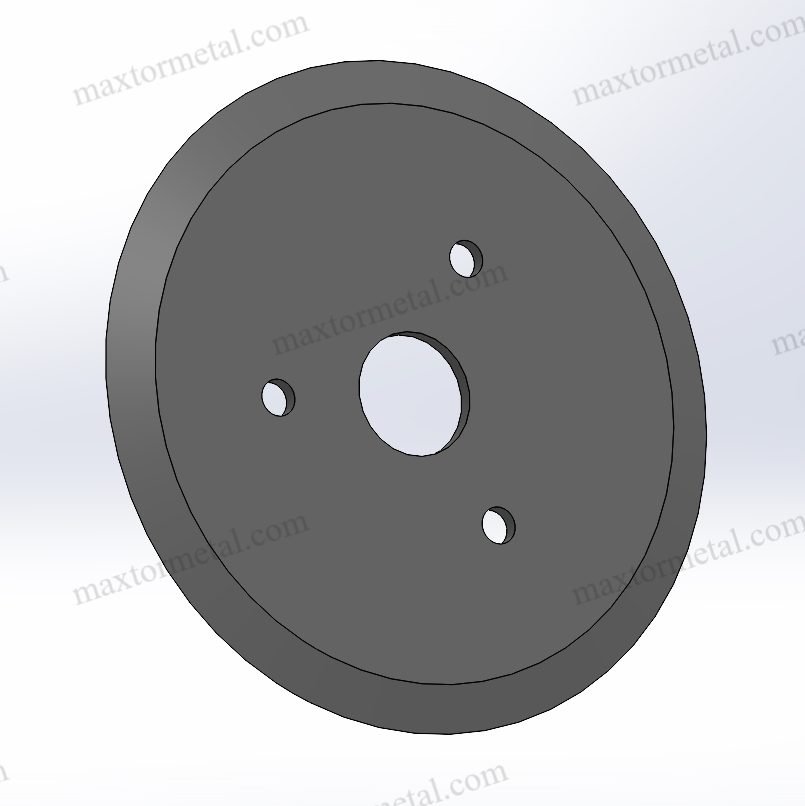
स्लिटिंग बर्स (slitting burrs) स्लिट के साथ उभरे हुए किनारे, धुंधले किनारे, डस्टिंग, या “चबाए हुए” धागों के रूप में दिखाई देते हैं—अक्सर वेब के एक तरफ सबसे खराब होते हैं। ये न केवल दिखने में खराब लगते हैं; बल्कि इनके कारण स्क्रैप (किनारे की ट्रिमिंग, रिजेक्ट्स), डाउनस्ट्रीम जाम और अनियोजित ठहराव होते हैं जब ऑपरेटरों को चलते हुए सेटअप को ठीक करना पड़ता है।.
अच्छी खबर यह है: बर्स में अचानक होने वाली कई वृद्धियां सेटअप ड्रिफ्ट के कारण होती हैं जिन्हें आप बिना पूरी तरह से खोले 15-30 मिनट में लाइन-साइड पर ही ठीक कर सकते हैं। सबसे तेज़ सफलता आमतौर पर ओवरलैप और क्लीयरेंस को वापस रेंज में लाने, किनारे की स्थिति को बहाल करने और वेब मैकेनिक्स (तनाव और गति) को स्थिर करने से मिलती है।.
शुरू करने के लिए आपको विशेष उपकरणों की आवश्यकता नहीं है। अधिकांश संयंत्रों में पहले से ही आवश्यक चीजें मौजूद होती हैं: फीलर गेज, एक डायल इंडिकेटर, प्रेशर फिल्म, और एक IR थर्मामीटर।.
सुरक्षा संबंधी सूचना: यह गाइड केवल प्रक्रिया समस्या निवारण के लिए है। किसी भी स्लिटिंग स्टेशन का निरीक्षण या समायोजन करने से पहले हमेशा अपनी साइट के लॉकआउट/टैगआउट, गार्डिंग और OEM प्रक्रियाओं का पालन करें।.
नीचे दी गई जांच करें और आपको आज ही साफ किनारे, अधिक स्थिर OEE और स्वामित्व की कम कुल लागत दिखाई देगी—क्योंकि आप स्क्रैप और “अंदाजे से ट्यूनिंग” में लगने वाले समय दोनों को कम कर देंगे।”
सार्वजनिक उदाहरण (फिल्म/पैकेजिंग): एक पतली पॉलीमर वेब प्रक्रिया पर Maxcess केस स्टडी में झुर्रियों को समाप्त करने और रोल आउटपुट को दोगुना करने की रिपोर्ट दी गई वेब-स्प्रेडिंग समाधान स्थापित करने के बाद, जिससे स्लिटिंग और वाइंडिंग सहित डाउनस्ट्रीम प्रक्रियाओं को स्थिर करने में मदद मिली। देखें Maxcess केस स्टडी: Plitek ने झुर्रियों को समाप्त किया और रोल आउटपुट को दोगुना किया (सार्वजनिक संदर्भ; परिणाम लाइन डिज़ाइन और सामग्री पर निर्भर करते हैं)।.
तत्काल समाधान (स्लिटिंग बर्स)
ओवरलैप और क्लीयरेंस सेट करें
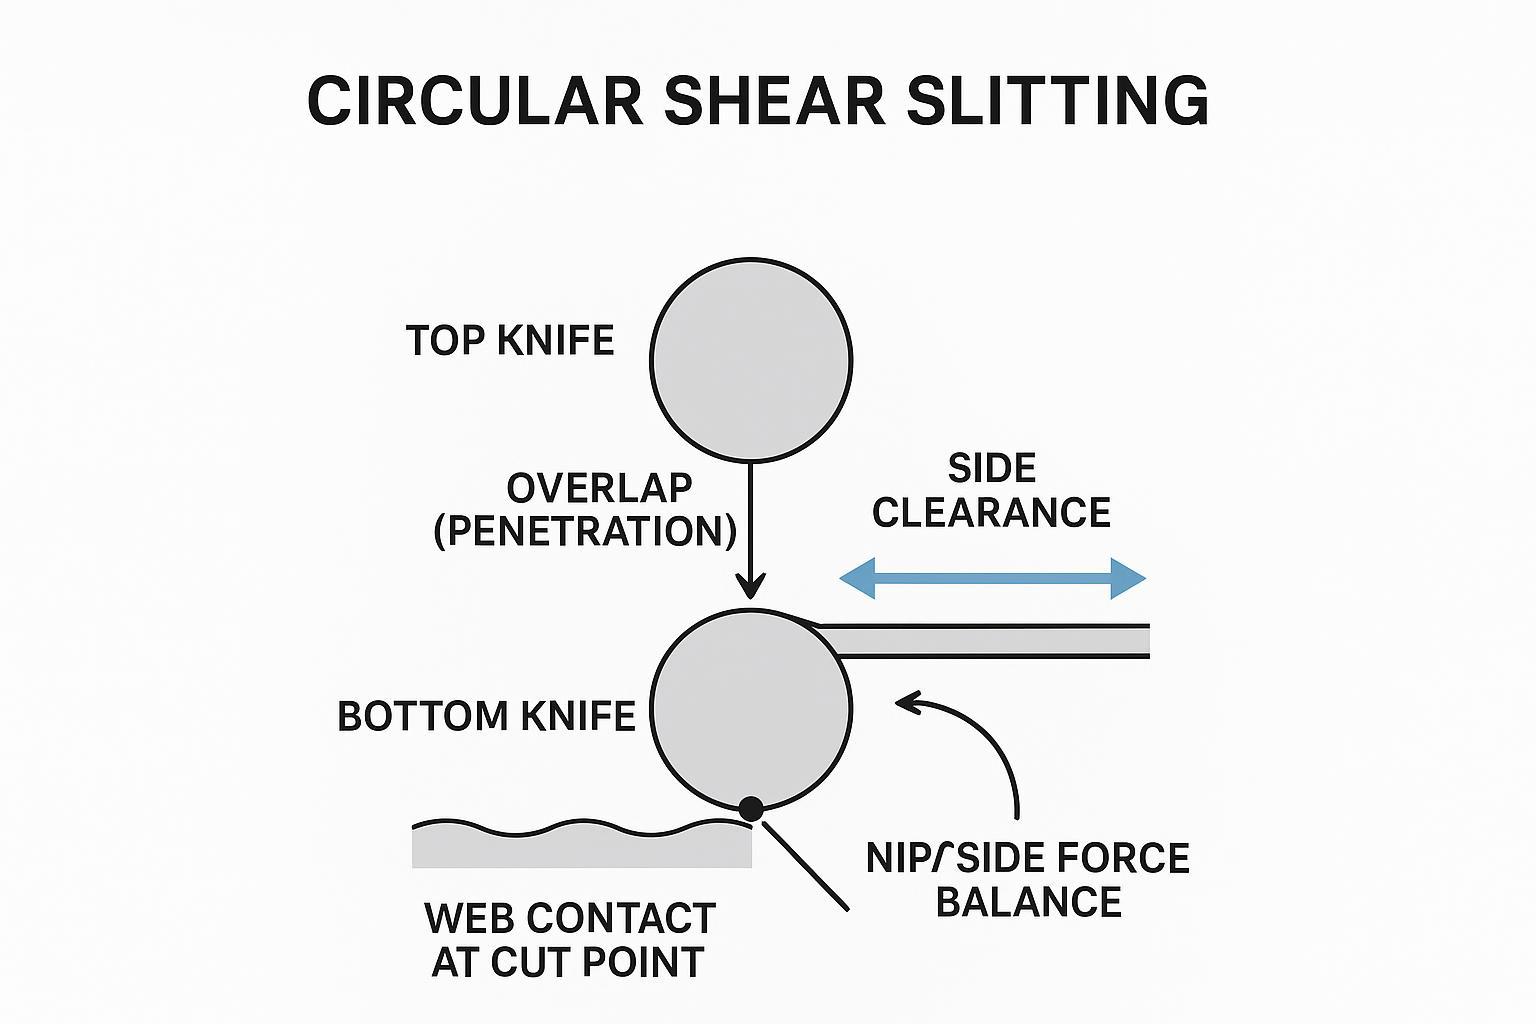
यदि चेंजओवर के बाद अचानक बर्स बढ़ जाते हैं, तो ओवरलैप और साइड क्लीयरेंस को मुख्य संदिग्ध #1 मानें। सर्कुलर शियर स्लिटिंग समस्या निवारण में शुरू करने के लिए यह सबसे तेज़ जगह है क्योंकि यह सीधे तौर पर यह तय करता है कि आप शियरिंग कर रहे हैं या रगड़ रहे हैं।.
“ओवरलैप” और “क्लीयरेंस” का क्या अर्थ है (एक वाक्य में): ओवरलैप यह है कि चाकू सैद्धांतिक स्पर्शरेखा बिंदु से कितना आगे तक प्रवेश करते हैं; क्लीयरेंस नियंत्रित साइड गैप है जो चाकू को रगड़ने के बजाय शियर करने की अनुमति देता है।.
एक संक्षिप्त ठहराव के साथ शुरुआत करें और इन स्लिटर नाइफ ओवरलैप और क्लीयरेंस की जांच करें:
- कट पॉइंट पर साइड क्लीयरेंस की पुष्टि करें (फीलर गेज)।. ऑपरेटर साइड और ड्राइव साइड दोनों की जांच करें। बहुत अधिक खुला क्लीयरेंस वेब को शियर करने के बजाय विकृत कर सकता है; बहुत तंग क्लीयरेंस घर्षण को बढ़ाता है और गर्मी से संबंधित किनारे की क्षति पैदा कर सकता है।.
- छोटे चरणों में ओवरलैप को रीसेट करें।. यदि आपको धुंधला किनारा और डस्टिंग दिखाई देती है, तो ओवरलैप को थोड़ा कम करें। यदि स्लिट फटा हुआ या बीच-बीच में बिना कटा हुआ दिखता है, तो ओवरलैप को थोड़ा बढ़ाएं। एक समय में एक ही वेरिएबल बदलें।.
- चौड़ाई में समानांतरता को सत्यापित करें।. यदि एक लेन साफ है और दूसरी में बर्स हैं, तो सेटअप समग्र रूप से चौकोर हो सकता है लेकिन आर्बर स्टैक में सुसंगत नहीं हो सकता है।.
कुंजी ले जाएं: सभी लेनों में एक समान शियर स्लिटिंग बर्स आमतौर पर ओवरलैप/क्लीयरेंस या चाकू की स्थिति की ओर इशारा करते हैं; एक दोहराए जाने वाले पैटर्न में आने और जाने वाले बर्स अक्सर रनआउट या तनाव स्थिरता की ओर इशारा करते हैं।.
क्लीयरेंस लॉजिक और सामान्य गलतियों पर अधिक विस्तृत संदर्भ के लिए, MAXTOR METAL की गाइड देखें: शियर ब्लेड क्लीयरेंस सेट करने की निश्चित गाइड.
यदि आप चेंजओवर के बाद ओवरलैप/क्लीयरेंस को डायल कर रहे हैं—या आप बर्स और गर्मी को कम करने के लिए चाकुओं की पेयरिंग कर रहे हैं—तो MAXTOR METAL के गोलाकार स्लिटर चाकू और ब्लेड विशिष्ट कॉन्फ़िगरेशन और अनुकूलन विकल्पों के लिए देखें।.
किनारे की तीक्ष्णता को बहाल करें और डिबर करें
एक “नया” चाकू कट एज पर स्वचालित रूप से एक तेज चाकू नहीं होता है—विशेष रूप से यदि इसे संभाला गया हो, टकराया गया हो, या दूषित स्पेसर्स के साथ असेंबल किया गया हो।.
लाइन-साइड क्रियाएं जो तेजी से काम करती हैं:
- माइक्रो-चिप्स और रोल रिंग्स के लिए निरीक्षण करें।. यदि उपलब्ध हो तो आवर्धन का उपयोग करें; छोटा सा किनारे का नुकसान फिल्मों और नॉनवॉवेन्स पर अत्यधिक बर्स पैदा कर सकता है।.
- संपर्क सतहों और स्पेसर्स को साफ करें।. स्पेशर पर एक भी बर या फंसा हुआ मलबा चाकू के स्टैक को झुका सकता है और कट पॉइंट पर वास्तविक क्लीयरेंस को बदल सकता है।.
- यदि आप तुरंत तेज नहीं कर सकते हैं, तो लोड कम करें।. जब आप दोबारा तेज करने का समय निर्धारित करते हैं, तब तक फटने से रोकने के लिए गति और/या तनाव को थोड़ा कम करें।.
घर्षण के संकेतक के रूप में तापमान पर नज़र रखें। यदि IR थर्मामीटर चाकुओं के आसपास बढ़ता हुआ हॉट स्पॉट दिखाता है, तो हो सकता है कि आप रगड़ रहे हों (बहुत तंग, बहुत अधिक साइड फोर्स) या कुंद किनारे से काट रहे हों।.
किनारे के लक्षणों की चीट शीट (त्वरित दृश्य जांच):
- साफ शियर: स्पष्ट किनारा, न्यूनतम डस्टिंग, लेन-टू-लेन सुसंगत रूप।.
- रगड़/अत्यधिक तंग साइड फोर्स: चमकदार या धुंधला किनारा, चाकू का बढ़ता तापमान, कभी-कभी “पॉलिश” किया हुआ रूप।.
- फटना (अपर्याप्त शियर क्रिया): ragged edge, intermittent uncut fibers/strands, burr that worsens when tension fluctuates.
- Micro-chips/rolled edge: localized burr that “prints” repeatedly, often paired with a periodic defect pattern and audible tick/chatter.
Align entry, stabilize tension and speed
Once overlap/clearance and edge condition are reasonable, burrs that persist are often web-mechanics problems.
- Square the web into the station. A skewed entry angle can bias side force and make one edge consistently worse.
- Stabilize tension before you touch knife settings again. A tension change can “fake” a clearance issue by changing how the web sits at the cut point.
- Reduce speed briefly to isolate cause. If burrs drop quickly with a 10–20% speed reduction, you’re likely dealing with a stability issue (flutter, tension loop response, or heat buildup).
- Check overspeed assumptions if your system uses it. Industry guidance commonly references a small bottom-knife overspeed to maintain scissor action; see the principles described in the Carolina Knife “Principles of Shear Splitting” PDF.
त्वरित निदान किट
त्वरित SOP तालिका: लक्षण → कारण → जांच → त्वरित समाधान → सत्यापन
| What you see | संभावित कारण | What to check | Quick fix | Verify it worked |
|---|---|---|---|---|
| Uniform burr across lanes | Overlap/clearance out of range; dull edge | Feeler gauge at cut point; knife edge under magnification; spacer cleanliness | Reset overlap/clearance in small steps; clean spacers; reduce load (speed/tension) if needed | Edge looks crisp; dusting drops; knife temp trend stabilizes |
| Burr mostly on one side | Skewed entry; side load imbalance; stack not parallel | Web entry squareness; pressure film pattern; lane-to-lane clearance | Square web; balance nip/side load; re-check parallelism | Left/right edge match improves |
| Burr repeats periodically down-web | Runout/TIR; stack error; mounting face contamination | Dial indicator TIR at knife OD; check mounting faces | Clean faces; re-stack; replace damaged spacers; verify alignment | Pattern disappears; TIR reduced |
| Fuzzy edge / fiber pull-out | Tearing from low shear action; dull edge; unstable tension | Overlap/clearance; tension stability; edge condition | Increase overlap slightly; stabilize tension; sharpen/replace if chipped | Less fuzz; steadier slit edge |
| Shiny/smeared edge on film | Rubbing/heat; too tight clearance; debris | IR temp trend; clearance; spacer burrs | Open clearance slightly; clean stack; reduce side force | Temp rise slows; smear disappears |
(Always follow your OEM manual, safety procedures, and holder design limits before making adjustments.)
Runout and axis alignment
If burr quality cycles “good/bad/good/bad” at a regular interval down-web, suspect runout.
Do a quick runout check with a dial indicator:
- Measure TIR on the knife OD while rotating slowly. If runout is high, the effective overlap and clearance change once per revolution.
- Check bearing/shaft condition and mounting faces. A clean knife on a dirty or damaged mounting surface will still run out.
- Confirm axis alignment between upper and lower arbors. Misalignment forces the cut point to wander, which shows up as lane-to-lane inconsistency.
This pattern-based diagnosis matches what many shear slitting OEMs describe: burr that appears periodically is usually not “material randomness,” but geometry repeatability (runout, stack error, alignment).
Pressure mapping and nip balance
Uneven side load or nip force can turn a good knife setup into a rubbing setup.
Use pressure film to map contact:
- Place film at the nip/holder contact zone per your line’s safe procedure.
- Run at low speed briefly and compare the print density across the width.
- Correct obvious left/right imbalance first, then re-check edge quality.
For a quick reminder of common shear slitting failure modes tied to overlap and setup forces, DIENES USA’s list of issues is a useful reference: “6 of the most common problems found in shear slitting”.
If you’re deciding between shear and crush slitting for a film job, DIENES USA also notes that shear slitting is preferred when a very clean and uniform cutting edge is required, while crush cutting is easier but tends to produce rougher edges and higher dust. See “Shear vs. Crush: When to use Which One?”.
Preventive checks and logging
Lock in your gains by making the setup repeatable across shifts.
A simple way to make troubleshooting faster (and more objective) is to log three “signals” every time burr spikes: runout (TIR), knife-area temperature rise, and tension stability. Use the conservative guidance below as starting reference points and always defer to your OEM manual, holder design, and web/material limits:
- Runout (TIR) quick-check: If you measure more than about 0.001–0.002 in (0.025–0.05 mm) TIR at the knife OD during a slow rotation, treat it as a likely contributor to periodic burr (effective overlap/clearance changes once per revolution). If you’re above this range, clean mounting faces, re-stack, and re-check before changing geometry. (Reference guidance compiled from knife/slitting suppliers; for example, DIENES USA’s shear cutting resources discuss how geometry repeatability impacts slit quality and dust generation: “The 2 Types of Shear Cutting and the 4 Relations that Impact Quality”.)
- Temperature trend: Log the knife-area temperature at startup and again after 5–10 minutes. A fast upward trend (even if the absolute number varies by plant) often indicates rubbing from tight clearance, debris in the stack, or dull edges.
- Tension stability: Record setpoint and the observed swing (or dancer position variation). If burr correlates with larger swings after speed changes, stabilize tension control before re-tuning overlap/clearance.
Log template (copy/paste):
- Minimum fields: material, thickness, speed, tension setpoint, overlap, clearance, symptom (burr/fuzz/dusting), corrective action, result.
- Optional (recommended): measured TIR, knife temp (start/10 min), lane #, photos under magnification, date/shift/operator.
Keeping the “minimum fields” consistent is what makes trend reviews and repeatability possible across shifts.
- Record the last “good” overlap/clearance, tension, and speed for each material and thickness.
- Log knife life by hours or meters slit, not by calendar time.
- Add a two-minute verification step: feeler gauge check + quick IR temperature scan after startup.
MAXTOR METAL supports matched blade pairing, QC traceability, and one‑stop import to help plants keep knife geometry and documentation consistent from order to install.
सामग्री-विशिष्ट ट्यूनिंग
Films (PET/OPP/PE)
Films punish heat and rubbing.
A practical rule: when a film edge defect changes quickly with speed or tension, suspect stability/heat first (flutter, side force, rubbing). When it prints in a repeatable pattern, suspect geometry repeatability (runout/stack). Use the IR thermometer and a quick TIR check to decide which path to follow before you touch overlap/clearance again.
- Start with lower overlap and a tighter, controlled clearance than you’d use for fibrous webs.
- If you see edge melt or a glossy “smeared” lip, reduce overlap and confirm you’re not over-loading the side force.
- Verify results with magnification: the goal is a clean edge with minimal dusting and no stretched “whiskers.”
Nonwovens and textiles
Nonwovens often show burr as fiber pull-out or fuzz.
- Prioritize edge sharpness और stable web support at the cut point.
- Increase overlap modestly if you see incomplete shear, but back off if fuzz increases (that’s often rubbing or excessive compression).
- If the web is stretchy, tune tension for stability first—otherwise you’ll chase overlap all shift.
Paper and laminates
Paper and laminates are sensitive to dusting, delamination, and edge cracking.
- Keep overlap in a moderate range and avoid excessive compression.
- Watch for dust bursts that correlate with temperature rise; that often indicates friction or dullness rather than “bad paper.”
- When burr increases after a speed change, re-check tension response and web entry alignment before you touch knife geometry.
क्षेत्र से परिणाम (उदाहरण)
In one film/packaging slitting improvement project, a standardized setup-and-verification routine (geometry checks, spacer hygiene, and quick logging) delivered measurable gains:
- Scrap down 45%
- Burr-related stops down 65.94%
- Changeover time down 46.8%
- Knife life increased by 4.3×
(Results vary by material, line condition, operator practices, and holder design. Use these numbers as a reference for what’s achievable when the process becomes repeatable.)
निष्कर्ष
Fast wins come from three things: correct overlap/clearance, sharp edges, and balanced pressure at the cut point.
To keep burrs from returning, verify runout, tension stability, and anvil/holder condition—and document the last-known-good settings so you can repeat them on the next changeover.
Track a few KPIs and review them weekly: burr-related complaints, scrap rate, changeover time, and uptime. If those numbers improve, your “fix” is real—not just a short-term adjustment that hides the problem.
If you want a second set of eyes on knife pairing and inspection documentation for your material set, you can contact मैक्सटोर धातु with your knife drawings/specs and current defect photos.
FAQ
1) What causes slitting burrs in shear slitting?
Slitting burrs most often come from dull knives, incorrect overlap/clearance, runout, or unstable web mechanics (tension and speed). Uniform burr points to setup and edge condition; periodic burr often points to runout or stability problems.
2) How do I reduce slitting burrs in 15 minutes without changing knives?
Reset overlap and side clearance in small steps, clean spacer/contact faces, stabilize tension, and reduce speed briefly to isolate the cause. Use an IR thermometer to catch friction/heat that indicates rubbing.
3) What’s the difference between overlap and clearance on slitter knives?
Overlap is how far the knives penetrate past the tangent line to create scissor action; clearance is the controlled side gap that prevents rubbing while still allowing shear. Wrong overlap or clearance can turn shear cutting into tearing or friction.
4) Why do slitting burrs come and go in a repeating pattern?
A repeating burr pattern down the web is a classic runout symptom: once per revolution the effective overlap and clearance change. Confirm with a dial indicator runout check on the knife OD and mounting surfaces.
5) What tools should a line-side slitting burr troubleshooting kit include?
At minimum: feeler gauges (clearance checks), dial indicator (runout/TIR), pressure film (nip/side load balance), and an IR thermometer (heat/friction). These four tools cover most burr spikes quickly.
6) Why do we get a fuzzy slit edge on film and nonwovens?
Fuzzy edges typically indicate tearing or fiber pull-out rather than clean shear. Check sharpness first, then verify overlap/clearance, tension stability, and whether side load is causing rubbing and heat.
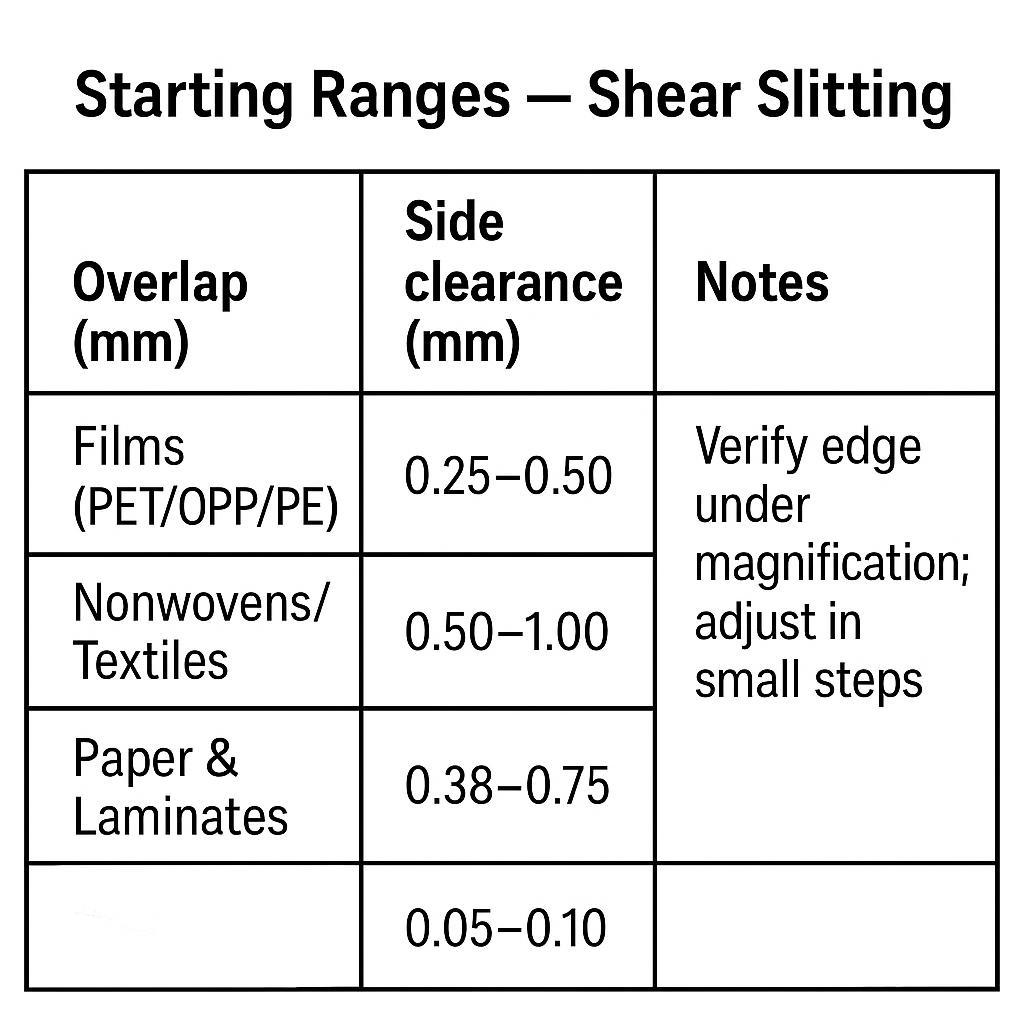
7) What are safe starting settings for overlap and clearance by material?
Use conservative starting ranges, then verify edge quality under magnification and adjust in small steps. As a baseline, films often need lower overlap and tighter control to avoid heat; nonwovens often need sharpness and stability more than force.
8) How do I stop burr problems from coming back after the next changeover?
Document the last-known-good settings (overlap/clearance, tension, speed), add a short startup verification (feeler gauge + IR scan), and log knife life by hours or meters. Repeatability is what protects OEE across shifts.
जेरी चू is a Technical Support Specialist in MAXTOR METAL’s After-sales Service team with 10 वर्ष of cross-industry field experience (paper, plastic recycling/shredding, metal slitting, and wood processing). He supports customers in troubleshooting real-world converting and slitting issues such as edge burrs and excessive dust. Certifications: पीएमपी और सीएमआरपी.

 English
  Spanish
  Italian
  French
  Portuguese
  Russian
  German
  Arabic
  Hindi
Hindi  Vietnamese
  Indonesian
  Japanese
  Korean