

- このガイドで扱う内容:冶金学的ウィンドウ、品質保証/検証、衛生管理、投資対効果(ROI)
- 対象読者:技術管理者、製造・プロセスエンジニア
- 結果:HRC 56~58における440Cの仕様策定と検証のためのデータに基づいた道筋
Urschelスタイルのダイサーヘッドは、過酷な交番荷重(サイクリックローディング)条件下で動作します。バンドソーの刃は高頻度で食材に接触し、その衝撃の強さは、柔らかい生鮮品と硬い冷凍食材(IQF急速冷凍野菜や根菜類は、硬化木材に匹敵する表面硬度を持つ場合があります)の間で大きく異なります。カットサイズの安定性と刃の寿命は直結しており、最初の冷凍サイクルでバンドソーに欠け(チッピング)が生じると、それ以降のすべてのカットで寸法にバラつきが発生します。そのため、この用途における材料選定基準(クオリフィケーション)は単なる硬度規格の指定にとどまらず、ラインが処理するすべての製品ミックスに耐えうる「検証されたプロセスウィンドウ(熱処理条件)」の確立が不可欠となります。
Urschelスタイルのヘッド用交換ダイサーバンド(切丁機用バンドソー)を検証する場合、440Cは「厳格に管理されて初めて真価を発揮する」素材と言えます。刃先を維持する十分な硬度と、湿気のある環境に耐える耐食性を兼ね備えている反面、ずさんな熱処理や仕上げ加工は一切許容されません。
品質システムの観点から( Maxtor Metal ドキュメント(重要な消耗品))再現性への最短ルートは、「440C、HRC 56~58」を 検証済みプロセスウィンドウ—単なる発注書の項目ではない。.
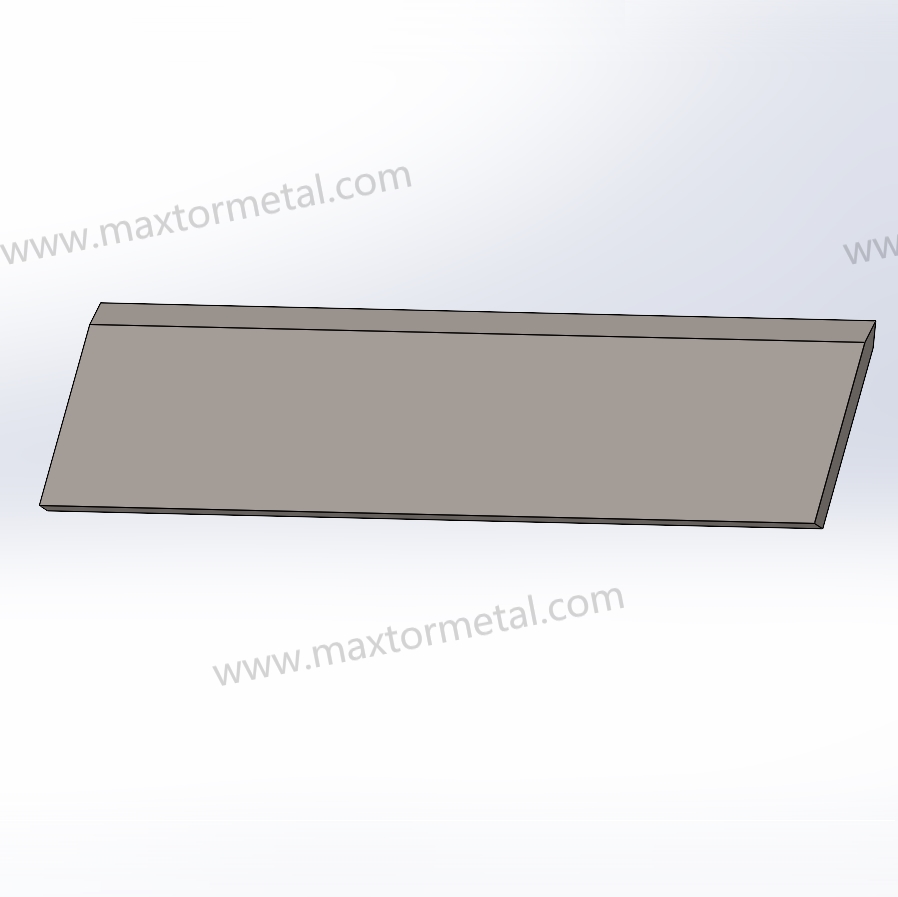
技術ノート: 検証計画に受信ストリップフォームと注文言語も含まれる場合は、Maxtor Metalを参照してください。 面取り加工された工業用ブレード用鋼帯(リール入り) コイルの長さ、厚みの公差、表面仕上げの等級など、形状仕様については、この品質保証プロトコルに準拠します。.
本ガイドについて(およびその信頼性の根拠)
このガイドは、品質システムを重視して事業を運営する刃物メーカーの視点から書かれています。具体的には、管理可能なプロセスウィンドウを定義し、要件を監査可能な記録に結び付け、現場データを使用してフィードバックループを閉じるという考え方に基づいています。.
何 Maxtor Metal 資格取得プログラムにおいてサポート可能な内容(提供可能な書類の例):
- 受入検査記録 ストリップ/バンド用(寸法、視覚的基準、サンプリング計画、処理方法)—共有可能
- 硬度計制御校正証明書および校正間隔に関する声明書 — 共有可能
- 熱処理バッチ記録: 時間/温度チャート、焼入れ媒体に関する注記、零下サイクル、焼き戻しパラメータ — 共有可能
- 入荷したストリップから完成したダイサーバンドまでの、熱/ロットのトレーサビリティ。
- 工程内検査および最終検査記録
- 材料試験報告書(MTR)/化学分析記録(加熱ロット識別子付き) — 顧客との秘密保持契約に基づき利用可能
- 硬度サンプリングマップ+結果 — 顧客との秘密保持契約に基づき利用可能
- 認定ロットおよび故障解析のための金属組織学的支援。; 金属組織写真/報告書(位置、倍率、受入に関する注記) — 顧客との秘密保持契約に基づき利用可能
- 研削/表面完全性スクリーニング記録 (燃焼スクリーニング方法+合格基準)— 顧客との秘密保持契約に基づき入手可能
- 表面粗さ(Ra)試験記録 カットオフ値、方向、サンプリング位置などを含む - 顧客との秘密保持契約に基づき入手可能
- X線回折法による残留オーステナイト(RA)の検証は、通常、承認された第三者機関の研究所で行われます。 RA定量化が必要な場合
このガイドを自社工場の品質保証システムに適合させたい場合は、これをテンプレートとして使用し、設備、製品構成、リスクプロファイルに合わせて許容範囲を調整してください。.
440Cの基本特性
組成および製品形態
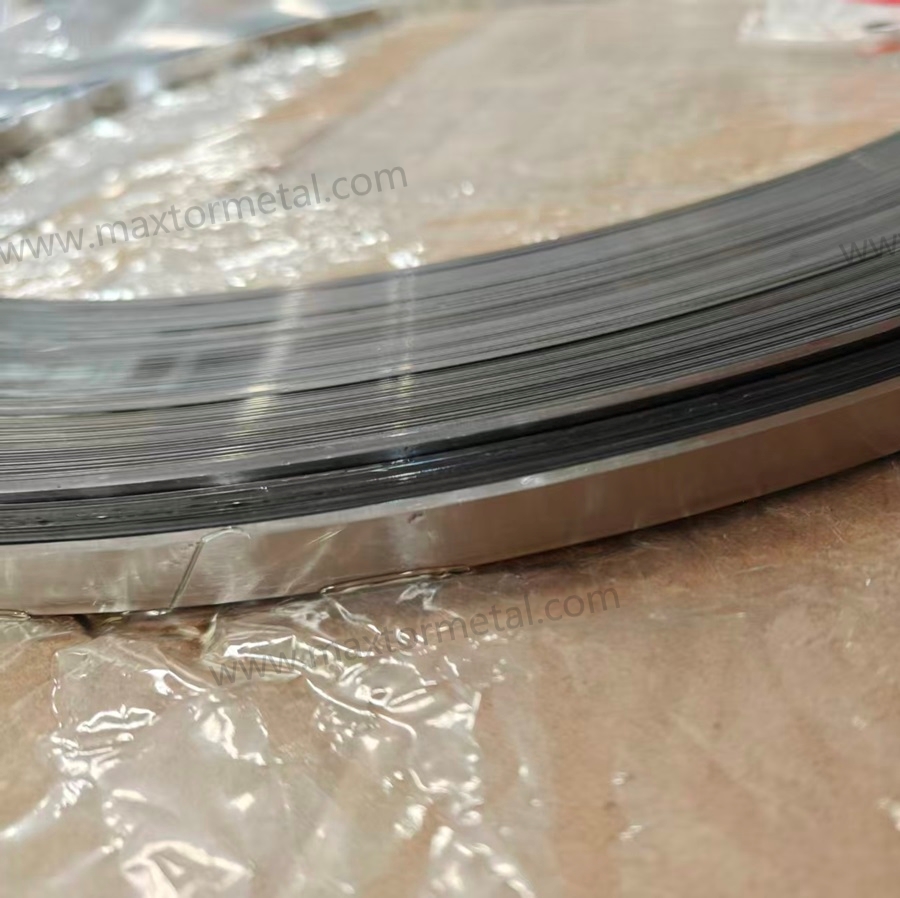
440Cは、焼入れ焼戻し後に高い硬度が得られるように設計された高炭素マルテンサイト系ステンレス鋼です。ダイサーバンドにとって重要なのは、この合金の性能がマルテンサイト組織と炭化物によって決まるため、化学組成、炭化物の分布、熱処理といった要素が、刃持ちやチッピング挙動に実際に大きな違いとして現れるということです。.
入荷資材の必要量を記述する実用的な方法は次のとおりです。
- 等級(440C / UNS S44004 または同等品)を指定してください。
- 許容される製品形状(ダイサーバンドへの成形および仕上げに適したストリップ/バンド)を定義する
- 等級を文書に紐付ける:加熱ロット追跡情報+化学組成記録
標準的な組成の参考資料として、ASM International の Alloy Digest のエントリを参照してください。 AISIタイプ440C 良い出発点となる。.
HRC 56~58の物件
HRC 56~58は、ダイサーサービスにとって一般的な「中間帯」であり、以下のバランスを目指しています。
- 耐摩耗性と刃持ちに十分な硬度
- 一時的な衝撃(製品の異物混入、氷、硬い部分、供給不良など)による微細な欠けを軽減するのに十分な靭性マージン。
落とし穴は、同じロックウェル硬度でも、微細構造(炭化物のサイズ/分布、残留オーステナイト含有量、焼き戻し状態)は大きく異なる可能性があるということです。そのため、硬度は離型基準として必要ではありますが、十分条件ではありません。.
重要なポイント: HRC 56-58 を次のように扱います 受付期間 現場で予測を行うためには、微細構造/RA検査および表面完全性検査と組み合わせる必要がある。.
清潔度オプション(ESR/VIM)
ウルシェル式ダイサーバンドの場合、, 従来型エアメルト 440℃ コストパフォーマンスの観点からすると、通常はこれがデフォルト設定となります。ただし、入荷時の品質保証とプロセス検証を通じて、包含事項と変動性を適切に管理することが前提となります。.
より環境に優しい製氷方法を検討するのはどのような場合でしょうか?
- ESR(電気スラグ再溶解): 故障モードが介在物によるエッジチッピングであり、より高い清浄度が必要な場合。.
- VIMおよび/またはVIM+ESR: 最高の一貫性を追求し、追加コストを正当化できる場合(または、アプリケーションが散乱に非常に敏感な場合)。.
現実的なアプローチとしては、まず厳格な検証プロトコルを用いて従来型の溶融技術を検証し、現場データから制限要因が熱処理、形状、表面損傷ではなく清浄度であることが示された場合にのみ「アップグレード」を行うことです。.
Cara Menentukan Jendela Heat-Treatment yang Valid untuk Pisau Sabuk Dicer 440C
オーステナイト化および焼入れ範囲
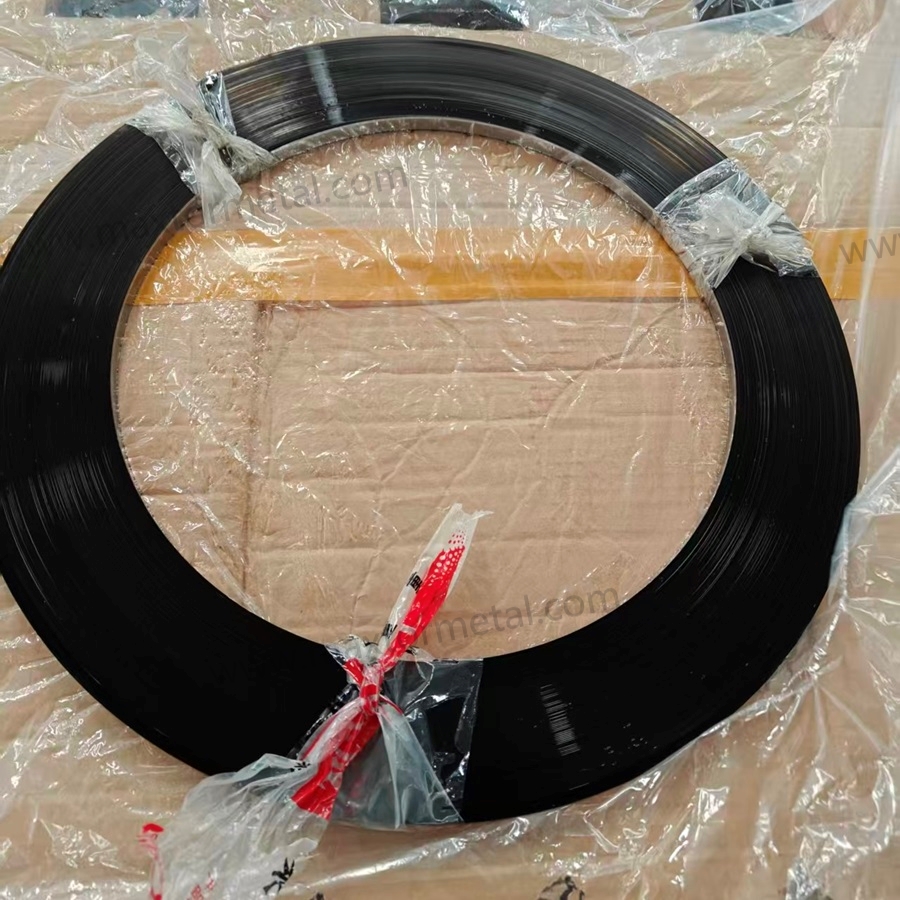
マルテンサイト系ステンレス鋼のほとんどの加工ウィンドウは、440Cオーステナイト化を大まかに 約1850~1950°F 温度範囲(セクションサイズと炉の能力が重要)で加熱した後、制御された急冷を行う。温度範囲が重要な理由は正反対である。下限温度を下回ると炭化物の溶解が不完全になり、硬度にムラが生じる恐れがある。一方、上限温度を超えるとマトリックスに炭素が過剰に溶解し、残留オーステナイトが押し上げられ、目的とするマルテンサイトの割合が減少する。.
ほとんどの誤処理を防ぐ2つのルール:
- オーステナイト化温度を「高ければ高いほど安全」と考えてはいけません。過度な温度や保持時間は、残留オーステナイト(RA)を上昇させ、炭化物の状態を変化させる可能性があります。.
- 焼き入れを「とにかく速く」行うものと捉えてはいけません。ひび割れや歪みを生じさせることなく、必要な変形条件を満たす焼き入れ方法を選びましょう。.
ステンレス鋼の熱処理範囲と考慮事項に関する基準となる参考資料として、ASMの ステンレス鋼の熱処理 有用な公式情報源です。.
極低温と焼き戻しによる強靭さ
ダイサーバンドが硬度を満たしているにもかかわらず欠けてしまう一般的な理由は 微細構造の不一致—多くの場合、RAが多すぎる、マルテンサイトが十分に安定化していない、または残留応力が高い。.
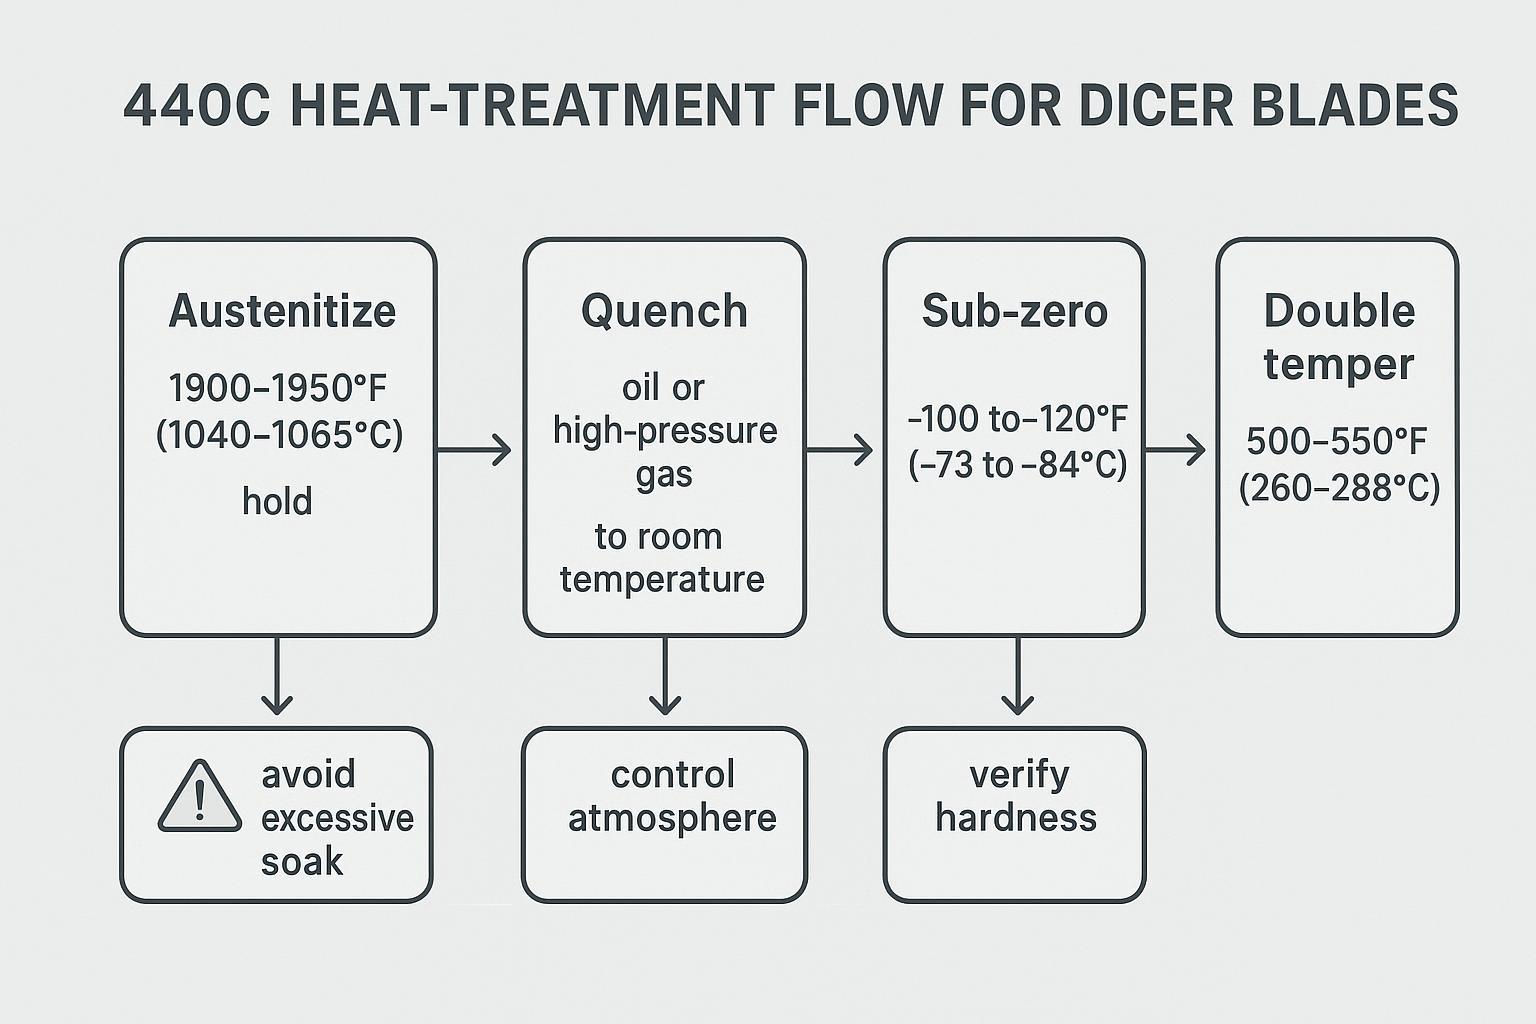
多くの加工業者が採用している、実用的で現場に適した手順は次のとおりです。
- オーステナイト化処理(承認された範囲内で)
- クエンチ
- 氷点下 (冷療法)RAを軽減し安定化させる
- 二重の気質 ストレスを軽減し、硬度/靭性を調整する
これを正当化できる表現方法は、「このレシピをそのまま使う」ではなく、次のようにすることです。
- 文書化された炉制御とバッチ記録を要求する
- サプライヤーに対し、各工程における検証済み範囲を宣言するよう求める。
- 硬度、RA値、微細構造、フィールドトライアルのKPIを用いて結果を検証する
微細構造の目標と落とし穴
ダイサーバンドの場合、微細構造のターゲットは機能的である。
- 適切な炭化物分布を有する焼戻しマルテンサイトマトリックス
- RA値は、あなたの欠けリスク許容度に合わせて調整されます。
- 研削による表面の熱損傷(焼け)によって脆い層が形成された痕跡は見られない。
早期の欠けや寿命の不安定さとして現れる一般的な落とし穴:
- 高残留オーステナイト硬度は合格するかもしれないが、安定性が低下し、荷重下で変形する可能性がある。.
- 過剰オーステナイト化: RA値を上げ、炭化物の状態を変化させることができます。.
- 焼き戻し不足または不適切な焼き戻しサイクル残留応力が高い。.
- 研磨焼け/再硬化:表面がもろくなり、端に微細なひび割れが生じる。.
HRC 56–58が必要条件であって十分条件ではない理由:品質保証(QA)および検証プロトコル
硬度および衝撃試験法(ASTM E18/E23)
硬度は最も迅速なスクリーニング指標だが、それは測定方法が管理されている場合に限る。.
- 規格に基づいたロックウェル法を使用する。 ASTM E18 そして定義する:
- スケール(一般的には、硬化マルテンサイト系ステンレス鋼の場合はHRC)
- 部品/ロットあたりの発注数
- 配置計画(端面を避ける、薄い支持されていない領域を避ける)
- R&Rの期待値を測る
チッピング耐性が重要な場合は、次のような一貫した方法で靭性の指標を追加します。 ASTM E23 (シャルピー)。薄い帯状/ブレード形状の場合、小型試験片計画が必要になる場合がありますが、主な利点は比較できることです。 区画間 そして プロセス間 絶対的な数値を追い求めるのではなく。.
微細構造およびRA検査(第三者機関によるXRD分析+金属組織学的検査)
2つのチェック項目で「硬度ギャップ」を解消します。
- X線回折法による残留オーステナイト(RA): リスクプロファイルとアプリケーションに適したリリースバンドを設定します。社内に XRD がない場合は、 承認された第三者検査機関 また、ロットごとに結果を比較できるように、その方法を固定します。.
- 金属組織学炭化物分布、マルテンサイト状態、および異常構造を検証し、故障解析と関連付ける。.
RA(レジデントアシスタント)採用に関する実践的なガイダンス(バンドの設定方法)
ロックウェル硬度は非常に異なる微細構造間で類似している可能性があるため、RAは 予測 リリース指標、特に主な故障モードがエッジチッピングの場合。.
ウルシェル式ヘッドなどの湿式ダイサーバンド用途の場合、Maxtor Metalのエンジニアリング慣行では、認定時に≤5% RAを初期管理目標値として使用し、現場でのチッピングデータに基づいてバンドを締めたり緩めたりします。これは普遍的な数値ではなく、形状、製品の硬度、および衛生化学によって最適値は変化しますが、調達文書に漠然とした指示ではなく、正当性があり監査可能な出発点を提供します。.
調達文書においてRA(リスク評価)を明記する正当な方法は以下のとおりです。
- 予選段階故障モードに基づいてRAターゲットを定義し、現場での結果に基づいてそれを安定させる。.
- If your dominant risk is micro-chipping/brittle edge failures, start with a lower RA target(≤5% is a common field starting point for dicer band service).
- If your dominant risk is distortion/cracking risk in heat treat, avoid overly aggressive RA reduction and use trials to confirm.
- Production surveillance stage: once the process is proven, keep RA as a periodic audit metric to control drift.
Note: the “right” RA number depends on geometry, processing route, and service conditions. If you already have baseline RA data from a known-good band, use that baseline to set your acceptance band rather than adopting a generic number.
What to document (so the data stays auditable)
- specimen prep method and location
- etchant and imaging magnification (metallography)
- RA measurement method parameters (XRD setup) and reporting format
- measurement uncertainty / repeatability statement from the lab (so you can set a realistic acceptance band)
- the acceptance band and the corrective action when out of band
Out-of-band actions (examples)
- RA higher than your band while hardness is in spec → review austenitize/soak control, quench severity, sub-zero step effectiveness, and temper stabilization; re-check for grind burn before release
- RA lower than expected with increased cracking/distortion risk → review quench and cold treatment severity; confirm geometry stability and residual stress condition
A simple way to set acceptance bands (no guesswork)
If you don’t want to debate “generic” RA numbers, set your acceptance bands from a known-good baseline lot, then tighten them as field data accumulates.
| メトリック | What to collect in the baseline lot | A practical acceptance-band rule | Why it works |
|---|---|---|---|
| 硬度(HRC) | n measurements per lot using a fixed location plan | Use your spec window (e.g., 56–58) and add a drift check (e.g., median stays inside the window across lots) | Prevents “meets spec but drifting” situations |
| RA by XRD | n measurements, same specimen location, same lab/method | Start with a percentile band (e.g., keep future lots within the baseline 10–90% range), then tighten if chipping risk is high | Robust when you don’t trust normality assumptions |
| Edge life | n trials per lot (hours or tons) under the same product mix | Track the median and 10–90% range per lot; require non-regression vs baseline before approving changes | Separates true improvement from outliers |
| Chipping rate | chips per inspection interval with the same inspection method | Use a simple rule: if the median worsens vs baseline for two consecutive lots, trigger a root-cause review | Creates an early-warning system |
Tip: when using third-party XRD, require the lab to report repeatability/uncertainty so you don’t set a band tighter than the method can reliably resolve.
Geometry, burn, and surface finish (Ra ≤ 32 µin)
For replacement dicer bands, geometry and surface integrity often dominate “mysterious” field failures. Include explicit checks for:
- flatness / straightness (fit-up stability)
- edge geometry (bevel angle, land, edge radius if specified)
- burr control
- grinding burn and microcracking (nital etch, Barkhausen where appropriate, or microscopy)
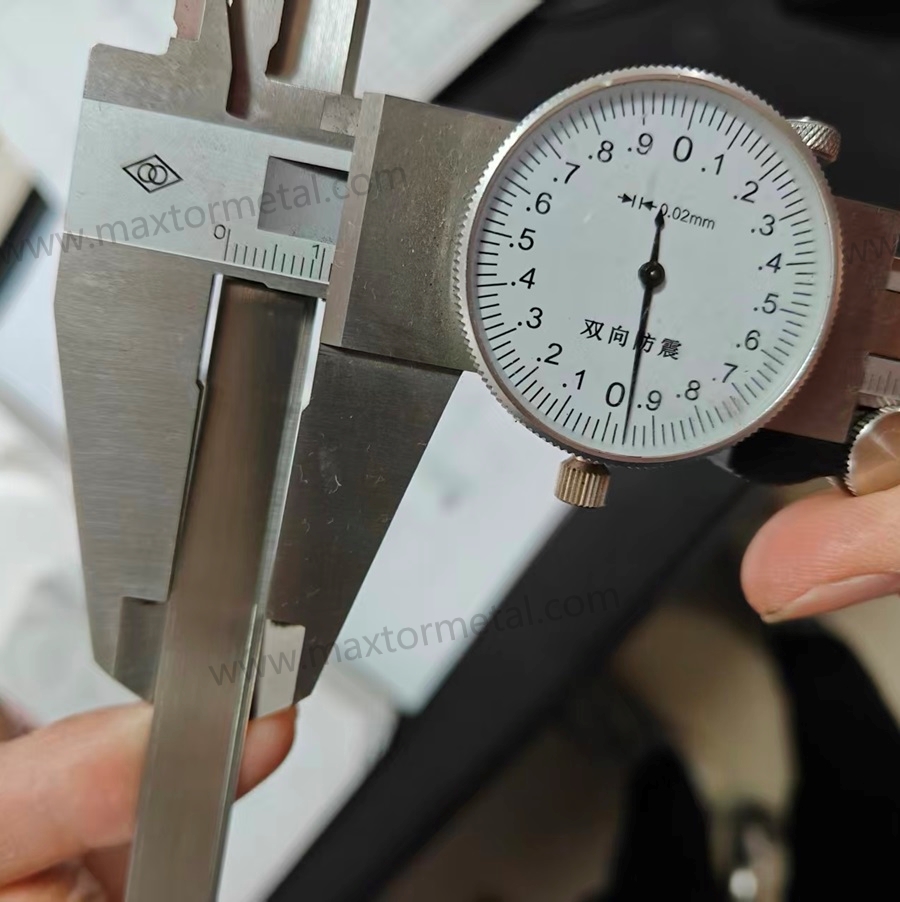
For product-contact surfaces, a common hygienic baseline is Ra ≤ 0.8 µm (32 µin). 3-A sanitary design guidance frequently references this threshold; see the 3-A SSI deck Basics of Sanitary Design. EHEDG design guidelines consistently specify product-contact surfaces smoother than Ra = 0.8 µm; see EHEDG Guideline Document 8 for the relevant hygienic equipment design criteria.
Make Ra requirements comparable by specifying measurement details (otherwise different suppliers may report different numbers for the same surface):
- measurement direction (parallel/perpendicular to grind lines)
- evaluation length and cutoff / filter setting used by the profilometer
- number of traces per part and the sampling locations
A practical acceptance package ties finish to function:
- Ra (specify the measurement cutoff and direction)
- visual finish criteria (no pits, laps, embedded debris)
- passivation status (see next section)
Maxtor Metal quality controls and traceability records (technical integration): A QC-oriented supplier should be able to provide a traceable record set for each lot, such as:
- heat/lot number linkage from strip to finished band
- material test report (chemistry) and incoming verification
- heat-treat batch record (time/temperature charts, quench media, sub-zero cycle, temper cycles)
- hardness sampling map and results
- microstructure photo set and RA report (XRD) for qualification lots (and periodic surveillance thereafter)
- surface finish (Ra) records and burn screening criteria
- nonconformance disposition and corrective-action link when a lot is out of band
This isn’t marketing fluff—it’s what lets a plant engineer correlate a chipping spike to a specific heat treat batch, grind wheel condition, or strip heat.
卫生管理とコンプライアンス(規格適合)
Cleaning and passivation (ASTM A380/A967)
In wet food-processing service, “stainless” isn’t a binary state. Surface condition (free iron, embedded grit, smeared metal from machining) can change corrosion behavior and cleanability.
Two widely cited references to anchor your cleaning/passivation language are:
- ASTM A380 for cleaning/descaling/passivation practices
- ASTM A967 for passivation treatment options and related requirements
Write your spec so sanitation steps are verifiable:
- define the cleaning/passivation method class to be used
- require documentation of the process and any verification tests you rely on
Chemical compatibility in washdowns
Dicer environments often see aggressive washdowns, temperature swings, and chloride exposure. Even with 440C, corrosion risk increases when:
- chloride concentration is high
- there are crevices or rough surfaces
- passivation is inconsistent
- residues remain trapped under bands or hardware
This is where surface finish, passivation discipline, and assembly hygiene matter as much as the alloy selection.
Documentation and traceability for audits
If you’re in a regulated or audit-heavy environment, treat blades/bands as controlled components:
- link each lot to a traceability packet
- store heat-treat records and inspection data by lot
- define retention time and retrieval process
The payoff is simple: when a plant sees a sanitation deviation or foreign material risk, you can isolate by lot and respond with evidence.
フィールドテストとROI(投資対効果)
Why ROI framing matters for blade qualification
For procurement and production managers, the question behind any blade qualification is simple: does the cost and effort of running a validated program pay off? The answer is almost always yes—but only if you measure the right things.
A practical way to frame the ROI case before a trial:
| Cost driver | Typical measurement unit | Where validated 440C at HRC 56–58 reduces cost |
|---|---|---|
| Blade changeover downtime | Minutes/week × labor + line rate | Longer, more consistent edge life reduces unplanned stops |
| Blade consumption rate | Bands per ton processed | Reduced chipping scatter extends usable life per set |
| Cut-size rework/waste | % yield loss on critical cut dimension | Tighter Cpk on HRC and RA → more consistent cut geometry |
| Supplier qualification overhead | Engineer-hours per lot | Standardized documentation package reduces re-qualification burden |
Example framing (hypothetical): A mid-size frozen vegetable processor running two Urschel lines might see blade changeover account for 20–40 minutes of downtime per week per line under an unvalidated supply program. If a validated process window improves edge-life consistency, it can be reasonable to expect a meaningful reduction in that downtime—but the exact number depends on product mix, sanitation cycle frequency, and baseline blade life. That’s why predefining trial KPIs (see below) is the only reliable way to measure your specific ROI.
主なポイント: Blade validation is not a cost—it is the mechanism by which you convert a commodity purchase into a controlled consumable with predictable cost-per-ton.
簡易検証テンプレート(QA計画へのコピー&ペースト用)
Use this as a “minimum viable” qualification pack for replacement dicer bands. It is designed so a plant can audit the lot, reproduce the processing window, and run CAPA when results drift.
Stage 1 — Qualification lots (prove the process window)
Use this stage when you are onboarding a supplier, changing strip source, changing heat-treatment routing, or adjusting finishing.
A) Incoming material (strip/band)
- Supplier, PO, part number / drawing revision
- Grade designation (440C / UNS S44004 or equivalent)
- Heat/lot number and traceability linkage
- MTR / chemistry record (under customer NDA if required)
- Incoming inspection record: dimensions, visual criteria, sampling plan, disposition
When planning incoming receiving records for 440C blade strip coils, the Tool Steel MTC Reading & QA Checklist for Strip Blades covers the EN 10204 3.1 certificate structure, chemistry cross-check, and 9-point hardness mapping that support a defensible acceptance decision before heat treatment validation begins.
B) Process records (heat treat + finishing)
- Heat-treat batch ID + time/temperature chart
- Quench media notes + control checks
- Sub-zero step (temperature, time, sequence)
- Temper cycles (count, temperature range, time)
- Grinding / finishing record (wheel spec, dressing interval, coolant condition, operator/shift)
Maxtor Metal maintains batch-level records for each of these steps as standard practice; qualification customers can request the full documentation package under a mutual NDA.
C) Release tests (qualification lot)
- Hardness (ASTM E18): sampling map, number of indents, results, gage status
- Surface integrity: burn screening method + acceptance criteria
- Surface finish (Ra): instrument settings (cutoff), direction, sampling locations, results
- Metallography: photo set ID, location, magnification, acceptance notes (under customer NDA if required)
- RA by XRD (third-party, if required): lab, method reference, location, result, uncertainty/repeatability statement
D) Field trial log (qualification lots)
- Installation: date/time, line, product type, sanitation cycle notes
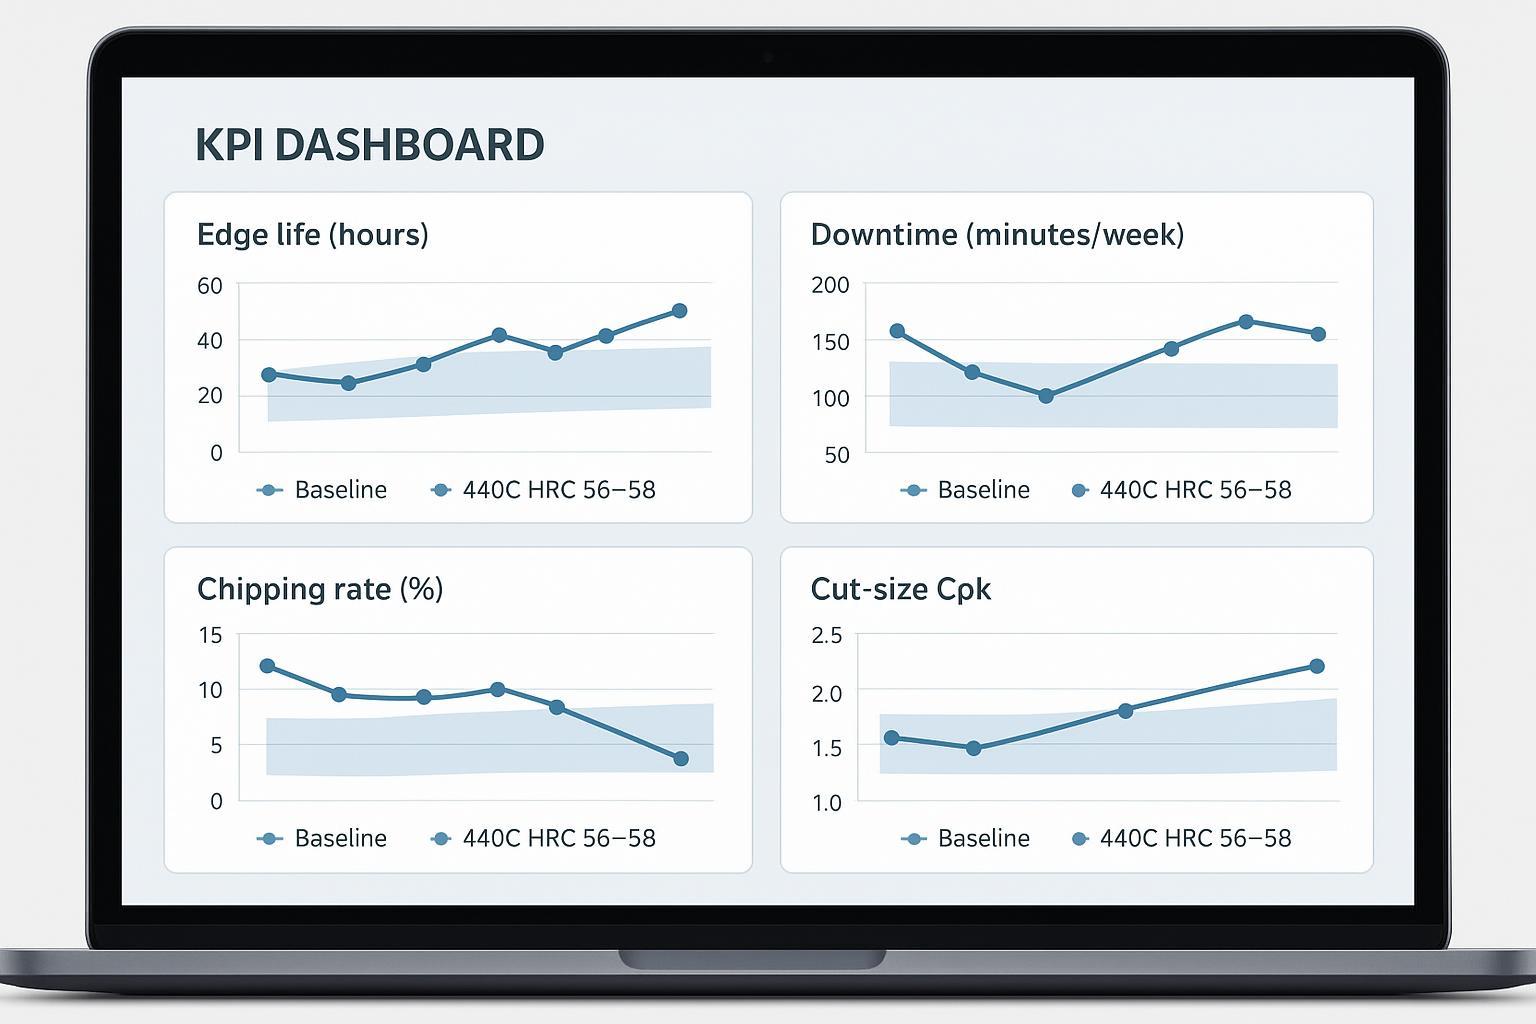
- KPI log: edge life, chipping rate, downtime, cut-size Cpk
- Removal reason: planned vs failure, with photo evidence when possible
Stage 2 — Production lots (control drift)
After the process window is proven, keep a lean release plan on every lot and move deeper tests to periodic surveillance.
A) Lot release (every lot)
- Traceability linkage (heat/lot → finished band)
- Hardness check with the same location plan
- Surface integrity screening (burn) and Ra verification per your agreed sampling plan
- Confirm heat-treatment batch record is complete and within declared ranges
B) Periodic surveillance (e.g., on a scheduled cadence or when drift is suspected)
- Metallography photo set review
- RA by third-party XRD (when RA is a controlling risk)
- Expanded dimensional/geometry audits
Out-of-spec & CAPA triggers (simple, audit-friendly rules)
- Any release metric out of band → quarantine the lot and run a documented disposition (use-as-is / rework / scrap)
- If a KPI regresses vs baseline for consecutive lots or shows a consistent drift trend → trigger a root-cause review
- Prioritize checks in this order when failures are ambiguous: burn/surface integrity → RA/microstructure → heat-treat records → strip heat/MTR
Trial design and KPIs in frozen and root crops
A good trial doesn’t just ask “did it last longer?” It asks whether the new bands improve repeatable output without raising risk.
Trial design principles:
- Compare against a baseline band under the same product mix and sanitation cycle.
- Control one variable at a time (material/HT/finish), or you won’t know what caused the outcome.
- Predefine the run duration or throughput target.
KPIs that travel well across frozen and root crops:
- edge life (hours or tons processed)
- downtime (minutes/week attributable to band changeover or rework)
- chipping rate (chips per inspection interval, or % bands failing before target)
- cut-size capability (Cpk on the critical cut-size dimension)
How to present trial results (so decisions are data-backed)
To reduce debate and make trials comparable across lots, define a simple statistical view upfront:
- Lot-to-lot scatter: use box plots for edge life (hours/tons) and chipping counts per inspection interval
- Stability over time: use a basic control chart for chipping rate or downtime minutes/week
- 製造能力項目: report cut-size Cpk on the critical dimension with the same sampling method each run
If you only do one thing: report sample size (n), 、 median, 、そして 10–90% range for edge life per lot. That usually reveals whether you have a true process-window improvement or just a “best-case” outlier.
Make the trial “audit-ready” by defining acceptance bands upfront:
- HRC 56–58 is the hardness band—define the sampling plan.
- Define a chipping threshold (what counts as a fail).
- Define Cpk targets (or the minimum improvement delta) for cut-size.
- Define sanitation outcomes (no abnormal corrosion/pitting after a defined washdown cycle count).
A practical logging checklist:
- lot ID + heat-treat batch ID
- installation date/time, line, product type
- sanitation cycles and chemistry notes
- inspection intervals and findings (chips, burn, corrosion marks)
- reason for removal (planned vs failure)
Root-cause feedback to process window
When a trial misses targets, force a closed-loop diagnosis rather than “try a different supplier” guessing:
- If hardness is in band but chipping is high → prioritize RA/microstructure check + grind burn screening.
- If edge life is low with clean edges → revisit carbide condition (austenitize/temper window) and surface finish.
- If corrosion appears early → revisit passivation and surface finish, then confirm washdown compatibility.
Done well, your field trial becomes a control loop: it tightens the heat-treatment and finishing window until the outcome is predictable.
代替材と选定基準
420 vs 440C trade-offs
420-class martensitic stainless generally offers:
- better toughness margin at a given corrosion resistance level
- lower achievable wear resistance than 440C at comparable processing
If your dominant failure mode is brittle chipping (and not wear), 420 variants can be worth evaluating—but you’ll usually pay for it in edge life unless geometry and process changes compensate.
D2/M2 risks in wet service
High-wear tool steels like D2 and high-speed steels like M2 can deliver excellent wear resistance, but wet service introduces risks:
- corrosion and staining
- sanitation chemical sensitivity
- crevice corrosion at interfaces
If you go this route, you’re often forced into coatings, tighter cleaning constraints, or more aggressive surface protection—each with its own validation burden.
PM stainless options and when to upgrade
Powder-metallurgy (PM) stainless options can improve cleanliness and consistency, and may reduce inclusion-driven chipping scatter. Upgrade triggers typically look like:
- you’ve validated geometry, finishing, and conventional 440C heat treat
- failure analysis still points to cleanliness/inclusion sensitivity
- ROI still works after the material premium
適用範囲と限界
This guide is intended for qualification and supplier validation of 440C dicer replacement bands operating in wet, sanitation-driven environments.
- Use it when your goal is repeatability: stable hardness, controlled microstructure/RA (when required), and verified surface integrity.
- Treat all numeric targets as site-specific: geometry, product mix, sanitation chemistry, and equipment condition can shift the “best” window.
- For unusually severe impact loading, highly abrasive inclusions, or extreme corrosion exposure, treat this guide as a baseline and add additional validation (materials upgrade, coating trials, or application-specific testing).
Final acceptance should be based on documented lot records and your plant trial results (and third-party verification where required).
Once material validation is complete, the next OEE lever for coil-fed dicer lines is typically coil change frequency — see コイル交換頻度の削減によるOEE利益の向上 for the changeover math and a blade strip producer pilot case.
For dicer band blades that will undergo reconditioning, the validation records completed in this guide — particularly the HRC target window and retained austenite control — directly define the regrinding thresholds your toolroom should enforce. See the Regrinding Industrial Strip Blades: Sharpening vs Scrap Guide for the scrap/regrind decision framework and minimum stock removal depth that preserves the metallurgical work done here.
結論
- 440C remains a cost-effective choice when validated to spec
- Use the defined QA and trial protocol to ensure repeatability
The one-sentence version: For Urschel-style dicer band applications in wet food-processing environments, 440C validated to HRC 56–58 with controlled RA (≤5% starting target), documented heat-treat batch records, and surface integrity screening is the most cost-effective path to repeatable edge life—provided the validation protocol treats hardness as a necessary but not sufficient release criterion.
If you want a spec that holds up across suppliers, the key is to bind “440C at HRC 56–58” to documented process controls: heat/lot traceability, heat-treat batch records, hardness + RA verification, and surface integrity checks. That’s the same discipline Maxtor Metal applies internally to keep performance repeatable across lots. Maxtor Metal qualification packages—including MTRs, heat-treat batch records, hardness sampling maps, and third-party XRD reports—are available to customers running formal supplier validation programs.
For reference language around strip supply forms and how to describe them in procurement documents, you can note earlier—then keep your acceptance criteria in the validation protocol above.
FAQs:
440Cダイサー用交換刃の適正な硬度はどのくらいですか?
HRC 56–58が一般的な受入基準(プロセスウィンドウ)となります。これは刃先の耐摩耗性と一定の靭性(粘り強さ)のバランスが取れているためです。ただし、硬度だけで出荷判定をしないでください。必ず組織検査/残留オーステナイトの確認、および表面性状(研削焼け)のチェックと組み合わせて評価してください。
HRC 56–58に達するための440Cの推奨熱処理条件は何ですか?
典型的な管理プロセスとしては、1850–1950°F(1010–1065°C)の範囲でのオーステナイト化、クエンチ(焼入れ)、残留オーステナイトを低減するためのサブゼロ処理(深冷処理)、そしてダブルテンパー(二回焼戻し)が挙げられます。名目上のレシピに頼るのではなく、記録された炉の管理パラメータを使用し、硬度と残留オーステナイト(RA)データで結果を検証してください。
硬化処理された440C刃物の硬度を正しく測定するにはどうすればよいですか?
ASTM E18などの標準規格に基づくロックウェル硬さ試験法を使用し、測定位置計画を定義し、ロットごとのサンプリング頻度を設定してください。誤った測定値を防ぐため、測定セットアップが薄肉部に適していることを確認してください。
440Cの残留オーステナイトはどのように測定しますか?
X線回折(XRD)が一般的な定量測定法です。これに金属組織試験(金相観察)を組み合わせることで、微Snapshot組織の状態を正確に評価できます。重要なのは、受入判定幅(許容範囲)を設定し、測定条件(パラメータ)を記録して、ロット間で結果を比較可能にすることです。Urschelスタイルのダイサーバンド用途では、初期管理目標値として「残留オーステナイト(RA)5%以下」が業界の一般的なベン치マークとなっています。
食品に接触するステンレス製刃物において、許容される表面粗さはどのくらいですか?
製品接触面における一般的な衛生基準(ハイジェニック・ベースライン)は Ra ≤ 0.8 µm(32 µin)です。これは3-A衛生デザインガイドラインに規定されており、EHEDGのドキュメントにも反映されています。サプライヤーが同一の基準で報告できるよう、測定方法および測定方向(研磨目に対する方向)を明確に定義してください。
ステンレス製ダイサーバンド(切丁機用バンドソー)の不動態化処理には、どの規格を拠り所にすべきですか?
洗浄および不動態化処理の施工実務にはASTM A380を、化学的不動態化処理の選択肢および要求事項にはASTM A967を使用してください。その上で、提出書類(品質証明書)および検証に関する受入基準を明記してください。
硬度が仕様内であるにもかかわらず、440Cダイサー刃がチッピング(刃こぼれ)するのはなぜですか?
硬度測定だけでは、残留オーステナイト量、炭化物の状態、残留応力、あるいは研削焼け(研磨時の熱損傷)を検知できないためです。チッピングの多くは、残留オーステナイト(RA)の過多、戻し処理による安定化不足、または表面の熱損傷(研削応力)に起因します。
代替用ダイサーバンド(切丁機用バンドソー)を認定するための工場実機試験(プラントトライアル)は、どのように設計すべきですか?
管理されたベースライン比較手法を用い、KPI(刃先寿命、ダウンタイム、チッピング率、カットサイズCpk)を事前定義し、開始前に受入許容幅を設定してください。ロットID、洗浄殺菌サイクル、検査結果を記録し、不具合発生時にプロセスウィンドウ(製造条件の範囲)の根本原因まで追跡できるようにします。Maxtor Metalでは、このプロセスをサポートするため、試験用ドキュメントのテンプレートおよびロット単位のトレーサビリティ記録を提供可能です。
著者
ジェシー・シュー — Senior Quality Engineer, QA (Quality Assurance), Maxtor Metal
- 経験: 15 years in quality engineering, with hands-on 故障解析 experience to distinguish whether edge chipping or rapid wear is driven by heat-treatment process variation versus material segregation.
- 認定資格: ASQ–CQE, ISO 9001 Lead Auditor, ASNT Level II

 English
  Spanish
  Italian
  French
  Portuguese
  Russian
  German
  Arabic
  Hindi
Hindi  Vietnamese
  Indonesian
  Japanese
  Korean